Transmitting response from a Web page to a server.

{ Re-post from my Medium Post }

My project has pivoted from a standalone android app to a Web page that will generate a custom app for an event organizer’s use.

Read up here on what my project actually is.

So obviously some changes at the server are to be made to make this possible.

How are you planning to do it?

First of we started by providing a Web page that the organizers can use to submit information about the app they need to be built like the App’s name, the link to the API (for fetching the json files) and their email address (for mailing them the apk once it’s generated).

The HTML file for the same can be found here.

Some changes to the Travis build should also be made so that it can use this data for building.

From there on, the details submitted by them will be converted by a json object (using javascript) and further send to the open event server via a POST request where it will be written to a database.

We will be able to fetch this file from the database by the following link

openevent.com/api/v2/customapps/id.

Simultaneously one Travis build will also be trigger using the API that will auto build the latest commit, taking the modified json file data provided by the orga-server.

This configuration will be provided to Travis while the build time.

Cool, any difficulties yet!

One of the main challenges that we are facing is manually triggering the Travis build.

We can do this via the Travis API but that’s still in beta and also we are getting our head around on how to implement it.

I also had a tough time learning javascript and HTML for making the Web page and then I also have to read up on sending a POST request to the server via Ajax.

It’s a bit tough, but should be fun.

So, that was all for now, see you next week and all the best for your projects.✌

Continue ReadingTransmitting response from a Web page to a server.

Engelsystem – Implementing Localization

This post is on how to make your website available in different languages.The main reason of localization is that it can be used by different people knowing different languages across the world and help them to understand the system better .

The tools used in implementing localization are poedit where we create the .po files .

Steps to download poedit and Run it.

sudo apt-get install poedit

On ubuntu/linux this can be used

On Mac/Windows

The executable can be downloaded at https://poedit.net/download

Steps to run poedit in Linux/Windows/Mac

choose File → New Catalog.Enter the details in Translation properties like your email . Source code charset should be selected as UTF-8.Now the source path should be selected as (.) dot to tell Poedit to search for PHP files in the same folder.

Screenshot from 2016-06-04 17:23:39

In the source keywords there are three options ‘_’ , ‘gettext’ and ‘gettext_noop’.Make sure all necessary functions are added and press OK.

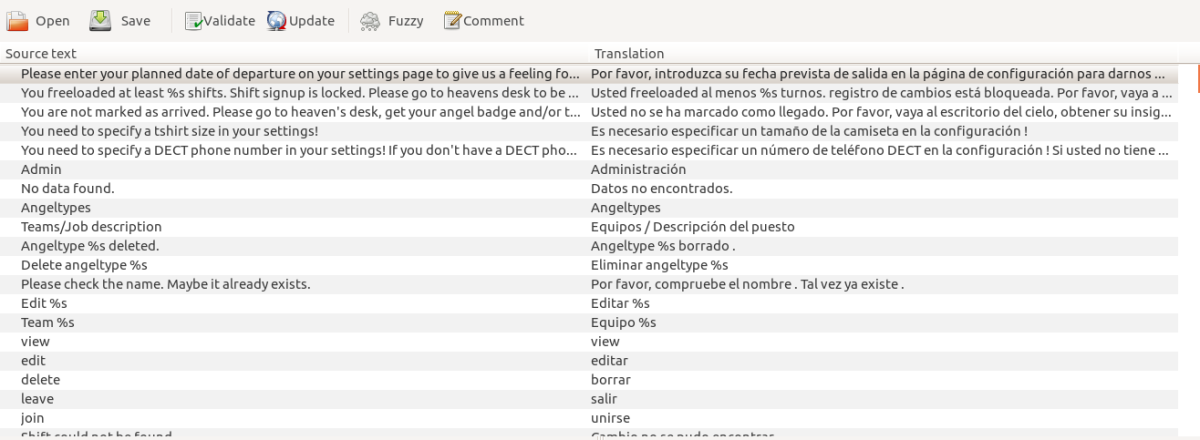
Now we can see list of strings and their translated strings comes like this.we need to install the necessary dictionary for this.

Screenshot from 2016-06-04 17:44:25

If we save it we get a .po and .mo files if it passing all the validation.which can be used to implement localization in the project.

How to Use .po and .mo files

In our engelsystem.we need to add the list of languages we would like to implement in the file internationalization_helper.php

$locales = array(
     'de_DE.UTF-8' => "Deutsch",
     'hi_IN.UTF-8' => "Hindi", 
     'sp_EU.UTF-8' => "Spanish",
     'en_US.UTF-8' => "English" 
 );

these are list of languages currently implemented.

function make_langselect() {
   global $locales;
   $URL = $_SERVER["REQUEST_URI"] . (strpos($_SERVER["REQUEST_URI"], "?") > 0 ? '&' : '?') . "set_locale=";
   
   $items = array();
   foreach ($locales as $locale => $name)
     $items[] = toolbar_item_link(htmlspecialchars($URL) . $locale, '', '<img src="pic/flag/' . $locale . '.png" alt="' . $name . '" title="' . $name . '"> ' . $name);
   return $items;
 }

This function renders a language selection.

Development: https://github.com/fossasia/engelsystem

Issues/Bugs:Issues

Continue ReadingEngelsystem – Implementing Localization

Open Event: Planning the Scheduler UI

{ Repost from my personal bloghttps://blog.codezero.xyz/planning-the-scheduler-ui/ }

In the first phase of the GSoC coding period, Saptak Sengupta and myself have been working on the Scheduler UI.

The Scheduler UI would allow the organizers to graphically schedule/manage the sessions in their conference/event.

Event-Organizer by Josh Greco has been a major inspiration for the timeline design. The css styles have been borrowed from that project.

After some research, we have decided to use the interact.js javascript library for implementing drag-drop and resizing functionality to the project and lodash for array/collection manipulations and for some useful utility functions.

The following tasks have been formulated:

  • Drag-and-drop interface to add session blocks into a timeline
  • Resize sessions to change time
  • load live data from the server using the API
  • Handle session clashes within a track properly
  • Add Track button that opens up a modal to add a track.
  • Search option for unscheduled sessions
  • Save each session change/update using the API
  • Option to Export timeline as pdf
  • Option to export timeline/calendar as iCal

An umbrella issue (#349) has been created in the open-event-orga-serverrespository to track the progress. There will be a separate issue created for each task when that task is being worked upon and the same would be referred to in the umbrella issue.

We are targeting GSOC 2016: Milestone 4 (Due by June 12, 2016) to finish the Scheduler UI and we are confident that we’ll be able to reach our target. *fingers-crossed* :sweat_smile:

To know more about the Scheduler UI, read Enhancing the Open Event Server: Scheduler UI.

Continue ReadingOpen Event: Planning the Scheduler UI

Next steps to an Open Event Android Applications

This year also I’ll be working on the FOSSASIA Open Event project for Google Summer of Code 2016. It’s an honour to be working with such an elite team of people. We have 10 people working on Open event this time : 6 on the server and 2 each on the client apps ( Android and Webapp)

So what are our plans for this year, let’s have a look :

The system was basically setup last year but when used it for FOSSASIA 2016, we got to know the bugs it had and it was these bugs that made it unusable. for instance, the server had lack of permissions which allowed anyone to come and change data on the server which is why instead of using the server, we went with a spreadsheet and made a parser to convert the spreadsheet data into json files. So we made this Scraper that we used to create json files and commit them to github repo. We used this json as Github Api and made a website here that displays a neat schedule.

For the android app, since the json was not of the original format we used while building the server, it was buggy because it didn’t show data at a lot of places and we saw the need for many other features like live sessions, notifications for changes in timings, broadcasts from the organisers etc. That is why we have Open Event this time again as a GSoC project and it’s bigger this time with 10 students and almost as much mentors. Justin is heading the mentors team this time along with Mario to guide us into making the system perfect.

On the Android side me and Harshit Dwivedi will be taking care of everything. Since I was at FOSSASIA 2016, I talked to a lot of attendees and got to know their feedback therefore I know what all we need to include and will work really hard to make the system a success.

Adios till the next post!

Continue ReadingNext steps to an Open Event Android Applications

Engelsystem: Enhancing security in registration form

My first impression when looking at the PHP application (Engelsystem) was that it is a well-built MVC app. It seems to have everything an event manager could want. But the security implemented in the registration form was not good.

Registration forms are a great way to follow up people’s interest in what you are offering on your website and with these tools you are able to make sure it is done right. Unfortunately, registration forms can be a large source of a sender acquiring bounced addresses and Spam Traps which could cause your business to spam a hosts mailbox without proper validation of addresses. This can reflect poorly in your SendGrid internal reputation as well as reflect poorly upon your business. Fortunately, there are many helpful techniques that can help a sender avoid many of the issue that can come up through their registration form.

A registration from should ask for complete information about the user to ensure that the user registering for the service is not fake.

Sometimes in the registration process, a person makes a mistake in entering their email such as person@domain.coom or person@@domain.com. By entering the email address twice and having a system in place that checks that the addresses match up, the person entering their email address has a much smaller chance of accidentally entering an invalid address.

A good technique in protecting your registration form from bots is placing a required Captcha in the form:

04

A Captcha is a test to ensure that form is filled out by a human being as opposed to a bot. The image is not replicable by a bot but easily replicated by a human being.

One common issue that arises with email registration forms is people registering false or fake addresses. To prevent this, the form can say that the service is not granted unless they confirm via email that they would like the service. This can be done with a Double Opt-In Email, confirming that their address exists. A double opt-in email not only helps ensure that there is an actual human being registering but also validates that the recipient did indeed sign up for your registration.
There are many great techniques available to protect your registration form but a balance must be created between user friendliness and security. Some forms have many required fields in registering as well as checks to make sure that the form is filled out correctly. Too many fields can drive away potential interest in your site or product. One way to balance out the registration process is to have other information about the person be collected on a landing page after the registration form is done. This serves to be both user friendly as well as allow you to collect valuable information.

In my first week, I enhanced the registration form, adding new fields and marking some fields as important.

05

Development: https://github.com/fossasia/engelsystem                                           Issues/Bugs:https://github.com/fossasia/engelsystem/issues

Continue ReadingEngelsystem: Enhancing security in registration form

79 issues done in one week!

Have you ever wondered how to achieve such a result?

Screen Shot 2016-05-31 at 12.09.51I couldn’t believe that we’ve solved such many issues in Milestone 2. The 79 is 34% of all issues, isn’t it amazing? I think that defining what kind of project do we want to develop and what features should it have allows us to move quickly and cooperate with the whole team very effectively.

What you need to achieve similar score?

First of all, you need to prepare good document which help a whole team to get familiar with the project and its features. The most important part is to describe very precisely step by step a project flow, and features required to implement. It can help us to avoid obstacles, tie-ups and questions related to flow, because every developer is able to go through the document and find a desired answer.

Secondly, you need to define a target what are we going to achieve and when. Based on this info developers can define plan of work easily. We have divided 3 month period into 15 milestones. In each end of milestone we talk what we have achieved, what has been done, what hasn’t been done and what are we going to do in next week.

Daily, also works well in our team, because we are able to monitor what is currently happening in project. And you can quickly help if someone has a problem.

Flow of solving issues is very simple(Justin configured a CI). We have two branches – master and testing. Writing tests is essential to do before writing code. If tests are ready and passed successfully we can create a pull request. Then other developers review our code and finally if everything is ok we can merge changes with testing branch.

Continue Reading79 issues done in one week!

Open Source Event App Development

Some background about myself, I am a 3rd year Information Technology student from JSS Academy of Technical Education, Noida, India. I love Front-end development and is currently working on an awesome project Open-Event .

The project will make it easier for the events, tech summits to create a web app and mobile app quickly by providing necessary information such as speakers for the event, sessions, tracks, location etc. The project itself consists of three core components :
1. Open-Event Organiser Server
2. Open-Event Android App
3. Open-Event Web app
It’s the end of community bonding period before the past week, which was the best time to get ourselves familiar with the practices of the community, understanding of the codebase, making new friends and setting up goals. I have already set up my goals and is working on Open-event-web app.

The first version of the web app is to make the web app functional by just uploading a JSON file, the second part is to make it sync with the REST API provided by the Orga-server. I with Arnav have created the User-Story for the web app. Also, I have created the data-flow for the work, we will be carrying forward.

I am having a good time, and will work hard to complete the goals of the project.

Thanks

Continue ReadingOpen Source Event App Development

One step at a time – The beginnings of CommonsNet

The beginnings

If you have been accepted to a serious project like Google Summer of Code is, you can feel lost and scared. I think it’s nothing special and probably everyone experiences it. You can feel that pressure because you want to fulfill all expectations, follow your obligations and to do your best, but working in such project is something different from working on your own, private and small one.  Your organisation and mentors require something from you, and they can even provide you with a detailed guideline how to behave but doubts may occur anyway.

My advice is not to give up and go through that tought period in order to experience the joy of results and sense of satisfaction, and to learn something to be better in the future. I am going to tell about my beginnings and to provide you with some tips  from my own experience

CommonsNet

CommonsNet (feel free to see it) is a new project of FOSSASIA. It focuses on providing users with transparent information about WiFi they may use in public places like hotels, restaurants, stations. The thing is that for now, if you go to a new place, and want to connect to Internet, you look for a free WIFI sign and as soon as you find it you try to connect. But think about it, how much do you know about this connection? Is is safe for your private data? How fast is it? Does the Internet connection have any legal restrictions?  I suppose that you answer ‘no’ to all these questions. But what if you know? Or if you can compare details of different WIFI available in a specific public place and connect to more suitable for your needs. I am sure you will appreciate it. I hope to run this project successfully and I am going to tell you more about it in next posts.

How to start?

Due to the fact that CommonsNet is a new project as I have mentioned before, and for now apart from mentor @agonarch and FOSSASIA leaders @mariobehling @hpdang, I am an only contributor, I am in a good position to tell you what are my steps. Remember not to think about all at once. It will make you crazy.

So first of all – prepare your work. Try to get to know about your project as much as possible. Follow group chat, GitHub repositories, do research in Internet about the subject of area of your project or don’t be afraid to ask your team member. That’s what I have done at first. I have prepared a Google Doc about all WiFi details. I  have tried to get to know as much as possible and to gather this information in a clear, easy-to-understand way.
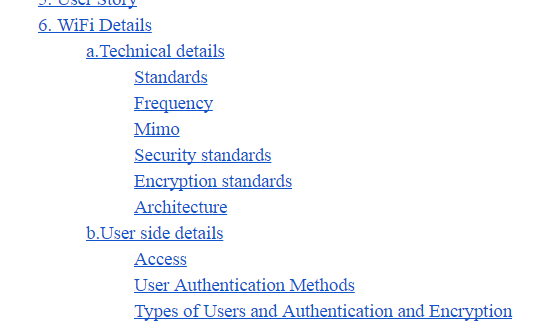
project details

I need it because I will be preparing a wizard form for users to let them provide all important details about their WiFi. I need to think seriously which data are important and have to be used to do it. It is not finished yet and will be changing (yes, I am going to share it with you and update you about changes!) but for now I want you to follow my view about it, how am I going to use the gathered information. wizard-ui
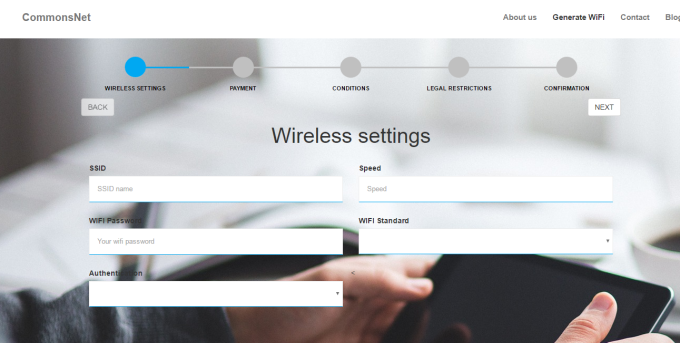
Next step is to prepare user stories. I think it’s a crucial point before you start to implement your project. I think there is no point of developing something until you think who will your user be. You need to imagine him/her and try to predict what he or she may expect from your app. Remeber – even if app is well coded it’s useless until somebody wants to use it. You can find many tutorials how to write a good user story in Internet. Just type ‘user stories’ in Google search. Some of them are here;

http://www.romanpichler.com/blog/10-tips-writing-good-user-stories/

https://www.mountaingoatsoftware.com/agile/user-stories

You can also see my user stories created for CommonsNet .

Furthermore, I have prepared a mockups to visualize my ideas. I think it’s also an important part of running your project. It will help you to express and concretize your ideas and let the whole team discuss about it. And there is no doubt that it’s easier to change a simple draft of mockups than coded views. You can see my mockups here: CommonsNet MockupsScreen Shot 2016-06-23 at 12.38.20
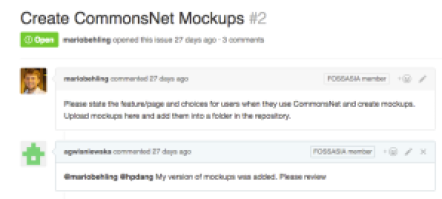
As soon as you finish all these activities is a high time to start creating issues on GitHub. Yes, of course, you probably have already started, so have I, but I am talking about further issues which help you to take control over your progress and work, discuss on specific subject and share it with other.

Lost on GitHub?

Is is possible at all? I suppose we all know and use GitHub. It’s a perfect place of working to all programmers. Its possibilities seems to be unlimited. But maybe some of you experience the difficulties which I have experienced at first, because just like me you have used GitHub so far only for your private aims and simply just pushed code and have not worried about creating issues, following discussions and  organizing your work step by step . Let me to explain you why and how to follow GitHub flow.

GitHub issues let you and your team take control over your work. It’s really important to create bigger, let’s say main issues, and then subissues, which help you to divide your work into small parts. Remember – only one step at a time! Using my mockups first I have created some issues which present main tasks like ‘deploying app to Heroku’ or different pages in my app like ‘Home’, ‘About us’. And then I have created many smaller issues – subissues to present what tasks I have to do in each section like ‘Home’ -> ‘Impementing top menu’, ‘Implementing footer’, ‘Implementing big button’. It helps me to control where I am, what have been done, and what do I need to do next. And I think the smaller the tasks are, the more fruitful the discussion and work can be, because you can simply refine each detail. Please feel free to see CommonsNet issues. It’s not finished yet, and while working I am going to add further issues but it presents the main idea I am talking about.

Screen Shot 2016-06-23 at 12.57.48.png

I hope these tips help you to run your work and to go through harder time – easier. And remember even the longest journey starts from the first step!

Please follow CommonsNet webiste https://commonsnet.herokuapp.com/ to be updated about progress, latest news and tips how to resolve programming problems you may experience.

Feel free to follow us on social media Facebook https://web.facebook.com/CommonsNetApp/  Twitter https://twitter.com/Commons_Net

Continue ReadingOne step at a time – The beginnings of CommonsNet

The Official Beginning

This blog marks the start of the coding period for Google Summer of Code. I will start by talking about the community bonding period and then my plan to begin the summer.

Community bonding was an interesting and intense period. Managing college, assignments, exams and working on the project all at the same time. I think this is the capability that sets us apart. We had started out with fixing small issues in the steam-shell. Steam-shell is a command line interface that allows the user certain limited set of commands to interact with the server. I will list down the issues I solved and the improvements I made.

My first task was to improve the display of commands like ‘look’. This command lists out the gates/files/documents/rooms/conatiners present in the current room. The old display showed one entry in one line. I improved this to make it something similar to the ls command of linux. I used sprintf(“%#-80s”,<variable>) to give the output a structure.

Next I worked on the create command. I found a bug that this command was not working for containers and documents. I fixed it by adding the required conditions in the code and then I worked upon to improve the functionality of the command as suggested by my mentor Trilok. I added the feature to enter the destination where the new object is to be created and a ‘.’ to create it in the present directory. Initially this feature was only for Rooms and Containers, later I extended this to all kinds of objects.

After this I spent a few days studying the COAL protocol. I have already written in detail about this in my previous blog. Though I was not successful in completely understanding the protocol but this gave me an idea of the client-server architecture. This was towards the end of the community bonding period and I decided to spend the rest of my time with steam-shell itself.

Now as the coding period begins officially I will be working to fix the edit command. Currently the edit command opens the file on a vi/vim/emac instance. The vi and vim opens in the same window and it misbehaves. Then I will be extending the feature for multiple documents and in the next week move on to work on COAL again.

Continue ReadingThe Official Beginning

Integrate sTeam-shell into Vi and Indentation of output

(ˢᵒᶜⁱᵉᵗʸserver) aims to be a platform for developing collaborative applications.
sTeam server project repository: sTeam.

Indentation of sTeam-shell output

The Indentation of the output in the look command in steam-shell is formatted to be displayed in the way the output is displayed when the ls command is executed in a terminal window.

The module reference provided by the pike language is used for formatting.
The pike reference module can be found at Pike Ref module

The screen-width of the the user is calculated using the command tput rows.
This value is then passed as an argument to the write function to display it in the form of output of an ls command.
The example of this can be seen in the modref by Pike.

Issue. Github Issue Github PR
Indentation of output in steal-shell. Issue-24 PR-42

Example:

write("%-$*s\n", screen_width,"Given a\nlist of\nslosh-n\nseparated\n'words',\nthis option\n"+ "creates a\ntable out\nof them\nthe number of\ncolumns\n"+"be forced\nby specifying a\npresision.\nThe most obvious\n"+"use is for\nformatted\nls output.");

Output:

 Given a          list of          slosh-n
 separated        'words',         this option
 creates a        table out        of them
 the number of    columns          be forced
 by specifying a  precision.       The most obvious
 use is for       formatted        ls output.

The following changes have been made in order to incorporate the changes:

IndentationCodeChange

Integration of sTeam-shell into Vi

For integration of sTeam-shell.pike into the Vi, the steam-shell is made compatible to be run when a command is passed as an argument to it. The changes have been made in steam-shell.pike and the applauncher.pike. Also a new file called as VisTeam.pike is created. When this is executed it validates the user and opens two vi buffers. One for typing the command and the other to display the log/ output of the executed command.

A steam-shell.vim vi plugin is created so as to be able to run the Steam function in vi. Whenever this function is executed the selected text in the vi visual mode will be executed.

The results are displayed in the log buffer in a new tab. Since the already existing vim scripts Goldenratio.vim and watchforchanges.vim divide the command buffer and the log buffer in the ration 2:1, the output is not visible in the logs. Thus a newtab consisting of the logs is opened.

Issue. Github Issue Github PR
Integrate sTeam-shell into Vi. Issue-37 PR-41

InsertIntoVIExecute the command:

ExecuteCommandsTeam

Display the output:

DisplayTheOutput

Checkout the FOSSASIA Idea’s page for more information on projects supported by FOSSASIA.

Continue ReadingIntegrate sTeam-shell into Vi and Indentation of output