How to write your own custom AST parser?

In Yaydoc, we are using pandoc to convert text from one format to another. Pandoc is one of the best text conversion tool which helps users to convert text between different markup formats. It is written in HASKELL. Many wrapper libraries are available for different programming languages which include python, nodejs, ruby. But in yaydoc, for a few particular scenarios we have to customize the conversion to meet our needs. So I started to build to a custom parser. The parser which I made will convert yml code block to yaml code block because sphinx need yaml code block for rendering. In order to parse, we have to split the text into tokens to our need. So initially we have to write a lexer to split the text into tokens. Here is the sample snippet for a basic lexer.

class Node:
    def __init__(self, text, token):
        self.text = text
        self.token = token
 
    def __str__(self):
        return self.text+' '+self.token
 
 
def lexer(text):
    def syntax_highliter_lexer(nodes, words):
        splitted_syntax_highligter = words.split('```')
        if splitted_syntax_highligter[0] is not '':
            nodes.append(Node(splitted_syntax_highligter[0], 'WORD'))
        splitted_syntax_highligter[0] = '```'
        words = ''.join([x for x in splitted_syntax_highligter])
        nodes.append(Node(words, 'SYNTAX HIGHLIGHTER'))
        return nodes
 
    syntax_re = re.compile('```')
    nodes = []
    pos = 0
    words = ''
    while pos < len(text):
        if text[pos] == ' ':
            if len(words) > 0:
                if syntax_re.search(words) is not None:
                    nodes = syntax_highliter_lexer(nodes, words)
                else:
                    nodes.append(Node(words, 'WORD'))
                words = ''
            nodes.append(Node(text[pos], 'SPACE'))
            pos = pos + 1
        elif text[pos] == '\n':
            if len(words) > 0:
                if syntax_re.search(words) is not None:
                    nodes = syntax_highliter_lexer(nodes, words)
                else:
                    nodes.append(Node(words, 'WORD'))
                words = ''
            nodes.append(Node(text[pos], 'NEWLINE'))
            pos = pos + 1
        else:
            words += text[pos]
            pos = pos + 1
    if len(words) > 0:
        if syntax_re.search(words) is not None:
            nodes = syntax_highliter_lexer(nodes, words)
        else:
            nodes.append(Node(words, 'WORD'))
    return nodes

After converting your text into tokens. We have to parse the tokens to match our need. In this case we need to build a simple parser

I chose the ABSTRACT SYNTAX TREE to build the parser. AST is a simple tree based on root node expression. The left node is evaluated first then the right node value. If there is one node after the root node just return the value. Sample snippet for AST parser

def parser(nodes, index):
    if nodes[index].token == 'NEWLINE':
        if index + 1 < len(nodes):
            return nodes[index].text + parser(nodes, index + 1)
        else:
            return nodes[index].text
    elif nodes[index].token == 'WORD':
        if index + 1 < len(nodes):
            return nodes[index].text + parser(nodes, index + 1)
        else:
            return nodes[index].text
    elif nodes[index].token == 'SYNTAX HIGHLIGHTER':
        if index + 1 < len(nodes):
            word = ''
            j = index + 1
            end_highligher = False
            end_pos = 0
            while j < len(nodes):
                if nodes[j].token == 'SYNTAX HIGHLIGHTER':
                    end_pos = j
                    end_highligher = True
                    break
                j = j + 1
            if end_highligher:
                for k in range(index, end_pos + 1):
                    word += nodes[k].text
                if index != 0:
                    if nodes[index - 1].token != 'NEWLINE':
                        word = '\n' + word
                if end_pos + 1 < len(nodes):
                    if nodes[end_pos + 1].token != 'NEWLINE':
                        word = word + '\n'
                    return word + parser(nodes, end_pos + 1)
                else:
                    return word
            else:
                return nodes[index].text + parser(nodes, index + 1)
        else:
            return nodes[index].text
    elif nodes[index].token == 'SPACE':
        if index + 1 < len(nodes):
            return nodes[index].text + parser(nodes, index + 1)
        else:
            return nodes[index].text

But we didn’t use the parser in Yaydoc because maintaining a custom parser is a huge hurdle. But it provided a good learning experience.

Resources:

Continue ReadingHow to write your own custom AST parser?

Building Metapackages to Customize the Meilix Linux Distro Generator

This article will guide you to build a metapackage with your required configuration and to use it inside the meilix distro to customize and use the inbuild metapackages to customize the configuration file of packages and properties of various browsers.
Metapackages are scripts which contain the link to existing packages. It’s a .deb file. As packages include dependencies analogically metapackages include packages. So, we can say that metapackages do not contain actual software, they depend upon packages. This guide will help you to make your own metapackage easily, configure it and distribute it among your friends and other Linux users.

How to get started to build a metapackage for meilix?

At first one needs to sort out the metapackages that it needs to be there in the metapackages. One can also come up with the package which he don’t want to install but that comes under dependency of the some package.
It’s easy, a few lines of commands and you will have a .deb metapackage in your hand.
We will use equivs as a tool to build metapackages.

Install equivs :

sudo apt-get install equivs
equivs-control ns-control

This will create a file with the name ns-control and that files looks similar to this:

1.### Commented entries have reasonable defaults.
2.### Uncomment to edit them.
3.# Source: <source package name; defaults to package name>
4.Section: misc
5.Priority: optional
6.# Homepage: <enter URL here; no default>
7.Standards-Version: 3.9.2
8.Package: <package name; defaults to equivs-dummy>
9.# Version: <enter version here; defaults to 1.0>
10.# Maintainer: Your Name <yourname@example.com>
11.# Pre-Depends: <comma-separated list of packages>
12.# Depends: <comma-separated list of packages>
13.# Recommends: <comma-separated list of packages>
14.# Suggests: <comma-separated list of packages>
15.# Provides: <comma-separated list of packages>
16.# Replaces: <comma-separated list of packages>
17.# Architecture: all
18.# Multi-Arch: <one of: foreign|same|allowed>
19.# Copyright: <copyright file; defaults to GPL2>
20.# Changelog: <changelog file; defaults to a generic changelog>
21.# Readme: <README.Debian file; defaults to a generic one>
22.# Extra-Files: <comma-separated list of additional files for the doc directory>
23.# Files: <pair of space-separated paths; First is file to include, second is destination>
24.# <more pairs, if there's more than one file to include. Notice the starting space>
25.Description: <short description; defaults to some wise words>
long description and info

second paragraph


Now the question is what to do with this:
Line 3-7 : the control information of the source packages.
Line 8-25 : the control information for the binary packages
Source packages are those packages which contain the source code of the package. One can compile the source and install it in any architecture of the machine .
Binary packages are those packages which are specific to the architecture of machine. And one can easily install it with a click.

Description of important lines:
Line 3: The name of the source package, same to Line 8
Line 4: section of the distribution
There are various categories in which a source package can be put into.
Line 9: version of the package, it is helpful if you want it install packages of a particular version
Line 11: you have to write the dependencies of the packages #better remain this commented
Line 12 : Include the name of the packages that you want to include in the metapackage
Line 17: Architecture is set to all that is for both 32 and 64 bit.
Line 25: Provide description

Next is what
Then after filling up the text file, now it’s time to build it.

Build the package:

equivs-build ns-control

Now it will run and will give you a .deb file.
dpkg i *.deb will install the deb file.

This is the metapackage which contains the packages which you have included.
I have used this wiki as a source for the required information.

Suppose one of most popular metapackage : gnome-desktop-environment – It is the a desktop environment gnome flavoured. It gives the graphical user interface to the user with popular email, office tools, music and other wide range of applications.

How a common Linux user can get the benefit of it?

We know that most of the people avoid Linux because of its beautiful command line feature. They just want to use mouse/touchpad throughout.
With the help of this, a person can build a metapackage. This one can distribute to its friend and can also use for the future purpose.
One can also use this to make a collection of metapackages of different packages like hacking tools, text tools, etc.

How we uses the metapackages?

Meilix script uses the metapackages for building of all the required packages. In our webapp version (meilix-generator) we made several metapackages that will be asked from the user and a user can choose one among them according to its requirement. It will also contain the information that which packages the metapackage is made of.

Suppose event metapackages include the packages needed by the people for the events purpose which will predefined by us and they will consist of lightweight text editor, media player, document viewer etc. In an education related metapackage one contain packages related to school, workshop.

Now meilix repo contains its own metapackages that it uses to contain the distro.

How meilix metapackage is used to control distro configuration?

We can even control the distro properties including the browser configuration, it’s startup page, search page and many more things through metapackages. Let’s see how:

We created a metapackage with the name meilix-default-settings and used it to config various features in the distro. The meilix settings metapackage consists of etc folder where we can made the changes to get it on the distro. We can even include property folder in the .config under skel folder to copy the changes into the home folder of the new user. To change the chrome configuration, we need to edit the chrome.json file. To change firefox configuration we need to edit prefs.js file.

The metapackage folder is: https://github.com/fossasia/meilix/tree/master/meilix-default-settings

Repository using metapackages

https://github.com/fossasia/meilix
https://github.com/fossasia/meilix-generator  (the webapp)

Continue ReadingBuilding Metapackages to Customize the Meilix Linux Distro Generator

Using react-url-query in SUSI Chat

For SUSI Web Chat, I needed a query parameter which can be passed to the components directly to activate the SUSI dreams in my textarea using just the URL which is not easy when one is using react-router. React URL Query is a package for managing state through query parameters in the URL in React. It integrates well with React Router and Redux and provides additional tools specifically targeted at serializing and deserializing state in URL query parameters. So for example, if one wants to pass some parameters to populate in your component directly through the URL, you can use react-url-query. Eg. http://chat.susi.ai/?dream=fossasia will populate fossasia in our textarea section without actually typing the term textarea.

So this in the URL,
Screenshot from 2017-06-29 09.46.33

Will produce this in the textarea,

To achieve this. the following steps are required:

  1. First we proceed with installing the packages (Dependencies  – history)
npm install history --save
npm install react-url-query --save
  1.   We then instantiate a history in our component where we want to listen to the parameters like the following code. Our class ChatApp is where we want to pass the params.

ChatApp.react.js

import history from '../history'; 
//Import the history object from the History package.
    
 // force an update if the URL changes inside the componentDidMount function
  componentDidMount() {
      history.listen(() => this.forceUpdate());
   }
  1.  Next, we define the props of the parameters in our Message Section. For that we need the following props-
  • urlPropsQueryConfig – this is where we define our URLConfig
  • Static proptypes – the query param to which we want to pass the value, so for me it’s dream.
  • The defaultProps when no such value is being passed to our param should be left a blank.
  • And then we finally assign the props.
  • This is then passed to the Message Composer Section from where we receive the value passed.

MessageSection.react.js

// Adding the UrlConfig
const urlPropsQueryConfig = {
  dream: { type: UrlQueryParamTypes.string }
};

 // Defining the query param inside our ClassName
  static propTypes = {
    dream: PropTypes.string
  }
// Setting the default param

  static defaultProps = {     
dream: ''
  }

 //Assigning the props inside the render() function
    const {
      dream
    } = this.props;
 //Passing the dream to the MessageComposer Section

                  <MessageComposer
                    threadID={this.state.thread.id}
                    theme={this.state.darkTheme}
                    dream={dream} />                
//Exporting our Class

export default addUrlProps({ urlPropsQueryConfig })(ClassName);
  1. Next we update the Message Composer section by the props we had passed. For this we first check if the props are null, we don’t populate it in our textarea if it is, otherwise we populate the textarea with the value ‘dream + props.dream’ so the value passed in the URL will be prepend by a word dream to enable the ‘dream value’ in our textarea.

The full file is available at MessageComposer.js

 //Add Check to the constructor
 constructor(props) {
    super(props);
    this.state = {text: ''};
    if(props.dream!==''){   //Setting the text as received ‘dream dreamPassed’
      this.state= {text: 'dream '+ props.dream}
    }
  }
// Populate the textarea
        <textarea
          name="message"
          value={this.state.text}
          onChange={this._onChange.bind(this)}
          onKeyDown={this._onKeyDown.bind(this)}
          ref={(textarea)=> { this.nameInput = textarea; }}
          placeholder="Type a message..."
        />
// Add props to the component
MessageComposer.propTypes = {
  /* other props */,
  dream: PropTypes.string //Setting Proptypes to receive the prop from the MessageSection
};

Now we have the full code working for querying any dream. Head over to chat.susi.ai?dream=fossasia Change fossasia to see the text change.

Resources

Continue ReadingUsing react-url-query in SUSI Chat

Using SUSI as your dictionary

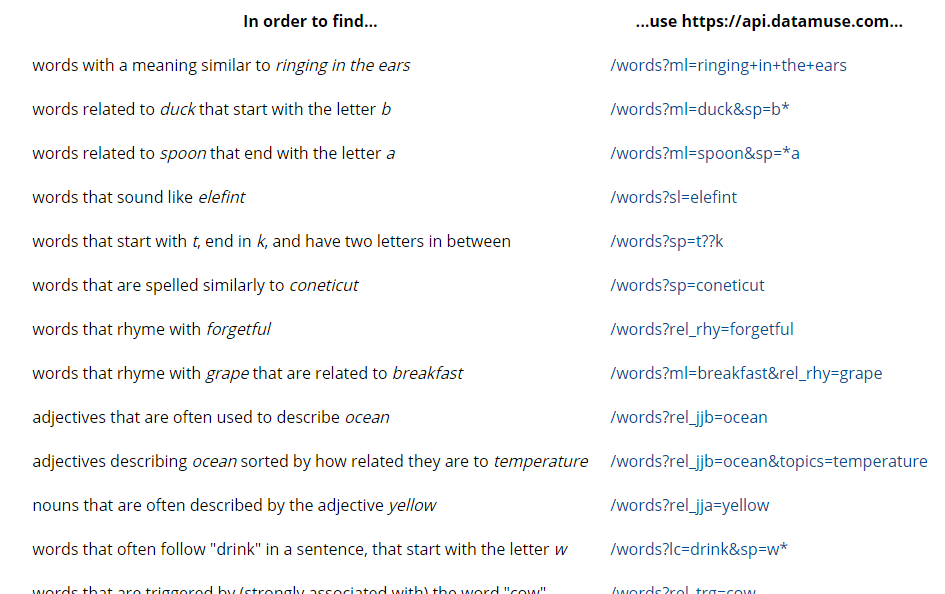
SUSI can be taught to give responses from APIs as well. I made use of an API called Datamuse which is a premier search engine for English words, indexing 10 million unique words and phrases in more than 1000 dictionaries and glossaries.

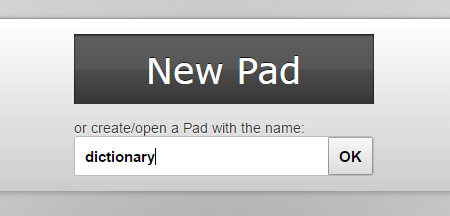
1. First, we head towards creating our dream pad for creating rules for the skill. To do this we need to create a dream at dream.susi.ai and give it a name, say dictionary.

2. After that one needs to go to the API and check the response generated.

3. Going through the docs of the API, one can create various queries to produce informative responses as follows –

  • Word with a similar meaning.

define *| Meaning of *| one word for *

!console: $word$
{
"url":"https://api.datamuse.com/words?ml=$1$",
"path":"$.[0]"
}
eol
  • Word related to something that start with a given letter.

word related to * that start with the letter *

!console: $word$
{
"url":"https://api.datamuse.com/words?ml=$1$&sp=$2$*",
"path":"$.[0]"
}
eol

  • Word that sound like a given word..

word that sound like *|sounding like *

!console: $word$
{
"url":"https://api.datamuse.com/words?sl=$1$",
"path":"$.[0]"
}
eol

  • Words that are spelled similarly to a given word.

words that are spelled similarly to *| similar spelling to *| spelling of *

!console: $word$
{
"url":"https://api.datamuse.com/words?sp=$1$",
"path":"$.[0]"
}
eol

  • Word that rhyme with a given word.

rhyme *| word rhyming with *

!console: $word$
{
"url":"https://api.datamuse.com/words?rel_rhy=$1$",
"path":"$.[0]"
}
eol

  • Adjectives that are often used to describe a given word.

adjective to describe *|show adjective for *|adjective for *

!console: $word$
{
"url":"https://api.datamuse.com/words?rel_jjb=$1$",
"path":"$.[0]"
}
eol

  • Suggestions for a given word.

suggestions for *| show words like *| similar words to * | words like *

!console: $word$
{
"url":"https://api.datamuse.com/sug?s=$1$",
"path":"$.[0]"
}
eol

This is a sample query response for define *

To create more dictionary skills go to http://dream.susi.ai/p/dictionary and add skills from the API. To contribute by adding more skills, send a pull request to the susi_skill_data.  To test the skills, you can go to chat.susi.ai

Continue ReadingUsing SUSI as your dictionary

20 Amazing Things SUSI can do for You

SUSI.AI has a collection of varied skills in numerous fields such as knowledge, entertainment, problem solving, small-talk, assistants etc. Here’s a list of top skills which SUSI possesses.

Knowledge Based

  1. Ask SUSI to describe anything.

Sample Queries describe *

  1. Ask SUSI the distance between any two cities.

Sample queries – distance between * and *|What is distance between * and * ?| What is distance between * and *         

  1. Ask SUSI about your site’s rank.

Sample Query – site rank of *                

  1. Ask SUSI to know the location of any place.

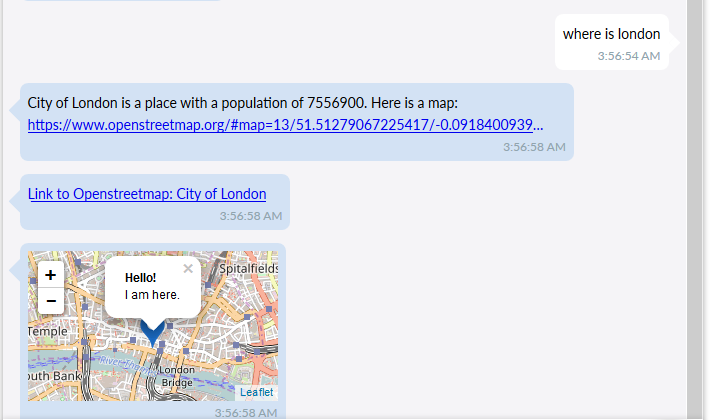
Sample Queries – where is *


  1. Ask SUSI the time in any city.

 Sample Query – current time in *


  1. Ask SUSI the weather information of any city.

Sample Queries – temperature in * , hashtags * *, mentions * *, weather in *, Tell me about humidity in *|What is humidity in *|Humidity in *|* Humidity, Tell me tomorrow’s weather in *|Weather forecast of *


  1. Ask SUSI to wiki about anything.

Sample Query – wiki *


  1. Ask SUSI about any word, words etc.

Sample Queries – define *| Meaning of *| one word for *, word related to * that start with the letter *, word that sound like *|sounding like *, words that are spelled similarly to *| similar spelling to *| spelling of *, rhyme *| word rhyming with *, adjective to describe *|show adjective for *|adjective for *, suggestions for *| show words like *| similar words to * | words like *

  1. Ask SUSI about a day in the calendar.

Sample Queries – Date * ?, Day * ?, Day on year * month * date *?


  1. Ask to convert a currency to USD for you. 

Sample Queries –  convert * to USD


Problem Solving Based

  1. Ask SUSI to solve a problem for you in Mathematics.

  Sample Queries – compute *| Compute *| Calculate *| calculate *


Entertainment Based

  1. Ask SUSI to draw a card for you.

Sample Query – draw a card


  1. Ask SUSI to toss a coin for you.

Sample Query – flip a coin


  1. Ask SUSI to tell you a Big Bang Theory Joke.

Sample Query – * big bang theory| tell me about big bang theory|geek jokes|geek joke|big bang theory *

  1. Ask SUSI to generate a meme for you.

 Sample Query – get me a meme


  1. Ask SUSI to give you a recipe. 

Sample Queries – * cook *, cook *|how to cook *|recipe for


  1. Ask SUSI to tell you a random joke.

Sample Queries – tell me a joke|recite me a joke|entertain me

  1. Ask SUSI to give you a random gif.

Sample Query – random gif


Assistants

  1. Ask SUSI to translate something for you

Sample Queries – What is * in french|french for * , What is * in german|german for *, What is * in spanish|spanish for *,  What is * in hindi|hindi for *

  1. Ask SUSI to search anything for you.

Sample Queries – search *|query *|duckduckgo *


To contribute to the above skills you can follow the tutorial here. To test or chat with SUSI you can go to chat.susi.ai

Continue Reading20 Amazing Things SUSI can do for You

Using Flux to embed SUSI’s API Service in a Chat System.

To embed SUSI’s API Service in a chat-like system, I needed a view which could populate the content dynamically and maintain the state of the Application at the same time. Flux follows a unidirectional data flow path and I used this feature to the advantage of the Chat Application to maintain the real time state of the Chat View.

A Flowchart model of Flux looks like

flux flowchart


src: https://github.com/facebook/flux

Flux uses a dispatcher service to render its views, thus making the data flow in a unidirectional path. When a user reacts with a React view (here through the TextArea in the chat system), the view propagates an action through the dispatcher service, to the various stores that hold the application’s data and finally update the views that are affected. Here’s another flowchart model from the website which helps one understand the model in a better way.

flux flow

For the current Chat Application, I used a single Message Store which contained all the event listeners to detect any change in the view. For example, when I send a “Hey” to SUSI, an action is called to Dispatch this message to the Message Store with an ActionType  “CREATE_MESSAGE”. This store then renders the message in the Message Section View.

Here is an example snippet from the Actions.js file which performs an action of type CREATE_MESSAGE and dispatches the messages to the MessageStore.js.

export function createMessage(text, currentThreadID) {
let message = ChatMessageUtils.getCreatedMessageData(text, currentThreadID);
ChatAppDispatcher.dispatch({
type: ActionTypes.CREATE_MESSAGE,
message
});
ChatWebAPIUtils.createMessage(message);
};

The response from the message is generated as soon as another ActionType named

“CREATE_SUSI_MESSAGE” is dispatched to the store, thereby rendering the SUSI’s response generated in the view.

The file ChatConstants.js which declares all the ActionTypes.

import keyMirror from 'keymirror';

export default {

  ActionTypes: keyMirror({
    CREATE_MESSAGE: null,
    RECEIVE_RAW_CREATED_MESSAGE: null,
    CREATE_SUSI_MESSAGE: null,
    RECEIVE_SUSI_MESSAGE: null,
    RECEIVE_RAW_MESSAGES: null
  })

};

To get the message up on the view, I have used the following utils to call the API, render the messages to the view and call the different actions. Here’s a code snippet from ChatMessageUtils.js

export function createMessage(message) {
  ChatExampleDataServer.postMessage(message, createdMessage => {
    Actions.receiveCreatedMessage(createdMessage, message.id);
  });
  ChatExampleDataServer.postSUSIMessage(message, createdMessage => {
    Actions.createSUSIMessage(createdMessage, message.threadID);
  });
};

To know more about the project join us on Gitter at gitter.im/fossasia/susi_webchat, or to contribute go to https://github.com/fossasia/chat.susi.ai/.

A demo application can be found running at http://chat.susi.ai.

Resources –

To know more about Flux you can visit the following websites.

Continue ReadingUsing Flux to embed SUSI’s API Service in a Chat System.

Creating Middle Section of Listing Page for loklak Apps Store

The Loklak applications website that is apps.loklak.org now has a fully functional store listing page where users and developers can find various information about the app they have selected including information about getting started with the app, use of the app and other relevant information. Developers can showcase their apps and promote their apps with promo image and preview images.

Before beginning with the actual topic let me provide a brief overview of the various components on the page. The page consists of a left sidebar which contains various categories for app filtering. There is a right column showing suggested apps so that users can easily view apps which are similar to the one they have chosen. Finally there is a middle section containing app promo image, app title, short description, author’s name, a carousel showing preview images, a getting started section, an app use section and an other relevant information section and finally some additional information.

The main feature and requirement of the middle section is that it needs to be dynamic, that is, it should dynamically show information for a given selected app. No content should be hardcoded.

Now apps.loklak.org is entirely a front end project, there is no centralised data base from where the content can be loaded. How to solve this problem? From where to get the data related to each app. Well, here comes in the app.json file present in each app. Each application present on apps.loklak.org contains an app.json file which contains some metadata about the apps. Now the app.json can be modified by the developer of the app to contain relevant information and references to assets which will be used for app store listing.

Getting started with the middle section page

At first, let us have a look at a sample app.json file.

{
  "@context":"http://schema.org",
  "@type":"SoftwareApplication",
  "permissions":"/api/search.json",
  "name":"sentimentVisualizer",
  "headline":"Sentiment Visualizer",
  "alternativeHeadline":"Tool for visualizing the sentiment of a tweet",
  "applicationCategory":"Visualizer",
  "applicationSubCategory":"Text Retrieval",
  "operatingSystem":"http://loklak.org",
  "promoImage":"promo.png",
  "appImages":["disp1.png", "disp2.png", "disp3.png"],
  "getStarted":"getStarted.md",
  "appUse":"appUse.md",
  "oneLineDescription":"Application to visualise sentiment related to tweets",
  "appSource": "https://github.com/fossasia/apps.loklak.org/tree/master/sentimentVisualizer",
  "contributors": [{"name": "Damini Satya", "url": "https://github.com/daminisatya"}],
  "techStack": ["HTML", "CSS", "AngularJs", "Bootstrap", "Loklak API"],
  "license": {"name": "LGPL 2.1", "url": "https://www.gnu.org/licenses/old-licenses/lgpl-2.1"},
  "version": "1.0",
  "updated": "June 14,2017",
  "author":{
    "@type":"Person",
    "name":"Damini Satya",
    "email":"daminisatya@gmail.com",
    "url":"https://github.com/daminisatya",
    "sameAs":"https://github.com/daminisatya"
  }
}

Each of the apps must have an app.json like the above one. As it can be seen, it contains all the necessary information for sore listing, like app name, version, oneLineDescription, etc. It also contains paths to important assets.

Before proceeding we need to know the name of the app which has been selected. This is obtained from the url as shown below.

var addr = window.location + "";
if (addr.indexOf("?") !== -1) {
    $scope.appName = addr.split("?")[1].split("=")[1];
}

Once we get the app name, next thing which we need to do is load the contents of app.json.
This is done using AngularJs’s http service.

$http.get($scope.appName + "/app.json").success(function (data) {
        $scope.appData = data;
        $scope.setupCarousel();
        $scope.getStarted();
        $scope.appUse();
        $scope.others();
});

A http ajax call is made to app.json of the corresponding app and the entire data is stored in appData.

Before moving to the subsequent function calls let us take a look at the corresponding html code which creates the top section.

<div class="app-image-and-info">
              <div class="app-image animated fadeInDown">
                <img ng-src="../{{selectedApp.name}}/promo.png" class="img-rounded image-loaded img-responsive">
              </div>
              <div class="app-info">
                <h2 class="app-name"> {{selectedApp.name}} </h2>
                <h4 class="app-headline"> {{appData.headline}} </h4>
                <h5 class="author"> <a href={{appData.author.url}} class="author-link">
                  by {{appData.author.name}} </a> </h5>
                <div class="short-desc"> {{appData.oneLineDescription}} </div>
                <a href="../{{selectedApp.name}}" class="try-now"> Try Now </a>
              </div>
            </div>

It inserts the promo image, app name, one line description, author name and link and a ‘Try now’ button to try the live app.

In the last JS code snippet (last to last snippet) we saw some function calls. The first one is setupCarousel.

$scope.setupCarousel = function () {
        var items = "";
        var active = "";
        for (var i = 0; i < $scope.appData.appImages.length; i++) {
            var image = $scope.appData.appImages[i];
            active = i == 0 ? " active" : "";
            var item = "";
            item = "
+ active + "'> + $scope.selectedApp.name + "/" + image + "'>
"
; items += item; } $(document).ready(function () { $(".carousel-inner").html(items); }); }

This function iterates over all the preview image paths and creates a html string for the image carousel. Finally it inserts the html into the corresponding div.

The next three functions loads the text content from the respective file paths via ajax calls.
Let us see one of them as the other two are almost similar.

$scope.getStarted = function () {
        $http.get($scope.appName + "/" +$scope.appData.getStarted).success(function (data) {
            $(document).ready(function () {
                $(".get-started-md").html(converter.makeHtml(data));
            });
        });
}

Since this text contents will be used for showcasing purpose, raw text would look somewhat dull and boring. Developer’s should be able to customise them. But gain, we cannot go for css styling as the content is dynamically loaded, a single page is being used for all apps. What if developer is able to use markdown in their text? This will definitely solve the problem as developers will be able to format and style their content. So how do we render markdown to html? Well showdown.js allows us to do so. It dynamically renders markdown to html. This library has been used here to convert the markdown to html and finally insert it into the page using jquery.

After these three sections, there is a section showing some additional data like app version, last updated, contributors list, technology used, license, author’s website and mail etc. All these informations are fetched from app.json and displayed via AngularJS variables. The functional store listing page can be seen here

Important resources

Continue ReadingCreating Middle Section of Listing Page for loklak Apps Store

Creating a Responsive Menu in Open Event Frontend

Open Event Frontend uses semantic ui for creating responsive HTML components, however there are some components that are not responsive in nature like buttons & menus. Therefore we need to convert tabbed menus to a one column dropdown menu in mobile views. In this post I describe how we make menus responsive. We are creating a semantic UI custom styling component in Ember to achieve this.

In Open Event we are using the tabbed menus for navigation to a particular route as shown below.

Menu (Desktop)

As you can see there is an issue when viewing the menu on mobile screens.

Menu (Mobile)

Creating custom component for menu

To make the menu responsive we created a custom component called tabbed-navigation which converts the horizontal menu into a vertical dropdown menu for smaller screens. We are using semantic ui styling components for the component to implement the vertical dropdown for mobile view.

tabbed-navigation.js

currentRoute: computed('session.currentRouteName', 'item', function() {
  var path = this.get('session.currentRouteName');
  var item = this.get('item');
  if (path && item) {
    this.set('item', this.$('a.active'));
    this.$('a').addClass('vertical-item');
    return this.$('a.active').text().trim();
  }
}),
didInsertElement() {
  var isMobile = this.get('device.isMobile');
  if (isMobile) {
    this.$('a').addClass('vertical-item');
  }
  this.set('item', this.$('a.active'));
},
actions: {
  toggleMenu() {
    var menu = this.$('div.menu');
    menu.toggleClass('hidden');
  }
}

In the component we check if the device is mobile & change the classes accordingly. For mobile devices we add the vertical-item class to all the items in the menu. We set a property called item in the component which stores the selected item of the menu.

We add a computed property called currentRoute which observes the current route and the selected item, and sets the item to currently active route, and returns the name of the current route.

We add an action toggleMenu which is used to toggle the display of the vertical menu for mobile devices.

tabbed-navigation.hbs

We add a vertical menu dynamically for mobile devices with a button and the name of the current selected item which is stored in currentRoute variable, we also toggle between horizontal & vertical menu based on the screen size.

{{#if device.isMobile}}
  <div role="button" class="ui segment center aligned" {{action 'toggleMenu'}}>
    {{currentRoute}}
  </div>
{{/if}}
<div role="button" class="mobile hidden ui fluid stackable {{unless isNonPointing (unless device.isMobile 'pointing')}} {{unless device.isMobile (if isTabbed 'tabular' (if isVertical 'vertical' 'secondary'))}} menu" {{action 'toggleMenu'}}>
  {{yield}}
</div>

tabbed-navigation.scss

.tabbed-navigation {
  .vertical-item {
    display: block !important;
    text-align: center;
  }
}

Our custom component must look like an item of the menu, to ensure this we use display block property which will allow us to place the menu appear below the toggle button. We also center the menu items so that it looks more like a vertical dropdown.

{{#tabbed-navigation}}
  {{#link-to 'events.view.index' class='item'}}
    {{t 'Overview'}}
  {{/link-to}}
  {{#link-to 'events.view.tickets' class='item'}}
    {{t 'Tickets'}}
  {{/link-to}}
  <a href="#" class='item'>{{t 'Scheduler'}}</a>
  {{#link-to 'events.view.sessions' class='item'}}
    {{t 'Sessions'}}
  {{/link-to}}
  {{#link-to 'events.view.speakers' class='item'}}
    {{t 'Speakers'}}
  {{/link-to}}
  {{#link-to 'events.view.export' class='item'}}
    {{t 'Export'}}
  {{/link-to}}
{{/tabbed-navigation}}

To use this component all we need to do is wrap our menu inside the tabbed-navigation component and it will convert the horizontal menu to the vertical menu for mobile devices.

The outcome of this change on the Open Event Front-end now looks like this:

Thank you for reading the blog, you can check the source code for the example here.

Resources

Continue ReadingCreating a Responsive Menu in Open Event Frontend

Creating a store listing page for Loklak Apps Store

The various apps built with the loklak api is presently hosted at apps.loklak.org. On visiting the site, the users are presented with an app wall from where users can select any app and the user will be taken to the live version of the app. However there is no store listing page available like other app sites (for ex. Google playstore) where information about the app like how to use the app, what the app does, getting started with the app can be found.

The first part of my GSOC project is to create such an app store listing page where users/developers can find  all relevant information about the selected app.

Proposed design of the store listing page

The store listing page will be designed in three column format. There will be a left sidebar which will contain a list of categories for navigation, the category to which the selected app belongs will be highlighted. There will be a right side bar which will contain a list of similar apps for suggestion. The middle section will contain all the necessary information about the selected application, promo image and app preview images. Apart from this the page will contain a navbar for basic navigation.

Getting started with the store listing page implementation

Let’s get started with the left sidebar. Target is to make the entire page as dynamic as possible. Minimum information will be hard coded in html  and js code. Maximum data will be fetched from external json files using ajax requests. In this way if we need to make any change to data, it can be done by simply changing the data in the json files, the html and js code can be left intact.

First the store listing page has to know which app has been selected by the user. For this the app name is sent as an url parameter to the store listing page. The store listing page itself will have url like this http://apps.loklak.org/details.html?q=<app_name>. From here we can easily get the app name as shown below.

var addr = window.location + "";
if (addr.indexOf("?") !== -1) {
    $scope.appName = addr.split("?")[1].split("=")[1];
}

The category names, icon, and color are loaded from apps.json file. The apps.json file is one of the most important files in the repository which manages app and site meta data. It contains list of category objects each of which contains category name, category style and category icon reference.

$http.get('apps.json').success(function (data) {
        $scope.categories = data.categories;
        $scope.apps = data.apps;
        $scope.categories.unshift({"name": "All","image":"all.png","style" :
            {"background-color": "#ED3B3B"}});
        $scope.getSelectedApp();
        $scope.getSimilarApps();
    });

Using the above code we get all the categories and apps and bind them with the scope variable so that we can access them from the corresponding HTML.

Next we need to actually setup the UI for the sidebar using the data we have acquired. Well here comes in AngularJs’s one of the most useful feature – two way data binding. Using two way data binding we can easily access the category list from HTML code, iterate over it and set up the UI.

<div class="category-body">
              <ul class="menu-list">
                <li class="menu-list-item" ng-repeat="category in categories track by $index">
                  <a href="/#{{category.name.split(' ').join('')}}" class="menu-item" id="{{category.name | nospace}}"
                    ng-class="{selected: category.name.split(' ').join('') ==
                      selectedApp.applicationCategory.split(' ').join('')}">
                    <span class="category-image" ng-style = {{category.style}}>
                      <img ng-src="images/sidebar-images/{{category.image}}">
                    </span>
                    <span class="category-name"> {{category.name}} </span>
                  </a>
                </li>
              </ul>
            </div>

As it can be seen from the above code ng-class is being used to conditionally add a class named ‘selected’ for highlighting the category to which the selected app belongs. Each icon is given its own custom background color using ng-style, and the source is set using ng-src. Clicking on an category will take the user to the main page (app wall) and the user will be presented with only those apps which belong to the category which the user previously selected.

Creating a suggestion list

Next step is creating the right side column. It will contain all the other apps which are similar to the one selected by the user. For this we need to filter out all the apps which belongs to the same category to which the user selected app belongs. This can be done easily by using the list of apps which we have got from apps.json file. We can simply iterate over all the apps and filter the apps from the required category into another list.

$scope.getSimilarApps = function() {
        $scope.apps.forEach(function (item) {
            if (item.applicationCategory === $scope.selectedApp.applicationCategory
                && item.name !== $scope.selectedApp.name) {
                $scope.similarApps.push(item);
            }
        });
    }

This small function does the task of filtering and populates the similarApps list.

Next, once again we need to setup the UI using the data AngularJs acquired. For this we again iterate over the similarApps list and this time we set up cards to hold the app image and name.

<div class="similar-apps">
            <div class="similar-apps-header">
              <h4> Similar apps </h4>
            </div>
            <div class="similar-apps-list">
              <div ng-repeat="app in similarApps" class="card fadeIn">
                <a href="../details.html?q={{app.name}}">
                  <img ng-src="../{{app.name}}/screenshot.png" class="similar-app-image" alt="App image">
                  <div class="card-container">
                    <h4>{{app.headline}}</h4>
                  </div>
                </a>
              </div>
            </div>
          </div>

On clicking on any of the card, the store listing page of the corresponding app will be shown.

Important resources

  •  Find more information of AngularJS and AngularJS services here.
Continue ReadingCreating a store listing page for Loklak Apps Store

Integrating Selenium Testing in the Open Event Webapp

Enter Selenium. Selenium is a suite of tools to automate web browsers across many platforms. Using Selenium, we can control the browser and instruct it to do an ‘action’ programmatically. We can then check whether that action had the appropriate reaction and make our test cases based on this concept. There are various implementations of Selenium available in many different languages: Java, Ruby, Javascript, Python etc. As the main language used in the project is Javascript, we decided to use it.

https://www.npmjs.com/package/selenium-webdriver
https://seleniumhq.github.io/selenium/docs/api/javascript/index.html

After deciding on the framework to be used in the project, we had to find a way to integrate it in the project. We wanted to run the tests on every PR made to the repo. If it failed, the build would be stopped and it would be shown to the user. Now, the problem was that the Travis doesn’t natively support running Selenium on their virtual machine. Fortunately, we have a company called Sauce Labs which provides automated testing for the web and mobile applications. And the best part, it is totally free for open source projects. And Travis supports Sauce Labs. The details of how to connect to Sauce Labs is described in detail on this page:

https://docs.travis-ci.com/user/gui-and-headless-browsers/

Basically, we have to create an account on Sauce Labs and get a sauce_username and sauce_access_key which will be used to connect to the sauce cloud. Travis provides a sauce_connect addon which creates a tunnel which allows the Sauce browsers to easily access our application. Once the tunnel is established, the browser in the Sauce cloud can use it to access the localhost where we serve the pages of the generated sites. A little code would make it more clear at this stage:

Here is a short excerpt from the travis.yml file :-

addons:
 sauce_connect:
   username: princu7
 jwt:
   secure: FslueGK2gtPHkRANMpUlGyCGsr1jTVuaKpP+SvYUxBYh5zbz73GMq+VsqlE29IZ1ER1+xMfWuCCvg3VA7HePyN6hzoZ/t0LADureYVPur6R5ZJgqgQpBinjpytIjo2BhN3NqaNWaIJZTLDSAT76R7HuNm01=

As we can see from the code, we have installed the sauce_connect addon and then added the sauce_username and sauce_access_key which we got when we registered on the cloud. Now, what is this gibberish we are seeing? Well, that is actually the sauce_access_key. It is just in its encrypted form. Generally, it is not a good practice to show the access keys in the source code. Anyone else can then use it and can cause harm to the resources allocated to us. You can read all about encrypting environment variables and JWT (JSON Web Tokens) here:-

https://docs.travis-ci.com/user/environment-variables/
https://docs.travis-ci.com/user/jwt

So, this sets up our tunnel to the Sauce Cloud. Here is one of the screenshots showing that our tunnel is opened and tests can be run through it.

sauce.png

After this, our next step is to make our test scripts run in the Sauce Cloud through the tunnel. We already use a testing framework mocha in the project. We can easily use mocha to run our client-side tests too. Here is a link to study it in a little more detail:

http://samsaccone.com/posts/testing-with-travis-and-sauce-labs.html

This is a short excerpt of the code from the test script

describe("Running Selenium tests on Chrome Driver", function() {
 this.timeout(600000);
 var driver;
 before(function() {
   if (process.env.SAUCE_USERNAME !== undefined) {
     driver = new webdriver.Builder()
       .usingServer('http://'+    process.env.SAUCE_USERNAME+':'+process.env.SAUCE_ACCESS_KEY+'@ondemand.saucelabs.com:80/wd/hub')
       .withCapabilities({
         'tunnel-identifier': process.env.TRAVIS_JOB_NUMBER,
         build: process.env.TRAVIS_BUILD_NUMBER,
         username: process.env.SAUCE_USERNAME,
         accessKey: process.env.SAUCE_ACCESS_KEY,
         browserName: "chrome"
       }).build();
   } else {
     driver = new webdriver.Builder()
       .withCapabilities({
         browserName: "chrome"
       }).build();
   }
 });

 after(function() {
   return driver.quit();
 });

 describe('Testing event page', function() {

   before(function() {
     eventPage.init(driver);
           eventPage.visit('http://localhost:5000/live/preview/a@a.com/FOSSASIASummit');
   });

   it('Checking the title of the page', function(done) {
     eventPage.getEventName().then(function(eventName) {
       assert.equal(eventName, "FOSSASIA Summit");
       done();
     });
   });
 });
});

Without going too much into the detail, I would like to offer a brief overview of what is going on. At a high level, before starting any tests, we are checking whether the test is being run in a Travis environment. If yes, then we are appropriately setting up the webdriver for it to run on the Sauce Cloud through the tunnel which we opened previously. We also specify the browser on which we would like to run, which in this care here, is Chrome.

After this preliminary setup is done, we move on to the actual tests. Currently, we only have a basic test to check whether the title of the event site generated is correct or not. We had generated FOSSASIA Summit in the earlier part of the test script. So we just run the site and check its title which should obviously be ‘FOSSASIA Summit’. If due to some error it is not the case, then an error will be thrown and the Travis build we fail. Here is the screenshot of a successful passing test:

6c0a0775-6ad4-45f9-bfa1-a8baef4e6401.png

More tests will be added over the upcoming weeks.

Resources:

Continue ReadingIntegrating Selenium Testing in the Open Event Webapp