How to use Digital Ocean and Docker to setup Test CMS for Phimpme

One of the core feature of Phimpme app is sharing images to other different accounts, including various open source CMS such as WordPress, Drupal etc and other open source data storage account such as OwnCloud, NextCloud etc.

One can not have everything at place, but for development and testing purpose it is required in our end. So problem I was facing to get things done in most optimize way. I thought setting things on hosted server would be good, because it saves lots of time in setting locally in our system, adding all the dependencies. And also we cannot share the account as it is limited to our local environment.

Digital Ocean caught my attention in providing hosting service. It is very easy to use with their droplet creation. Select as per your system requirement and service requirement, the droplet will be ready in few moments and we can use it anywhere.

Note: DigitalOcean is a paid service. Student can use Github Education Pack for free credits on Digital Ocean. I used the same.

I currently worked on Nextcloud integration so here in this blog I will tell how to quickly create nextcloud server using Digital Ocean and Docker.

Step 1: Creating Droplet

DigitalOcean completely work on droplets and one can anytime create and destroy different droplets associated with their account.

Choose an Image

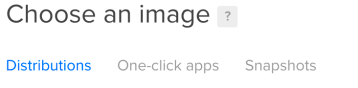
So there are three options of choosing the image of Droplet.

Distributions : Which is other operating systems you want to use

One Click app: It is a very good feature as it creates everything for use in just one click. But again, it doesn’t provide everything, like there is no NextCloud. That’s why I used docker to take its image.

Snapshots: This is if you saved your droplet already, so it will pick it and creates similar to the saved image. Here I selected Docker from one-click apps section.

Selecting the size

This is for selecting the size of the server we are creating, For small development purpose $5 plan is good. There is a good thing in DigitalOcean as it didn’t charge on the monthly basis to the use. It works on hourly basis and charge according to that. Also providing the SSD Disk for fast IO operations.

Choose a datacenter Region

Add SSH

This is very important to add a ssh key. Otherwise you have to setup root password or used the shell they provide. To work on your computer terminal, its good that you setup an ssh key already and it to the account.

How to get ssh key in your system: https://help.github.com/

Rename the number of droplet and name of the droplet and create.

Now it will show there in your droplet section

Step 2: Access the Server

As we have already added the ssh key to our droplet. Now we can access it from our terminal. Open the terminal and type this

➜  ~ ssh root@<your IP> 

It will logged in to you

root@docker-512mb-blr1-01:~# 

Our objective is setting a NextCloud Account.

Here now I will use Docker. Firstly, What is Docker?

Go here to read: https://www.docker.com/what-docker

I will explain docker in other words. Like I setted up everything which I need. Now If I have to destroy this all and want to use it after some days. Or if my friends wants to use the setted platform. What is the option here?

Recreate and everything everytime? NO.

Just create docker image, save it pull the image when you want, and run it to serve on the serve. Your friends need, provide them the docker image.

Isn’t it cool and much time saving.

Browse the Docker Hub

In the hub we can find docker images for various platforms officially maintained by the authors.

Nextcloud have their official account on Docker to provide latest images to the developers.

Here is the link : https://hub.docker.com/_/nextcloud/

Pull the image in your server.

root@docker-512mb-blr1-01:~# docker pull nextcloud
Using default tag: latest
latest: Pulling from library/nextcloud
9f0706ba7422: Pull complete
4c407763908f: Pull complete
82e2bc3a45c1: Pull complete
c84e1013aed1: Pull complete
a3b5e03d7e24: Pull complete
917f836a88be: Pull complete
b2dc54431819: Pull complete
a60b574790b8: Pull complete
49ef0f1aff88: Pull complete
7773a865ee49: Pull complete
9e0e5cc56a9d: Pull complete
bfade1c7421e: Pull complete
ece8ceb33bed: Pull complete
c691d2747a3e: Pull complete
4b5e96bf54c9: Pull complete
6fbe30ae456b: Pull complete
e0c534b35a6b: Pull complete
4d2687f4b6f3: Pull complete
00197422846a: Pull complete
6ab57168c49c: Pull complete
9e1260db005f: Pull complete
Digest: sha256:1bb5c256f19dcec60d8468c00bc7dc74efdf93390666cb82e20bcacbbbd9746c
Status: Downloaded newer image for nextcloud:latest
root@docker-512mb-blr1-01:~#

Following the documentation

I need to run this command $ docker run -d -p 8080:80 nextcloud

It serves the account on localhost.

Check on your https://<IP>:8080

So in this way I easily setup different account for testing and integration purpose in Phimpme Android app. It really saves lots of time and speed up the process.

You can easily destroy the droplet after work is done.

Student can use the free credits from GitHub Education Pack.

Source:


Continue ReadingHow to use Digital Ocean and Docker to setup Test CMS for Phimpme

Shrinking Model Classes Boilerplate in Open Event Android Projects Using Jackson and Lombok

JSON is the de facto standard format used for REST API communication, and for consuming any of such API on Android apps like Open Event Android Client and Organiser App, we need Plain Old Java Objects, or POJOs to map the JSON attributes to class properties. These are called models, for they model the API response or request. Basic structure of these models contain

  • Private properties representing JSON attributes
  • Getters and Setters for these properties used to change the object or access its data
  • A toString() method which converts object state to a string, useful for logging and debugging purposes
  • An equals and hashcode method if we want to compare two objects

These can be easily and automatically be generated by any modern IDE, but add unnecessarily to the code base for a relatively simple model class, and are also difficult to maintain. If you add, remove, or rename a method, you have to change its getters/setters, toString and other standard data class methods.

There are a couple of ways to handle it:

  • Google’s Auto Value: Creates Immutable class builders and creators, with all standard methods. But, as it generates a new class for the model, you need to add a library to make it work with JSON parsers and Retrofit. Secondly, there is no way to change the object attributes as they are immutable. It is generally a good practice to make your models immutable, but if you are manipulating their data in your application and saving it in your database, it won’t be possible except than to create a copy of that object. Secondly, not all database storage libraries support it
  • Kotlin’s Data Classes: Kotlin has a nice way to made models using data classes, but it has certain limitations too. Only parameters in primary constructor will be included in the data methods generated, and for creating a no argument constructor (required for certain database libraries and annotation processors), you either need to assign default value to each property or call the primary constructor filling in all the default values, which is a boilerplate of its own. Secondly, sometimes 3rd party libraries are needed to work correctly with data classes on some JSON parsing frameworks, and you probably don’t want to just include Kotlin in your project just for data classes
  • Lombok: We’ll be talking about it later in this blog
  • Immutables, Xtend Lang, etc

This is one kind of boilerplate, and other kind is JSON property names. As we know Java uses camelcase notation for properties, and JSON attributes are mostly:

  • Snake Cased: property_name
  • Kebab Cased: property-name

Whether you are using GSON, Jackson or any other JSON parsing framework, it works great for non ambiguous property names which match as same in both JSON and Java, but requires special naming attributes for translating JSON attributes to camelcase and vice versa. Won’t you want your parser to intelligently convert property_name to propertyName without having you write the tedious mapping which is not only a boilerplate, but also error prone in case your API changes and you forget to update the annotations, or make a spelling mistake, as they are just non type-safe strings.

These boilerplates cause serious regressions during development for what should be a simple Java model for a simple API response. These both kinds of boilerplate are also related to each other as all JSON parsers look for getters and setters for private fields, so there are two layers of potential errors in modeling JSON to Java Models. This should be a lot simpler than it is. So, in this blog, we’ll see how we can configure our project to be 0 boilerplate tolerant and error free. We reduced approximately 70% boilerplate using this configuration in our projects. For example, the Event model class we had (our biggest) reduced from 590 lines to just 74!

We will use a simpler class for our example here:

public class CallForPapers {

    private String announcement;
    @JsonProperty("starts-at")
    private String startsAt;
    private String privacy;
    @JsonProperty("ends-at")
    private String endsAt;

    // Getters and Setters

    @Override
    public String toString() {
        return "CallForPapers{" +
                "announcement='" + announcement + '\'' +
                ", startsAt='" + startsAt + '\'' +
                ", privacy='" + privacy + '\'' +
                ", endsAt='" + endsAt + '\'' +
                '}';
    }
}


Note that getters and setters have been omitted for brevity. The actual class is 57 lines long

As you can see, we are using @JsonProperty annotation to properly map the starts-at attribute to startsAt property and similarly on endsAt. First, we’ll remove this boilerplate from our code. Note that this seems a bit overkill for 2 attributes, but imagine the time you’ll save by not having to maintain 100s of attributes for the whole project.

Jackson is smart enough to map different naming styles to one another in both serializing and deserializing. This is done by using Naming Strategy class in Jackson. There is an option to globally configure it, but I found that it did not work for our case, so we had to apply it to each model. It can be simply done by adding another annotation on the top of your class declaration and removing the JsonProperty attribute from your fields

@JsonNaming(PropertyNamingStrategy.KebabCaseStrategy.class)
public class CallForPapers {

    private String announcement;
    private String startsAt;
    private String privacy;
    private String endsAt;

    // Getters and Setters

    @Override
    public String toString() {
        return "CallForPapers{" +
                "announcement='" + announcement + '\'' +
                ", startsAt='" + startsAt + '\'' +
                ", privacy='" + privacy + '\'' +
                ", endsAt='" + endsAt + '\'' +
                '}';
    }
}


Our class looks like this now. But be careful to properly name your getters and setters because now, Jackson will map attributes by method names, so if you name the setter for startsAt -> setStartsAt it will automatically understand that the attribute to be mapped is “starts-at”. But, if the method name is something else, then it won’t be able to correctly map the fields. If your properties are not private, then Jackson may instead use them to map fields, so be sure to name your public properties in a correct manner.

Note: If your API does not use kebab case, there are plenty of other options or naming strategies present in Jackson, one example will be

  • PropertyNamingStrategy.SnakeCaseStrategy for attributes like “starts_at”

 Needless to say, this will only work if your API uses a uniform naming strategy

Now we have removed quite a burden from the development lifecycle, but 70% of class is still getters, setters, toString and other data methods. Now, we’ll configure lombok to automatically generate these for us. First, we’ll need to add lombok in our project by adding provided dependency in build.gradle and sync the project

provided 'org.projectlombok:lombok:1.16.18'


And now you’d want to install Lombok plugin in Android Studio by going to Files > Settings > Plugins and searching and installing Lombok Plugin and restarting the IDE


After you have restarted the IDE, navigate to your model and add @Data annotation at the top of your class and remove all getters/setters, toString, equals, hashcode and if the plugin was installed correctly and lombok was installed from the gradle dependencies, these will be automatically generated for you at build time without any problem. A way for you to see the generated methods is to the structure perspective in the Project Window.


There are many more fun tools in lombok and more fine grained control options are provided. Our class looks like this now

@Data
@JsonNaming(PropertyNamingStrategy.KebabCaseStrategy.class)
public class CallForPapers {
    private String announcement;
    private String startsAt;
    private String privacy;
    private String endsAt;
}


Reduced to 16 lines (including imports and package). Now, there are some corner cases that you want to iron out for the integration between lombok and Jackson to work correctly.

Lombok uses property names for generating its getters and setters. But there’s a different convention for handling booleans. For the sake of simplicity, we’ll only talk about primitive boolean. You can check out the links below to learn more about class type. The primitive boolean property of the standard Java format, for example hasSessions will generate hasSessions and getter and setHasSessions. Jackson is smart but it expects a getter named getHasSessions creating problems in serialization. Similarly, for a property name isComplete, generate getter and setter will be isComplete and setComplete, creating a problem in deserialization too. Actually, there are ways how Jackson can get boolean values mapped correctly with these getters/setters, but that method needs to rename property itself, changing the getters and setters generated by Lombok. There is actually a way to tell Lombok to not generate this format of getter/setter. You’d need to create a file named lombok.config in your project directory app/ and write this in it

lombok.anyConstructor.suppressConstructorProperties = true
lombok.addGeneratedAnnotation = false
lombok.getter.noIsPrefix = true


There are some other settings in it that make it configured for Android specific project

There are some known issues in Android related to Lombok. As lombok itself is an annotation processor, and there is no order for annotation processors to run, it may create problems with other annotation processors. Dagger had issues with it until they fixed it in their later versions. So you might need to check out if any of your libraries depend upon the lombok generated code like getters and setters. Certain database libraries use that and Android Data Binding does too. Currently, there is no solution to the problem as they will throw an error about not finding a getter/setter because they ran before lombok. A possible workaround is to make properties public so that instead of using getters and setters, these libraries use them instead. This is not a good practice, but as this is a data class and you are already creating getters and setters for all fields, this is not a security vulnerability.

There are tons of options for both Jackson and Lombok with a lot of features to help the development process, so be sure to check out these links:

Continue ReadingShrinking Model Classes Boilerplate in Open Event Android Projects Using Jackson and Lombok

Smart Data Loading in Open Event Android Orga App

In any API centric native application like the Open Event organizer app (Github Repo), there is a need to access data through network, cache it for later use in a database, and retrieve data selectively from both sources, network and disk. Most of Android Applications use SQLite (including countless wrapper libraries on top of it) or Realm to manage their database, and Retrofit has become a de facto standard for consuming a REST API. But there is no standard way to manage the bridge between these two for smart data loading. Most applications directly make calls to DB or API service to selectively load their data and display it on the UI, but this breaks fluidity and cohesion between these two data sources. After all, both of these sources manage the same kind of data.

Suppose you wanted to load your data from a single source without having to worry from where it is coming, it’d require a smart model or repository which checks which kind of data you want to load, check if it is available in the DB, load it from there if it is. And if it not, call the API service to load the data and also save it in the DB there itself. These smart models are self contained, meaning they handle the loading logic and also handle edge cases and errors and take actions for themselves about storing and retrieving the data. This makes presentation or UI layer free of data aspects of the application and also remove unnecessary handling code unrelated to UI.

From the starting of Open Event Android Orga Application planning, we proposed to create an efficient MVP based design with clear separation of concerns. With use of RxJava, we have created a single source repository pattern, which automatically handles connection, reload and database and network management. This blog post will discuss the implementation of the AbstractObservableBuilder class which manages from which source to load the data intelligently

Feature Set

So, first, let’s discuss what features should our AbstractObservableBuilder class should have:

  • Should take two inputs – disk source and network source
  • Should handle force reload from server
  • Should handle network connection logic
  • Should load from disk observable if data is present
  • Should load from network observable if data is not present is disk observable

This constitutes the most basic data operations done on any API based Android application. Now, let’s talk about the implementation

Implementation

Since our class will be of generic type, we will used variable T to denote it. Firstly, we have 4 declarations globally

private IUtilModel utilModel;
private boolean reload;
private Observable<T> diskObservable;
private Observable<T> networkObservable;


  • UtilModel tells us if the device is connected to internet or not
  • reload tells if the request should bypass database and fetch from network source only
  • diskObservable is the database source of the item to be fetched
  • networkObservable is the network source of the same item

Next is a very simple implementation of the builder pattern methods which will be used to set these variable fields

@Inject
public AbstractObservableBuilder(IUtilModel utilModel) {
    this.utilModel = utilModel;
}

AbstractObservableBuilder<T> reload(boolean reload) {
    this.reload = reload;

    return this;
}

AbstractObservableBuilder<T> withDiskObservable(Observable<T> diskObservable) {
    this.diskObservable = diskObservable;

    return this;
}

AbstractObservableBuilder<T> withNetworkObservable(Observable<T> networkObservable) {
    this.networkObservable = networkObservable;

    return this;
}


UtilModel is the required dependency, and so is added as a constructor parameter.

All right, all variables are set up, now we need to create the build function to actually create the observable:

@NonNull
public Observable<T> build() {
    if (diskObservable == null || networkObservable == null)
        throw new IllegalStateException("Network or Disk observable not provided");

    return Observable
            .defer(getReloadCallable())
            .switchIfEmpty(getConnectionObservable())
            .compose(applySchedulers());
}

Reloading Logic

First of all, we check if the caller forgot to add disk or network source and throw an exception if it is actually so. Next, we use defer operator to defer the call to getReloadCallable() so that this function is not executed until this observable is subscribed. Some articles over the internet directly use combine operators from Rx to make things easy, but this lazy calling is the most efficient way to do things because no actual call will be made to observables.

Secondly, you can easily test the behaviour in unit tests, by verifying that

  • no call to the network observable was made if the data inside disk observable was present; or
  • call to network observable was made even if there was data in disk observable if the reload request was made

These tests would not have been possible if we did not employ the lazy call technique because the calls to the observables and utilModel would have been made before the subscription to this model happen, in order to create this observable eagerly.

Now, let’s see what getReloadCallable does

@NonNull
private Callable<Observable<T>> getReloadCallable() {
    return () -> {
        if (reload)
            return Observable.empty();
        else
            return diskObservable
                .doOnNext(item -> 
                    Timber.d("Loaded %s From Disk on Thread %s",
                    item.getClass(), Thread.currentThread().getName()));
    };
}


This function’s role is to return the disk observable if the request is not a reload call, or else return an empty observable, so that force network request happens to reload the data

So it returns a Callable which encapsulates this logic, and besides that, it also adds a log if loading from disk about the type of item loaded and the thread it was loaded on

Connection and Database Switch Logic

In the next chain of operation, we make a switchIfEmpty call to getConnectionObservable(). Because of the above reloading logic, switchIfEmpty serves 2 purpose here, it changes to API call:

  • if db does not contain data
  • If it is a reload call

The observable we switch to is returned by getConnectionObservable() and its purpose is to check if the device is connected to the internet, and if it is, to forward the network request and if it is not, then return an Error Observable.

@NonNull
private Observable<T> getConnectionObservable() {
    if (utilModel.isConnected())
        return networkObservable
            .doOnNext(item -> Timber.d("Loaded %s From Network on Thread %s",
                item.getClass(), Thread.currentThread().getName()));
    else
        return Observable.error(new Throwable(Constants.NO_NETWORK));
}

We use util model to determine if we are connected to internet and take action accordingly. As you can see, here too, we log about the data being loaded and the thread information.

Threading

Lastly, we want to ensure that all processing happens on correct threads, and for that, we call compose with an Observable Transformer to make all requests happen on I/O scheduler and the data is received on Android’s Main Thread

@NonNull
private <V> ObservableTransformer<V, V> applySchedulers() {
    return observable -> observable
        .subscribeOn(Schedulers.io())
        .observeOn(AndroidSchedulers.mainThread());
}

And that’s all it takes to create a reactive, generic and reusable data handler for disk and network based operations. In the repository pattern we have employed in the Open Event Android Orga Application, all our data switching and handling code is delegated to it, with unit tests and integration tests testing the individual and cross component working in all cases.

If you want to learn more about other implementations, you can read these articles

Continue ReadingSmart Data Loading in Open Event Android Orga App

Adding Tablet support for PSLab Android App

Making layouts compatible with tablet definitely, helps in increasing the target audience. Tablets are different than smartphones, they available in size as big as 7’’ and 10’’. This gives developers/designers a lot of screen space to work on which in turn can be utilized in a way different than smartphones. In the PSLab Oscilloscope Activity and in fact the entire application needs to have tablet support. To achieve these two approaches are used. They are as follow:

  1. Creating layouts compatible with the tablet
  2. Programmatically differentiate between phone and tablet

Creating layouts compatible with the Tablet

A series of following steps help to create layouts for the tablet with much ease

  1. Right click on layouts. Then move the cursor to new and select Layout resource file.

  1. A new resource file dialog box will appear. Under filename type the same name of the file for which you want to create tablet layout. Under directory name type layout-sw600dp for the layout of 7’’ tablet and layout-sw720dp for layout of 10’’ tablet.

  1. The Android Studio will automatically create a folder with two layouts, one for phone and another for tablet inside layouts folder. Now you can work on tablet layout and make the app compatible with the tablet.

Programmatically differentiate between Phone and Table

In Oscilloscope Activity of PSLab Android App, the dimensions of the layout are programmatically set. These dimensions are different from that should be used for the tablet. So, it is important for the app to know whether it’s operating on a phone or a tablet.

This can be achieved using the following steps.

  1. Right click on resources, move the cursor on new and select Android resource file.

  1. A new resource file dialog will appear, under file name type isTablet and press OK. Here we are creating a resource for a phone.

  1. In the XML file isTablet write the following code.

<?xml version="1.0" encoding="utf-8"?>
<resources>
   <bool name="isTablet">false</bool>
</resources>

This resource returns false when accessed.

  1. Repeat 1, 2 step and under new resource file dialog box type values-600dp. Then write the following code.

<?xml version="1.0" encoding="utf-8"?>
<resources>
   <bool name="isTablet">true</bool>
</resources>

This resource returns true when accessed.

  1. Now you can access this resource in Activity simply writing the following code.

boolean tabletSize = getResources().getBoolean(R.bool.isTablet);

tabletSize will be true if accessed in a tablet otherwise it will be false. Hence code can written accordingly.

By this way, we can find whether the application is running on tablet or phone programmatically.

Resources


Continue ReadingAdding Tablet support for PSLab Android App

Developing Oscilloscope UI in PSLab Android App

User Interface (UI) is one of the most important part of any software development. In PSLab while developing the UI of the Oscilloscope the following points are very critical.

  1. The UI should expose all the functionalities of Oscilloscope that can be performed using PSLab.
  2. The UI should be very convenient to use. It should allow the user to access functionalities of the PSLab with ease.
  3. The UI should be attractive.

Since Android smartphones come with relatively small size, it was a challenge to develop a UI for Oscilloscope. In this blog, I am going to mention the steps involved in developing the Oscilloscope UI.

Step 1: Creating a mockup

Initially, a mock-up for Oscilloscope UI is created using moqups tool. Later, the mock-up was discussed in public channel where fellow developers and mentors approved it. Let’s discuss some benefits of adopting this layout for Oscilloscope Activity.

  • The graph is ensured maximum screen space as it is the most important component/section of the Oscilloscope. This is also the reason why we kept the screen orientation to landscape.
  • The widgets don’t populate the screen, make the UI look clean.
  • The UI is comparable to basic app’s people use in their daily lives hence very convenient to use.

Mockup of Oscilloscope UI developed using moqups tool

Step 2: Deciding the API to be used

In Oscilloscope Activity, the main component is the graph. The captured data from the PSLab device is plotted on the graph. We decided to use MPAndroidCharts for the same.

Step 3: Deciding the space given to different sections of the UI

The next step was to decide how much screen space each section of Oscilloscope should acquire. There are 3 sections of the Oscilloscope UI.

  1. Graph
  2. Side panel consisting of buttons, each button loads a different set Oscilloscope controls and features in 3.
  3. A lower panel which is basically a fragment displaying controls and features corresponding to the button selected in 2.

By trying different dimensions and arrangements the following configuration fits the best.

To achieve this, the dimensions of different sections is set programmatically. This makes the UI compatible with different screen sizes.

public void onWindowFocusChanged() {

       RelativeLayout.LayoutParams lineChartParams = (RelativeLayout.LayoutParams) mChartLayout.getLayoutParams();
       lineChartParams.height = height * 2 / 3;
       lineChartParams.width = width * 5 / 6;
       mChartLayout.setLayoutParams(lineChartParams);
       RelativeLayout.LayoutParams frameLayoutParams = (RelativeLayout.LayoutParams) frameLayout.getLayoutParams();
       frameLayoutParams.height = height / 3;
       frameLayoutParams.width = width * 5 / 6;
       frameLayout.setLayoutParams(frameLayoutParams);
   
}

onWindowFocusChanged method is called in onCreate method. Here we are first receiving current layout parameters and then setting new layout parameters.

Step 4: Developing each section

  1. Graph

The graph needs to be customized concerning following requirements

  • Dual y axis, one dedicated to CH2 and another to analog input selected.
  • Black background
  • Grid lines
  • Scaling
  • Initial scale for x and y axis.

To achieve this a chartInit method is created which initializes the graph as per required. It is called in onCreate method.

2. Side Panel

It is a simple layout consisting of image buttons and text views. It is used to replace fragments in Lower Panel. To achieve this, image buttons and textviews were added to the layout and image buttons weight is set to 2. Later onClick listeners were added to both image buttons and textviews.

3. Lower Panel

The lower panel is frame layout which accommodates different fragments (one at a time). To achieve these different fragments are created that are ChannelsParametersFragment, TimebaseTriggerFragment, DataAnalysisFragment and XYPlotFragment. In ChannelsParametersFragment, TimebaseTriggerFragment and XYPlotFragment fragments, constraint views are used whereas in TimebaseTriggerFragment table layout is used. Each fragment allows the user to access different controls and features.

The Final Layout

The above is the GIF of the Oscilloscope UI.

This covers various steps for developing Oscilloscope UI in PSLab Android App.

Resources

Continue ReadingDeveloping Oscilloscope UI in PSLab Android App

Performing Fourier Transforms in the PSLab Android App

Oscilloscope is one of the key features of PSLab. When periodic signals such as sine waves are read by the Oscilloscope, curve fitting functions are used to construct a curve that has the best fit to a series of data points. In PSLab, the sine curve fitting involves the Fourier Transforms. FFT (short for “Fast Fourier Transform”) is nothing more than a curve-fit of sines and cosines to some given data. In order to understand the implementation of Fourier Transforms in PSLab Android App let’s first have a look at the Fourier transform equations.

The first equation here is the Forward Fourier transform. It converts the function of time (t) into the function of frequency (ω).
The second equation is Inverse Fourier transform. It does the opposite to first equation ie. it converts the function of frequency (ω) into the function of time (t).

So, first I will answer what is transform?
It is the mapping between two different sets of domains. In this case, the information is changed from the time domain to frequency domain. The data in these domains look different but represent the same information. A transform will get you from one representation to another.

Fourier transforms converts between the time domain f(t) and the frequency domain F(ω).
Performing Fourier Transforms in Android
Let’s perform Forward Fourier transform. This means it converts the function of time (t) into the function of frequency (ω). We will use Apache Maths Commons to perform Fourier transforms. Since we have finite input data set we will calculate Discrete Fourier Transform (DFT).
The algorithm which is being used here is Fast Fourier Transform (FFT) which is the best algorithm to calculate Fourier transforms.

FastFourierTransformer fastFourierTransformer = 
      new FastFourierTransformer(DftNormalization.STANDARD);

Here we are creating an instance of FastFourierTransformer which passed STANDARD normalization convention to its constructor. Normalization other than STANDARD is UNITARY.
Complex complex[] = fastFourierTransformer.transform(input, TransformType.FORWARD);

Here, input array and TransformType. FORWARD is also passed to transform method. Input is an array of data representing time whereas TransformType. FORWARD defines the type of Fourier transform that should be performed ie. forward or inverse.

Complex complex[] = fastFourierTransformer.transform(input, TransformType.FORWARD);

The output will be an array of complex number. Each data point will be represented like the following graph in the complex plane.

Suppose the amplitude of the data point given in above graph is 1 and phase shift is 45°. So, solving this we will get 2/√2 as both real and imaginary components. Therefore, F (ω) would be 1/√2 + (1/√2) i.
Dealing with Complex numbers in Java
A complex number has both real and imaginary part. Using Apache Maths Commons we can use Complex to represent a complex number.

Complex number = new Complex(1,2);
System.out.println(number);
Output
1.0 + 2.0i

We can also get real and imaginary parts separately of Complex numbers.

System.out.println(number.getReal());
System.out.println(number.getImaginary());
Output
1.0
2.0

The array of the Complex numbers can be implemented like the following

Complex[] number;
Complex c1 = new Complex(1, 2);
Complex c2 = new Complex(3, 4);
number = new Complex[]{c1, c2};
System.out.println(Arrays.toString(number));
System.out.println(number[1]);
Output

[(1.0, 2.0), (3.0, 4.0)]
(3.0, 4.0)

Resources

Continue ReadingPerforming Fourier Transforms in the PSLab Android App

Storing a Data List in Phimpme Android

In Phimpme Android, it is required to store all the available camera parameters like a list of ISO values, available camera resolution etc. so that it can be displayed to the user in the camera settings. In Phimpme, we have stored these list of data in SharedPreferences with some modifications. As we cannot store a list directly in SharedPreference, in this post I will be discussing how we achieved this in Phimpme Android application.

To store the ArrayList you have to create a function that will convert the array into a string by using some symbol.

Step – 1

First, Create a class say TinyDB which contains functions to store an array in sharedPreferences.

public class TinyDB
{
private SharedPreferences preferences;
public TinyDB(Context appContext) {
preferences = PreferenceManager.getDefaultSharedPreferences(appContext);
}
}

Step – 2

Create functions to convert the array into string and store in sharedPreferences.

putListInt() method will convert the string ArrayList to String and store in sharedPreferences.

Similarly, putListString() method will convert the integer ArrayList to string and store in sharedPreferences.

public void putListInt(String key, ArrayList<Integer> intList) {
  if (key == null) return;
  if (intList==null) return;
  Integer[] myIntList = intList.toArray(new Integer[intList.size()]);
  preferences.edit().putString(key, TextUtils.join(“‚‗‚”, myIntList)).apply();
}

  
public void putListString(String key, ArrayList<String> stringList) {
  if (key == null) return;
  if (stringList ==null)return;
  String[] myStringList = stringList.toArray(new String[stringList.size()]);
  preferences.edit().putString(key, TextUtils.join(“‚‗‚”, myStringList)).apply();
}


Now create the object of TinyDB.class to call the above functions using tinyDb object.

Now our data is saved in sharedPreference to get this data we have to create a getter for the ArrayList.


Step-3

Add two functions in TinyDB.class to get the string and integer ArrayList.

public ArrayList<String> getListString(String key) {
        return new ArrayList<String>(Arrays.asList(TextUtils.split(preferences.
=getString(key, “”), “‚‗‚”)));
}


public ArrayList<Integer> getListInt(String key) {
  String[] myList = TextUtils.split(preferences.getString(key, “”), “‚‗‚”);
  ArrayList<String> arrayToList = new ArrayList<String>(Arrays.asList(myList));
  ArrayList<Integer> newList = new ArrayList<Integer>();

  for (String item : arrayToList)
      newList.add(Integer.parseInt(item));

  return newList;
}

Now to get the saved integer and string ArrayList simply call this function by creating an instance of TinyDB.class.

The below screenshot depicts how we have stored the list of camera resolutions in SharedPreference using TinyDB class.

So this is how you can store the entire ArrayList in sharedPreferences. For more detail, you can see the TinyDb.class in our Phimpme project.

Resources:  

https://stackoverflow.com/questions/7057845/save-arraylist-to-sharedpreferences

http://blog.nkdroidsolutions.com/arraylist-in-sharedpreferences/

http://findnerd.com/list/view/Save-ArrayList-of-Object-into-Shared-Preferences-in-Android/510?page=10&ppage=3

https://github.com/fossasia/phimpme-android/blob/development/app/src/main/java/org/fossasia/phimpme/opencamera/Camera/TinyDB.java


Continue ReadingStoring a Data List in Phimpme Android

Protecting Gallery Images in Phimpme Android

Encrypting media is very important to ensure privacy and for this some users install apps to lock protect their images with a password or any other security method i.e Gallery lock. In Phimpme, along with the camera, accounts and gallery, we are providing an inbuilt encryption option in which user can set password to hide media and to protect from deletion of media. In this post I am explaining how we implemented the security feature in the Phimpme Android app.

Step-1

In Phimpme I created a SecurityHelper class which contains the user password information along with the details of where the user has applied for the protection.

public class SecurityHelper {
   private boolean activeSecurity;
   private String passwordValue;
   private Context context;
   public SecurityHelper(Context context){
       this.context = context;
       }
}

The dialog box to enter the password in Phimpme.

Step -2

Now in phimpme, we will ask the user to enter the password and it gets to be done using edittext and on click on submit the password gets stored in sharedPreferences in preference_use_password in Strings.xml.

Step – 3

The next step is to protect Phimpme gallery so we have to check before deleting any images using gallery it can be done using SecurityHelper.isActiveSecurity() method.

If security option is activated, we will provide the dialog box in which user have to enter the password and we will compare the password with the saved password in Sharedpreference, if it matches then we will allow the deletion of the selected media.

if (securityObj.isActiveSecurity()) {
AlertDialog passwordDialog = passwordDialogBuilder.create();
           passwordDialog.show();

           passwordDialog.getButton(AlertDialog.BUTTON_POSITIVE).setOnClickListener(new View.OnClickListener() {
               @Override
               public void onClick(View v) {
                   // if password is correct, call DeletePhotos and perform deletion
                   if (securityObj.checkPassword(editTextPassword.getText().toString())) {
                       passwordDialog.dismiss();
                       new DeletePhotos();
                   }
                   // if password is incorrect, don't delete and notify user of incorrect password
                   else {
                       Toast.makeText(getApplicationContext(), R.string.wrong_password, Toast.LENGTH_SHORT).show();
                       editTextPassword.getText().clear();
                       editTextPassword.requestFocus();
                   }
               }
           });
       } else new DeletePhotos().execute();
   }
});

This is how we are providing the inbuilt encryption to protect gallery in Phimpme-Android.

Resources


Continue ReadingProtecting Gallery Images in Phimpme Android

Dynamic Ticket Analysis UI using Data Binding in Open Event Android Orga App

Any event manager application has the responsibility to show the analytics about the event to the organiser and in Open Event Android Orga App (Github Repo), we wanted to achieve a way to display the analytics of total and sold tickets with the data present to us.
To analyse, we have a list of tickets, which are divided into 3 categories:

  • Free
  • Paid
  • Donation

Our goal was to show information about total tickets and the amount of sold tickets per category. This blog will focus on the dynamic UI creation for the ticket analysis component of the Event Details Dashboard using Android Layout Data Binding. By using Data Binding, we not only reduced the amount of Java Boilerplate code we would have to write, but also accomplished UI reuse in just XML which wouldn’t have been possible without it. You’ll see in a moment what I mean.

Properties

So first, we’d need to define some properties which will be bound in the UI. These properties are declared in the Event model and their type is ObservableLong provided by the Android DataBinding package. The reason why we are using these instead of primitives is because these fields being Observable, will update the UI as soon as they are updated, without requiring the programmer to set the View Property at all.

There are six fields, 3 for total tickets of each type and 3 for sold tickets

public final ObservableLong freeTickets = new ObservableLong();
public final ObservableLong paidTickets = new ObservableLong();
public final ObservableLong donationTickets = new ObservableLong();

public final ObservableLong soldFreeTickets = new ObservableLong();
public final ObservableLong soldPaidTickets = new ObservableLong();
public final ObservableLong soldDonationTickets = new ObservableLong();

Some more advantages we get from using these are the batch view update and the use of computed properties in UI. Imagine having a TextView display the amount of free tickets and a progress bar showing the percentage of free tickets sold. Traditionally, you’d have to set the text and compute the percentage and set the progress bar as the data changes, whereas you can just use the fields in layout as is in both TextView and ProgressBar with the computations required and they’ll work in harmony.

We have leveraged this feature to show the analytics component of tickets with a

  • Ticket Type
  • Circular Progress Bar
  • Sold Tickets
  • Total Tickets

All using the XML layout and databinding

Ticket Component

For each ticket component, we have 4 variables, namely

  • Ticket Type Name
  • Total Amount
  • Completed Amount (Sold Tickets)
  • Color

First 3 are fairly self explanatory, the color attribute we used in our component needs a little bit of description. We decided to give each ticket category its own color for circular progress bar for aesthetics. So, we need each component to have its own color attribute too. But this is not a normal android color ID or a hex. We needed 2 variants of the same color to show in the circular progress to discern the total and completed part. As we are using Material Color Palette, which has a color divided by intensities, we used 500 variant for completed portion and 100 (lighter) variant for the background of circular progress.

Let’s look at the layout now:

<data>
    <variable name="color" type="String" />
    <variable name="ticketName" type="String" />
    <variable name="total" type="long" />
    <variable name="completed" type="long" />
</data>

<LinearLayout
     android:orientation="vertical">
    <TextView
        android:text="@{ticketName}" />
    <FrameLayout>
        <com.mikhaellopez.circularprogressbar.CircularProgressBar
            app:circular_progress_color="@{color}"
            app:progress_with_animation="@{total == 0 ? 0 : (int) ((completed*100)/total)}" />

        <LinearLayout
            android:orientation="horizontal">

            <TextView
                android:text="@{completed}" />
            <TextView
                android:text='@{"/" + total}' />

        </LinearLayout>
    </FrameLayout>

    <TextView
        android:text='@{(total == 0 ? 0 : (int) ((completed*100)/total)) + "%"}' />

</LinearLayout>

Note: The layout snippet is not complete. Only attribute names to be discussed in the blog are shown for brevity

As you can see, after the data variable declarations, we have a CardView first showing the ticket name on top, and then we have a FrameLayout wrapping the circular progress and a textview showing the Sold/Total tickets.

Circular Progress Bar

Let’s discuss the circular progress first, we have used this library to create a circular progress bar, the two other attributes circular_progress_color and progress_with_animation are specific to Open Event Orga Application and we have created custom adapters for them:

@BindingAdapter("progress_with_animation")
public static void bindCircularProgress(CircularProgressBar circularProgressBar, int progress) {
    circularProgressBar.setProgressWithAnimation(progress, 500);
}

@BindingAdapter("circular_progress_color")
public static void bindCircularProgressColor(CircularProgressBar circularProgressBar, String colorName) {
    Context context = circularProgressBar.getContext();
    Resources resources = circularProgressBar.getResources();

    int color = ContextCompat.getColor(context, resources.getIdentifier(colorName + "_500", "color", context.getPackageName()));
    int bgColor = ContextCompat.getColor(context, resources.getIdentifier(colorName + "_100", "color", context.getPackageName()));

    circularProgressBar.setColor(color);
    circularProgressBar.setBackgroundColor(bgColor);
}
  • progress_with_animation sets the provided integer value as the progress of the circular progress bar with an animation of 500 ms
  • circular_progress_color finds the 100 and 500 variant of the color name string provided and sets them as background and foreground color of the progress bar

These are the color definitions we have used in the app:

<color name="light_blue_100">#B3E5FC</color>
<color name="light_blue_500">#03A9F4</color>
<color name="purple_100">#E1BEE7</color>
<color name="purple_500">#9C27B0</color>
<color name="red_100">#ffcdd2</color>
<color name="red_500">#f44336</color>

As you can that if we pass purple as the color name, it’ll load purple_100 and purple_500 and set it as corresponding background and foreground color

Other Properties

Now, let’s talk about other properties like the progress value :

  • total == 0 ? 0 : (int) ((completed*100)/total)The conditional is used to prevent divide by zero error.
    The same expression is used to display the circular progress and percentage text in the TextView at the bottom of the layout
  • completed and “/” + total are used to in TextViews of different sizes to create a nice design with completed/total format

This completes our ticket component design and now we’ll see how to reuse this component to display different ticket types.

Composite Layout

To use the ticket component, we just include the layout and bind specific variables from Event model to create a dynamic layout like this:

<data>
    <variable
        name="event"
        type="org.fossasia.openevent.app.data.models.Event" />
</data>

<LinearLayout
    android:orientation="vertical">

    <TextView
        android:text="@string/tickets" />

    <LinearLayout
        android:orientation="horizontal">

        <include
            layout="@layout/ticket_analytics_item"
            bind:color='@{"light_blue"}'
            bind:completed="@{event.soldFreeTickets}"
            bind:ticketName="@{@string/ticket_free}"
            bind:total="@{event.freeTickets}" />

        <include
            layout="@layout/ticket_analytics_item"
            bind:color='@{"purple"}'
            bind:completed="@{event.soldPaidTickets}"
            bind:ticketName="@{@string/ticket_paid}"
            bind:total="@{event.paidTickets}" />

        <include
            layout="@layout/ticket_analytics_item"
            bind:color='@{"red"}'
            bind:completed="@{event.soldDonationTickets}"
            bind:ticketName="@{@string/ticket_donation}"
            bind:total="@{event.donationTickets}" />
    </LinearLayout>

</LinearLayout>

The layout consists of a horizontal with 3 equally divided ticket components,

  • Free Ticket Component -> Light Blue
  • Paid Ticket Component -> Purple
  • Donation Ticket Component -> Red

This is how it looks on a device


So this is how data binding made us accomplish easily which would have been a very convoluted solution using traditional ID based view binding. For more info about data binding, refer to these sites:

https://developer.android.com/topic/libraries/data-binding/index.html

http://www.vogella.com/tutorials/AndroidDatabinding/article.html

Continue ReadingDynamic Ticket Analysis UI using Data Binding in Open Event Android Orga App

Serialisation, Deserialisation and gson in Open Event Android

JSON is a format to exchange and inter-change data. It has almost become a universal means for transferring data because of it being lightweight, human understandable, machine readable and most importantly, it’s language independence. It can be used with, and in any programming language. (Reference)

FOSSASIA’s Open Event project makes extensive use of JSON for transferring information about events, their speakers, sessions and other event information. The Open Event Android application itself loads all it’s data in JSON format. This JSON is uploaded by the user in the form of a .zip compressed file or by giving an API link. Now before we use this data in the app, we have to parse the data to get Java objects that can be used in Android. Deserialisation is the process of converting JSON to Java objects. In the same way, Serialisation refers to converting Java objects into JSON.

In most applications and frameworks, JSON is serialized and deserialized on multiple instances. The most common approach is to create objects corresponding to the JSON format and then use functions to convert them to JSON line-by-line, attribute by attribute. While this approach will work, it will mean writing unnecessary code and spending a lot more time on it. In Open-event-Android, we are using Google’s gson library to  serialise and deserialise JSON and corresponding Java objects respectively.

Why are we using gson specifically? And why do we need any library in the first place?

Yes, we can obviously make functions in Java by defining all the JSON parameters and converting the JSON into Java objects manually. It is indeed the obvious approach, but the entire process will be time-consuming, complex and definitely not error-free. Also, as projects become bigger, it is inevitable to take care of the code size and reduce it to only what is necessary.

Let’s take a look at the one of the Open Event JSON file as a sample to try and understand things in a better way. This is an example of event.json in the FBF8’2017 sample.

{

"id": 180,
"name": "F8-Facebook Developer Conference 2017",
"latitude": 37.329008,
"longitude": -121.888794,
"location_name": "San Jose Convention Center, 150 W San Carlos St  San Jose  CA USA 95113 ",
"start_time": "2017-04-18T10:00:00-07:00",
"end_time": "2017-04-19T10:00:00-07:00",
"timezone": "US / Pacific",
"description": "Join us for our annual 2-day event, where developers and businesses come together to explore the future of technology. Learn how Facebook connects the world through new products and innovation. This year's event is bigger than ever – with more than 50 sessions, interactive experiences, and the opportunity to meet one-on-one with members of the Facebook team.",
"background_image": "/images/background.jpg",
"logo": "/images/fbf8.png",
"organizer_name": "Facebook",
"organizer_description": "Join us for our annual 2-day event, where developers and businesses come together to explore the future of technology. Learn how Facebook connects the world through new products and innovation. This year's event is bigger than ever – with more than 50 sessions, interactive experiences, and the opportunity to meet one-on-one with members of the Facebook team.",
"event_url": "https://www.fbf8.com",
"social_links": [
{"id": 1,
"link": "https://www.facebook.com/FacebookForDevelopers",
"name": "Facebook"},
{"id": 2,
"link": "https://twitter.com/fbplatform",
"name": "Twitter"},
{"id": 3,
"link": "https://www.instagram.com/explore/tags/fbf8/",
"name": "Instagram"},
{"id": 4,
"link": "https://github.com/Facebook",
"name": "GitHub"}],
"ticket_url": null,
"privacy": "public",
"type": "",
"topic": "Science & Technology",
"sub_topic": "High Tech",
"code_of_conduct": "",
"copyright": {
"logo": "",
"licence_url": "https://en.wikipedia.org/wiki/All_rights_reserved",
"holder": "Facebook",
"licence": "All rights reserved",
"holder_url": null,
"year": 2017},
"call_for_papers": null,
"email": null,
"has_session_speakers": false,
"identifier": "7d16c124",
"large": null,
"licence_details": {
"logo": "",
"compact_logo": "",
"name": "All rights reserved",
"url": "https://en.wikipedia.org/wiki/All_rights_reserved",
"long_name": "All rights reserved",
"description": "The copyright holder reserves, or holds for their own use, all the rights provided by copyright law under one specific copyright treaty."},
"placeholder_url": null,
"schedule_published_on": null,
"searchable_location_name": null,
"state": "Published",
"version": {
"event_ver": 0,
"microlocations_ver": 0,
"sessions_ver": 0,
"speakers_ver": 0,
"sponsors_ver": 0,
"tracks_ver": 0}}

For a file with so many attributes, it can be very tedious to make a parser class in Java. Instead, we simply use the gson library to do the job.

To install gson in maven central, add the following dependency:

<dependencies>
   <!--  Gson: Java to Json conversion -->
   <dependency>
     <groupId>com.google.code.gson</groupId>
     <artifactId>gson</artifactId>
     <version>2.8.0</version>
     <scope>compile</scope>
   </dependency>
</dependencies>                                             

[source:https://github.com/google/gson/blob/master/UserGuide.md]

To use gson in Android, we need to add the following dependency in build.gradle of the project.

compile ‘com.google.code.gson:gson:2.6.2’

Using gson in your code is as simple as using any built-in class in java. There are two main functions – toJson()and fromJson() that will be used throughout the processes of serialisation and deserialisation.

First off, let’s declare a basic Java object. I will take an example of a Java object that represents a car to simplify things a bit. This object car contains 3 variables- Name, Model number and color of the car. For example:

class Car(){
String  name;
int model_no;
String colour;
Car(){}
}

Serialisation:

Serialising the car object now, that is converting the object into JSON format:

Car one = new Car();
Gson gson = new GSON();
String serialised_output= gson.toJson(car);//serialised_output=>JSON

Deserialisation:

Deserializing the JSON now, that is converting the JSON into java objects:

Car car = gson.fromJson(serialised_output,Car.class);

Finally, you can find the GitHub link for gson library here in case you want to know more about it or if you are facing some issues with the library, you can report them there. This is the link to the official Google group for discussions related to gson.

Continue ReadingSerialisation, Deserialisation and gson in Open Event Android