How to Implement Feedback System in SUSI iOS

The SUSI iOS app provides responses for various queries but the response is always not accurate. To improve the response, we make use of the feedback system, which is the first step towards implementing Machine Learning on the SUSI Server. The way this works is that for every query, we present the user with an option to upvote or downvote the response and based on that a positive or negative feedback is saved on the server. In this blog, I will explain how this feedback system was implemented in the SUSI iOS app.

Steps to implement:

We start by adding the UI which is two buttons, one with a thumbs up and the other with a thumbs down image.

textBubbleView.addSubview(thumbUpIcon)
textBubbleView.addSubview(thumbDownIcon)
textBubbleView.addConstraintsWithFormat(format: "H:[v0]-4-[v1(14)]-2-[v2(14)]-8-|", views: timeLabel, thumbUpIcon, thumbDownIcon)
textBubbleView.addConstraintsWithFormat(format: "V:[v0(14)]-2-|", views: thumbUpIcon)
textBubbleView.addConstraintsWithFormat(format: "V:[v0(14)]-2-|", views: thumbDownIcon)
thumbUpIcon.isUserInteractionEnabled = true
thumbDownIcon.isUserInteractionEnabled = true

Here, we add the subviews and assign constraints so that these buttons align to the bottom right next to each other. Also, we enable the user interaction for these buttons.

We know that the user can rate the response by pressing either of the buttons added above. To do that we make an API call to the endpoint below:

BASE_URL+'/cms/rateSkill.json?'+'model='+model+'&group='+group+'&skill='+skill+’&language’+language+’&rating=’+rating

Here, the BASE_URL is the url of the server, the other three params model, group, language and skill are retrieved by parsing the skill location parameter we get with the response. The rating is positive or negative based on which button was pressed by the user. The skill param in the response looks like this:

skills:
[
"/susi_skill_data/models/general/entertainment/en/quotes.txt"
]

Let’s write the method that makes the API call and responds to the UI that it was successful.

if let accepted = response[ControllerConstants.accepted] as? Bool {
  if accepted {
    completion(true, nil)
    return
  }
  completion(false, ResponseMessages.ServerError)
  return
}

Here after receiving a response from the server, we check if the `accepted` variable is true or not. Based on that, we pass `true` or `false` to the completion handler. Below the response we actually receive by making the request.

{
session: {
identity: {
type: "host",
name: "23.105.140.146",
anonymous: true
}
},
accepted: true,
message: "Skill ratings updated"
}

Finally, let’s update the UI after the request has been successful.

if sender == thumbUpIcon {
thumbDownIcon.tintColor = UIColor(white: 0.1, alpha: 0.7)
thumbUpIcon.isUserInteractionEnabled = false
thumbDownIcon.isUserInteractionEnabled = true
feedback = "positive"
} else {
thumbUpIcon.tintColor = UIColor(white: 0.1, alpha: 0.7)
thumbDownIcon.isUserInteractionEnabled = false
thumbUpIcon.isUserInteractionEnabled = true
feedback = "negative"
}
sender.tintColor = UIColor.hexStringToUIColor(hex: "#2196F3")

Here, we check the sender (the thumbs up or down button) and based on that pass the rating (positive or negative) and update the color of the button.

Below is the app in action with the feedback system.

Resources:

Continue ReadingHow to Implement Feedback System in SUSI iOS

Zooming Feature in the Phimpme Android’s Camera

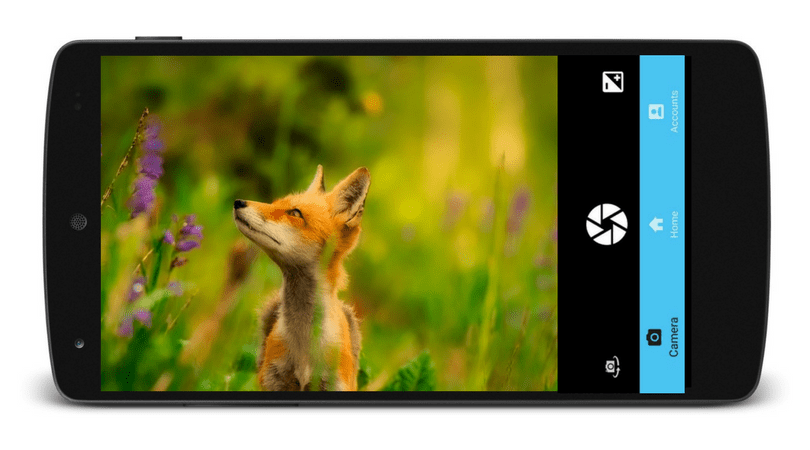
The Phimpme Android application comes with a complete package of camera, Edit images, sharing and gallery functionalities. It has a well featured and fully functional camera with all the capabilities that a user expects from a camera application. One such feature in the Phimpme Android application is the zooming functionality. It provides the user the option to zoom in using the pinch gesture of the fingers or the user can select the settings to zoom in from the volume buttons. In this tutorial, I will be explaining how I achieved the zooming functionality in the Phimpme Android app.

Step 1

The first thing we need to do is to check whether the device will support the zoom in functionality or not to avoid random crashes while runtime of the application and while performing the zoom action in case the camera of the device doesn’t support this feature. This can be done by the following lines of code:

Camera.Parameters params = mCamera.getParameters();
Boolean supports = params.isZoomSupported();

Step 2

Now after getting the camera parameters and checking whether the camera supports the zoom in functionality, we need to add the touch listener to the surface view of the camera so that we can get the touch locations and the finger spacing of the user to get the pinch to zoom in functionality. This can be done using the following line of code.

surfaceView.setOnTouchListener(this);

Whenever the user touches the screen this touch listener gives a callback to the overridden onTouchEvent method and passes the MotionEvent to the function. The motion event object in Android handles the movement reports. Now in the onTouchEvent method, we calculate the finger spacing between the two fingers and calculate the approximate amount by which the user wants to zoom in. The finger spacing can be calculated using the following lines of code.

float x = event.getX(0) - event.getX(1);
   float y = event.getY(0) - event.getY(1);
   return FloatMath.sqrt(x * x + y * y);

After getting the finger spacing we need to cancel the auto focus of the camera before performing the zoom action so that the application does not crash. This can be achieved by a single line of code below.

mCamera.cancelAutoFocus();

Step 3

The final step is to set the zoom level in the camera application by calculating the zoom level by using the finger spacing. For this, first we need to get the max zoom level supported by the device so that we do not apply the zoom level that is not supported by the device. The calculation of max zoom level and setting of the desired zoom level by the user can be performed by using the following lines of code.

int maxZoom = params.getMaxZoom();
   int zoom = params.getZoom();
   float newDist = getFingerSpacing(event);
   if (newDist > mDist) {
       //zoom in
       if (zoom < maxZoom)
           zoom++;
   } else if (newDist < mDist) {
       //zoom out
       if (zoom > 0)
           zoom--;
   }
   mDist = newDist;
   params.setZoom(zoom);

This is how we have achieved the functionality of zooming in and clicking pictures in the Phimpme Android application. To get the full source code and to know how to use the volume control buttons to zoom in/out, please refer to the Phimpme Android repository.

Resources

  1. GitHub – Open camera source code : https://github.com/almalence/OpenCamera
  2. Android developer’s guide – MotionEvents in Android : https://developer.android.com/reference/android/view/MotionEvent.html
  3. StackOverflow – Pinch to zoom functionality : https://stackoverflow.com/questions/8120753/android-camera-preview-zoom-using-double-finger-touch
  4. GitHub – Phimpme Android repository : https://github.com/fossasia/phimpme-android
Continue ReadingZooming Feature in the Phimpme Android’s Camera

Encoding and Decoding Images as Data in UserDefaults in SUSI iOS

In this blog post, I will be explaining how to encode and decode images and save them in UserDefaults so that the image persists even if it is removed from the Photos app. It happens a number of times that images are removed from the gallery by the users which results in the app loosing the image. So, to avoid this, we save the image by encoding it in a data object and save it inside UserDefaults. In SUSI iOS app we simply select an image from the image picker, encode it and save it in UserDefaults. To set the image, we simply fetch the image data from the UserDefaults and decode it to an image.

There are two ways we can do the encoding and decoding process:

  • Using Data object
  • Using Base64 string

For the scope of this tutorial, we will use the Data object.

Implementation Steps

  1. To use the image picker, we need to add permissions to `Info.plist` file.
<key>NSLocationWhenInUseUsageDescription</key>
<string>Susi is requesting to get your current location</string>
<key>NSPhotoLibraryUsageDescription</key>
<string>Susi needs to request your gallery access to select wallpaper</string>
  1. Select image from gallery

First, we present an alert which gives an option to select the image from the gallery.

// Show wallpaper options to set wallpaper or clear wallpaper
func showWallpaperOptions() {
  let imageDialog = UIAlertController(title: ControllerConstants.wallpaperOptionsTitle, message: nil, preferredStyle: UIAlertControllerStyle.alert)
  imageDialog.addAction(UIAlertAction(title: ControllerConstants.wallpaperOptionsPickAction, style: .default, handler: { (_: UIAlertAction!) in
  imageDialog.dismiss(animated: true, completion: nil)
  self.showImagePicker()
  }))
  imageDialog.addAction(UIAlertAction(title: ControllerConstants.wallpaperOptionsNoWallpaperAction, style: .default, handler: { (_: UIAlertAction!) in
    imageDialog.dismiss(animated: true, completion: nil)
    self.removeWallpaperFromUserDefaults()
  }))
  imageDialog.addAction(UIAlertAction(title: ControllerConstants.dialogCancelAction, style: .cancel, handler: { (_: UIAlertAction!) in
    imageDialog.dismiss(animated: true, completion: nil)
  }))
  self.present(imageDialog, animated: true, completion: nil)
}

Here, we create and UIAlertController with three options to select, one which presents the image picker controller, the second one removes the background wallpaper and the third dismisses the alert.

  1. Set the image as background view
// Callback when image is selected from gallery
func imagePickerController(_ picker: UIImagePickerController, didFinishPickingMediaWithInfo info: [String : Any]) {
  dismiss(animated: true, completion: nil)
  let chosenImage = info[UIImagePickerControllerOriginalImage] as? UIImage
  if let image = chosenImage {
    setBackgroundImage(image: image)
  }
}

We use the `didFinishPickingMediaWithInfo` delegate method to set the image as background. First we get the image using the the `info` dictionary using the `UIImagePickerControllerOriginalImage` key.

  1. Save the image in UserDefaults (encoding)
// Save image selected by user to user defaults
func saveWallpaperInUserDefaults(image: UIImage!) {
  let imageData = UIImageJPEGRepresentation(image!, 1.0)
  let defaults = UserDefaults.standard
  defaults.set(imageData, forKey: userDefaultsWallpaperKey)
}

We first convert the image to a data object using the `UIImageJPEGRepresentation` method followed by saving the data object in UserDefaults with the key `wallpaper`.

  1. Decode the data object back to UIImage 

Now whenever we need to decode the image, we simply get the data object from the UserDefaults and use it to display the image.

// Check if user defaults have an image data saved else return nil/Any
func getWallpaperFromUserDefaults() -> Any? {
  let defaults = UserDefaults.standard
  return defaults.object(forKey: userDefaultsWallpaperKey)
}

Below is the output when an image is selected and displayed as a background.

Resources:

Continue ReadingEncoding and Decoding Images as Data in UserDefaults in SUSI iOS

Using The Dark and Light Theme in SUSI iOS

SUSI being an AI for interactive chat bots, provides answers to the users in the intelligent way. So, to make the SUSI iOS app more user friendly, the option of switching between themes was introduced. This also enables the user switch between themes based on the environment around. Any user can switch between the light and dark themes easily from the settings.

We start by declaring an enum called `theme` which contains two strings namely, dark and light.

enum theme: String {
    case light
    case dark
}

We can update the color scheme based on the theme selected very easily by checking the currently active theme and based on that check, we update the color scheme. To check the currently active theme, we define a variable in the `AppDelegate` which holds the value.

var activeTheme: String?

Below is the way the color scheme of the LoginViewController is set.

var activeTheme: String?func setupTheme() {
  let image = UIImage(named: ControllerConstants.susi)?.withRenderingMode(.alwaysTemplate)
  susiLogo.image = image
  susiLogo.tintColor = .white
  UIApplication.shared.statusBarStyle = .lightContent
  let activeTheme = AppDelegate().activeTheme
  if activeTheme == theme.light.rawValue {
    view.backgroundColor = UIColor.lightThemeBackground()
  } else if activeTheme == theme.dark.rawValue {
    view.backgroundColor = UIColor.darkThemeBackground()
  }
}

Here, we first get the image and set the rendering mode to `alwaysTemplate` so that we can change the tint color of the image. Next, we assign the image to the `IBOutlet` and change the tint color to `white`. We also change the status bar style to `lightContent`. Next, we check the active theme and change the view’s background color accordingly. For this method to execute, we call it inside, `viewDidLoad` so that the theme loads up as the view loads.

Next, lets add this option of switching between themes inside the `SettingsViewController`. We add a cell with `titleLabel` as `Change Theme` and use the collectionView’s delegate method of `didSelect` to show an alert. This alert contains three options, Dark theme, Light Theme and Cancel. Let’s code that method which presents the alert.

func themeToggleAlert() {
  let imageDialog = UIAlertController(title: ControllerConstants.toggleTheme, message: nil, preferredStyle: UIAlertControllerStyle.alert)
  imageDialog.addAction(UIAlertAction(title: theme.dark.rawValue.capitalized, style: .default, handler: { (_: UIAlertAction!) in
    imageDialog.dismiss(animated: true, completion: nil)
    AppDelegate().activeTheme = theme.dark.rawValue
    self.settingChanged(sender: self.imagePicker)
    self.setupTheme()
  }))
  imageDialog.addAction(UIAlertAction(title: theme.light.rawValue.capitalized, style: .default, handler: { (_: UIAlertAction!) in
    imageDialog.dismiss(animated: true, completion: nil)
    AppDelegate().activeTheme = theme.light.rawValue
    self.settingChanged(sender: self.imagePicker)
    self.setupTheme()
  }))
  imageDialog.addAction(UIAlertAction(title: ControllerConstants.dialogCancelAction, style: .cancel, handler: { (_: UIAlertAction!) in
    imageDialog.dismiss(animated: true, completion: nil)
  }))
  self.present(imageDialog, animated: true, completion: nil)
}

Here, we assign the alert view’s title and add 3 actions and their respective completion handlers. If we see inside these completion handlers, we can notice that we first dismiss the alert followed by updating the activeTheme variable in AppDelegate and call the `settingChanged` function which updates the user’s settings on the server. Finally, we update the color scheme.

Now, if we build and run the app and change the theme from the settings, we will notice that on returning to the chat view, the color scheme is not updated. The reason here is that we are setting up the theme on viewDidLoad which loads only once and is not executed until the controller is presented again. Here, we make use of the `viewDidAppear` method which executes every time the view appears.

override func viewDidAppear(_ animated: Bool) {
  super.viewDidAppear(animated)
  setupTheme()
}

To persist the selected theme, we used the UserDefaults to save the theme which got assigned everytime to the `activeTheme` variable when the app loads up.

UserDefaults.standard.set(AppDelegate().activeTheme, forKey: ControllerConstants.UserDefaultsKeys.theme)

On app launch, we assigned this User Default the value of the light theme as a default.

Below is the final output:

References:

Continue ReadingUsing The Dark and Light Theme in SUSI iOS

Implementing Proper CSS for Static Pages in SUSI.AI Web Chat

Our SUSI.AI Web Chat has many static pages like Overview, Devices, Team and Support. We have separate CSS files for each component. Recently, we faced a problem regarding design pattern where CSS files of one component were affecting another component. This blog is all about solving this issue and we take an example of distortion in our team’s page.

The current folder structure looks like this :

We can see that there are separate CSS files for all components. When the build of our react web app is complete, all the CSS files are loaded at once. So if CSS files contain classes with similar names, then this can disturb the original intended design of a particular component.

Our Team Page after merging of recent pull requests looked like this :

The Card component holding the images had extended vertically. The card component has following code:

<Card className='team-card' key={i}>
  <CardMedia className="container" >
    <img src={serv.avatar} alt={serv.name} 
      className="image" />
      <div className="overlay" >
        <div className="text">
         <FourButtons member={serv} />
        </div>
      </div>
  </CardMedia>
  <CardTitle title={serv.name} subtitle={serv.designation} />
</Card>

The CardMedia component is having className = “container”. This was defined in Team.css file. The CSS for this component is as follows :

.container {
  position: relative;
}
.container:hover .overlay {
  bottom: 0;
  height: 100%;
  opacity:0.7;
}

After inspecting through Chrome’s developer’s tool, it was found that these CSS properties were overwritten by another component having the same className as container. To resolve this issue there are multiple approaches:

  • Find the component with the same className and change the className of that component.
  • Change the className of current component.
  • Change the name of both components to resolve conflicts in future.

All the approaches will do the job for us. Here the easiest task was to change the className of the current component. This will save us time and we would not be adding extra lines of code. This is an efficient solution. So we decided to change the className to “container_div”. Then the CSS files will look like this:

.container_div {
  position: relative;
}
.container_div:hover .overlay {
  bottom: 0;
  height: 100%;
  opacity:0.7;
}

We also have to update the className in our CardMedia to “container_div”. After doing these changes. The cards were back to intended design:

To avoid such conflicts in future, it is recommended to name your CSS classes uniquely and after you’re done with making any component, recheck through developer’s tool that your component’s className does not have any conflicts with other components.

Resources:

CSS best practises: https://code.tutsplus.com/tutorials/30-css-best-practices-for-beginners–net-6741

Code for Team’s Page: https://github.com/fossasia/chat.susi.ai/tree/master/src/components/Team

Team Page: http://chat.susi.ai/team

Continue ReadingImplementing Proper CSS for Static Pages in SUSI.AI Web Chat

Implementing Tree View in PSLab Android App

When a task expands over sub tasks, it can be easily represented by a stem and leaf diagram. In the context of android it can be implemented using an expandable list view. But in a scenario where the subtasks has mini tasks appended to it, it is hard to implement it using the general two level expandable list views. PSLab android application supports many experiments to perform using the PSLab device. These experiments are divided into major sections and each experiments are listed under them.

The best way to implement this functionality in the android application is using a multi layer treeview implementation. In this context three layers are enough as follows;


This was implemented with the help from a library called AndroidTreeView. This blog will outline how to modify and implement it in PSLab android application.

Basic Idea

Tree view implementation simply follows the data structure “Tree” used in algorithms. Every tree has a root where it starts and from the root there will be branches which are connected using edges. Every edge will have a parent and child. To reach a child, one has to traverse through only one route.

Setting Up Dependencies

Implementing tree view begins with setting up dependencies in the gradle file in the project.

compile 'com.github.bmelnychuk:atv:1.2.+'

Creating UI for tree view

The speciality about this implementation is that it can be loaded into any kind of a layout such as a linearlayout, relativelayout, framelayout etc.

final TreeNode Root = TreeNode.root();
Root.addChildren(
       // Add child nodes here
);
// Set up the tree view
AndroidTreeView experimentsListTree = new AndroidTreeView(getActivity(), Root);
experimentsListTree.setDefaultAnimation(true);
[LinearLayout/RelativeLayout].addView(experimentsListTree.getView());

Creating a node holder

Trees are made of a collection of tree nodes. A holder for a tree node can be created using an object which extends the BaseNodeViewHolder class provided by the library. BaseNodeViewHolder requires a holder class which is generally static so that it can be accessed without creating an instance which nests textviews, imageviews and buttons.

Once the holder extends the BaseNodeViewHolder, it should override two methods as follows;

@Override
public View createNodeView(final TreeNode node, ClassContainingNodeData header) {

}

@Override
public void toggle(boolean active) {

}

createNodeView() which inflate the view and toggle() method which can be used to toggle clicks on the tree node in the UI.

The following code snippet shows how to create an object which extends the above mentioned class with the overridden methods.

public class ExperimentHeaderHolder extends TreeNode.BaseNodeViewHolder<ExperimentHeaderHolder.ExperimentHeader> {

    private ImageView arrow;

    public ExperimentHeaderHolder(Context context) {
            super(context);
    }

    @Override
    public View createNodeView(final TreeNode node, ExperimentHeader header) {

            final LayoutInflater inflater = LayoutInflater.from(context);
            final View view = inflater.inflate(R.layout.header_holder, null, false);

            TextView title = (TextView) view.findViewById(R.id.title);
            title.setText(header.title);

            arrow = (ImageView) view.findViewById(R.id.experiment_arrow);
        
            return view;
    }

    @Override
    public void toggle(boolean active) {
            arrow.setImageResource(active ? arrow_drop_up : arrow_drop_down);
    }

    public static class ExperimentHeader {

            public String title;

            public ExperimentHeader(String title) {
               this.title = title;
            }
    }
}

Creating a TreeNode

Once the holder is complete, we can move on to creating an actual tree node. TreeNode class requires an object which extends the BaseNodeViewHolder class as mentioned earlier. Also it requires a viewholder which it can use to inflate the view in the tree layout. The viewholder can be a different class. The importance of this different implementation can be explained as follows;

TreeNode treeNode = new TreeNode(new ExperimentHeaderHolder.ExperimentHeader(“Title”))
       .setViewHolder(new ExperimentHeaderHolder(context));

In the Saved Experiments section of PSLab android application, all the three levels shouldn’t implement the toggle behavior as a user clicks on the experiment (last level item), he doesn’t expect the icon to change like the ones in headers where an arrow points up and down when he clicks on it. In this case we can reuse a holder which has the title attribute while creating only a holder which does not override the toggle function to ignore icon toggling at the last level of the tree view. This explanation can be illustrated using a code snippet as follows;

new TreeNode(new ExperimentHeaderHolder.ExperimentHeader(“Title”))
       .setViewHolder(new IndividualExperimentHolder(context));

Creating parent nodes and finally the Root node

The final part of the implementation is to create parent nodes to group up similar experiments together. The TreeNode object supports a method call addChild() and addChildren(). addChild() method allows adding one tree node to the specific tree node and addChildren() method allows adding many tree nodes at the same time. Following code snippet illustrates how to add many tree nodes to a node and make it a parent node.

treeDiodeExperiments.addChildren(treeZener, treeDiode, treeDiodeClamp, treeDiodeClip, treeHalfRectifier, treeFullWave);

Setting a click listener

Click listener is a very important implementation. Each tree node can be attached with a click listener using the interface provided by the library as follows;

treeNode.setClickListener(new TreeNode.TreeNodeClickListener() {
   @Override
   public void onClick(TreeNode node, Object value) {

   }
});

The value object is the class attached to the holder and its attributes can be retireved by casting it to the specific class using casting methods;

String title = ((ExperimentHeaderHolder.ExperimentHeader) value).title;

Resources:

Continue ReadingImplementing Tree View in PSLab Android App

Adding Description to the Susi AI Skills

Susi skill CMS is an editor to write and edit skill easily. It follows an API-centric approach where the Susi server acts as API server and a web front-end act as the client for the API and provides the user interface. A skill is a set of intents. One text file represents one skill, it may contain several intents which all belong together. All the skills are stored in Susi Skill Data repository and the schema is as following.

Using this, one can access any skill based on four tuples parameters model, group, language, skill. To know what a skill is about we needed to add a !description operator which identifies the text as a description for the skill. Let’s check out how to achieve it.Susi Skill class provides parser methods for the set of intents, given as text files.

 public static JSONObject readEzDSkill(BufferedReader br) throws JSONException {}
if (line.startsWith("!") && (thenpos = line.indexOf(':')) > 0) {
        String head = line.substring(1, thenpos).trim().toLowerCase();
       String tail = line.substring(thenpos + 1).trim();
if (head.equals("description")) {
   description =tail;
    }
}
 if (description.length() > 0) intent.put("description", description); 

The method readEzDSkill parses the skill txt file, it checks if a line starts with ‘!description’ (‘bang operator with description’) it then stores the content in string variable description.
If a description is found in a skill, it is recorded and put into Json Array of intents.

private final Map<String, Set<String>> skillDescriptions; 
 if (intent.getDescription() !=null) {
  Set<String> descriptions = this.skillDescriptions.get(intent.getSkill());
  if (descriptions == null) {
     descriptions = new LinkedHashSet<>();
     this.skillDescriptions.put(intent.getSkill(), descriptions);
   }
   descriptions.add(intent.getDescription());
}

SusiMind class  process this json and stores the description in a map of skill path and description. This map is used by DescriptionSkillService to list descriptions for all the skills given its model, group and language. For adding the description servlet we need to inherit the service class from AbstractAPIHandler and implement APIhandler interface.In Susi Server, an abstract class AbstractAPIHandler extending HttpServelets and implementing API handler interface is provided.

 @Override
    public BaseUserRole getMinimalBaseUserRole() { return BaseUserRole.ANONYMOUS; }

    @Override
    public JSONObject getDefaultPermissions(BaseUserRole baseUserRole) {
        return null;
    }

    @Override
    public String getAPIPath() {
        return "/cms/getDescriptionSkill.json";
    }

The getAPIPath() methods sets the API endpoint path, it gets appended to base path which is 127.0.0.1:4000/cms/getDescriptionSkill.json for local host. The getMinimalBaseRole method tells the minimum Userrole required to access this servlet it can also be ADMIN, USER. In our case it is Anonymous. A User need not log in to access this endpoint.
Next, we implement serviceimpl method which gives us the desired response in JSON format.

@Override
    public ServiceResponse serviceImpl(Query call, HttpServletResponse response, Authorization rights, final JsonObjectWithDefault permissions) {
        String model = call.get("model", "");
        String group = call.get("group", "");
        String language = call.get("language", "");
        JSONObject descriptions = new JSONObject(true);
            for (Map.Entry<String, Set<String>> entry : DAO.susi.getSkillDescriptions().entrySet()) {
                String path = entry.getKey();
  if ((model.length() == 0 || path.indexOf("/" + model + "/") > 0) &&(group.length() == 0 || path.indexOf("/" + group + "/") > 0) &&(language.length() == 0 || path.indexOf("/" + language + "/") > 0)) {
      descriptions.put(path, entry.getValue());
   }
            }
            JSONObject json = new JSONObject(true)
                    .put("model", model)
                    .put("group", group)
                    .put("language", language)
                    .put("descriptions", descriptions);
        return new ServiceResponse(json);
    }

We can get the required parameters through a call.get() method where the first parameter is the key for which we want to get the value and second parameter is the default value. If the path contains the desired language, group and model, we return it as a response otherwise an error message is displayed. To check the response go to http://api.susi.ai/cms/getDescriptionSkill.json?model=general&group=knowledge&language=en or http://127.0.0.1:4000/cms/getDescriptionSkill.json.

This is how getDescriptionSkill service works. To add a description to the skill visit susi_skill_data, the storage place for susi skills. For more information and complete code take a look at Susi server and join gitter chat channel for discussions.

Resources

Continue ReadingAdding Description to the Susi AI Skills

Upload Images to OwnCloud and NextCloud in Phimpme Android

As increasing the stack of account manager in Phimpme Android. We have now two new items OwnCloud and NextCloud to add. Both are open source storage services. Provides complete source code of their official apps and libraries on Github. You can check below

OwnCloud: https://github.com/owncloud

NextCloud: https://github.com/nextcloud

This requires a hosting server, where you can deploy it and access it through their web app and Mobile apps. I added a feature in Phimpme to upload images directly to the server right from the app using their android-library.

Steps (How I did in Phimpme)

  • Add library in Application gradle file

Firstly, to work with, we need to add the android-library they provide.

compile "com.github.nextcloud:android-library:$rootProject.nextCloudVersion"

Check the new version from here and apply over it: https://github.com/nextcloud/android-library/releases

  • Login from Account Manager

As per our Phimpme app flow, User first connect itself from the account manager and then share image from app using these credentials. Added a new Login activity for OwnCloud and NextCloud both.


  • Saved credentials in Database

To use that further in android-library, I store the credentials in Realm database.

account.setServerUrl(data.getStringExtra(getString(R.string.server_url)));
account.setUsername(data.getStringExtra(getString(R.string.auth_username)));
account.setPassword(data.getStringExtra(getString(R.string.auth_password)));
  • Uploading image using library

As per the official guide of OwnCloud, used Created an object of OwnCloudClient. Set the username and password.

private OwnCloudClient mClient;
mClient = OwnCloudClientFactory.createOwnCloudClient(serverUri, this, true);
mClient.setCredentials(
       OwnCloudCredentialsFactory.newBasicCredentials(
               username,
               password
       )
);

Passed the image path which we are getting in the SharingActivity. Modified with adding the separator.

File fileToUpload = new File(saveFilePath);
String remotePath = FileUtils.PATH_SEPARATOR + fileToUpload.getName();

Used the UploadRemoteOperation Class and just need to pass the path, mimeType and timeStamp. The library have already defined functions to execute the upload operations.

UploadRemoteFileOperation uploadOperation =
       new UploadRemoteFileOperation(fileToUpload.getAbsolutePath(), remotePath, mimeType, timeStamp);
uploadOperation.execute(mClient, this, mHandler);

  • Setup Account using Docker and Digital Ocean

I have already a previous blog post on how to setup NextCloud or OwnCloud account on server using Digital Ocean and Docker.

Link: https://blog.fossasia.org/how-to-use-digital-ocean-and-docker-to-setup-test-cms-for-phimpme/

Resource:

  1. NextCloud Developer Mannual: https://docs.nextcloud.com/server/9/developer_manual/index.html
  2. OwnCloud Library installation: https://doc.owncloud.org/server/9.0/developer_manual/android_library/library_installation.html
  3. Examples: https://doc.owncloud.org/server/9.0/developer_manual/android_library/examples.html
Continue ReadingUpload Images to OwnCloud and NextCloud in Phimpme Android

Common Utility classes Progress Bar and Snack Bar in Phimpme Android

As the Phimpme Android is scaling very fast on its features, code gets redundant sometimes. Some of the widely used design widgets in Android are Progress Bar and Snack Bar. Progress Bar is shown to user when some process is happening in the background. Snackbar is a feedback operation to user of its recent process. In other words we can say Snackbar is the new toast in Android with a cool feature of setting action on them. So that User can interact with the feedback received on the process.

As In Phimpme lots of account Login and Logout progress happens. Uploading success and failure required Snackbar to show to the Users. So to remove the redundancy of the boilerplate of these codes, I added two Utilities class one is Phimpme ProgressbarHandler and other is SnackbarHandler in the app. Below is one by one code and explanation of both.

Progress Bar Handler

In the constructor I passed Context as parameter. Created a ViewGroup object and set view of android. Setting the progress bar style and length using Android core attributes such as progressBarStyleLarge and duration to setIndeterminate true.

private ProgressBar mProgressBar;

public PhimpmeProgressBarHandler(Context context) {
   ViewGroup layout = (ViewGroup) ((Activity) context).findViewById(android.R.id.content)
           .getRootView();

   mProgressBar = new ProgressBar(context, null, android.R.attr.progressBarStyleLarge);
   mProgressBar.setIndeterminate(true);


   RelativeLayout.LayoutParams params = new
           RelativeLayout.LayoutParams(RelativeLayout.LayoutParams.MATCH_PARENT,
           RelativeLayout.LayoutParams.MATCH_PARENT);

   RelativeLayout rl = new RelativeLayout(context);

   rl.setGravity(Gravity.CENTER);
   rl.addView(mProgressBar);

   layout.addView(rl, params);

   hide();

}

Next is used dynamically created Relative Layout object and setup the parameters for width and height as MATCH_PARENT. Setting gravity of the layout to center and added the progress bar view on it using the addView method. So basically we have a progress bar ready and we dynamically created a relative layout and added the view over it.

The function used in setting up the views and progress bar are from AOSP only.

After that a Progressbar is set, we now need functions to show and hide the progress bar in the code. Created two functions show() and hide().

public void show() {
   mProgressBar.setVisibility(View.VISIBLE);
}

public void hide() {
   mProgressBar.setVisibility(View.INVISIBLE);
}

These functions set the visibility of the the progress bar.

Usage:

Now in any class we can create object of our Progressbar handler class pass the context on it and use the show() and hide() methods wherever we want to show this and hide. Below is the code snippet to show the illustration.

phimpmeProgressBarHandler = new PhimpmeProgressBarHandler(this);

phimpmeProgressBarHandler.show();

phimpmeProgressBarHandler.hide();

Snackbar Handler

To do this, I created a separate class as Snackbar Handler. What we can do is to create a static function show() and inside the declaration, we can create an object of Snackbar and apply the styles to that.

As you can see in the code snippet below, I Created a static function with parameters such as View (to take the view instance), String (to show the message) and duration  of the Snackbar. Set Up the text, textsize and action on the snackbar. An “OK” action is predefined in the function only.

public static void show(View view, String text, int duration) {
   final Snackbar snackbar = Snackbar.make(view, text, duration);
   View sbView = snackbar.getView();
   TextView textView = (TextView)sbView.findViewById(android

.support.design.R.id.snackbar_text);
   textView.setTextColor(Color.WHITE);
   textView.setTextSize(12);
   snackbar.setAction("OK", new View.OnClickListener() {
       @Override
       public void onClick(View view) {
           snackbar.dismiss();
       }
   });
   snackbar.show();
}

Usage:

To use this directly call the show method pass the view and String of the message which you want to show on Snackbar. There are overloaded methods as well in which you can pass the durations. See the below code as example.

SnackBarHandler.show(parentLayout, getString(R.string.no_account_signed_in));

Resources

Continue ReadingCommon Utility classes Progress Bar and Snack Bar in Phimpme Android

How to Store and Retrieve User Settings from SUSI Server in SUSI iOS

Any user using the SUSI iOS client can set preferences like enabling or disabling the hot word recognition or enabling input from the microphone. These settings need to be stored, in order to be used across all platforms such as web, Android or iOS. Now, in order to store these settings and maintain a synchronization between all the clients, we make use of the SUSI server. The server provides an endpoint to retrieve these settings when the user logs in.

First, we will focus on storing settings on the server followed by retrieving settings from the server. The endpoint to store settings is as follows:

http://api.susi.ai/aaa/changeUserSettings.json?key=key&value=value&access_token=ACCESS_TOKEN

This takes the key value pair for storing a settings and an access token to identify the user as parameters in the GET request. Let’s start by creating the method that takes input the params, calls the API to store settings and returns a status specifying if the executed successfully or not.

 let url = getApiUrl(UserDefaults.standard.object(forKey: ControllerConstants.UserDefaultsKeys.ipAddress) as! String, Methods.UserSettings)

        _ = makeRequest(url, .get, [:], parameters: params, completion: { (results, message) in
            if let _ = message {
                completion(false, ResponseMessages.ServerError)
            } else if let results = results {
                guard let response = results as? [String : AnyObject] else {
                    completion(false, ResponseMessages.ServerError)
                    return
                }
                if let accepted = response[ControllerConstants.accepted] as? Bool, let message = response[Client.UserKeys.Message] as? String {
                    if accepted {
                        completion(true, message)
                        return
                    }
                    completion(false, message)
                    return
                }
            }
        })

Let’s understand this function line by line. First we generate the URL by supplying the server address and the method. Then, we pass the URL and the params in the `makeRequest` method which has a completion handler returning a results object and an error object. Inside the completion handler, check for any error, if it exists mark the request completed with an error else check for the results object to be a dictionary and a key `accepted`, if this key is `true` our request executed successfully and we mark the request to be executed successfully and finally return the method. After making this method, it needs to be called in the view controller, we do so by the following code.

Client.sharedInstance.changeUserSettings(params) { (_, message) in
  DispatchQueue.global().async {
    self.view.makeToast(message)
  }
}

The code above takes input params containing the user token and key-value pair for the setting that needs to be stored. This request runs on a background thread and displays a toast message with the result of the request.

Now that the settings have been stored on the server, we need to retrieve these settings every time the user logs in the app. Below is the endpoint for the same:

http://api.susi.ai/aaa/listUserSettings.json?access_token=ACCESS_TOKEN

This endpoint accepts the user token which is generated when the user logs in which is used to uniquely identify the user and his/her settings are returned. Let’s create the method that would call this endpoint and parse and save the settings data in the iOS app’s User Defaults.

if let _ = message {
  completion(false, ResponseMessages.ServerError)
} else if let results = results {
  guard let response = results as? [String : AnyObject] else {
    completion(false, ResponseMessages.ServerError)
    return
  }
  guard let settings = 
response[ControllerConstants.Settings.settings.lowercased()] as? [String:String] else {
    completion(false, ResponseMessages.ServerError)
    return
  }
  for (key, value) in settings {
    if value.toBool() != nil {
      UserDefaults.standard.set(value.toBool()!, forKey: key)
    } else {
      UserDefaults.standard.set(value, forKey: key)
    }
  }
  completion(true, response[Client.UserKeys.Message] as? String ?? "error")
}

Here, the creation of the URL is same as we created above the only difference being the method passed. We parse the settings key value into a dictionary followed by a loop which loop’s through all the keys and stores the value in the User Defaults for that key. We simply call this method just after user log in as follows:

Client.sharedInstance.fetchUserSettings(params as [String : AnyObject]) { (success, message) in
  DispatchQueue.global().async {
    print("User settings fetch status: \(success) : \(message)")
  }
}

That’s all for this tutorial where we learned how to store and retrieve settings on the SUSI Server.

References

Continue ReadingHow to Store and Retrieve User Settings from SUSI Server in SUSI iOS