Introduction to JWT

In this post, I will try to explain what is JWT, what are its advantages and why you should be using it.

JWT stands for JSON Web Tokens. Let me explain what each word means.

  1. Tokens – Token is in tech terms a piece of data (claim) which gives access to certain piece of information and allows certain actions.
  2. Web – Web here means that it was designed to be used on the web i.e. web projects.
  3. JSON – JSON means that the token can contain json data. In JWT, the json is first serialized and then Base64 encoded.

A JWT looks like a random sequence of strings separated by 2 dots. The yyyyy part which you see below has the Base64 encoded form of json data mentioned earlier.

xxxxx.yyyyy.zzzzz

The 3 parts in order are –

  • Header – Header is the base64 encoded json which contains hashing algorithm on which the token is secured.
  • Payload – Payload is the base64 encoded json data which needs to be shared through the token. The json can include some default keys like iss (issuer), exp (expiration time), sub (subject) etc. Particularly exp here is the interesting one as it allows specifying expiry time of the token.

At this point you might be thinking that how is JWT secure if all we are doing is base64 encoding payload. After all, there are easy ways to decode base64. This is where the 3rd part (zzzzz) is used.

  • Signature – Signature is a hashed string made up by the first two parts of the token (header and payload) and a secret. The secret should be kept confidential to the owner who is authenticating using JWT. This is how the signature is created. (assuming HMACSHA256 as the algorithm)
HMACSHA256(
  xxxxx + "." + yyyyy,
  secret)

How to use JWT for authentication

Once you realize it, the idea of JWT is quite simple. To use JWT for authentication, what you do is you make the client POST their username and password to a certain url. If the combination is correct, you return a JWT including username in the “Payload”. So the payload looks like –

{
  "username": "john.doe"
}

Once the client has this JWT, they can send the same in Header when accessing protected routes. The server can read the JWT from the header and verify its correctness by matching the signature (zzzzz part) with the encoded hash created using header+payload and secret (generated signature). If the strings match, it means that the JWT is valid and therefore the request can be given access to the routes. BTW, you won’t have to go through such a deal for using JWT for authentication, there are already a handful of libraries that can do these for you.

Why use JWT over auth tokens ?

As you might have noticed in the previous section, JWT has a payload field that can contain any type of information. If you include username in it, you will be able to identify the user just by validating the JWT and there will be no need to read from the database unlike typical tokens which require a database read cycle to get the claimed user. Now if you go ahead and include permission informations in JWT too (like'isAdmin': True), then more database reads can be prevented. And this optimization comes at no cost at all. So this is why you should be using JWT.

We at Open Event use JWT for our primary means of authentication. Apart from that, we support basic authentication too. Read this post for some points about that.

That’s it for now. Thanks for reading.


{{ Repost from my personal blog http://aviaryan.in/blog/gsoc/jwt-intro.html }}

Continue ReadingIntroduction to JWT

Adding revisioning to SQLAlchemy Models

{ Repost from my personal blog @ https://blog.codezero.xyz/adding-revisioning-to-sqlalchemy-models }

In an application like Open Event, where a single piece of information can be edited by multiple users, it’s always good to know who changed what. One should also be able to revert to a previous version if needed. That is where revisioning comes into picture.

We use SQLAlchemy as the database toolkit and ORM. So, we wanted a versioning tool that would work well with our existing setup. That’s when I came across SQLAlchemy-Continuum – a versioning extension for SQLAlchemy.

Installation

The installation of the module is just like any other python library. (don’t forget to add it to your requirements.txt file, if you have one)

pip install SQLAlchemy-Continuum
Setup

Now, it’s time to enable SQLAlchemy-Continuum for the required models.

Let’s consider an Event model.

import sqlalchemy as sa

class Event(Base):
    __tablename__ = 'events'
    id = sa.Column(sa.Integer, primary_key=True, autoincrement=True)
    name = sa.Column(sa.String)
	start_time = sa.Column(db.DateTime, nullable=False)
    end_time = sa.Column(db.DateTime, nullable=False)
    description = db.Column(db.Text)
    schedule_published_on = db.Column(db.DateTime)

We need to do three things to enable SQLAlchemy-Continuum.

  1. Call make_versioned() before the model(s) is/are defined.
  2. Add __versioned__ = {} to all the models that we want to be versioned
  3. Call configure_mappers from SQLAlchemy after declaring all the models.
import sqlalchemy as sa
from sqlalchemy_continuum import make_versioned

# Must be called before defining all the models
make_versioned()

class Event(Base):

    __tablename__ = 'events'
    __versioned__ = {}  # Must be added to all models that are to be versioned

    id = sa.Column(sa.Integer, primary_key=True, autoincrement=True)
    name = sa.Column(sa.String)
	start_time = sa.Column(db.DateTime, nullable=False)
    end_time = sa.Column(db.DateTime, nullable=False)
    description = db.Column(db.Text)
    schedule_published_on = db.Column(db.DateTime)

# Must be called after defining all the models
sa.orm.configure_mappers()

SQLAlchemy-Continuum creates two tables:

  1. events_version which stores the version history for the Event model linked to the transaction table via a foreign key
  2. transaction which stores information about each transaction (like the user who performed the transaction, transaction datetime, etc)

SQLAlchemy-Continuum also adds listeners to Event to record all create, update, delete actions.

Usage

All the CRUD (Create, read, update, delete) operations can be done as usual. SQLAlchemy-Continuum takes care of creating a version record for each CUD operation. The versions can be easily accessed using the versions property that is now available in the Event model.

event = Event(name="FOSSASIA 2017", description="Open source conference in asia")
session.add(event)  # Event added to transaction
session.commit() # Transaction comitted and event recored created

# This would have created the first version record which can be accessed
event.versions[0].name == "FOSSASIA 2017"

# Lets make some changes to the recored.
event.name = "FOSSASIA 2016"
session.add(event)
session.commit()

# This would have created the second version record which can be accessed
event.versions[1].name == "FOSSASIA 2016"

# The first version record still remains and can be accessed
event.versions[0].name == "FOSSASIA 2017"

So, that’s how basic versioning can be implemented in SQLAlchemy using SQLAlchemy-Continuum.

Continue ReadingAdding revisioning to SQLAlchemy Models

Building interactive elements with HTML and javascript: Resizing

{ Repost from my personal blog @ https://blog.codezero.xyz/building-interactive-elements-with-html-and-javascript-resizing }

Unlike draggable, HTML/js does not provide us with a direct spec for allowing users to graphically resize HTML DOM elements. So, we’ll be using mouse events and pointer locations to achieve the ability of resizing.

We’ll start with a box div.

<div id="box">  
    <div>Resize me !</div>
</div>  

A little bit of CSS magic to make it look a little bit better and square.

#box {
    position: relative;
    width: 130px;
    height: 130px;
    background-color: #2196F3;
    color: white;
    display:flex;
    justify-content:center;
    align-items:center;
    border-radius: 10px;
}

Now, we need a handle element. The user will be using this handle element to drag and resize the box.

<div id="box">  
    <div>Resize me !</div>
    <div id="handle">
    </div>
</div>  

Now, we just have an invisible div. Let’s give it some color, make it square. We also have to position it at one corner of the box.

#handle {
    background-color: #727272;
    width: 10px;
    height: 10px;
    cursor: se-resize;
    position:absolute;
    right: 0;
    bottom: 0;
}

The parent div#box has the CSS property position: relative and by setting div#handle the property position:absolute, we have the ability to position the handle absolutely with respect to its parent.

Also, note the cursor: se-resize property. This instructs the browser to set the cursor to the resize cursor () when the user is over it.

Now, it’s upto to javascript to take over. :wink:

var resizeHandle = document.getElementById('handle');  
var box = document.getElementById('box');  

For resizing, the user would click on the handle and drag it. So, we need to start resizing the moment the user presses and holds on the handle. Let’s setup a function to listen for the mousedown event.

resizeHandle.addEventListener('mousedown', initialiseResize, false);  

the initialiseResize function should do two things:

  1. Resize the box every time the mouse pointer moves.
  2. Listen for mouseup event so that the event listeners can be removed as soon as the user is done resizing.
function initialiseResize(e) {  
    window.addEventListener('mousemove', startResizing, false);
    window.addEventListener('mouseup', stopResizing, false);
}
function startResizing(e) {  
    // Do resize here
}
function stopResizing(e) {  
    window.removeEventListener('mousemove', startResizing, false);
    window.removeEventListener('mouseup', stopResizing, false);
}

To resize the box according to the user’s mouse pointer movements, we’ll be taking the current x and y coordinates of the mouse pointer (in pixels) and change the box’s height and width accordingly.

function startResizing(e) {  
   box.style.width = (e.clientX) + 'px';
   box.style.height = (e.clientY) + 'px';
}

e.clientX gives the mouse pointer’s X coordinate and e.clientY gives the mouse pointer’s Y coordinate

Now, this works. But this would only work as expected if the box is placed in the top-left corner of the page. We’ll have to compensate for the box’s left and top offsets. (position from the left and top edges of the page)

function startResizing(e) {  
   box.style.width = (e.clientX - box.offsetLeft) + 'px';
   box.style.height = (e.clientY - box.offsetTop) + 'px';
}

There you go :smile: We can now resize the box !

https://jsfiddle.net/niranjan94/w8k1ffju/embedded

Continue ReadingBuilding interactive elements with HTML and javascript: Resizing

Paginated APIs in Flask

Week 2 of GSoC I had the task of implementing paginated APIs in Open Event project. I was aware that DRF provided such feature in Django so I looked through the Internet to find some library for Flask. Luckily, I didn’t find any so I decided to make my own.

A paginated API is page-based API. This approach is used as the API data can be very large sometimes and pagination can help to break it into small chunks. The Paginated API built in the Open Event project looks like this –

{
    "start": 41,
    "limit": 20,
    "count": 128,
    "next": "/api/v2/events/page?start=61&limit=20",
    "previous": "/api/v2/events/page?start=21&limit=20",
    "results": [
    	{
    		"data": "data"
    	},
    	{
    		"data": "data"
    	}
    ]
}

Let me explain what the keys in this JSON mean –

  1. start – It is the position from which we want the data to be returned.
  2. limit – It is the max number of items to return from that position.
  3. next – It is the url for the next page of the query assuming current value of limit
  4. previous – It is the url for the previous page of the query assuming current value of limit
  5. count – It is the total count of results available in the dataset. Here as the ‘count’ is 128, that means you can go maximum till start=121 keeping limit as 20. Also when you get the page with start=121 and limit=20, 8 items will be returned.
  6. results – This is the list of results whose position lies within the bounds specified by the request.

Now let’s see how to implement it. I have simplified the code to make it easier to understand.

from flask import Flask, abort, request, jsonify
from models import Event

app = Flask(__name__)

@app.route('/api/v2/events/page')
def view():
	return jsonify(get_paginated_list(
		Event, 
		'/api/v2/events/page', 
		start=request.args.get('start', 1), 
		limit=request.args.get('limit', 20)
	))

def get_paginated_list(klass, url, start, limit):
    # check if page exists
    results = klass.query.all()
    count = len(results)
    if (count < start):
        abort(404)
    # make response
    obj = {}
    obj['start'] = start
    obj['limit'] = limit
    obj['count'] = count
    # make URLs
    # make previous url
    if start == 1:
        obj['previous'] = ''
    else:
        start_copy = max(1, start - limit)
        limit_copy = start - 1
        obj['previous'] = url + '?start=%d&limit=%d' % (start_copy, limit_copy)
    # make next url
    if start + limit > count:
        obj['next'] = ''
    else:
        start_copy = start + limit
        obj['next'] = url + '?start=%d&limit=%d' % (start_copy, limit)
    # finally extract result according to bounds
    obj['results'] = results[(start - 1):(start - 1 + limit)]
    return obj

Just to be clear, here I am assuming you are using SQLAlchemy for the database. The klass parameter in the above code is the SqlAlchemy db.Model class on which you want to query upon for the results. The url is the base url of the request, here ‘/api/v2/events/page’ and it used in setting the previous and next urls. Other things should be clear from the code.

So this was how to implement your very own Paginated API framework in Flask (should say Python). I hope you found this post interesting.

Until next time.

Ciao


{{ Repost from my personal blog http://aviaryan.in/blog/gsoc/paginated-apis-flask.html }}

Continue ReadingPaginated APIs in Flask

Sending e-mail from linux terminal

So while finalizing the apk-generator for my GSoC project, I faced a roadblock in sending the generated App to the organizer.

Normally the build takes around 10–12 minutes, so asking the user to wait for that long on the website and then providing him/her with a download link did not feel like a good option. (amirite?)

So I and Manan Wason thought of a different approach to this problem, which was to email the generated app to the organzier.

For doing this, we used 2 handy tools MSMTP and Mutt.
We can use MSMTP to send email but unfortunately we cannot include attachments, so we used Mutt to help us send email with attachments from the command line.
So hang tight and follow the rest of the guide to start sending emails from your terminal and get yourself some developer #swag

Step 1 : Installation

Use the following commands to install MSMTP and Mutt

sudo apt-get -y install msmtp
sudo apt-get -y install ca-certificates
sudo apt-get -y install mutt

We need to have a file that contains Certificate Authority (CA) certificates so that we can connect using SSL / TLS to the email server.

Step 2 : Configuring MSMTP

Now we’ll MSMTP configuration on /etc/msmtprc with the content below. NOTE : You will have to enter your username and password on this file so make sure to make this file private.

Lets first open this file

nano /etc/msmtprc

Next, add following text to the file,

account default
tls on
tls_starttls off
tls_certcheck off
auth on
host smtp.mail.yahoo.com (change this to smtp.gmail.com for gmail)
user username
password password
from username@yahoo.com
logfile /var/log/msmtp.log

NOTE : Refrain from using gmail as they might terminate your account for sending email via MSMTP.

For configuring mutt, we’ll use a similar command to edit the file located at /root/.muttrc

nano /root/.muttrc

Add following text to it which specifies the MSMTP account to use for sending email

set sendmail=”/usr/bin/msmtp”
set use_from=yes
set realname=”MY Real Name”
set from=username@yahoo.com
set envelope_from=yes

That’s it!
Now lets get ready for the fun part, SENDING THOSE EMAILS 😀

Step 3 : Sending

Now, there are 2 cases that might arise while sending the email,

1 : Sending without attachment

This is pretty straightforward and can be done with either MSMTP or Mutt.

Using MSMTP

printf “To: recipient@domain.comnFrom: username@domain.comnSubject: Testing MSMTPnnHello there. This is email test from MSMTP.” | msmtp recipient@domain.com

Entering the following code will send the email to the recipient and also display the sent email in the terminal.

Using Mutt

mutt -s “Testing Mutt” — recipient@domain.com < /path/to/body.txt

NOTE : ‘body.txt’ is the file whose contents will be used in the body of the email that will be sent to ‘recipient@domain.com’.

2 : Sending WITH an attachment

Unlike the previous case, this can be done ONLY using Mutt and the code used is

mutt -a /path/to/attachment.txt -s “Testing Mutt — recipient@domain.com < /path/to/body.txt

The syntax is similar to the above case where we sent the email without attachments.

So well, that it then!
If you followed the instructions carefully, you will have a working email client built into your terminal!
Pretty cool right?

So that’s it for this week, hope to catch you next week with some more interesting tips and tutorials.

Continue ReadingSending e-mail from linux terminal

Building interactive elements with HTML and javascript: Drag and Drop

{ Repost from my personal blog @ https://blog.codezero.xyz/building-interactive-elements-with-html-and-javascript-drag-and-drop }

Traditionally, all interactions in a website has been mostly via form inputs or clicking on links/button. The introduction of native Drag-and-drop as a part of the HTML5 spec, opened developers to a new way of Graphical input. So, how could this be implemented ?

Making any HTML element draggable is as simple as adding draggable="true" as an attribute.

<div id="a-draggable-div" draggable=true>  
    <h4>Drag me</h4>
</div>  

This will allow the user to drag div#a-draggable-div. Next, we need to designate a dropzone, into which the user can drop the div.

<div id="dropzone" ondragover="onDragOver(event)">  
</div>  
function onDragOver(e) {  
    // This function is called everytime 
    // an element is dragged over div#dropzone
    var dropzone = ev.target;

}

Now, the user will be able to drag the element. But, nothing will happen when the user drops it into the dropzone. We’ll need to define and handle that event. HTML5 provides ondrop attribute to bind to the drop event.

When the user drops the div into the drop zone, we’ll have to move the div from it’s original position into the drop zone. This has to be done in the drop event.

<div id="dropzone"  
ondrop="onDrop(event)"  
ondragover="onDragOver(event)"> </div>  
function onDrop(e) {  
    e.preventDefault();
    var draggableDiv = document.getElementById("a-draggable-div");
    draggableDiv.setAttribute("draggable", "false");
    e.target.appendChild(draggableDiv);
}

So, when the user drops the div into the drop zone, we’re disabling the draggable property of the div and appending it into the drop zone.

This is a very basic drag and drop implementation. It gets the job done. But, HTML5 provides us with more events to make the user’s experience even better 1.

Event Description
drag Fired when an element or text selection is being dragged.
dragend Fired when a drag operation is being ended (for example, by releasing a mouse button or hitting the escape key).
dragenter Fired when a dragged element or text selection enters a valid drop target.
dragexit Fired when an element is no longer the drag operation’s immediate selection target.
dragleave Fired when a dragged element or text selection leaves a valid drop target.
dragover Fired when an element or text selection is being dragged over a valid drop target
dragstart Fired when the user starts dragging an element or text selection.
drop Fired when an element or text selection is dropped on a valid drop target.

With these events a little bit of css magic a more user friendly experience can be created like highlighting the drop zones when the user starts to drag an element or changing the element’s text based on its state.

Demo:

https://jsfiddle.net/niranjan94/tkbcv3md/16/embedded/

External Resources:
Continue ReadingBuilding interactive elements with HTML and javascript: Drag and Drop

Transmitting response from a Web page to a server.

{ Re-post from my Medium Post }

My project has pivoted from a standalone android app to a Web page that will generate a custom app for an event organizer’s use.

Read up here on what my project actually is.

So obviously some changes at the server are to be made to make this possible.

How are you planning to do it?

First of we started by providing a Web page that the organizers can use to submit information about the app they need to be built like the App’s name, the link to the API (for fetching the json files) and their email address (for mailing them the apk once it’s generated).

The HTML file for the same can be found here.

Some changes to the Travis build should also be made so that it can use this data for building.

From there on, the details submitted by them will be converted by a json object (using javascript) and further send to the open event server via a POST request where it will be written to a database.

We will be able to fetch this file from the database by the following link

openevent.com/api/v2/customapps/id.

Simultaneously one Travis build will also be trigger using the API that will auto build the latest commit, taking the modified json file data provided by the orga-server.

This configuration will be provided to Travis while the build time.

Cool, any difficulties yet!

One of the main challenges that we are facing is manually triggering the Travis build.

We can do this via the Travis API but that’s still in beta and also we are getting our head around on how to implement it.

I also had a tough time learning javascript and HTML for making the Web page and then I also have to read up on sending a POST request to the server via Ajax.

It’s a bit tough, but should be fun.

So, that was all for now, see you next week and all the best for your projects.✌

Continue ReadingTransmitting response from a Web page to a server.

[Tutorial] Continuous Integration Automated Build for your Pharo Application

reposted from jigyasagrover.wordpress.com/ci-automated-build-for-your-pharo-application

Hello Fellas !

This post aims to put forward the basics of Build Automation and also brief the steps required to put up a Pharo application on Continuous Integration, Inria which is a platform for Scheduled Automated Build.
For simplicity, Build automation is the act of scripting or automating a wide variety of tasks that software developers do in their day-to-day activities including things like:
  • compiling computer source code into binary code
  • packaging binary code
  • running automated tests
  • deploying to production systems
  • creating documentation and/or release notes

Various types of automation are as:

  • On-Demand automation such as a user running a script at the command line
  • Scheduled automation such as a continuous integration server running a nightly build
  • Triggered automation such as a continuous integration server running a build on every commit to a version control system.
In recent years, build management tools have provided relief when it comes to automating the build process.
The dominant benefits of continuous integration include:
  • Improvement of product quality
  • Acceleration of compile and link processing
  • Elimination of redundant tasks
  • Minimization of ‘bad builds’
  • Have history of builds and releases in order to investigate issues
  • Save time and money – because of above listed reasons.

A build system should fulfill certain requirements.

Basic requirements:

  1. Frequent or overnight builds to catch problems early.
  2. Support for Source Code Dependency Management
  3. Incremental build processing
  4. Reporting that traces source to binary matching
  5. Build acceleration
  6. Extraction and reporting on build compile and link usage

Optional requirements:

  1. Generate release notes and other documentation such as help pages
  2. Build status reporting
  3. Test pass or fail reporting
  4. Summary of the features added/modified/deleted with each new build

Considering the above mentioned advantages of automated build, the below enlisted steps will help to put up your own Pharo application hosted on github on the CI server for continuous integration/scheduled build.
 1. Log on to Continuous Integration, Inria website (https://ci.inria.fr/).

Screenshot from 2015-08-08 15:53:49
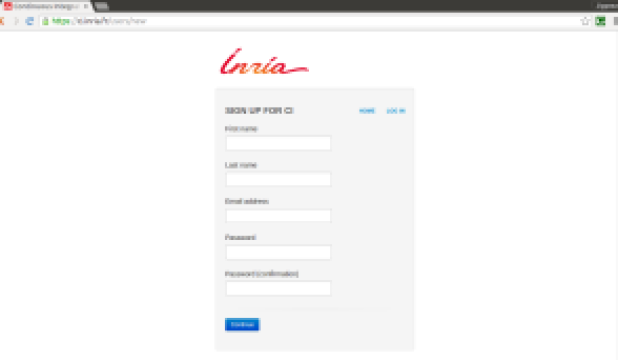
2. Click on ‘Sign Up‘ at the top-right corner, enter the required details and register for CI.

Screenshot from 2015-08-08 15:54:02
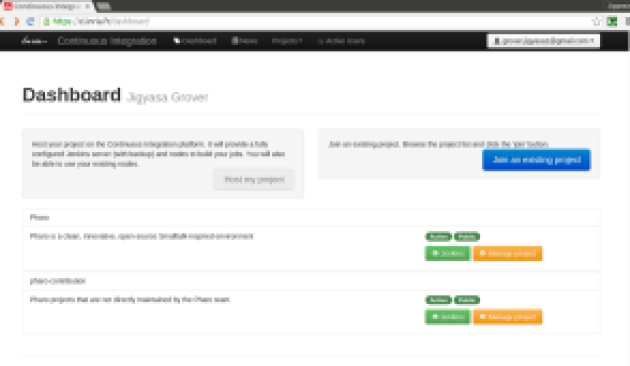
3. From the ‘Dashboard‘ option located at the top most of the screen click on ‘Join an existing project‘ blue button as shown .

Screenshot from 2015-08-08 15:59:22
4. Search ‘pharo-contribution‘ in the enlisted public projects and click on ‘Join

5. On clicking the ‘Join‘ button, a message stating: “Request to join the project ‘pharo-contribution’ sent.” appears.

6. It might take a day or two for the request approval mail to deliver at your registered Email ID.

The E-Mail content is as follows:
        Your request to join pharo-contribution has been accepted
        Hi _ _ _,
        Your request to join the project pharo-contribution has been accepted !
        Regards,
        Support team.

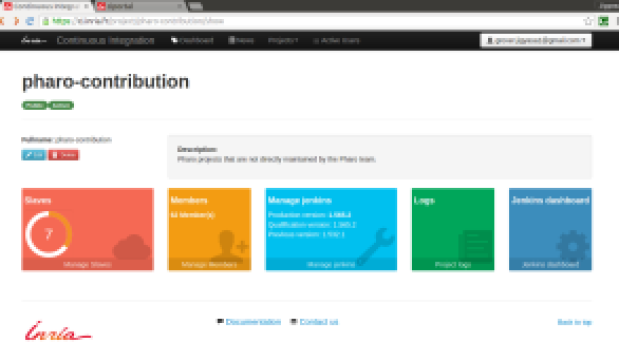
7. Click on ‘My Account‘ option and under ‘My Projects‘ check the status of pharo-contribution project. It should state ‘member‘.

Screenshot from 2015-08-08 16:17:55
8. Now, visit the LINK: https://ci.inria.fr/pharo-contribution/job/JobTemplate/  to create a ‘New Job

Screenshot from 2015-08-08 16:21:06
9. Read all the steps mentioned carefully. After going through all the points, click on the ‘New Job‘ mentioned in point 2 on the Project Job Template web page.

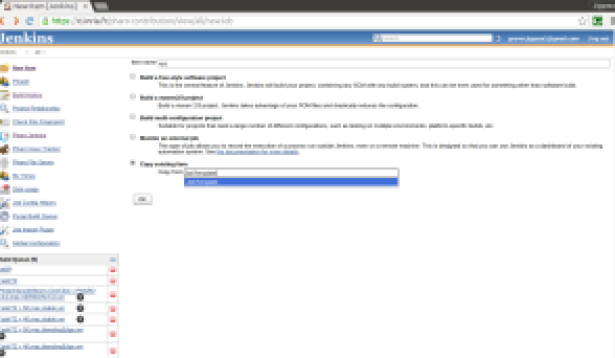
10. Enter the ‘Project Name‘ in the ‘Item Name: ‘ box and choose ‘Copy from existing item‘ option and fill ‘JobTemplate

Screenshot from 2015-08-08 16:30:01
11. After clicking OK, You will be directed to your project configuration.

12. Fill in the description of the project in the desired box.

Screenshot from 2015-08-08 16:32:31
13. Fill int the configuration details of your project like:

* Maximum number of builds
*  Link to GitHub Project
*  Source Code Manager
* Build Triggers
*  Schedule of build (@hourly, @daily, @weekly, @fortnightly, @monthly, @yearly etc.)
*  Configuration Matrix (User Defined Axis: Name && Version Values- stable, development etc.)
* Build environment options
* Post-build actions
*  Report regressed tests

14. The main task is to carefully write the commands in the ‘Execute Shell
The default commands are as:

Screenshot from 2015-08-08 16:39:06
15. After saving and applying the changes, the application is all set for automated build.

16. Each build’s ‘Console Output‘ can be used to analyse the steps and highlight the weak areas of the project.
For instance: The below output is of a project whose stable version build was successful.

Screenshot from 2015-08-08 16:49:05

TIP: Keep a regular tab on the build results and analyze each line of the Console Output with utmost care.

Hope this post was able to help you start with the automation build process of Pharo Application.

Do like if it was worth a read !
Post queries/suggestions as comments 🙂 Looking forward to them.


UPCOMING: Next, I plan to share experience of putting up my Pharo application searchQuick on CI Inria for automated build. I intend to detail about the various configuration settings applied along with the Execute Shell commands utilized for a GitHub project 🙂


Introduction Accredits: Wikipedia 
Resources:  Build Automation and Continuous Integration .


Continue Reading[Tutorial] Continuous Integration Automated Build for your Pharo Application