Implementing Feedback Feature in SUSI Android App

Recently, on SUSI Server, a new servlet was added which is used to rate SUSI Skills either positive or negative. The server stores the rating of a particular skill in a JSON file. These ratings help in improving answers provided by SUSI. So, the server part is done and it was required to implement this in the SUSI Android App. In this blog, I will cover the topic of implementation of the Rating or Feedback feature in SUSI Android App. This will including all the cases when feedback should be sent, when it should not be sent, when to send positive feedback, when to send negative feedback, etc.

API Information

For rating a SUSI Skill, we have to call on  /cms/rateSkill.json providing 5 parameters which are:

  1. model: The model of SUSI Skill. (String)
  2. group: The Group under the model in which that particular skill resides. (String)
  3. language: The language of skill. (String)
  4. skill: This is skill name. (String)
  5. rating: This can be two strings, either “positive” or “negative”. String)

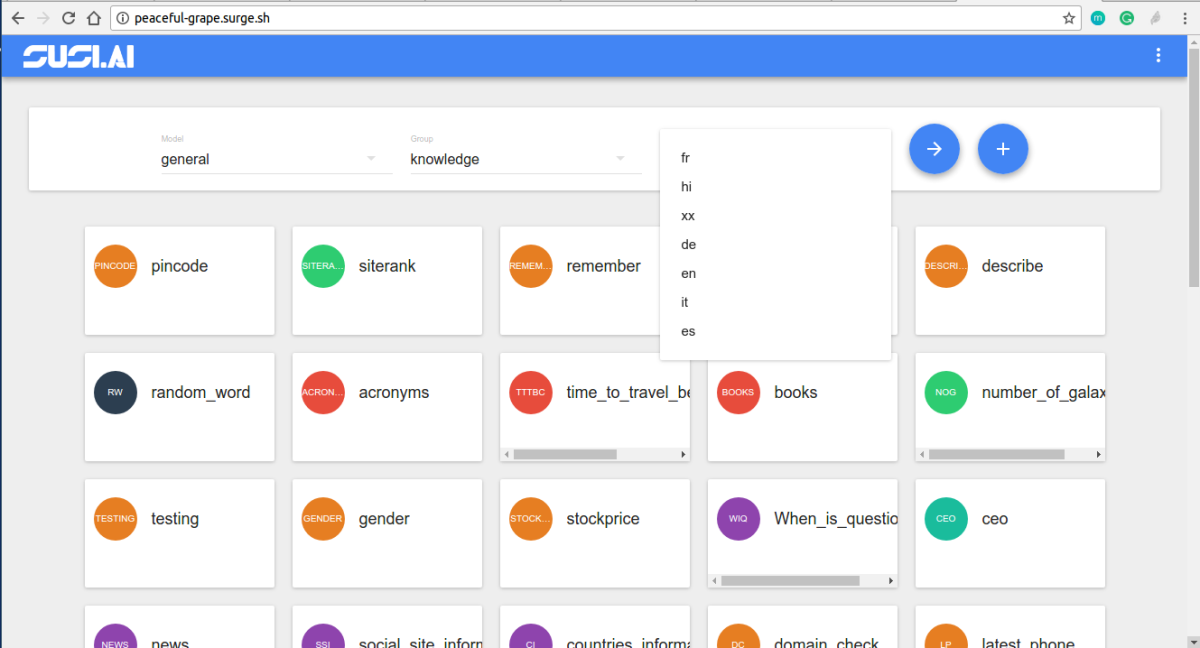
Basically, in the SUSI Skill Data repo (in which all the skills are stored), models, groups language etc are part of folder structure.

So, if a skill is located here

https://github.com/fossasia/susi_skill_data/blob/master/models/general/Knowledge/en/news.txt

This would mean

model = general

group = Knowledge

language = en

skill = news

rating = positive/negative

Implementation in SUSI Android App


So, when the like button on a particular skill is clicked, a positive call is made and when the dislike button is clicked, a negative call is made.

Let’s see example when the thumbs up button or like button is clicked.

There can be three cases possible:

  1. None of Like button or dislike button is clicked already: In this case, initially, both like and dislike button will be transparent/hollow. So, when like button is clicked, the like button will be colored blue and a call will be made with positive feedback.
  2. Like button is already clicked: In this case, like button is already clicked. So, it will already be blue. So, when user clicks again on positive button, it should get back to normal/hollow indicating rating which was sent is cancelled and a a call will be made with negative feedback thus cancelling or neutralizing the earlier, positive feedback.
  3. Dislike button is already clicked: In this case, the dislike button is already blue, indicating a negative call is already made. So, now when the like button is clicked, we need to cancel the earlier negative feedback call and sending another negative feedback call. Thus, sending two negative feedback calls. And after that coloring dislike button as blue.

Look at the code below. It is self explanatory. There are three if-else conditions covering all the above mentioned three cases.

thumbsUp.setOnClickListener(new View.OnClickListener() {
   @Override
   public void onClick(View view) {
       thumbsUp.setImageResource(R.drawable.thumbs_up_solid);
       if(!model.isPositiveRated() && !model.isNegativeRated()) {
           rateSusiSkill(Constant.POSITIVE, model.getSkillLocation(), context);
           setRating(true, true);
       } else if(!model.isPositiveRated() && model.isNegativeRated()) {
           setRating(false, false);
           thumbsDown.setImageResource(R.drawable.thumbs_down_outline);
           rateSusiSkill(Constant.POSITIVE, model.getSkillLocation(), context);
           sleep(500);
           rateSusiSkill(Constant.POSITIVE, model.getSkillLocation(), context);
           setRating(true, true);
       } else if (model.isPositiveRated() && !model.isNegativeRated()) {
           rateSusiSkill(Constant.NEGATIVE, model.getSkillLocation(), context);
           setRating(false, true);
           thumbsUp.setImageResource(R.drawable.thumbs_up_outline);
       }
   }
});

Similarly for when dislike button is clicked, the above three mentioned cases still hold resulting in this code snippet.

thumbsDown.setOnClickListener(new View.OnClickListener() {
   @Override
   public void onClick(View view) {
       thumbsDown.setImageResource(R.drawable.thumbs_down_solid);
       if(!model.isPositiveRated() && !model.isNegativeRated()) {
           rateSusiSkill(Constant.NEGATIVE, model.getSkillLocation(), context);
           setRating(true, false);
       } else if(model.isPositiveRated() && !model.isNegativeRated()) {
           setRating(false, true);
           thumbsUp.setImageResource(R.drawable.thumbs_up_outline);
           rateSusiSkill(Constant.NEGATIVE, model.getSkillLocation(), context);
           sleep(500);
           rateSusiSkill(Constant.NEGATIVE, model.getSkillLocation(), context);
           setRating(true, false);
       } else if (!model.isPositiveRated() && model.isNegativeRated()) {
           rateSusiSkill(Constant.POSITIVE, model.getSkillLocation(), context);
           setRating(false, false);
           thumbsDown.setImageResource(R.drawable.thumbs_down_outline);
       }
   }
});

Summary

So, this blog talked about how the Feedback feature in SUSI Android App is implemented. This included how a network call is made, logic for sending positive/negative feedback, logic to withdraw feedback etc. So, If you are looking forward to contribute to SUSI Android App, this can help you a little. But if not so, this may also help you in understanding and how rating mechanism in social media websites like Facebook, Twitter, Quora, Reddit, etc work.

References

  1. To know about servlets https://en.wikipedia.org/wiki/Java_servlet
  2. To see how to implement one https://www.javatpoint.com/servlet-tutorial
  3. To see how to make network calls in android using Retrofit https://guides.codepath.com/android/Consuming-APIs-with-Retrofit
  4. To see how to implement click listeners on button https://developer.android.com/reference/android/view/View.OnClickListener.html
Continue ReadingImplementing Feedback Feature in SUSI Android App

Implementing SUSI Linux App as a Finite State Machine

SUSI Linux app provides access to SUSI on Linux distributions on desktop as well as hardware devices like Raspberry Pi. It is a headless client that can be used to interact to SUSI via voice only. As more and more features like multiple hotword detection support and wake button support was added to SUSI Linux, the code became complex to understand and manage. A system was needed to model the app after. Finite State Machine is a perfect approach for such system.

The Wikipedia definition of State Machine is

It is an abstract machine that can be in exactly one of a finite number of states at any given time. The FSM can change from one state to another in response to some external inputs; the change from one state to another is called a transition.”

This means that if you can model your app into a finite number of states, you may consider using the State Machine implementation.

State Machine implementation has following advantages:

  • Better control over the working of the app.
  • Improved Error handling by making an Error State to handle errors.
  • States work independently which helps to modularize code in a better form.

To begin with, we declare an abstract State class. This class declares all the common properties of a state and transition method.

from abc import ABC, abstractclassmethod
import logging

class State(ABC):
   def __init__(self, components):
       self.components = components
       self.allowedStateTransitions = {}

   @abstractclassmethod
   def on_enter(self, payload=None):
       pass

   @abstractclassmethod
   def on_exit(self):
       pass

   def transition(self, state, payload=None):
       if not self.__can_transition(state):
           logging.warning("Invalid transition to State{0}".format(state))
           return

       self.on_exit()
       state.on_enter(payload)

   def __can_transition(self, state):
       return state in self.allowedStateTransitions.values()

We declared the on_enter() and on_exit() abstract method. These methods are executed on the entering and exiting a state respectively. The task designated for the state can be performed in the on_enter() method and it can free up resources or stop listening to callbacks in the on_exit() method. The transition method is to transition between one state to another. In a state machine, a state can transition to one of the allowed states only. Thus, we check if the transition is allowed or not before continuing it. The on_enter() and transition() methods additionally accepts a payload argument. This can be used to transfer some data to the state from the previous state.

We also added the components property to the State. Components store the shared components that can be used across all the State and are needed to be initialized only once. We create a component class declaring all the components that are needed to be used by states.

class Components:

   def __init__(self):
       recognizer = Recognizer()
       recognizer.dynamic_energy_threshold = False
       recognizer.energy_threshold = 1000
       self.recognizer = recognizer
       self.microphone = Microphone()
       self.susi = susi
       self.config = json_config.connect('config.json')

       if self.config['hotword_engine'] == 'Snowboy':
           from main.hotword_engine import SnowboyDetector
           self.hotword_detector = SnowboyDetector()
       else:
           from main.hotword_engine import PocketSphinxDetector
           self.hotword_detector = PocketSphinxDetector()

       if self.config['wake_button'] == 'enabled':
           if self.config['device'] == 'RaspberryPi':
               from ..hardware_components import RaspberryPiWakeButton
               self.wake_button = RaspberryPiWakeButton()
           else:
               self.wake_button = None
       else:
           self.wake_button = None

Now, we list out all the states that we need to implement in our app. This includes:

  • Idle State: App is listening for Hotword or Wake Button.
  • Recognizing State: App actively records audio from Microphone and performs Speech Recognition.
  • Busy State: SUSI API is called for the response of the query and the reply is spoken.
  • Error State: Upon any error in the above state, control transfers to Error State. This state needs to handle the speak the correct error message and then move the machine to Idle State.

Each state can be implemented by inheriting the base State class and implementing the on_enter() and on_exit() methods to implement the correct behavior.

We also declare a SUSI State Machine class to store the information about current state and declare the valid transitions for all the states.

class SusiStateMachine:
   def __init__(self):
       super().__init__()
       components = Components()
       self.__idle_state = IdleState(components)
       self.__recognizing_state = RecognizingState(components)
       self.__busy_state = BusyState(components)
       self.__error_state = ErrorState(components)
       self.current_state = self.__idle_state

       self.__idle_state.allowedStateTransitions = \
           {'recognizing': self.__recognizing_state, 'error': self.__error_state}
       self.__recognizing_state.allowedStateTransitions = \
           {'busy': self.__busy_state, 'error': self.__error_state}
       self.__busy_state.allowedStateTransitions = \
           {'idle': self.__idle_state, 'error': self.__error_state}
       self.__error_state.allowedStateTransitions = \
           {'idle': self.__idle_state}

       self.current_state.on_enter(payload=None)

We also set Idle State as the current State of the System. In this way, State Machine approach is implemented in SUSI Linux.

Resources:


Continue ReadingImplementing SUSI Linux App as a Finite State Machine

Enhanced Skill Tiles in SUSI Skill CMS

The SUSI Skill Wiki is a management system for all the SUSI Skills and the Skill display screen ought to look attractive. The earlier version of the Skill Display was just a display with the skill name populated as cards as shown in the image.

image

So as we progressed over to add more metadata to the SUSI Skills, we had the challenge to show all details which were as follows –

An example of a skill metadata format-

"cricketTest": {
      "image": "images/images.jpg",
      "author_url": "skill.susi.ai",
      "examples": ["Testing Works"],
      "developer_privacy_policy": "na",
      "author": "cms",
      "skill_name": "cricket",
      "dynamic_content": true,
      "terms_of_use": "na",
      "descriptions": "testing",
      "skill_rating": null
    }

To embed the Skill metadata in the Tiles the following steps are to be followed –

  1. We first use the end point at the SUSI Server, http://api.susi.ai/cms/getSkillList.json with the following attributes –
    1. model – The skill follows a general model or maybe a tutorial model
    2. group -The category or group of the skill.
    3. language – The language of the skill output.

2.  An AJAX request to this end point gives us the following response.

{
accepted: true,
model: "general",
group: "Knowledge",
language: "en",
skills: 
{
capital: 
{
image: "images/capital.png",
author_url: "https://github.com/chashmeetsingh",
examples: 
[
"capital of Bangladesh"
],
developer_privacy_policy: null,
author: "chashmeet singh",
skill_name: "capital",
dynamic_content: true,
terms_of_use: null,
descriptions: "a skill to tell user about capital of any country.",
skill_rating: 
{
negative: "0",
positive: "1"
}
}

We use the descriptions, skill_name, examples, image from the skill metadata to create our Skill Tile.

  1. The styles of the cards follow a CSS flexbox structure. A sample mock up of the Skill Card looks as follows.

We first handle all the base cases and show “No name available”, “No description available” for data which does not exist or is found to be “null”. We then create the card mock-up in ReactJS which looks somewhat like this code snippet in the file BrowseSkill.js

                            <Card style={styles.row} key={el}>
                                <div style={styles.right} key={el}>
                                    {image ? <div style={styles.imageContainer}>
                                        <img alt={skill_name} src={image} style={styles.image}/>
                                    </div>:
                                    <CircleImage name={el} size="48"/>}
                                    <div style={styles.titleStyle}>"{examples}"</div>
                                </div>
                                <div style={styles.details}>
                                    <h3 style={styles.name}>{skill_name}</h3>
                                    <p style={styles.description}>{description}</p>
                                </div>
                            </Card>

  1. We then add the following styles to the Card and its contents which complete the look of the View.
imageContainer:{   
        position: 'relative',
        height: '80px',
        width: '80px',
        verticalAlign: 'top'
    },
    name:{
        textAlign: 'left',
        fontSize: '15px',
        color: '#4285f4',
        margin: '4px 0'
    },
    details:{
        paddingLeft:'10px'
    },
    image:{
        maxWidth: '100%',
        border: 0
    },
description:{
        textAlign:'left',
        fontSize: '14px'   
    },
row: {
        width: 280,
        minHeight:'200px',
        margin:"10px",
        overflow:'hidden',
        justifyContent: "center",
        fontSize: '10px',
        textAlign: 'center',
        display: 'inline-block',
        background: '#f2f2f2',
        borderRadius: '5px',
        backgroundColor: '#f4f6f6',
        border: '1px solid #eaeded',
        padding: '4px',
        alignSelf:'flex-start'
    },
titleStyle:{
    textAlign: 'left',
    fontStyle: 'italic',
    fontSize: '16px',
    textOverflow: 'ellipsis',
    overflow: 'hidden',
    width: '138px',
    marginLeft: '15px',
    verticalAlign: 'middle',
    display: 'block'
}

To see the SUSI Skills or to contribute to it, please visit http://skills.susi.ai

Resources

Continue ReadingEnhanced Skill Tiles in SUSI Skill CMS

Adding Fallback Images in SUSI.AI Skill CMS

SUSI.AI Skill CMS shows image of a every skill. Here we are going to talk about a special case, where we handle the case when image is not found. We will be discussing the author’s skill component(all the skills by an author) and how we added fallback image in order to handle all the cases. For displaying image in table displaying all skills of author, we provide the path of image in SUSI Skill Data repository. The path is provided as follows :

let image = 'https://raw.githubusercontent.com/fossasia/susi_skill_data/master/models/general/'+ parse[6]+'/'+parse[7]+'/images/'+parse[8].split('.')[0];

Explanation:
parse is the array which contains the models, language ISO code, and the name of the skill. This is obtained after parsing JSON from this endpoint :

"http://api.susi.ai/cms/getSkillsByAuthor.json?author=" + author;
  • parse[6]: This represents a model of the skill. There are currently six models Assistants, Entertainment, Knowledge, Problem Solving, Shopping and Small Talks.
  • parse[7]: This represents ISO language code of the skill.
  • parse[8]: This represents the name of the skill.

Now the image variable just needs the file extension. We have .jpg and .png extensions in images in our skill data repository. So we made two images :

let image1 = image + '.png';
let image2 = image + '.jpg';

The img tag only takes one attribute in src and we can only add a string in alt tag. Now we needed to check which image exists and add proper src. This can be solved by following methods:

We can use Jquery to solve this:

$.get(image_url)
        .done(function() { 
                // image exists
        }).fail(function() { 
                // Image doesn't exist
    })

This will result in more code and and also this does not handles the case where no image is found and we need to show the Circle Image component which takes first two letters of skill and make a circular component. After researching the internet we found a perfect solution to our problem. There is an npm package named react-image, which is an alternative to default img tag. Features of react-image package helpful to us are:

  • We can provide multiple fallback images in an array as source which will be used in order of index of array. This feature solves our problem of extensions, we add provide image with all extensions.
  • We can show a fallback element in case no images are loaded. This solves our second problem where we needed to show Circle Image component.

Code looks like this:

<Img
  style={imageStyle}
  src={[
       image1,
       image2
      ]}
  unloader={<CircleImage name={name} size="40"/>}
 />

Resources:

Continue ReadingAdding Fallback Images in SUSI.AI Skill CMS

Generating Map Action Responses in SUSI AI

SUSI AI responds to location related user queries with a Map action response. The different types of responses are referred to as actions which tell the client how to render the answer. One such action type is the Map action type. The map action contains latitude, longitude and zoom values telling the client to correspondingly render a map with the given location.

Let us visit SUSI Web Chat and try it out.

Query: Where is London

Response: (API Response)

The API Response actions contain text describing the specified location, an anchor with text ‘Here is a map` linked to openstreetmaps and a map with the location coordinates.

Let us look at how this is implemented on server.

For location related queries, the key where is used as an identifier. Once the query is matched with this key, a regular expression `where is (?:(?:a )*)(.*)` is used to parse the location name.

"keys"   : ["where"],
"phrases": [
  {"type":"regex", "expression":"where is (?:(?:a )*)(.*)"},
]

The parsed location name is stored in $1$ and is used to make API calls to fetch information about the place and its location. Console process is used to fetch required data from an API.

"process": [
  {
    "type":"console",
    "expression":"SELECT location[0] AS lon, location[1] AS lat FROM locations WHERE query='$1$';"},
  {
    "type":"console",
    "expression":"SELECT object AS locationInfo FROM location-info WHERE query='$1$';"}
],

Here, we need to make two API calls :

  • For getting information about the place
  • For getting the location coordinates

First let us look at how a Console Process works. In a console process we provide the URL needed to fetch data from, the query parameter needed to be passed to the URL and the path to look for the answer in the API response.

  • url = <url>   – the url to the remote json service which will be used to retrieve information. It must contain a $query$ string.
  • test = <parameter> – the parameter that will replace the $query$ string inside the given url. It is required to test the service.

For getting the information about the place, we used Wikipedia API. We name this console process as location-info and added the required attributes to run it and fetch data from the API.

"location-info": {
  "example":"http://127.0.0.1:4000/susi/console.json?q=%22SELECT%20*%20FROM%20location-info%20WHERE%20query=%27london%27;%22",
  "url":"https://en.wikipedia.org/w/api.php?action=opensearch&limit=1&format=json&search=",
  "test":"london",
  "parser":"json",
  "path":"$.[2]",
  "license":"Copyright by Wikipedia, https://wikimediafoundation.org/wiki/Terms_of_Use/en"
}

The attributes used are :

  • url : The Media WIKI API endpoint
  • test : The Location name which will be appended to the url before making the API call.
  • parser : Specifies the response type for parsing the answer
  • path : Points to the location in the response where the required answer is present

The API endpoint called is of the following format :

https://en.wikipedia.org/w/api.php?action=opensearch&limit=1&format=json&search=LOCATION_NAME

For the query where is london, the API call made returns

[
  "london",
  ["London"],
  ["London  is the capital and most populous city of England and the United Kingdom."],
  ["https://en.wikipedia.org/wiki/London"]
]

The path $.[2] points to the third element of the array i.e “London  is the capital and most populous city of England and the United Kingdom.” which is stored in $locationInfo$.

Similarly to get the location coordinates, another API call is made to loklak API.

"locations": {
  "example":"http://127.0.0.1:4000/susi/console.json?q=%22SELECT%20*%20FROM%20locations%20WHERE%20query=%27rome%27;%22",
  "url":"http://api.loklak.org/api/console.json?q=SELECT%20*%20FROM%20locations%20WHERE%20location='$query$';",
  "test":"rome",
  "parser":"json",
  "path":"$.data",
  "license":"Copyright by GeoNames"
},

The location coordinates are found in $.data.location in the API response. The location coordinates are stored as latitude and longitude in $lat$ and $lon$ respectively.

Finally we have description about the location and its coordinates, so we create the actions to be put in the server response.

The first action is of type answer and the text to be displayed is given by $locationInfo$ where the data from wikipedia API response is stored.

{
  "type":"answer",
  "select":"random",
  "phrases":["$locationInfo$"]
},

The second action is of type anchor. The text to be displayed is `Here is a map` and it must be hyperlinked to openstreetmaps with the obtained $lat$ and $lon$.

{
  "type":"anchor",
  "link":"https://www.openstreetmap.org/#map=13/$lat$/$lon$",
  "text":"Here is a map"
},

The last action is of type map which is populated for latitude and longitude using $lat$ and $lon$ respectively and the zoom value is specified to be 13.

{
  "type":"map",
  "latitude":"$lat$",
  "longitude":"$lon$",
  "zoom":"13"
}

Final output from the server will now contain the three actions with the required data obtained from the respective API calls made. For the sample query `where is london` , the actions will look like :

"actions": [
  {
    "type": "answer",
    "language": "en",
    "expression": "London  is the capital and most populous city of England and the United Kingdom."
  },
  {
    "type": "anchor",
    "link":   "https://www.openstreetmap.org/#map=13/51.51279067225417/-0.09184009399817228",
    "text": "Here is a map",
    "language": "en"
  },
  {
    "type": "map",
    "latitude": "51.51279067225417",
    "longitude": "-0.09184009399817228",
    "zoom": "13",
    "language": "en"
  }
],

This is how the map action responses are generated for location related queries. The complete code can be found at SUSI AI Server Repository.

Resources:

Continue ReadingGenerating Map Action Responses in SUSI AI

Showing Url, Location and Carousel Responses in Viber Bot

SUSI Webchat is capable of sending Url, location and carousel responses. In this blog, we will learn about implementing these same responses in SUSI viber bot. We can send text response instead of carousels but it doesn’t attract users and cause difficulties in understanding. In SUSI webchat for query “news” it sends a URL of an article from BBC news which looks like this:

If we send a query “Where is Singapore” it sends location using map response and it looks like this:

For web search SUSI sends carousels which look like this:


To implement these responses in SUSI Viber bot we will send a post request with specific types to the send_message endpoint of Viber chat API https://chatapi.viber.com/pa/send_message. Url, location and carousel responses will be implemented in following way:

  • Url:
    For receiving URL in Viber bot we will post a request with type:’url’ and media:’url to be sent here’. A request will look like code given below.
var options = {
                method: 'POST',
                url: 'https://chatapi.viber.com/pa/send_message',
                headers: headerBody,
                body: {
                    receiver: req.body.sender.id,
                    min_api_version: 1,
                    sender: {
                        name: 'Name of your public Account here',
                        avatar: 'Avatar url for your public account here'
                    },
                    tracking_data: 'tracking data',
                    type: 'url',
                    Media: 'http://www.website.com/go_here'
                },
                json: true
            };
request(options, function(err, res, body) {
                   if (err) throw new Error(err);
                   console.log(body);
               });
  • Location:
    For receiving location with a map on Viber bot we will post a request with type: ‘location’ and location: { lat: latitude, lon: longitude }. In location response, we have to send latitude and longitude values of location to be shown on the map. A request will look like code given below:
var options = {
                method: 'POST',
                url: 'https://chatapi.viber.com/pa/send_message',
                headers: headerBody,
                body: {
                    receiver: req.body.sender.id,
                    min_api_version: 1,
                    sender: {
                        name: 'Name of your public Account here',
                        avatar: 'Avatar url for your public account here'
                    },
                    tracking_data: 'tracking data',
                    type: 'location',
                    location: {
                           lat: latitude,
                           lon: longitude
                       }
                },
                json: true
            };
request(options, function(err, res, body) {
                   if (err) throw new Error(err);
                   console.log(body);
               });

Location response in Viber bot will look like this:

  • Carousel:
    Carousels are horizontal tiles which can be scrolled to view content on them. To receive carousels on Viber bot we will post a request with type: ‘rich_media’ and

    rich_media: {
                       Type: "rich_media",
                       ButtonsGroupColumns: 6,
                       ButtonsGroupRows: 6,
                       BgColor: "#FFFFFF",
                       Buttons: buttons
           }
    

    In rich media “ButtonsGroupColumns” is the number of columns per carousel content block,  “ButtonsGroupRows” is the number of rows per carousel content block and buttons is an array of buttons which contains content to be shown in carousels. A request will look like code given below.

    var options = {
                    method: 'POST',
                    url: 'https://chatapi.viber.com/pa/send_message',
                    headers: headerBody,
                    body: {
                        receiver: req.body.sender.id,
                        min_api_version: 1,
                        sender: {
                            name: 'Name of your public Account here',
                            avatar: 'Avatar url for your public account here'
                        },
                        tracking_data: 'tracking data',
                        type: 'rich_media',
                           rich_media: {
                               Type: "rich_media",
                               ButtonsGroupColumns: 6,
                               ButtonsGroupRows: 6,
                               BgColor: "#FFFFFF",
                               Buttons:{
                                   Columns: 6,
                                   Rows: 3,
                                   Text: 'text to be shown in carousel',
                                   "ActionType": "open-url",
                                   "ActionBody": 'link to be opened on clicking on carousel block',
                                   "TextSize": "medium",
                                   "TextVAlign": "middle",
                                  "TextHAlign": "middle"
                              }            
                           }
                    },
                    json: true
                };
    request(options, function(err, res, body) {
                       if (err) throw new Error(err);
                       console.log(body);
                   });
    

    Carousel response from Viber bot will look like this:

    We have successfully implemented URL, location and carousel response in Viber bot.

    If you want to learn more about Viber chat API refer to https://developers.viber.com/docs/api/rest-bot-api/

    Resources

    Viber Chat API: https://developers.viber.com/docs/api/rest-bot-api/
    Claudia bot builder platform to build Viber bot: https://claudiajs.com/tutorials/viber-chatbot.html
    Viber bot by using PHP: http://thedebuggers.com/build-viber-chat-bot-6-simple-steps/

Continue ReadingShowing Url, Location and Carousel Responses in Viber Bot

Adding Push Wake Button to SUSI on Raspberry PI

SUSI Linux for Raspberry Pi provides the ability to call SUSI with the help of a Hotword ‘Susi’. Calling via Hotword is a natural way of interaction but it is even handier to invoke SUSI listening mode with the help of a Push button. It enables to call SUSI in a noisy environment where detection of Hotword is not that accurate.

To enable Push Wake button is Susi, we need access to Hardware Pins. Devices like Raspberry PI provides GPIO (General Purpose Input Output) Pins for interacting with Hardware Devices.

In this tutorial, we are adding support for Push Wake Button in Raspberry PI, though similar procedure can be extended to add Wake Button to Orange Pi, Beaglebone Black, and other devices. For adding push wake button, we require:

We now need to do wiring to connect button to Raspberry Pi. The button can be connected to Raspberry Pi following the connection diagram. 

After this, we need to install the Raspberry Pi GPIO Python Library. Install it using:

$ pip3 install RPi.GPIO

Now, we may detect the press of the button in our code. We declare an abstract class for implementing Wake Button. In this way, we can later extend our code to include Wake Buttons for more platforms.

import os
from abc import ABC, abstractclassmethod
from queue import Queue
from threading import Thread

from utils.susi_config import config


class WakeButton(ABC, Thread):
   def __init__(self, detection_callback, callback_queue: Queue):
       super().__init__()
       self.detection_callback = detection_callback
       self.callback_queue = callback_queue
       self.is_active = False

   @abstractclassmethod
   def run(self):
       pass

   def on_detected(self):
       if self.is_active:
           self.callback_queue.put(self.detection_callback)
           os.system('play {0} &'.format(config['detection_bell_sound']))
           self.is_active = False

We defined WakeButton class as a Thread. This is done to ensure that listening to Wake Buttons is done in background thread and it does not disturb the main thread. The callback to be executed on main thread after button press is detected is added to callback queue. Main Thread listens on the callback queue and executes any pending functions from other threads.

We also play an Audio File additionally on detection of a button press to confirm the activation of detection to the user.

Now, we define Raspberry Pi Wake Button class. This class extends from abstract WakeButton declared above.

from queue import Queue

import RPi.GPIO as GPIO
import time
from .wake_button import WakeButton


class RaspberryPiWakeButton(WakeButton):
   def __init__(self, detection_callback, callback_queue: Queue):
       super().__init__(detection_callback, callback_queue)
       GPIO.setmode(GPIO.BCM)
       GPIO.setup(18, GPIO.IN, pull_up_down=GPIO.PUD_UP)

   def run(self):
       while True:
           input_state = GPIO.input(18)
           if not input_state:
               self.on_detected()
               self.is_active = False
               time.sleep(0.2)

This class defines the Wake Button for Raspberry Pi. We continuously poll for the input value of GPIO Pin number 18 on which button is connected. If value is negative, it indicated that button was pressed.

Now, we need to add an option if configuration script to give users a choice to enable or disable wake button. We first need to check, if device is Raspberry Pi, since feature is available on Raspberry PI only. To do this, we try to import RPi.GPIO module. If module loading fails, it indicates that device does not support Raspberry Pi GPIO modes. We set the configuration parameters according to it.

def setup_wake_button():
   try:
       import RPi.GPIO
       print("Device supports RPi.GPIO")
       choice = input("Do you wish to enable hardware wake button? (y/n)")
       if choice == 'y':
           config['WakeButton'] = 'enabled'
           config['Device'] = 'RaspberryPi'
       else:
           config['WakeButton'] = 'disabled'
   except ImportError:
       print("This device does not support RPi.GPIO")
       config['WakeButton'] = 'not available'

Now, we simply use the Raspberry Pi wake button detector in our code.

if config['wake_button'] == 'enabled':
   if config['device'] == 'RaspberryPi':
       from hardware_components import RaspberryPiWakeButton

       wake_button = RaspberryPiWakeButton(callback_queue=callback_queue, detection_callback=start_speech_recognition)
       wake_button.start()

Now, when you need to invoke SUSI Listening Mode, instead of saying ‘SUSI’ as Hotword, you may also press the push button. Ask your query after hearing a small bell and get instant reply from SUSI.

Resources:

Continue ReadingAdding Push Wake Button to SUSI on Raspberry PI

Getting skills by an author in SUSI.AI Skill CMS

The skill description page of any skill in SUSI.AI skill cms displays all the details regarding the skill. It displays image, description, examples and name of author. The skill made by author can impress the users and they might want to know more skills made by that particular author.

We decided to display all the skills by an author. We needed an endpoint from server to get skills by author. This cannot be done on client side as that would result in multiple ajax calls to server for each skill of user. The endpoint used is :

"http://api.susi.ai/cms/getSkillsByAuthor.json?author=" + author

Here the author is the name of the author who published the particular skill. We make an ajax call to the server with the endpoint mentioned above and this is done when the user clicks the author. The ajax call response is as follows(example) :

{
 0:       "/home/susi/susi_skill_data/models/general/Entertainment/en/creator_info.txt",
 1: "/home/susi/susi_skill_data/models/general/Entertainment/en/flip_coin.txt",
 2: "/home/susi/susi_skill_data/models/general/Assistants/en/websearch.txt",
session: {
identity: {
type: "host",
name: "139.5.254.154",
anonymous: true
  }
 }
}

The response contains the list of skills made by author. We parse this response to get the required information. We decided to display a table containing name, category and language of the skill. We used map function on object keys to parse information from every key present in JSON response. Every value corresponding to a key represents a response of following type:

"/home/susi/susi_skill_data/models/general/Category/language/name.txt"

Explanation:

  • Category: There are currently six categories Assistants, Entertainment, Knowledge, Problem Solving, Shopping and Small Talks. Each skill falls under a different category.
  • language: This represents the ISO language code of the language in which skill is written.
  • name: This is the name of the skill.

We want these attributes from the string so we have used the split function:

let parse = data[skill].split('/');

data is JSON response and skill is the key corresponding to which we are parsing information. We store the array returned by split function in variable parse. Now we return the following table in map function:

return (
            <TableRow>
               <TableRowColumn>
                   <div>
                      <Img
                         style={imageStyle}
                         src={[
                              image1,
                              image2
                         ]}
                         unloader={<CircleImage name={name} size="40"/>}
                       />
                       {name}
                    </div>
                </TableRowColumn>
                <TableRowColumn>{parse[6]}</TableRowColumn>
                <TableRowColumn>{isoConv(parse[7])}</TableRowColumn>
             </TableRow>
          )

Here :

    • name: The name of skill converted into Title case by the following code :
let name = parse[8].split('.')[0];
name = name.charAt(0).toUpperCase() + name.slice(1);
  • parse[6]: This represents the category of the skill.
  • isoConv(parse[7]): parse[7] is the ISO code of the language of skill and isoConv is an npm package used to get full form of the language from ISO code.
  • CircleImage: This is a fallback option in case image at the URL is not found. This takes first two words from the name and makes a circular component.

After successful execution of the code, we have the following looking table:

Resources:

Continue ReadingGetting skills by an author in SUSI.AI Skill CMS

Implementation of React Routers in SUSI Web Chat

When we were developing the SUSI Web Chat application we wanted to implement set of static pages with the chat application. In the start we just wanted to navigate  through different static pages and move back to the web chat application. But it takes time to load a new page when user clicks on a link. Our goal was therefore to minimize the loading time by using lazy loading. For that we used react-route .It is standard library for react js.

From the docs:

“React Router keeps your UI synced with the URL. It has a simple API with powerful features like lazy code loading, dynamic route matching, and location transition handling built right in. Make the URL your first thought, not an after-thought.” (https://www.npmjs.com/package/react-router-plus)

We need react-route to be installed in our application first. We can install it using NPM by running this command on project folder.

npm install --save react-router-dom

Next we have to set up our routes. We have two types of headers in our application. One is chat application header, second one is static page header. In static page header we have a navigation to switch between static pages.
First we need to choose the router type because there are two types of routers in react. “” and “” we can use “” in our example because our server can handle dynamic requests. If we are requesting data from static page we should use “” .
We used that in “” and made another new component called “” and used it on “index.js” like this.

import { BrowserRouter as Router } from 'react-router-dom';
Import App from .App;
 ReactDOM.render(
  	<IntlProvider locale={defaultPrefLanguage}>
		<Router> <App /> </Router>
	</IntlProvider>,
  	document.getElementById('root')  );

In “App.js” we can set up routes like this.

        <Switch>
            <Route exact path='/' component={ChatApp}/>
            <Route exact path="/overview" component={Overview} />
            <Route exact path='/blog' component={Blog} />
            <Route exact path="/logout" component={Logout} />
            <Route exact path="/settings" component={Settings} />
            <Route exact path="*" component={NotFound} />
        </Switch>

We use elements to render component when they match with the corresponding path. We use “path” to add router location that we need to match width the component. We use “exact” property to render the component if location exactly matches with the “path”. If we do not use “exact” property it renders when we have child routes after the path like “/blog/1 “ .
We used “” element to group routes.
We can’t use anchor () tags to navigate pages without reloading. We have to use tags instead of that. We have to replace all the places we have used

<a href= ‘URL’>lable name </a>

with this,

<Link to=’URL’>Lable name</Link>   

After doing above changes application will perform faster and it will load all page contents soon after you click the navigation links.

If you would like to join with FOSSASIA and contribute to SUSI Web Chat Application please fork this repository on Github.

Resources

Continue ReadingImplementation of React Routers in SUSI Web Chat

How to Get Secure Webhook for SUSI Bots in Kubernetes Deployment

Webhook is a user-defined callback which gets triggered by any events in code like receiving a message from a user in SUSI bot is an event. Few bots need webhook URI for callback like in SUSI Viber bot we need to define a webhook URI in the code to receive callbacks and make our Viber bot work. In this blog, we will learn how can we get an SSL activated webhook while deploying our bot to Google container using Kubernetes. We will generate SSL certificate using kube lego service that is included in kubernetes and you will define that in yaml files below. We can also generate SSL certificate using third party services like CloudFlare but by using it we will be dependant on CloudFlare so we will use kube lego.

We will start off by registering a domain first on which we will activate SSL certificate and use that domain as a webhook. Go to freenom and register your account. After logging in, register a free domain of any name and check out that order. Next, you have to set IP for DNS of this domain. To do so we will reserve an IP address in our Google cloud project with this command:

gcloud compute addresses create IPname --region us-central1

You will get a created message. To see your IP go to VPC Network -> External IP addresses. Add this IP to DNS zone of your domain and save it for later use in yaml files that we will use for deployment. Now we will deploy our bot using yaml files but before deployment, we will create a cluster

gcloud container clusters create clusterName

After creating cluster add these yaml files to your bot repository and add your IP address that you have saved above to the yamls/nginx/service.yaml file for “loadBalancerIP” parameter. Replace domain name in yamls/application/ingress-notls.yaml and yamls/application/ingress-tls.yaml with your domain name that you have registered already. Add your email ID to yamls/lego/configmap.yaml for “lego.email” parameter. Replace “image” and “env” parameters in yamls/application/deployment.yaml with your docker image and your environment variables that you are using in your code. After changing yaml files we will use this deploy script to create a deployment. Change paths for yaml files in script according to your yaml files path.

In gcloud shell run the following command to deploy an application using given configurations.

bash ./path-to-deploy-script/deploy.sh create all

This will create the deployment as we have defined in the script. The Kubernetes master creates the load balancer and related Compute Engine forwarding rules, target pools, and firewall rules to make the service fully accessible from outside of Google Cloud Platform. Wait for a few minutes for all the containers to be created and the SSL Certificates to be generated and loaded.

You have successfully created a secure webhook. Test it by opening the domain that you have registered at the start.

Resources

Enabling SSL using CloudFlare: https://jonnyjordan.com/blog/how-to-setup-cloudflare-flexible-ssl-for-wordpress/
https://www.youtube.com/watch?v=qFvwEVkl5gk

Continue ReadingHow to Get Secure Webhook for SUSI Bots in Kubernetes Deployment