Authentication in SUSI.AI

Authentication is a part of AAA system which stands for Authentication, Authorization and Accounting System. In this blog, we will see how SUSI.AI authenticates its client. Let’s first see what each term of AAA means

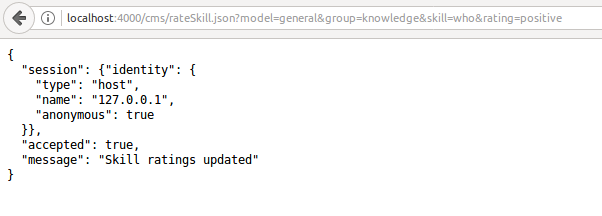
  • Authentication : Authentication means identifying individual user with some unique information. Susi uses email addresses for non-anonymous identity and  anonymous identity users  are identified by their host name.
  • Authorization : It refers to identifying the access rights of the user and granting permissions depending on the user’s authorization level. In Susi we have BaseUserRole as   
    • ANONYMOUS  users who have not logged in
    • USER                  logged in Users
    • PRIVILEGED       users with special rights, like. moderators
    • ADMIN              maximum right, that user is allowed to do everything . Depending on the useroles, permissions are specified.
  • Accounting : Accounting is referred as keeping track of user’s activity. Susi Server uses DAO in which accounting object is stored as JSONTray. Susi also remembers the chat log of a user.

Now that we have basic idea about AAA, let’s check how Susi authenticates its user.

public class ClientIdentity extends Client {
    
    public enum Type {
        email(true), // non-anonymous identity
        host(false); // anonymous identity users which do not authentify; they are identified by their host name
        private final boolean persistent;
      }

}

Susi has ClientIdentity class which extends to base class Client, which has a string sufficient to identify an user. The user are represented with Objects of this class. The client identification string is defined as <typeName: untypedId> pair where <typeName> denotes an authentication method and <untypedId> a name within that authentication domain.

public class Authentication {

    private JsonTray parent;
    private JSONObject json;
    private ClientCredential credential;
...
}

This credential is used as key in DAO.authentication. Parent is used for the storage object , it is null if there is no parent file (no persistency). The DAO uses credential key and implements methods like getAuthentication, getAuthorization,getAccounting taking Non null parameter ClientIdentity and returns the object of respective classes. The method setExpireTime sets an expire time for anonymous users and tokens after end of duration in time seconds passed as parameter the Authentication expires.

public class DAO {
// AAA Schema for server usage
    private static JsonTray authentication;
    private static JsonTray authorization;
    private static JsonTray accounting;
    public  static UserRoles userRoles;
..
}

The JsonTray is class to hold the volume as <String,JsonObject> pairs as a Json file. The UserRequests  class holds all the user activities. The ClientIdentity class extend the base class Client and provides an Identification String for authentication of users.

public abstract class AbstractAPIHandler extends HttpServlet implements APIHandler {
    @Override
    public abstract BaseUserRole getMinimalBaseUserRole();

}

The AbstractAPIHandler checks the permissions of the user using the userroles of and comparing it with the value minimum base role of each servlet. Thus to specify the user permission for a servlet one just need to extend servlet to AbstractAPIHandler and  Override the getMinimalBaseUserRole method.

 public static ClientIdentity getIdentity(HttpServletRequest request, HttpServletResponse response, Query query) {

if(authentication.getIdentity() != null && authentication.checkExpireTime())   // check if login cookie is set
return authentication.getIdentity();
else if(request.getSession().getAttribute("identity") != null){ // check session is set
return (ClientIdentity) request.getSession().getAttribute("identity");
else if (request.getParameter("access_token") != null){ // check if access_token is valid
 return authentication.getIdentity();
else
 return getAnonymousIdentity(query.getClientHost());
}

It also implements method getIdentity()  which checks a request for valid login data, an existing session, a cookie or an access token and returns user identity if some login is active, otherwise the anonymous identity.  

This is how Susi uses credential to authenticate users and use it for accounting and authorization. The endpoints provided by server are used by Android and web clients. Susi accounts service is at  http://accounts.susi.ai. For more details do visit code repository and join gitter chat channel for discussions.

Resources

Continue ReadingAuthentication in SUSI.AI

Adding API endpoint to SUSI.AI for Skill Historization

SUSI Skill CMS is an editor to write and edit skill easily. It follows an API centric approach where the Susi server acts as API server. Using Skill CMS we can browse history of a skill, where we get commit ID, commit message  and name the author who made the changes to that skills. In this blogpost we will see how to fetch complete commit history of a skill in the susi skill repository. A skill is a set of intents. One text file represents one skill, it may contain several intents which all belong together. Susi skills are stored in susi_skill_data repository. We can access any skill based on four tuples parameters model, group, language, skill.  For managing version control in skill data repository, the following dependency is added to build.gradle . JGit is a library which implements the Git functionality in Java.

dependencies {
 compile 'org.eclipse.jgit:org.eclipse.jgit:4.6.1.201703071140-r'
}

To implement our servlet we need to extend our servlet to AbstractAPIHandler. In Susi Server, an abstract class AbstractAPIHandler extending HttpServelets and implementing API handler interface is provided.

public class HistorySkillService extends AbstractAPIHandler implements APIHandler {}

The AbstractAPIHandler checks the permissions of the user using the userroles of and comparing it with the value minimum base role of each servlet. Thus to specify the user permission for a servlet we need Override the getMinimalBaseUserRole method.

 @Override
    public BaseUserRole getMinimalBaseUserRole() {
        return BaseUserRole.ANONYMOUS;
    }

UserRoles can be Admin, Privilege, User, Anonymous. In our case it is Anonymous. A User need not to log in to access this endpoint.

  @Override
    public String getAPIPath() {
        return "/cms/getSkillHistory.json";
    }

This methods sets the api endpoint path. One need to send requests at http://api.susi.ai/cms/getSkillHistory.json to get the modification history of skill. Next we will implement The ServiceImpl method where we will be processing the user request and giving back the service response.

@Override
    public ServiceResponse serviceImpl(Query call, HttpServletResponse response, Authorization rights, final JsonObjectWithDefault permissions) {

        String model_name = call.get("model", "general");
        File model = new File(DAO.model_watch_dir, model_name);
        String group_name = call.get("group", "knowledge");
        File group = new File(model, group_name);
        String language_name = call.get("language", "en");
        File language = new File(group, language_name);
        String skill_name = call.get("skill", "wikipedia");
        File skill = new File(language, skill_name + ".txt");
        JSONArray commitsArray;
        commitsArray = new JSONArray();
        String path = skill.getPath().replace(DAO.model_watch_dir.toString(), "models");
        //Add to git
        FileRepositoryBuilder builder = new FileRepositoryBuilder();
        Repository repository = null;
        try {
            repository = builder.setGitDir((DAO.susi_skill_repo))
                    .readEnvironment() // scan environment GIT_* variables
                    .findGitDir() // scan up the file system tree
                    .build();
            try (Git git = new Git(repository)) {
                Iterable<RevCommit> logs;
                logs = git.log().addPath(path).call();
                int i = 0;
                for (RevCommit rev : logs) {
                    commit = new JSONObject();
                    commit.put("commitRev", rev);
                    commit.put("commitName", rev.getName());
                    commit.put("commitID", rev.getId().getName());
                    commit.put("commit_message", rev.getShortMessage());
                    commit.put("author",rev.getAuthorIdent().getName());
                    commitsArray.put(i, commit);
                    i++;
                } success=true;
            } catch (GitAPIException e) {
                e.printStackTrace();
                success=false;
           } if(commitsArray.length()==0){
            success=false;
        }
        JSONObject result = new JSONObject();
        result.put("commits",commitsArray);
        result.put("success",success);
        return new ServiceResponse(result);
    }

To access any skill we need parameters model, group, language. We get this through call.get method where first parameter is the key for which we want to get the value and second parameter is the default value. Based on received model, group and language browse files in that folder we build the susi_skill_data repository path read the git variables and scan up the file system tree using FileRepositoryBuilder build() method. Next we fetch all the logs of the skill file and store them in json commits array and finally pass as a server response with success messages. In case of exceptions, pass service with success flags as false.

We have successfully implemented the servlet. Check the working of endpoint by sending request like http://api.susi.ai/cms/getSkillHistory.json?model=general&group=knowledge&language=en&skill=bitcoin and checking the response.

Susi skill cms uses this endpoint to fetch the skill history, try it out at http://skills.susi.ai/browseHistory

Resources
Continue ReadingAdding API endpoint to SUSI.AI for Skill Historization

Continuous Integration in Yaydoc using GitHub webhook API

In Yaydoc,  Travis is used for pushing the documentation for each and every commit. But this leads us to rely on a third party to push the documentation and also in long run it won’t allow us to implement new features, so we decided to do the continuous documentation pushing on our own. In order to build the documentation for each and every commit we have to know when the user is pushing code. This can be achieved by using GitHub webhook API. Basically we have to register our api to specific GitHub repository, and then GitHub will send a POST request to our API on each and every commit.

“auth/ci” handler is used to get access of the user. Here we request user to give access to Yaydoc such as accessing the public repositories , read organization details and write permission to write webhook to the repository and also I maintaining state by keeping the ci session as true so that I can know that this callback is for gh-pages deploy or ci deployOn

On callback I’m keeping the necessary informations like username, access_token, id and email in session. Then based on ci session state, I’m redirecting to the appropriate handler. In this case I’m redirecting to “ci/register”.After redirecting to the “ci/register”, I’m getting all the public repositories using GitHub API and then I’m asking the users to choose the repository on which users want to integrate Yaydoc CI

After redirecting to the “ci/register”, I’m getting all the public repositories using GitHub API and then I’m asking the users to choose the repository on which users want to integrate Yaydoc CI

router.post('/register', function (req, res, next) {
      request({
        url: `https://api.github.com/repos/${req.session.username}/${repositoryName}/hooks?access_token=${req.session.token}`,
        method: 'POST',
        json: {
          name: "web",
          active: true,
          events: [
            "push"
          ],
          config: {
            url: process.env.HOSTNAME + '/ci/webhook',
            content_type: "json"
          }
        }
      }, function(error, response, body) {
        repositoryModel.newRepository(req.body.repository,
          req.session.username,
          req.session.githubId,
          crypter.encrypt(req.session.token),
          req.session.email)
          .then(function(result) {
            res.render("index", {
              showMessage: true,
              messages: `Thanks for registering with Yaydoc.Hereafter Documentation will be pushed to the GitHub pages on each commit.`
            })
          })
      })
    }
  })

After user choose the repository, they will send a POST request to “ci/register” and then I’m registering the webhook to the repository and I’m saving the repository, user details in the database, so that it can be used when GitHub send request to push the documentation to the GitHub Pages.

router.post('/webhook', function(req, res, next) {
  var event = req.get('X-GitHub-Event')
  if (event == 'Push') {
      repositoryModel.findOneRepository(
        {
          githubId: req.body.repository.owner.id,
          name: req.body.repository.name
        }
      ).
      then(function(result) {
        var data = {
          email: result.email,
          gitUrl: req.body.repository.clone_url,
          docTheme: "",
        }
        generator.executeScript({}, data, function(err, generatedData) {
            deploy.deployPages({}, {
              email: result.email,
              gitURL: req.body.repository.clone_url,
              username: result.username,
              uniqueId: generatedData.uniqueId,
              encryptedToken: result.accessToken
            })
        })
      })
      res.json({
        status: true
      })
   }
})

After you register on webhook, GitHub will send a request to the url which we registered on the repository. In our case “https:/yaydoc.herokuapp.com/ci/auth” is the url. The type of the event can be known by reading ‘X-GitHub-Event’ header. Right now I’m registering only for the push event. So we’ll only be getting the push event. GitHub also gives us the repository details in the request body.

When the user makes a commit to the repository, GitHub will send a POST request to the Yaydoc’s server. Then, we’ll get the repository name and Github’s user ID from the request body. By use of this, I’ll retrieve the access token from the database which we already registered while the user registers the repository to the CI. The documentation will be generated using generate script and pushed to GitHub pages using deploy script.

Now Yaydoc generates documentation on every push when the user commits to the repository and also it will enable us to integrate new features in our own custom environment. We also plan to build a full featured CI platform.

Resources:

Continue ReadingContinuous Integration in Yaydoc using GitHub webhook API

Configurable Services in Loklak Search

Loklak search being an angular application has a concept of wiring down the code in the special form of classes called Services. These serviced have important characteristics, which make them a powerful feature of angular.

  • Services are shared common object wired together by Dependency Injection.
  • Services are lazily instantiated at the runtime.


The DI and the instantiation part of a service are handled by angular itself so we don’t have to bother about it. The parts of the services we are always concerned about is the logical part of the service. As the services are the sharable code at the time of writing a service we have to be 100% sure that this is the part of the code which we want to share with our components, else this can lead to the bad implementation of architecture which makes application harder to debug.

Now, the next question which arises is how services are different from something like redux state? Well, the difference lies in the word itself, services don’t have a persistent state of themselves. They are just a set of methods to separate a common piece of code from all the components into one class. These services have functions which take an input, processes them and spit an output.

Services in Loklak Search

So in loklak search, the main services are the ones which on request, fetch data from the backend API and return the data to the requester. All the services in loklak search have a fixed well-defined task, i.e. to use the API and get the data. This is how all the services must be designed, with a specific set of goals. A service should never try to do what is not necessary, or in other words, each service should have one and only one aim and it should do it nicely.

In loklak search, the services are classified by the API endpoints they hit to retrieve data. These services receive the query to be searched from the requested and they send the AJAX request to correct API endpoint and return the fetched data. This is the common structure of all the Loklak services, they all have a fetchQuery() method which takes a string argument query and requests the API for that query and after completion, it either returns the correct response from the API or throws an error if something goes wrong.

@Injectable()
class SearchService() {
public fetchQuery( query: string ) {  }
private extractData( response ) {  }
private handleError( error ) {  }
}

Problems faced in this structure

This simple structure was good enough for the application in the basic levels, but as the number of features in the application increase, our simple service becomes less and less flexible as the fetchQuery() method takes only a query string as an argument and requests the API for that query, along with some query parameters. These query parameters are the additional information given to the server to process and respond to our request in a particular way, like a number of results to be fetched, aggregations to be carried out, and much more. In the current implementation, the setting up these parameters were solely done by the service itself, so these parameters were fixed inside the service and there was no easy way to modify them. This reduced the flexibility of the service as all the requesters were bound to a fixed set of parameters, thus lacking the usability of the service in other places of the application.


Solution – Service Configs

The solution to this problem of service customizability is the Service Config classes. The objects of these classes contain the information about the query parameters which various requesters can configure according to their specific needs, and our services will simply configure the query params accordingly. This idea of having a shared structure for the service configurations plays very nicely with our scenario where we want extra control over the parameters which our service is configuring.

@Injectable()
class SearchService() {
public fetchQuery( query: string, config: SearchServiceConfig ) {  }
private extractData( response ) {  }
private handleError( error ) {  }
}

This small modification to our service structure enables us to have the amount of control which we required. The config class is a fairly simple one.

export class SearchServiceConfig {
private count: number;
private source: Source;
private fields: Set<AggregationFields>;
private aggregationLimit: number;
private maximumRecords: number;
private startRecord: number;
private timezoneOffset: string;
private filters: Set<Filter>;

// Other methods to get/set these attributes
}

Now any requester will instantiate a new object of this class and will set the attributes according to his needs then this object is passed to the fetchQuery() method of our function. Which designs the request to be sent accordingly.

Conclusion

In conclusion, i would like to mention the how these attributes are chosen to be a part of the Config and not as a query string. Our API endpoints accept the query string along with some attributes which filter out the results or run aggregations in various fields. So we should have all these attributes in our config as these all properties may vary according to the requesters need. Therefore, this idea of configurable services makes us not only better reuse the existing models and services in multiple situations but also make us write better predictable code.

Resources and Links

Continue ReadingConfigurable Services in Loklak Search

Using CoreLocation in SUSI iOS

The SUSI Server responds with intelligent answers to the user’s queries. To make these answers better, the server makes use of the user’s location which is sent as a parameter to the query request each time. To implement this feature in the SUSI iOS client, we use the CoreLocation framework provided by Apple which helps us to get the user’s location coordinates and add them as a parameter to each request made.

In order to start with using the CoreLocation framework, we first import it inside the view controller.

import CoreLocation

Now, we create a variable of type CLLocationManager which will help us to use the actual functionality.

// Location Manager
var locationManager = CLLocationManager()

The location manager has some delegate methods which give an option to get the maximum accuracy for a user’s location.  To set that, we need the controller to conform to the CLLocationManagerDelegate, so we create an extension of the view controller conforming to this.

extension MainViewController: CLLocationManagerDelegate {

   // use functionality

}

Next, we set the manager delegate.

locationManager.delegate = self

And create a method to ask for using the user’s location and set the delegate properties.

func configureLocationManager() {
       locationManager.delegate = self
       if CLLocationManager.authorizationStatus() == .notDetermined || CLLocationManager.authorizationStatus() == .denied {
           self.locationManager.requestWhenInUseAuthorization()
       }

       locationManager.distanceFilter = kCLDistanceFilterNone
       locationManager.desiredAccuracy = kCLLocationAccuracyBest
}

Here, we ask for the user location if it was previously denied or is not yet determined and following that, we set the `distanceFilter` as kCLDistanceFilterNone  and `desiredAccuray` as kCLLocationAccuracyBest.. Finally, we are left with starting to update the location which we do by:

locationManager.startUpdatingLocation()

We call this method inside viewDidLoad to start updation of the location when the view first loads. The complete extension looks like below:

extension MainViewController: CLLocationManagerDelegate {

   // Configures Location Manager
   func configureLocationManager() {
       locationManager.delegate = self
       if CLLocationManager.authorizationStatus() == .notDetermined || CLLocationManager.authorizationStatus() == .denied {
           self.locationManager.requestWhenInUseAuthorization()
       }

       locationManager.distanceFilter = kCLDistanceFilterNone
       locationManager.desiredAccuracy = kCLLocationAccuracyBest
       locationManager.startUpdatingLocation()
   }

}

Now, it’s very easy to use the location manager and get the coordinates and add it to the params for each request.

if let location = locationManager.location {
   params[Client.ChatKeys.Latitude] = location.coordinate.latitude as AnyObject
   params[Client.ChatKeys.Longitude] = location.coordinate.longitude as AnyObject
}

Now the params which is a dictionary object is added to each request made so that the user get’s the most accurate results for each query he makes.

References:

Continue ReadingUsing CoreLocation in SUSI iOS

Dynamic Segments in Open Event Frontend

In the Open Event Frontend project we have a page where we show all types of events. We have classified events into six classes like live, draft, past etc. Now each event type should have it’s own page describing it. What should we do now? Make six different routes corresponding to each class of event? Isn’t that too cumbersome. Is there any other method to do it?

Dynamic segment is the answer to the above question. Dynamic segment is that segment of the path for a route that will change based on content of  the page. Dynamic segments are frequently used in Open Event Frontend.

One such use is in /admin/events. Here we have button for different categories of events. We do not make separate routes for each of them, instead we use dynamic segments. We’ll have a single route and we will change the data in the route corresponding to the tab chosen.

Lets now add dynamic segments to /admin/events. First of all we’ll add the following code snippet in router.js.

this.route(‘events’, function() {
     this.route(‘list’, { path: ‘/:events_status’ });
     this.route(‘import’);
   });

Here : signifies the presence of dynamic segment and it is followed by an identifier. It’s the identifier by which the route matches the corresponding model to show.

Now as our route would show data depending upon the tab selected, we must change the title of page depending upon the same. For this we add the following code snippet in admin/events/list.js. Here we set the title of the page using titleToken() function and access the dynamic portion of url using params.events_status

export default Route.extend({
 titleToken() {
   switch (this.get(‘params.events_status’)) {
     case ‘live’:
       return this.l10n.t(‘Live’);
     case ‘draft’:
       return this.l10n.t(‘Draft’);
     case ‘past’:
       return this.l10n.t(‘Past’);
     case ‘deleted’:
       return this.l10n.t(‘Deleted’);
   }
 },
 model(params) {
   this.set(‘params’, params);
   return [{
   // Events data
   }];
 }
});

We’ll now link the tabs template/admin/events to the corresponding models using Link-to the helper.Here we have linked ‘Live’, ‘Draft’, ‘Past’, ‘Deleted’ buttons to dynamic segments. Let’s understand how it works.Let’s take example of Live button.Live button is linked to admin/events/list and this list is replaced by ‘live’. So our final route becomes admin/events/live.

<div class=“ui grid stackable”>
 <div class=“row”>
   <div class=“sixteen wide column”>
     {{#tabbed-navigation isNonPointing=true}}
       {{#link-to ‘admin.events.index’ class=’item’}}
         {{t ‘All Events’}}
       {{/link-to}}
       {{#link-to ‘admin.events.list’ ‘live’ class=’item’}}
         {{t ‘All Live’}}
       {{/link-to}}
       {{#link-to ‘admin.events.list’ ‘draft’ class=’item’}}
         {{t ‘All Draft’}}
       {{/link-to}}
       {{#link-to ‘admin.events.list’ ‘past’ class=’item’}}
         {{t ‘All Past’}}
       {{/link-to}}
       {{#link-to ‘admin.events.list’ ‘deleted’ class=’item’}}
         {{t ‘All Deleted’}}
       {{/link-to}}
       {{#link-to ‘admin.events.import’ class=’item’}}
         {{t ‘Import’}}
       {{/link-to}}
     {{/tabbed-navigation}}
   </div>
 </div>
 <div class=“row”>
   {{outlet}}
 </div>
</div>

Additional Resources

Continue ReadingDynamic Segments in Open Event Frontend

Query Model Structure of Loklak Search

Need to restructure

The earlier versions of loklak search applications had the issues of breaking changes whenever any new feature was added in the application. The main reason for these unintended bugs was identified to be the existing query structure. The query structure which was used in the earlier versions of the application only comprised of the single entity a string named as queryString.

export interface Query {
 queryString: string;
}

This simple query string property was good enough for simple string based searches which were the goals of the application in the initial phases, but as the application progressed we realized this simple string based implementation is not going to be feasible for the long term. As there are only a limited things we can do with strings. It becomes extremely difficult to set and reset the portions of the string according to the requirements. This was the main vision for the alternate architecture design scheme was to the ease of enabling and disabling the features on the fly.

Application Structure

Therefore, to overcome the difficulties faced with the simple string based structure we introduced the concept of an attribute based structure for queries. The attribute based structure is simpler to understand and thus easier to maintain the state of the query in the application.

export interface Query {
 displayString: string;
 queryString: string;
 routerString: string;
 filter: FilterList;
 location: string;
 timeBound: TimeBound;
 from: boolean;
}

The reason this is called an attribute based structure is that here each property of an interface is independent of one another. Thus each one can be thought of as a separate little key placed on the query, but each of these keys are different and are mutually exclusive. What this means is, if I want to write an attribute query, then it does not matter to me which other attributes are already present on the query. The query will eventually be processed and sent to the server and the corresponding valid results if exists will be shown to the user.

Now the question arises how do we modify the values of these attributes? Now before answering this I would like to mention that this interface is actually instantiated in the the Redux state, so now our question automatically gets answered, the modification to redux state corresponding to the query structure will be done by specific reducers meant for modification of each attribute. These reducers are again triggered by corresponding actions.

export const ActionTypes = {
 VALUE_CHANGE: '[Query] Value Change',
 FILTER_CHANGE: '[Query] Filter Change',
 LOCATION_CHANGE: '[Query] Location Change',
 TIME_BOUND_CHANGE: '[Query] Time Bound Change',
};

This ActionTypes object contains the the corresponding actions which are used to trigger the reducers. These actions can be dispatched in response to any user interaction by any of the components, thus modifying a particular state attribute via the reducer.

Converting from object to string

Now for our API endpoint to understand our query we need to send the proper string in API accepted format. For this there is need to convert dynamically from query state to query string, for this we need a simple function which take in query state as an input return the query string as output.

export function parseQueryToQueryString(query: Query): string {
 let qs: string;
 qs = query.displayString;
 if (query.location) {
qs += ` near:${query.location);

 if (query.timeBound.since) {
   qs += ` since:${parseDateToApiAcceptedFormat(query.timeBound.since)}`;

 if (query.timeBound.until) {
   qs += ` until:${parseDateToApiAcceptedFormat(query.timeBound.until)}`;

 return qs;
}

In this function we are just checking and updating the query string according to the various attributes set in the structure, and then returning the query string. So if eventually we have to convert to the string, then what is the advantage of this approach? The main advantage of this approach is that we know the query structure beforehand and we use the structure to build the string not just randomly selecting and removing pieces of information from a string. Whenever we update any of the attribute of the query state, the query is generated fresh, and not modifying the old string.

Conclusion

This approach makes the application to be able to modify the search queries sent to server in a streamlined and logical way, just by using simple data structure. This query model has provided us with a lot of advantages which are visible in the aspect of application stability and performance. This model has cuts out dirty regex matching, of typed queries and thus again help us to make simpler queries.

Resources and Links

Continue ReadingQuery Model Structure of Loklak Search

Adding tip to drop downs in Susper using CSS in Angular

To create simple drop downs using twitter bootstrap, it is fairly easy for developers. The issue faced in Susper, however, was to add a tip on the top over such dropdowns similar to Google:

This is how it looks finally, in Susper, with a tip over the standard rectangular drop-down:

This is how it was done:

  1. First, make sure you have designed your drop-down according to your requirements, added the desired height, width and padding. These were the specifications used in Susper’s drop-down.

.dropdown-menu{
height: 500px;
width: 327px;
padding: 28px;
}
  1. Next add the following code to your drop-down class css:

.dropdown-menu:before {
position: absolute;
top: -7px;
right: 19px;
display: inlineblock;
border-right: 7px solid transparent;
border-bottom: 7px solid #ccc;
border-left: 7px solid transparent;
border-bottom-color: rgba(0, 0, 0, 0.2);
content: ;
}
.dropdown-menu:after {
position: absolute;
top: -5px;
right: 20px;
display: inlineblock;
border-right: 6px solid transparent;
border-bottom: 6px solid #ffffff;
border-left: 6px solid transparent;
content: ;
}

In css, :before inserts the style before any other html, whereas :after inserts the style after the html is loaded. Some of the parameters are explained here:

  • Top: can be used to change the position of the menu tip vertically, according to the position of your button and menu.
  • Right: can be used to change the position of the menu tip horizontally, so that it can be positioned used below the menu icon.
  • Position : absolute is used to make sure all our values are absolute and not relative to the higher div hierarchically
  • Border: All border attributes are used to specify border thickness, color and transparency before and after, which collectively gives the effect of a tip for the drop down.
  • Content : This value is set to a blank string ‘’, because otherwise none of our changes will be visible, since the divs will have no space allocated to them.

Resources

Continue ReadingAdding tip to drop downs in Susper using CSS in Angular

Using SUSI AI Server to Store User Feedback for a Skill

User feedback is valuable information that plays an important  role in improving the quality of service. In SUSI AI server we are planning to make a feedback mechanism to see if the user liked the answer or not. The result of that user input (which can be given using a vote button) will be then learned to enhance the future use of the rule. So as a first step for implementation of  skill rating system with guided learning, we need to store the user rating of a skill . In this blogpost we will learn how to make an endpoint for getting skill rating from user. This API endpoint will be used  by its web and mobile clients.
Before the implementation of API  let’s look how data is stored in SUSI AI Susi_server uses DAO in which skill rating is stored as JSONTray. 

 public JsonTray(File file_persistent, File file_volatile, int cachesize) throws IOException {
        this.per = new JsonFile(file_persistent);
        this.vol = new CacheMap<String, JSONObject>(cachesize);
        this.file_volatile = file_volatile;
        if (file_volatile != null && file_volatile.exists()) try {
            JSONObject j = JsonFile.readJson(file_volatile);
            for (String key: j.keySet()) this.vol.put(key, j.getJSONObject(key));
        } catch (IOException e) {
            e.printStackTrace();
        }
    }

JsonTray takes three parameters the persistent file, volatile file and cache size to store them as cache map in String and JsonObject pairs. The HttpServlet class which provides methods, such as doGet and doPost, for handling HTTP-specific services.In Susi Server an abstract class AbstractAPIHandler extending HttpServelets and implementing API handler interface is provided. Next we will inherit our RateSkillService class from AbstractAPIHandler and implement APIhandler interface.

public class RateSkillService extends AbstractAPIHandler implements APIHandler {
    private static final long serialVersionUID =7947060716231250102L;
    @Override
    public BaseUserRole getMinimalBaseUserRole() {
        return BaseUserRole.ANONYMOUS;
    }

    @Override
    public JSONObject getDefaultPermissions(BaseUserRole baseUserRole) {
        return null;
    }

    @Override
    public String getAPIPath() {
        return "/cms/rateSkill.json";
    }

}

The getMinimalBaseRole method tells the minimum Userrole required to access this servlet it can also be ADMIN, USER. In our case it is Anonymous. A User need not to log in to access this endpoint. The getAPIPath() methods sets the API endpoint path, it gets appended to base path which is 127.0.0.1:4000/cms/rateSkill.json for local host .

Next we will implement serviceImpl method

  @Override
    public ServiceResponse serviceImpl(Query call, HttpServletResponse response, Authorization rights, final JsonObjectWithDefault permissions) {

        String model_name = call.get("model", "general");
        File model = new File(DAO.model_watch_dir, model_name);
        String group_name = call.get("group", "knowledge");
        File group = new File(model, group_name);
        String language_name = call.get("language", "en");
        File language = new File(group, language_name);
        String skill_name = call.get("skill", null);
        File skill = new File(language, skill_name + ".txt");
        String skill_rate = call.get("rating", null);

        JSONObject result = new JSONObject();
        result.put("accepted", false);
        if (!skill.exists()) {
            result.put("message", "skill does not exist");
            return new ServiceResponse(result);

        }
        JsonTray skillRating = DAO.skillRating;
        JSONObject modelName = new JSONObject();
        JSONObject groupName = new JSONObject();
        JSONObject languageName = new JSONObject();
        if (skillRating.has(model_name)) {
            modelName = skillRating.getJSONObject(model_name);
            if (modelName.has(group_name)) {
                groupName = modelName.getJSONObject(group_name);
                if (groupName.has(language_name)) {
                    languageName = groupName.getJSONObject(language_name);
                    if (languageName.has(skill_name)) {
                        JSONObject skillName = languageName.getJSONObject(skill_name);
                        skillName.put(skill_rate, skillName.getInt(skill_rate) + 1 + "");
                        languageName.put(skill_name, skillName);
                        groupName.put(language_name, languageName);
                        modelName.put(group_name, groupName);
                        skillRating.put(model_name, modelName, true);
                        result.put("accepted", true);
                        result.put("message", "Skill ratings updated");
                        return new ServiceResponse(result);
                    }
                }
            }
        }
        languageName.put(skill_name, createRatingObject(skill_rate));
        groupName.put(language_name, languageName);
        modelName.put(group_name, groupName);
        skillRating.put(model_name, modelName, true);
        result.put("accepted", true);
        result.put("message", "Skill ratings added");
        return new ServiceResponse(result);

    }

    /* Utility function*/
    public JSONObject createRatingObject(String skill_rate) {
        JSONObject skillName = new JSONObject();
        skillName.put("positive", "0");
        skillName.put("negative", "0");
        skillName.put(skill_rate, skillName.getInt(skill_rate) + 1 + "");
        return skillName;
    }


One can access any skill based on four tuples parameters model, group, language, skill. Before rating a skill we must ensure whether it exists or not. We can get the required parameters through call.get() method where first parameter is the key for which we want to get the value and second parameter is the default value. If skill.exists() method return false we generate error message stating “No such skill exists”. Otherwise check if the skill exist in our skillRating.json file if so, update the current ratings otherwise create a new json object and add it to rating file based on model, group and language. After successful implementation go ahead and test your endpoint on http://localhost:4000/cms/rateSkill.json?model=general&group=knowledge&skill=who&rating=positive

You can also check for the updated json file in  susi_server/data/skill_rating/skillRating.json 

{"general": {
 "assistants": {"en": {
   "language_translation": {
     "negative": "1",
     "positive": "0"
  }}},
 "smalltalk": {"en": {
   "aboutsusi": {
   "negative": "0",
   "positive": "1"
 }}},
 "knowledge": {"en": {
   "who": {
     "negative": "2",
     "positive": "4"
   }}}
}}

And if the skill is not present if will generate error message

We have successfully implemented the API endpoint for storing the user skill’s feedback. For more information take a look at Susi server and join gitter chat channel for discussions.

Resources 

Continue ReadingUsing SUSI AI Server to Store User Feedback for a Skill

Auto deployment of SUSI Skill CMS on gh pages

Susi Skill CMS is a web application framework to edit susi skills. It is currently in development stage, hosted on http://skills.susi.ai. It is built using ReactJS . In this blogpost we will see how to automatically deploy the repository on gh pages.
Setting up the project
Fork susi_skill_cms repository and clone it to your desktop, make sure you have node and npm versions greater than 6 and 3 respectively. Next go to cloned folder and install all the dependencies by running :

:$ npm install

Next run on http://localhost:3000 by running the command

:$ npm run start

To auto deploy changes on gh-pages branch, we need to setup Travis for the project. Register yourself on https://travis-ci.org/ and turn on the Travis for this repository. Next add .travis.yml in the root directory of the source folder.  

sudo: required
dist: trusty
language: node_js
node_js:
  - 6

before_install:
  - export CHROME_BIN=chromium-browser
  - export DISPLAY=:99.0
  - sh -e /etc/init.d/xvfb start

before_script:
  - npm run build

script:
  - npm run test

after_success:
  - bash ./deploy.sh

cache:
  directories: node_modules

# safelist
branches:
  only:
  - master 

Source: https://github.com/fossasia/susi_skill_cms/blob/master/.travis.yml

The travis configuration files will ensure that the project is building for every changes made, using npm run test command, in our case it will only consider changes made on master branch , if you want to watch other branches to add the respective branch name in travis configurations. After checking for build passing we need to automatically push the changes made for which we will use a bash script.

#!/bin/bash

SOURCE_BRANCH="master"
TARGET_BRANCH="gh-pages"

# Pull requests and commits to other branches shouldn't try to deploy.
if [ "$TRAVIS_PULL_REQUEST" != "false" -o "$TRAVIS_BRANCH" != "$SOURCE_BRANCH" ]; then
    echo "Skipping deploy; The request or commit is not on master"
    exit 0
fi

# Save some useful information
REPO=`git config remote.origin.url`
SSH_REPO=${REPO/https:\/\/github.com\//git@github.com:}
SHA=`git rev-parse --verify HEAD`

ENCRYPTED_KEY_VAR="encrypted_${ENCRYPTION_LABEL}_key"
ENCRYPTED_IV_VAR="encrypted_${ENCRYPTION_LABEL}_iv"
ENCRYPTED_KEY=${!ENCRYPTED_KEY_VAR}
ENCRYPTED_IV=${!ENCRYPTED_IV_VAR}
openssl aes-256-cbc -K $encrypted_2662bc12c918_key -iv $encrypted_2662bc12c918_iv -in deploy_key.enc -out ../deploy_key -d
chmod 600 ../deploy_key
eval `ssh-agent -s`
ssh-add ../deploy_key

# Cloning the repository to repo/ directory,
# Creating gh-pages branch if it doesn't exists else moving to that branch
git clone $REPO repo
cd repo
git checkout $TARGET_BRANCH || git checkout --orphan $TARGET_BRANCH
cd ..

# Setting up the username and email.
git config user.name "Travis CI"
git config user.email "$COMMIT_AUTHOR_EMAIL"

# Cleaning up the old repo's gh-pages branch except CNAME file and 404.html
find repo/* ! -name "CNAME" ! -name "404.html" -maxdepth 1  -exec rm -rf {} \; 2> /dev/null
cd repo

git add --all
git commit -m "Travis CI Clean Deploy : ${SHA}"

git checkout $SOURCE_BRANCH

# Actual building and setup of current push or PR.
npm install
npm run build
mv build ../build/

git checkout $TARGET_BRANCH
rm -rf node_modules/
mv ../build/* .
cp index.html 404.html

# Staging the new build for commit; and then committing the latest build
git add -A
git commit --amend --no-edit --allow-empty

# Deploying only if the build has changed
if [ -z `git diff --name-only HEAD HEAD~1` ]; then

  echo "No Changes in the Build; exiting"
  exit 0

else
  # There are changes in the Build; push the changes to gh-pages
  echo "There are changes in the Build; pushing the changes to gh-pages"

  # Actual push to gh-pages branch via Travis
  git push --force $SSH_REPO $TARGET_BRANCH
fi

Source : Bash script for automatic deployment

This bash script will enable travis ci user to push changes to gh pages, for this we need to store the credentials of the repository in encrypted form. To get the public/ private rsa keys use the following command

ssh-keygen -t rsa -b 4096 -C "your_email@example.com"

It will generate keys in .ssh/id_rsa folder in your home repository.

Make sure you do not enter any passphrase while generating credentials otherwise travis will get stuck at time of decrypting the keys. Copy the public key and deploy the key to repository by visiting  https://github.com/<your name>/<your repo>/settings/keys


Next install travis for encryption of keys.

sudo apt install ruby ruby-dev
sudo gem install travis

Encrypt your private deploy_key and add it to root of your repository using command

travis encrypt-file deploy_key

After successful encryption, you will see a message

Please add the following to your build script (before_install stage in your .travis.yml, for instance):

openssl aes-256-cbc -K $encrypted_2662bc12c918_key -iv $encrypted_2662bc12c918_iv -in deploy_key.enc -out ../deploy_key -d

Add the above generated script in travis and push the changes on your master branch. Do not push the deploy_key only the encryption file deploy_key.enc
Finally, add the deploy link of gh pages in package.json of your using key “homepage”.

 "homepage": "http://skills.susi.ai/"

And in scripts of package.json add

"deploy": "gh-pages -d build",

Commit and push your changes and from now onward all your changes will be automatically pushed to gh pages branch. For contribution visit Susi_Skill_CMS.

Resources

Continue ReadingAuto deployment of SUSI Skill CMS on gh pages