Link one repository’s subdirectory to another

Loklak, a distributed social media message search server, generates its documentation automatically using Continuous Integration. It generates the documentation in the gh-pages branch of its repository. From there, the documentation is linked and updated in the gh-pages branch of dev.loklak.org repository.

The method with which Loklak links the documentations from their respective subprojects to the dev.loklak.org repository is by using `subtrees`. Stating the git documentation,

“Subtrees allow subprojects to be included within a subdirectory of the main project, optionally including the subproject’s entire history. A subtree is just a subdirectory that can be committed to, branched, and merged along with your project in any way you want.”

What this means is that with the help of subtrees, we can link any project to our project keeping it locally in a subdirectory of our main repository. This is done in such a way that the local content of that project can easily be synced with the original project through a simple git command.

Representation:

A representation of how Loklak currently uses subtrees to link the repositories is as follows.

git clone --quiet --branch=gh-pages git@github.com/dev.loklak.org.git central-docs
cd central docs

git subtree pull --prefix=server https://github.com/loklak/loklak_server.git gh-pages --squash -m "Update server subtree"

git subtree split:

The problem with the way documentation is generated currently is that the method is very bloated. The markup of the documentation is first compiled in each sub-projects’s repository and then aggregated in the dev.loklak.org repository. What we intend to do now is to keep all the markup documentation in the docs folder of the respective repositories and then create subtrees from these folders to a master repository. From the master repository, we then intend to compile the markups to generate the HTML pages.

Intended Implementation:

To implement this we will be making use of subtree split command.

    1. Run the following command in the subprojects repository. It creates a subtree from the docs directory and moves it to a new branch documentation.
git subtree --prefix=docs/ split -b documentation
    1. Clone the master repository. (This is the repository we intend to link the subdirectory with.)
git clone --quiet --branch=master git@github.com:loklak/dev.loklak.org.git loklak_docs
cd loklak_docs
    1. Retrieve the latest content from the subproject.
      • During the first run.
git subtree add --prefix=raw/server ../loklak_server documentation --squash -m "Update server subtree"
      • During following runs.
git subtree pull --prefix=raw/server ../loklak_server documentation --squash -m "Update server subtree"
    1. Push changes.
git push -fq origin master > /dev/null 2>&1
Continue ReadingLink one repository’s subdirectory to another

Debugging Using Stetho in Open Event Android

The Open Event Android project helps event organizers to generator Apps (apk format) for their events/conferences by providing api end point or zip generated using Open Event server. In this android app data is fetched from the internet using network calls to the Open Event server and the data of the event is stored in a database. It is difficult to debug an app with so many network calls and database connectivity. A way to approach this is using  Stetho which is very helpful tool for debugging an app which deals with network calls and database.  

Stetho is Facebook’s open source project works as debug bridge for android applications which gives powerful Chrome Developers Tools for debugging android applications using Chrome desktop browser.

What can you do using stetho ?

  • Analyze network traffic
  • Inspect elements(layouts/views)  
  • View SQLite database in table format
  • Run queries on SQLite database
  • View shared preference and edit it
  • Manipulate android app from command line

Setup

1. Add Gradle dependency

To add stetho in your app add ‘com.facebook.stetho:stetho:1.5.0’ dependency in your app  module’s build.gradle file. This dependency is strictly required.

dependencies{
    compile 'com.facebook.stetho:stetho:1.5.0'
}

For network inspection add one of the following dependency according to which you will be using

'com.facebook.stetho:stetho-okhttp:1.5.0'
'com.facebook.stetho:stetho-okhttp3:1.5.0'
'com.facebook.stetho:stetho-urlconnection:1.5.0'

2. Initialize stetho

Initialize stetho in class MyApplication which extends Application class by overriding  onCreate() method. Make sure you have added MyAppication in manifest.

public class MyApplication extends Application {
    public void onCreate() {
        super.onCreate()
        Stetho.initializeWithDefaults(this);
    }
}

Stetho.initializeWithDefaults(this) initializes stetho with defaults configuration(without network inspection and more). It will be able to debug database.

Manifest file

<Application   android:name=”.MyApplication    …   />

For enabling network inspection add StethoInterceptor  in OkHttpClient

new OkHttpClient.Builder()
    .addNetworkInterceptor(new StethoInterceptor())
    .build();

Using Chrome Developer Tools

1. Open Inspect window

Run stetho initialized app on device or emulator then start Google chrome and type chrome://inspect. You will see you device with your app’s package name. Click on “inspect”2. Network Inspection

Go to Network tab. It will show all network calls. With almost all info like url(path), method, returned status code, returned data type, size, time taken etc.

You can also see preview of image and preview, response of returned json data by clicking on Name.

3. SQLite Database

Go to “Resources”  tab and select “Web SQL”. You will see database file(.db). By clicking on database file you will see all tables in that database file. And by clicking on table name you will see data in row-column format for that table.

4. Run queries on SQLite database

Same as above go to “Resources”  tab and select “Web SQL”. You will see database file(.db). By clicking on database file you will see console on right side, where you can run queries on SQLite database. Example,

SELECT * FROM tracks ;

5. Shared Preferences Inspection

Go to “Resources”  tab and select “Local Storage”. You will show all files that your app used to save key-value pairs in shared preference and by clicking on file you will see all key-value pairs.

6. Element(View/Layout) Inspection

Go to “Elements” tab. You will see top layout/view in view hierarchy. By clicking it you will see child layout/view of that layout/view. On hover on layout/view you view will be inspected in your device/emulator.


In this blog the most important have been put forward, but there are still  some nice stuff available,like:

  • An integration with JavaScript Console : Enables JavaScript code execution that can interact with the application
  • Dumpapp  : It allows an integration higher than the Developer Tools, enabling the development of custom plugins.

By now, you must have realized that stetho can significantly improve your debugging experience. To learn more about stetho, refer to

Continue ReadingDebugging Using Stetho in Open Event Android

Continuous Deployment Implementation in Loklak Search

In current pace of web technology, the quick response time and low downtime are the core goals of any project. To achieve a continuous deployment scheme the most important factor is how efficiently contributors and maintainers are able to test and deploy the code with every PR. We faced this question when we started building loklak search.

As Loklak Search is a data driven client side web app, GitHub pages is the simplest way to set it up. At FOSSASIA apps are developed by many developers working together on different features. This makes it more important to have a unified flow of control and simple integration with GitHub pages as continuous deployment pipeline.

So the broad concept of continuous deployment boils down to three basic requirements

  1. Automatic unit testing.
  2. The automatic build of the applications on the successful merge of PR and deployment on the gh-pages branch.
  3. Easy provision of demo links for the developers to test and share the features they are working on before the PR is actually merged.

Automatic Unit Testing

At Loklak Search we use karma unit tests. For loklak search, we get the major help from angular/cli which helps in running of unit tests. The main part of the unit testing is TravisCI which is used as the CI solution. All these things are pretty easy to set up and use.

Travis CI has a particular advantage which is the ability to run custom shell scripts at different stages of the build process, and we use this capability for our Continuous Deployment.

Automatic Builds of PR’s and Deploy on Merge

This is the main requirement of the our CD scheme, and we do so by setting up a shell script. This file is deploy.sh in the project repository root.

There are few critical sections of the deploy script. The script starts with the initialisation instructions which set up the appropriate variables and also decrypts the ssh key which travis uses for pushing the repo on gh-pages branch (we will set up this key later).

  • Here we also check that we run our deploy script only when the build is for Master Branch and we do this by early exiting from the script if it is not so.
#!/bin/bash

SOURCE_BRANCH="master"
TARGET_BRANCH="gh-pages"

# Pull requests and commits to other branches shouldn't try to deploy.
if [ "$TRAVIS_PULL_REQUEST" != "false" -o "$TRAVIS_BRANCH" != "$SOURCE_BRANCH" ]; then
echo "Skipping deploy; The request or commit is not on master"
exit 0
fi


  • We also store important information regarding the deploy keys which are generated manually and are encrypted using travis.
# Save some useful information
REPO=`git config remote.origin.url`
SSH_REPO=${REPO/https:\/\/github.com\//git@github.com:}
SHA=`git rev-parse --verify HEAD`

# Decryption of the deploy_key.enc
ENCRYPTED_KEY_VAR="encrypted_${ENCRYPTION_LABEL}_key"
ENCRYPTED_IV_VAR="encrypted_${ENCRYPTION_LABEL}_iv"
ENCRYPTED_KEY=${!ENCRYPTED_KEY_VAR}
ENCRYPTED_IV=${!ENCRYPTED_IV_VAR}
openssl aes-256-cbc -K $ENCRYPTED_KEY -iv $ENCRYPTED_IV -in deploy_key.enc -out deploy_key -d

chmod 600 deploy_key
eval `ssh-agent -s`
ssh-add deploy_key


  • We clone our repo from GitHub and then go to the Target Branch which is gh-pages in our case.
# Cloning the repository to repo/ directory,
# Creating gh-pages branch if it doesn't exists else moving to that branch
git clone $REPO repo
cd repo
git checkout $TARGET_BRANCH || git checkout --orphan $TARGET_BRANCH
cd ..

# Setting up the username and email.
git config user.name "Travis CI"
git config user.email "$COMMIT_AUTHOR_EMAIL"


  • Now we do a clean up of our directory here, we do this so that fresh build is done every time, here we protect our files which are static and are not generated by the build process. These are CNAME and 404.html
# Cleaning up the old repo's gh-pages branch except CNAME file and 404.html
find repo/* ! -name "CNAME" ! -name "404.html" -maxdepth 1  -exec rm -rf {} \; 2> /dev/null
cd repo

git add --all
git commit -m "Travis CI Clean Deploy : ${SHA}"


  • After checking out to our Master Branch we do an npm install to install all our dependencies here and then do our project build. Then we move our files generated by the ng build to our gh-pages branch, and then we make a commit, to this branch.
git checkout $SOURCE_BRANCH
# Actual building and setup of current push or PR.
npm install
ng build --prod --aot
git checkout $TARGET_BRANCH
mv dist/* .
# Staging the new build for commit; and then committing the latest build
git add .
git commit --amend --no-edit --allow-empty


  • Now the final step is to push our build files to gh-pages branch and as we only want to put the build there if the code has actually changed, we make sure by adding that check.
# Deploying only if the build has changed
if [ -z `git diff --name-only HEAD HEAD~1` ]; then

echo "No Changes in the Build; exiting"
exit 0

else
# There are changes in the Build; push the changes to gh-pages
echo "There are changes in the Build; pushing the changes to gh-pages"

# Actual push to gh-pages branch via Travis
git push --force $SSH_REPO $TARGET_BRANCH
fi


Now this 70 lines of code handle all our heavy lifting and automates a large part of our CD. This makes sure that no incorrect builds are entering the gh-pages branch and also enabling smoother experience for both developers and maintainers.

The important aspect of this script is ability to make sure Travis is able to push to gh-pages. This requires the proper setup of Keys, and it definitely is the trickiest part the whole setup.

  • The first step is to generate the SSH key. This is done easily using terminal and ssh-keygen.
$ ssh-keygen -t rsa -b 4096 -C "your_email@example.com”


  • I would recommend not using any passphrase as it will then be required by Travis and thus will be tricky to setup.
  • Now, this generates the RSA public/private key pair.
  • We now add this public deploy key to the settings of the repository.
  • After setting up the public key on GitHub we give the private key to Travis so that Travis is able to push on GitHub.
  • For doing this we use the Travis Client, this helps to encrypt the key properly and send the key and iv to the travis. Which then using these values is able to decrypt the private key.
$ travis encrypt-file deploy_key
encrypting deploy_key for domenic/travis-encrypt-file-example
storing result as deploy_key.enc
storing secure env variables for decryption

Please add the following to your build script (before_install stage in your .travis.yml, for instance):

    openssl aes-256-cbc -K $encrypted_0a6446eb3ae3_key -iv $encrypted_0a6446eb3ae3_key -in super_secret.txt.enc -out super_secret.txt -d

Pro Tip: You can add it automatically by running with --add.

Make sure to add deploy_key.enc to the git repository.
Make sure not to add deploy_key to the git repository.
Commit all changes to your .travis.yml.


  • Make sure to add deploy_key.enc to git repository and not to add deploy_key to git.

And after all these steps everything is done our client-side web application will deploy on every push on the master branch.

These steps are required only one time in project life cycle. At loklak search, we haven’t touched the deploy.sh since it was written, it’s a simple script but it does all the work of Continuous Deployment we want to achieve.

Generation of Demo Links and Test Deployments

This is also an essential part of the continuous agile development that developers are able to share what they have built and the maintainers to review those features and fixes. This becomes difficult in a web application as the fixes and features are more often than not visual and attaching screenshots with every PR become the hassle. If the developers are able to deploy their changes on their gh-pages and share the demo links with the PR then it’s a big win for development at a faster pace.

Now, this step is highly specific for Angular projects while there are are similar approaches for React and other frameworks as well, if not we can build the page easily and push our changes to gh-pages of our fork.

We use @angular/cli for building project then use angular-cli-ghpages npm package to actually push to gh-pages branch of the fork. These commands are combined and are provided as node command npm run deploy. And this makes our CD scheme complete.

Conclusion

Clearly, the continuous deployment scheme has a lot of advantages over the other methods especially in the client side web apps where there are a lot of PR’s. This essentially eliminates all the deployment hassles in a simple way that any deployment doesn’t require any manual interventions. The developers can simply concentrate on coding the application and maintainers can just simply review the PR’s by seeing the demo links and then merge when they feel like the PR is in good shape and the deployment is done all by the Shell Script without requiring the commands from a developer or a maintainer.

Links

Loklak Search GitHub Repository: https://github.com/fossasia/loklak_search

Loklak Search Application: http://loklak.net/

Loklak Search TravisCI: https://travis-ci.org/fossasia/loklak_search/

Deploy Script: https://github.com/fossasia/loklak_search/blob/master/deploy.sh

Further Resources

Continue ReadingContinuous Deployment Implementation in Loklak Search

How we implemented an InfoBox similar to Google in Susper

Research Work: This was initially proposed by @mariobehling , https://github.com/fossasia/susper.com/issues/181, where he proposed an idea of building an infobox similar to Google or Duckduckgo.

Later Michael Christen 0rb1t3r referenced DBpedia API, which can get a structured data from Wikipedia information.

One example of using the DBpedia API is: http://lookup.dbpedia.org/api/search/KeywordSearch?QueryClass=place&QueryString=berlin

More information about the structured Knowledge Graphs is available at https://en.wikipedia.org/wiki/Knowledge_Graph

Implementation:

We created an infobox component to display the data related to infobox https://github.com/fossasia/susper.com/tree/master/src/app/infobox

It takes care about rendering the information, styling of the rendered data retrieved from the DBpedia API

Infobox.component.html :

<div *ngIf="results?.length > 0" class="card">

<div>

<h2><b>{{this.results[0].label}}</b></h2>

<p>{{this.results[0].description}}</p>

</div>

<div class="card-container">

<h3><b>Related Searches</b></h3>


<div *ngFor="let result of results">

   <a [routerLink]="resultsearch" [queryParams]="{query: result.label}">{{result.label}}</a>

</div>

</div>

</div>

The infobox.component.ts makes a call to Knowledge service with the required query, and the knowledge service makes a get request to the DBpedia API and retrieves the results.

infobox.component.ts

this.query$.subscribe( query => {

if (query) {

   this.knowledgeservice.getsearchresults(query).subscribe(res => {

     if (res.results) {

       this.results = res.results;

     }

   });

 }


knowledeapi.service.ts

getsearchresults(searchquery) {


let params = new URLSearchParams();

params.set('QueryString', searchquery);


let headers = new Headers({ 'Accept': 'application/json' });

let options = new RequestOptions({ headers: headers, search: params });

return this.http

   .get(this.searchURL, options).map(res =>


     res.json()


   ).catch(this.handleError);


}

For passing params in an HTTP object, we should create URLSearchParams() object, set the parameters in it, and send them as RequestOptions in http.get method. If you observe the line let headers = new Headers({ ‘Accept’: ‘application/json’ }); . we informed the API to send us data in JSON format.

Thereby finally the infobox component retrieves the results and displays them on susper.

Whole code for this implementation could be found in this pull:

https://github.com/fossasia/susper.com/pull/288

Continue ReadingHow we implemented an InfoBox similar to Google in Susper

Calling an API in Angular: Using Ngrx/Redux Architecture and Yacy API for Susper

Initially, in Susper we retrieved data from Yacy using a service in Angular 2, but later we introduced redux architecture, which resolved many issues and also made the code structured. In the past when Web APIs were not standardised people used to make their own architecture to implement each functionality. Web APIs have simplified the process of sending a query to an external server and standardised the process of sharing one’s own work with others.

The rise of Internet and mobile content in the recent past has resulted in many developers decoupling the front end and back end of their projects by exposing APIs that they create so that Android and iOS devices can interact with them using Web APIs. If you are new to building web APIs, A good place would be to look is here https://zapier.com/learn/apis/chapter-1-introduction-to-apis/ .

To understand how the Susper front end implements API calls from Yacy, it’s essential to understand the ngrx redux architecture inspired by react redux which helps manage the state. In case you are new to redux, please go through this to learn more about it and look at this sample app before proceeding with the rest of this blog post

In Susper we have implemented a front end for peer-to-peer decentralised Search Engine Yacy using Yacy Search API.

The services here are very similar to the angular services that seasoned angular js developers are familiar with. This service implementation in the project is responsible for making the calls to the API whenever a query is made.

https://github.com/fossasia/susper.com/blob/master/src/app/search.service.ts

where we implemented a searchService –


getsearchresults(searchquery) {

let params = new URLSearchParams();

for (let key in searchquery) {

if (searchquery.hasOwnProperty(key)) {

params.set(key, searchquery[key]);

}

}

params.set('wt', 'yjson');

params.set('callback', 'JSONP_CALLBACK');

params.set('facet', 'true');

params.set('facet.mincount', '1');

params.append('facet.field', 'host_s');

params.append('facet.field', 'url_protocol_s');

params.append('facet.field', 'author_sxt');

params.append('facet.field', 'collection_sxt');

return this.jsonp

.get('http://yacy.searchlab.eu/solr/select', {search: params}).map(res =>

res.json()[0]

).catch(this.handleError);

}

Now that you have seen the above service it contains JSONP_CALLBACK as a parameter, which tells the server “Hey Yacy, I can understand JSON, so you could communicate or send me data in JSON”. Some servers need one to send a header Accept: application/json

*JSONP is JSON with padding, that is, you put a string at the beginning and a pair of parenthesis around it*

so what about Redux where have we used it then? Basically, every redux based project will have an action and a reducer for each state in the store. Especially for search implementation we have our reducers and actions at https://github.com/fossasia/susper.com/blob/master/src/app/reducers

And

https://github.com/fossasia/susper.com/blob/master/src/app/actions

Now going through the architecture when a user types something in the search bar a call to the action query is made this.store.dispatch(new query.QueryServerAction(event.target.value));

Which is of type QUERYSERVER


export class QueryServerAction implements Action {

type = ActionTypes.QUERYSERVER;

constructor(public payload: any) {}

}

export type Actions

= QueryAction|QueryServerAction ;


Now on the above action below effect gets called

@Injectable()

export class ApiSearchEffects {

@Effect()

search$: Observable<any>

= this.actions$

.ofType(query.ActionTypes.QUERYSERVER)

.debounceTime(300)

.map((action: query.QueryServerAction) => action.payload)

.switchMap(querypay => {

if (querypay === '') {

return empty();

}

const nextSearch$ = this.actions$.ofType(query.ActionTypes.QUERYSERVER).skip(1);

this.searchService.getsearchresults(querypay)

.takeUntil(nextSearch$)

.subscribe((response) => {

this.store.dispatch(new search.SearchAction(response));

return empty();

});

return empty();

});

If you check with the above lines it makes a call to the service we have built before. that is: searchService.getsearchresults()

On response, it dispatches the response as a payload to SearchAction

On receiving the payload with the searchAction, the searchReducer takes off the responsibility and stores the payload in a state in the store.

export function reducer(state: State = initialState, action: search.Actions): State {

switch (action.type) {

case search.ActionTypes.CHANGE: {

const search = action.payload;

return Object.assign({}, state, {

searchresults: search,

items: search.channels[0].items,

totalResults: Number(search.channels[0].totalResults) || 0,

navigation: search.channels[0].navigation,

});

}

default: {

return state;

}

}

}

Thereby results could be displayed in the results page by subscribing to the store as in this.items$ = store.select(fromRoot.getItems);

Why should we do this all why not a direct service call? There are two reasons to use ngrx store along with ngrx effects.

  1. Using a store the search results will be available to all components.
  2. When we have implemented an instant search, a query call to the server goes for each character input, thereby if the response from the server is not in order, it leads to different results. For instance, if one searches for ‘India’ they might get results shown for ‘Ind’. Which was faced by us while developing the server https://github.com/fossasia/susper.com/issues/256 where “When a user searches, there is a search performed while typing. The search results that are often shown do not always reflect the final search term, they show a result that appeared while the user was typing it in.” we solved this issue using takeUntil(nextSearch$) in the search-effect.ts
Continue ReadingCalling an API in Angular: Using Ngrx/Redux Architecture and Yacy API for Susper

How to make your Website as a default Search Engine

A huge number of users are forcefully made to use predefined search engines on their browsers. On the Firefox browser, you usually see a search box at the top right. In Chrome, you can simply put in anything into the URL bar and it will go to the standard search engine. The browser companies predefined these search boxes, e.g. Google on Chrome, Firefox depending on which language version you have Yahoo or another and on Internet Explorer/Edge it is Bing. This shuts out new and independent searches like our Susper search engine. However, we want to help users and provide them with a choice.


At Susper, we integrated a small toast modal which allows users to make Susper their default search engine. They can simply go to susper.com and they will see a small option to change their search engine.

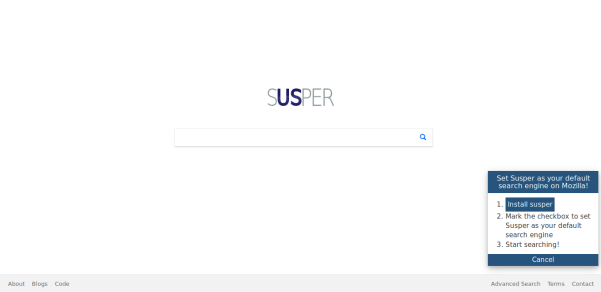
 Search box on Firefox
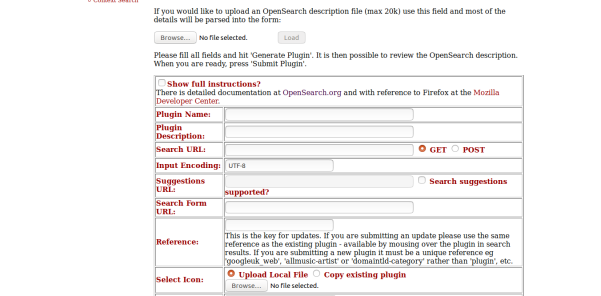
Implementation

We have Implemented this feature in a simple three-step procedure.

1.Generate Plugin for your search engine

create a plugin for your search engine at:-

http://mycroftproject.com/submitos.html

checked in with “show full instructions” checkbox at the top of the form to understand what those fields are.

Finally, a plugin got generated in XML format that we have to distribute to our user base.

2.Distributing the plugin to our user base

We at susper.com have implemented a toast onto the right bottom of the website’s homepage.

Where, when the user clicks on install Susper, the button triggers and displays an alert box.

Check the box “make this the current search engine”, and make the Susper search engine as your default search engine.


Implementation Code:-


We first check whether the search engine is installed already using window.external.IsSearchProviderInstalled , if not we show the toast for the user. When the user clicks Install button, this will call the window.external.AddSearchProvider API and installs susper using that.


<div id="set-susper-default">

<h3>Set Susper as your default search engine on Mozilla!</h3>

<ol>

<li><button id="install-susper">Install susper</button></li>

<li>Mark the checkbox to set Susper as your default search engine</li>

<li>Start searching!</li>

</ol>

<button id="cancel-installation">Cancel</button>

</div>

<script>

$(document).ready(function () {

if (window.external && window.external.IsSearchProviderInstalled) {

var isInstalled = window.external.IsSearchProviderInstalled("http://susper.com");

if (!isInstalled) {

$("#set-susper-default").show();

}

}

$("#install-susper").on("click", function () {

window.external.AddSearchProvider("http://susper.com/susper.xml");

});

$("#cancel-installation").on("click", function () {

$("#set-susper-default").remove();

});

});

</script>

In this way, we are able to give users an option to choose Susper as a default search engine.

More details regarding the implementation of this feature in susper could be checked at this pull https://github.com/fossasia/susper.com/pull/62 .

Continue ReadingHow to make your Website as a default Search Engine

Giving a Voice to Susi

Susi AI already has various apps and is available as a chatbot in various messaging platforms. We are going a step forward to make an SDK available for Susi that can be integrated on any Hardware Device (say speakers, toys, your bicycle etc – possibilities are endless )

One of the problem that I encountered while making a Prototype for the same is selecting an appropriate Text to Speech (TTS)  Engine.

It was a challenge, since on platforms like Android and iOS , you may utilize TTS engines bundled with Platform easily via a platform specific API, which are well optimized and give good performance.  The same was difficult on a hardware device that can run only Linux with no TTS provided by default.

Thus, I explored some possibilities

eSpeak TTS: eSpeak TTS (http://espeak.sourceforge.net/) was the first option considered for the task.
eSpeak is a compact open source software speech synthesizer for English and other languages, for Linux and Windows.

The major advantage of eSpeak is its small size (2MB) and small memory footprint which is advantageous in Low Memory Hardware like Orange Pi Zero or Raspberry Pi Zero.


Setting up eSpeak was easy but with its advantages , there were some drawbacks too.

  • The voice synthesis was quite robotic.
  • Very few voices were available.

Festival TTS: Festival offers a general framework for building speech synthesis systems as well as including examples of various modules. As a whole it offers full text to speech through a number APIs: from shell level, though a Scheme command interpreter, as a C++ library, from Java, and an Emacs interface.


Festival is free software. Festival and the speech tools are distributed under an X11-type licence allowing unrestricted commercial and non-commercial use alike.

Installing Festival:

On Arch Linux , it was pretty straight forward.

sudo pacman -S festival

There is a full wiki dedicated to it. ( https://wiki.archlinux.org/index.php/Festival )

Testing Festival

Festival has an interpreter to test it out. It can be invoked using
You may test out a TTS output using:

festival> (SayText "Hi!! I am Susi")

But the default sound in festival is still robotic and male. You don’t want your Personal Assistant to scare you out when you speak to her.

Thus, I searched on what are the best female voices available for Festival.

After looking at a discussion on the thread, https://ubuntuforums.org/showthread.php?t=751169 ,

I found that CMU-Arctic and HTS are some of the best voice sets for  Festival.

In Arch Linux, additional voice packs, are supplied in two additional packages,

festival-us and festival-english

Installation is straightforward:

sudo pacman -S festival-us festival-english

Now, on festival REPL , we can test out our new voices.

To see all available voices

festival> (voice.list)
(rab_diphone kal_diphone cmu_us_rms_cg cmu_us_awb_cg cmu_us_slt_cg)

Testing out a voice

festival> (voice_cmu_us_awb_cg)
cmu_us_awb_cg
festival> (SayText "Hi!! I am Susi")

This way after testing out all voices, with many different phrases. cmu_us_slt_cg  felt like an appropriate voice.

Setting Voice as Default

Voice may be set as default by adding following line to .festivalrc

 (set! voice_default voice_cmu_us_slt_cg)

Now festival will be invoked with this voice as default.

You may read a file using festival using

$ festival --tts <filename>

Calling Festival from Python

This was accomplished by first writing to a file, and then calling a subprocess to output speech using festival tts.

def speak(text):
    filename = '.response'
    file=open(filename,'w')
    file.write(text)
    file.close()
    # Call festival tts to reply the response by Susi
    subprocess.call('festival --tts '+filename, shell=True)


So, festival works pretty well on a moderately powerful machine, but while trying it on Raspberry Pi with a custom voice, there was noticeable amount of time delay for synthesis, so I searched for more alternatives.

Flite TTS: CMU Flite (festival-lite) is a small, fast run-time open source text to speech synthesis engine developed at CMU and primarily designed for small embedded machines and/or large servers. Flite is designed as an alternative text to speech synthesis engine to Festival for voices built using the FestVox suite of voice building tools.
Flite gives a noticeable speech improvement. It gives a Festival like output for 1/10th the amount taken by Festival.

Installing Flite TTS

On Raspberry Pi (Raspbian) , the version in Raspbian Jessie Repository is Flite 1.4 which does not support using an external speech file, so we need to compile and install from sources.

$ wget http://www.festvox.org/flite/packed/latest/flite-2.0.0-release.tar.bz2
$ tar xf flite-2.0.0-release.tar.bz2
$ cd flite-2.0.0-release/
$ ./configure
$ make
$ sudo make install

Now, you may download flitevox file for voice you wish to use from

http://www.festvox.org/flite/packed/latest/voices/

It can be invoked using

$ flite -voice file://<flitevox_file_path> -f <filepath-to-read>

You may save output audio stream to a file using

$ flite -voice file://<flitevox_file_path> -f <filepath-to-read> -o output.wav

Now, you can playback the audio. This can be invoked from python using.

import os

def speak_flite_tts(text):
    filename = '.response'
    file = open(filename, 'w')
    file.write(text)
    file.close()
    # Call flite tts to reply the response by Susi
    flite_speech_file = 'cmu_us_slt.flitevox'
    print('flite -voice file://{0} -f {1}'.format(flite_speech_file, filename))
    os.system('flite -v -voice file://{0} -f {1} -o output.wav'.format(flite_speech_file, filename))
    os.system('aplay output.wav')


In this way, we added offline Text to Speech Support of Susi Hardware SDK.

Continue ReadingGiving a Voice to Susi

Implementing a chatbot using the SUSI.AI API

SUSI AI is an intelligent Open Source personal assistant. It is a server application which is able to interact with humans as a personal assistant. The first step in implementing a bot using SUSI AI is to specify the pathway for query response from SUSI AI server.

The steps mentioned below provide a step-by-step guide to establish communication with SUSI AI server:

    1. Given below is HTML code that demonstrates how to connect with SUSI API through an AJAX call. To put this file on a Node Js server, see Step 2.  To view the response of this call, follow Step 4.

      <!DOCTYPE html>
      <body>
      <h1>My Header</h1>
      <p>My paragraph.</p>
      //Script with source here 
      //Script to be written here 
      </body>
      </html>
      

      In above code add scripts given below and end each script with closing tag </script>. In the second script we are calling SUSI API with hello query and showing data that we are receiving through call on console.

      <script src="https://ajax.googleapis.com/ajax/libs/jquery/3.2.1/jquery.min.js">
    2. <script>
      $(function (){ 
          $.ajax({ 
              dataType: 'jsonp', 
              type:'GET', url: 'http://api.susi.ai/susi/chat.json? timezoneOffset=-300&q=hello', 
               success: function(data){ 
                   console.log('success', data); 
               } 
          }); 
      });
    3. Code below is in node js to setup localhost and getting the same above result on browser. Below is Node Js code to setup a server at localhost for the above created HTML file.

      var http = require('http');
       var fs = require('fs');
       http.createServer(function (req, res) {
        fs.readFile('YOURFILENAME.html', function(err, data) {
          res.writeHead(200, {'Content-Type': 'text/html'});
          res.write(data);
          res.end();
        });
       }).listen(9000);
    4. We will get following response by running this Node js code and checking results on http://localhost:9000/ To run this code install Node Js and write “node filename.js” in command line.
    5. You can open above window by right clicking on page and selecting Inspect. Go to the Network option and select the relevant api call from left section of Inspect window.

We have successfully got response from SUSI API and now we can use this response for building bots for receiving replies for user.

Continue ReadingImplementing a chatbot using the SUSI.AI API

Handling Zip Upload in Open Event Webapp

In Open Event Webapp, we use Socket.IO library for real-time communication between client and the server. To be able to generate a site for an event, the user has to first upload the file to the generator. There are a lot of node libraries like multer and formidable which exists for this purpose. But they don’t support display of real-time stats regarding the progress of the uploaded file. To solve this issue, the project used socket-io-file-upload library which uploads the file to the Node.js server using Socket.IO and show live percentage denoting how much of the zip has been uploaded to the server.

It was working quite well until we discovered a major problem with the library. It didn’t support canceling the upload. If we clicked on the cancel button, it stopped showing the progress on the front end but actually continued to upload the file to the server on the back end. We had only two choices: Either to refresh the page or just wait for the existing zip file to upload completely. The former is a really bad solution and the latter result in wastage of time and bandwidth.

On investigating the issue, the problem was with how the library is designed. This was not a fault in our code or the library either. It was just that the library didn’t support this functionality.  After thoroughly searching for the solutions, we came across this library named socket-io-stream which met our requirements. It supports bidirectional binary data transfer with Stream API through Socket.IO. We can also cancel the upload in between.

For streaming between server and client, we will send stream instances first. To receive streams, we just wrap socket with socket-io-stream and then listen for any events as usual.

Client Side:

function uploadFile(file) {
  // Calculating size of the file and creating a stream to be sent to the server

  var size = (file.size/(1024*1024)).toString().substring(0, 3);
  var stream = ss.createStream();

  /* Creating a read stream and initializing variable to keep track of the size of the file uploaded so far */

  var blobStream = ss.createBlobReadStream(file);
  var fileUploadSize = 0;

  // Tracking upload progress and updating the variables

  blobStream.on('data', function(chunk) {
    fileUploadSize += chunk.length;
    var percent = (fileUploadSize / file.size * 100);

    /* isCancelling is a boolean which stores the status of the zip upload.That is, whether it is live or canceled */

      if (isCancelling) {
           var msg = 'File upload was cancelled by user';
           stream.destroy();
           socket.emit('cancelled', msg);
           isCancelling = false;
           console.log(msg);
       }

       updateUploadProgress(Math.floor(percent));
       if (percent === 100) {
           uploadFinished = true;
           enableGenerateButton(true);
       }
     });

  // Sending the stream to the server and transferring read data to it

   ss(socket).emit('file', stream, {size: file.size, name: file.name});
   blobStream.pipe(stream);
}

Server Side:

// Importing the library
const ss = require('socket.io-stream');

// Listening to the stream sent from the client
ss(socket).on('file', function(stream, file) {
  generator.startZipUpload(socket.connId);

  // Declare a filename and write the incoming data to it
  var filename = path.join(__dirname, '..', 'uploads/connection-' + id.toString()) + '/upload.zip';

  stream.pipe(fs.createWriteStream(filename));
});

That’s all we need to do to stream data from the client to the server. Head over here for more information regarding the library.

Continue ReadingHandling Zip Upload in Open Event Webapp

Diving into the codebase of the Open Event Front-end Project

This post aims to help any new contributor to get acquainted with the code base of the Open Event Front-end project.

The open event front-end is primarily the front-end for the Open Event API server. The project provides the functionality of signing up, add, update and view events details and many other functions to the organisers, speakers and attendees of the event which can be concert, conference, summit or a meetup. The open event front-end project is built on a JavaScript web application framework Ember.js. Ember uses a library Ember data for managing the data in the application and for communicating with server API via endpoints. Ember is a battery included framework which means that it creates all the boilerplate code required to set up the project and create a working web application which can be modified according to our needs.

The open event front-end is primarily the front-end for the Open Event API server. The project provides the functionality of signing up, add, update and view events details and many other functions to the organisers, speakers and attendees of the event which can be concert, conference, summit or a meetup. The open event front-end project is built on a JavaScript web application framework Ember.js. Ember uses a library Ember data for managing the data in the application and for communicating with server API via endpoints. Ember is a battery included framework which means that it creates all the boilerplate code required to set up the project and create a working web application which can be modified according to our needs.

For example: When I created a new project using the command:

$ ember new open-event-frontend

It created a new project open-event-frontend with all the boilerplate code required to set up the project which can be seen below.

create .editorconfig
create .ember-cli
create .eslintrc.js
create .travis.yml
create .watchmanconfig
create README.md
create app/app.js
create app/components/.gitkeep
Installing app
create app/controllers/.gitkeep
create app/helpers/.gitkeep
create app/index.html
create app/models/.gitkeep
create app/resolver.js
create app/router.js
create app/routes/.gitkeep
create app/styles/app.css
create app/templates/application.hbs
create app/templates/components/.gitkeep
create config/environment.js
create config/targets.js
create ember-cli-build.js
create .gitignore
create package.json
create public/crossdomain.xml
create public/robots.txt
create testem.js
create tests/.eslintrc.js
create tests/helpers/destroy-app.js
create tests/helpers/module-for-acceptance.js
create tests/helpers/resolver.js
create tests/helpers/start-app.js
create tests/index.html
create tests/integration/.gitkeep
create tests/test-helper.js
create tests/unit/.gitkeep
create vendor/.gitkeep
NPM: Installed dependencies
Successfully initialized git.

Now if we go inside the project directory we can see the following files and folders have been generated by the Ember-CLI which is nothing but a toolkit to create, develop and build ember application. Ember has a runtime resolver which automatically resolves the code if it’s placed at the conventional location which ember knows.

➜ ~ cd open-event-frontend
➜ open-event-frontend git:(master) ls
app  config  ember-cli-build.js  node_modules  package.json  public  README.md  testem.js  tests  vendor

What do these files and folders contain and what is their role in reference to the project, “Open event front-end”?

Directory structure of open event frontend project

Fig 1: Directory structure of the Open Event Front-end project

Let’s take a look at the folders and files Ember CLI generates.

App: This is the heart of the project. It is responsible for deciding how our application will look and work. This is the place where folders and files for models, components, routes, templates and styles are stored. The majority of our application’s code is written in this folder. The adapter directory contains the application.js file which is responsible for authorising all outgoing API requests. Since our application is an event application so it has various screens which display the list of events, sessions, schedule, speakers, functionality to add, delete, modify the event details etc. Most of the screens have some features in common which can be reused everywhere inside the application which is kept in components directory. The controllers directory contains the files which will be responsible for the front-end behaviour which is not related to the models of our application. For example actions like sharing the event details. The data of the event is fetched by API but when the share functionality has to work is decided by the controller. Models directory helps in mapping the format of data i.e. in which format the data is fetched from the API. As we interact with the application, it moves through many different states/screens using different URLs. The routes directory decides which template will be rendered and which model will be loaded to display the data in the current template. The services directory contains the services which kept on running in the application like authentication service to check whether the current user has logged in or not, translation service to translate the details into some other language other than English which is supported by the app if required. The styles directory contains .scss files for styling of layouts. The template directory contains the layouts for the user interface of the application in form of Handlebar Templates which contains the HTML code which will be rendered on the screen when the template will be called via routes. The utils directory contains all the utility files like the format of date and time, demographic details, event type, type of topics etc.   

Directory structure of App folder

Fig 2: Directory structure of the app folder

Config: It contains files where we can we configure the settings of our application. The environment.js file contains the details like application name and API endpoints and other details required to configure the application. The deploy.js file contains the configurational details about the deployment.

Directory structure of config folder

Fig 3: Directory structure of config folder

Mirage: It contains the files which are required to mock the API server. Since we need to fetch the data from the server so whenever we make a request to get and post the data, mirage will respond to that data. It also contains the file which helps in seeding fake data for the application. Here mocking means creating objects that simulate the behaviour of real objects. The default.js application handles the seeding the fake data but currently, we don’t require that hence it’s empty. The config.js file has the method which sets the API host and namespace of the application.

Directory structure of mirage folder

Fig 4: Directory structure of mirage folder

Node_modules: As we know that Ember is built with Node and uses various node.js modules for functioning. So this directory contains all the files generated from the running the npm package manager which we run at starting while installing and setting up the project on the local device. The package.json file contains all the file maintains the list of npm dependencies for our app.

Public: This directory contains all the assets such as images and fonts related to the application. In the case of our application, to add images apart from the ones that are fetched from the API, they have to be placed here.

Directory structure of public folder

Fig 5: Directory structure of public folder

Translations: Since our application provides various languages support so this directory contains the files to translate the messages.

Directory structure of translations folder

Fig 6: Directory structure of translations folder

Tests: This is the best feature which Ember has provided. We don’t have to generate test they are automatically generated by the Ember-CLI which can be modified according to our requirements. Ember generates three types of test which are Acceptance, Integration and Unit tests. Other than that Ember offers testing for helpers, controllers, routes and models. Test runner of Ember-CLI testem is configured in testem.js. All three types of test have been used in our application.

Directory structure of test folder

Fig 7: Directory structure of test folder

ember-cli-build.js: This file contains the detail how Ember CLI should build our app. In the case of our project, it contains all the metadata such as app imports and other details to build the app.   

Vendor: This directory usually contains all the front-end dependencies (such as JavaScript or CSS) which are not managed by Bower go (which is a package manager for managing components that contain HTML, CSS, JavaScript, fonts). But in the case of our project, we have only kept .gitkeep inside this since we have not included any dependency which Bower doesn’t maintain.

To summarise, this post explains about the content and the role of different files and folders in the directory structure of the Open Event Front-end Project which may help a new contributor to get started by getting a basic understanding of the project.

Continue ReadingDiving into the codebase of the Open Event Front-end Project