PSLab Remote Lab: Automatically deploying the EmberJS WebApp and Flask API Server to different domains

The remote-lab software of the pocket science lab enables users to access their devices remotely via the internet. Its design involves an API server designed with Python Flask, and a web-app designed with EmberJS that allows users to access the API and carry out various tasks such as writing and executing Python scripts. For testing purposes, the repository needed to be setup to deploy both the backend as well as the webapp automatically when a build passes, and this blog post deals with how this can be achieved.

Deploying the API server

The Heroku PaaS was chosen due to its ease of use with a wide range of server software, and support for postgresql databases. It can be configured to automatically deploy branches from github repositories, and conditions such as passing of a linked CI can also be included. The following screenshot shows the Heroku configuration page of an app called pslab-test1. Most of the configuration actions can be carried out offline via the Heroku-Cli


In the above page, the pslab-test1 has been set to deploy automatically from the master branch of github.com/jithinbp/pslab-remote . The wait for CI to pass before deploy has been disabled since a CI has not been setup on the repository.

Files required for Heroku to deploy automatically

Once the Heroku PaaS has copied the latest commit made to the linked repository, it searches the base directory for a configuration file called runtime.txt which contains details about the language of the app and the version of the compiler/interpretor to use, and a Procfile which contains the command to launch the app once it is ready. Since the PSLab’s API server is written in Python, we also have a requirements.txt which is a list of dependencies to be installed before launching the application.

Procfile

web: gunicorn app:app –log-file –

runtime.txt

python-3.6.1

requirements.txt

gunicorn==19.6.0
flask >= 0.10.1
psycopg2==2.6.2
flask-sqlalchemy
SQLAlchemy>=0.8.0
numpy>=1.13
flask-cors>=3.0.0

But wait, our app cannot run yet, because it requires a postgresql database, and we did not do anything to set up one. The following steps will set up a postgres database using the heroku-cli usable from your command prompt.

  • Point Heroku-cli to our app
    $ heroku git:remote -a pslab-test1
  • Create a postgres database under the hobby-dev plan available for free users.
    $ heroku addons:create heroku-postgresql:hobby-dev

    Creating heroku-postgresql:hobby-dev on ⬢ pslab-test1… free
    Database has been created and is available
    ! This database is empty. If upgrading, you can transfer
    ! data from another database with pg:copy
    Created postgresql-slippery-81404 as HEROKU_POSTGRESQL_CHARCOAL_URL
    Use heroku addons:docs heroku-postgresql to view documentation

  • The previous step created a database along with an environment variable HEROKU_POSTGRESQL_CHARCOAL_URL . As a shorthand, we can also refer to it simply as CHARCOAL .
  • In order to make it our primary database, it must be promoted

    $ heroku pg:promote HEROKU_POSTGRESQL_CHARCOAL_URL
    The database will now be available via the environment variable DATABASE_URL

  • Further documentation on creating and modifying postgres databases on Heroku can be found in the articles section .

At this point, if the app is in good shape, Heroku will automatically deploy its contents to pslab-test1.herokuapp.com. We can test it using a developer tool such as Postman, or make our own webapp to use it.

Deploying the EmberJS WebApp

Since we are using the free plan on Heroku which only allows one dyno, our EmberJS webapp which shares the repository cannot be deployed on the same heroku server. Therefore, we must look for other domains where the frontend can be deployed.

Surge.sh allows easy deployment of Ember apps, and we shall set up our CI’s configuration file .travis.yml to do this for us when a pull request is made, and the build passes

This excerpt from .travis.yml only shows parts relevant to deployment on Surge.sh

after_success:
– pushd frontend
– bash surge_deploy.sh
– popd

Once the build has passed, the after_success hook executes a script called surge_deploy.sh which is located in the directory of the webapp.

Contents of surge_deploy.sh

#!/usr/bin/env bash
if [ “$TRAVIS_PULL_REQUEST” == “false” ]; then
echo “Not a PR. Skipping surge deployment”
exit 0
fi

ember build –environment=’production’

export REPO_SLUG_ARRAY=(${TRAVIS_REPO_SLUG//\// })
export REPO_OWNER=${REPO_SLUG_ARRAY[0]}
export REPO_NAME=${REPO_SLUG_ARRAY[1]}

npm i -g surge

# Details of a dummy account. So can be added to vcs.
export SURGE_LOGIN=j********r@gmail.com
export SURGE_TOKEN=4********************************f
export DEPLOY_DOMAIN=https://${REPO_NAME}.surge.sh
surge –project ./dist –domain $DEPLOY_DOMAIN;

The variables SURGE_LOGIN and SURGE_TOKEN must be specified, otherwise Surge will open a login prompt, and since there is no way to feed details into a prompt in a Travis build, it will timeout and fail. The surge token can be obtained with a simple `surge login` followed by `surge token` on your system’s terminal.

Final Application

A user’s homepage on the webapp deployed at pslab-remote.surge.sh . The EmberJS app has been configured to send all AJAX requests to the API server located at pslab-remote.herokuapp.com .

Resources
Continue ReadingPSLab Remote Lab: Automatically deploying the EmberJS WebApp and Flask API Server to different domains

One Click Deployment Button for loklak Using Heroku with Gradle Build

The one click deploy button makes it easy for the users of loklak to get their own cloud instance created and deployed in their heroku account and can be used according to their flexibility. Heroku uses an app.json manifest in the code repo to figure out what add-ons, config and other deployment steps are required to make the code run. This is used to configure and deploy the app.

Once you have provide the app name and then click on deploy button, Heroku will start deploying the loklak server to a new app on your account:

When setup is complete, you can open the deployed app in your browser or inspect it in Dashboard.

All these steps and requirements can now be encoded in an app.json file and placed in a repo alongside a button that kicks off the setup with a single click.

App.json is a manifest format for describing apps and specifying what their config requirements are. Heroku uses this file to figure out how code in a particular repo should be deployed on the platform. Here is the loklak’s app.json file which used gradle build pack:

{
	"name": "Loklak Server",
	"description": "Distributed Tweet Search Server",
	"logo": "https://raw.githubusercontent.com/loklak/loklak_server/master/html/images/loklak_anonymous.png",
	"website": "http://api.loklak.org",
	"repository": "https://github.com/loklak/loklak_server.git",
	"image": "loklak/loklak_server:latest-master",
	"env": {
		"BUILDPACK_URL": "https://github.com/heroku/heroku-buildpack-gradle.git"
	}
}


If you are interested you can try deploying the peer from here itself. Checkout how simple it can be to deploy.

Deploy button:

Deploy

Resources:

Continue ReadingOne Click Deployment Button for loklak Using Heroku with Gradle Build

Heroku Deployment through Travis for Meilix-Generator

This article will tell the way to deploy the Meilix Generator on Heroku with the help of Travis. A successful deployment will help as a test for a good PR. Later in the article, we’ll see the one-button deployment on Heroku.

We will here deploy Meilix Generator on Heroku. The way to deploy the project on Heroku is that one should connect its Github account and deploy it on Heroku. The problem arises when one wants to deploy the project on each and every commit. This will help to test that the commits are passing or not. Here we will see that how to use Travis to deploy on Heroku on each and every commit. If the Travis test passed which means that the changes made in the commit are implemented.
We used the same idea to test the commits for Meilix Generator.

Idea behind it

Travis (.travis.yml) will be helpful to us to achieve this. We will use this deploy build to Heroku on each commit. If it gets successfully deployed then it proves that the commit made is working.

How to implement it

I will use Meilix Generator repository to tell the way to implement this. It is as simple as editing the .travis.yml file. We just have to add few lines to .travis.yml and hence it will get deployed.

deploy:
  provider: heroku
  api_key:
    secure: "YOUR ENCRYPTED API KEY"     # explained below
  app: meilix-generator                    # write the name of the app
  on:
    repo: fossasia/meilix-generator                # repo name
    branch: master                        # branch name

Way to generate the api key:
This is really a matter of concern since if this gets wrong then the deployment will not occur.

Steps:

  • cd into the repository which you want to deploy on Heroku.
  • Login Heroku CI and Travis CI into your terminal and type the following.

travis encrypt $(heroku auth:token) --add deploy.api_key

This will automatically provide the key inside the .travis.yml file.

You can also configure manually using

travis heroku setup

That it, you are done, test the build.

Things are still left:

But we are still left with the test of the PR.
For this we have to create a new app.json file as:

{
    "name": "Meilix-Generator",
    "description": "A webapp which generates iso for you",
    "repository": "https://github.com/fossasia/meilix-generator/",
    "logo": "https://github.com/fossasia/meilix-generator/blob/master/static/logo.png",
    "keywords": [
        "meilix-generator",
        "fossasia",
        "flask"
    ],
    "env": {
        "APP_SECRET_TOKEN": {
            "generator": "secret"
        },
        "ON_HEROKU": "true",
        "FORCE_SSL": "true",
        "INVITATION_CODE": {
            "generator": "secret"
        }
    },
    "buildpacks": {
            "url": "heroku/python"        # this is the only place of concern
        }
}

This code should be put in a file in the root of the repo with the name as app.json.
In the buildpacks : the url should be the one which contains the code base language used.

This can be helpful in 2 ways:

  1. Test the commit made and deploy it on Heroku
    2. One-click deployment button which will deploy the app on Heroku
  • Test the deployment through the URL:

https://heroku.com/deploy?template=https://github.com/user_name/repo_name/tree/master

  • Way to add the button:

[![Deploy](https://www.herokucdn.com/deploy/button.svg)](https://heroku.com/deploy)

How can this idea be helpful to a developer

A developer can use this to deploy its app on Heroku and test the commit automatically and view the quality and status of PR too.

Useful repositories and link which uses this:

I have used the same idea in my project. Do have a look:

https://github.com/fossasia/meilix-generator
deployment on Heroku
one-click deployment
app.json file schema   

Continue ReadingHeroku Deployment through Travis for Meilix-Generator

Setting Environment Variables up in Travis and Heroku for Meilix and Meilix-Generator

Meilix Generator is a webapp whose task is to take input as a configuration and start the Meilix build. But an anonymous person cannot start the Meilix build of any user and deploy the release in the repository. There are ways which are used as authentication passes through environment variable to start the build. In this article, I show the way I used to trigger Meilix by setting up environment variables in Meilix Generator.

Environment variables are of great use when one has to supply personal token in an open-source project for accessing the repository. So down there, we will have ways to configure the variables in Heroku and Travis. There are so many wikis out there but this one is the blend of both Heroku and Travis.

Heroku

There are several ways to setup variables in Heroku. The way I’m going to describe below is used to access Travis build using Heroku.
Using the Heroku variable generated using Travis will help to trigger the build on Travis.

How:

Idea:
We will use Travis CLI to generate a token (unique and keep it secret). Then provide the token as a variable name to the Heroku.
Backdoor:
This Travis token will give access to the Heroku to trigger the build on that particular Travis account. We use variable to provide the token since in the script we will use this variable as an environment variable to fetch the token in the place of token like as $token.
Implementation:
Open your terminal and type the following:

sudo apt install ruby ruby-dev
sudo gem install travis                       	# install Travis CLI
travis login --org   					# login into Travis
travis token --org		# generate your secret personal access token

You will get a token, copy and paste it into your Heroku app’s settings config vars token. You have to use the `KEY` as the variable which is used in the script for triggering the build. Save it and you are done the setting of the token in the Heroku.

Travis

Now it’s time for Travis token.
It is used to deploy the build to that repository only.
We can use the token in two ways either paste it in the setting of that repository on Travis or pasting the encrypted form of that in the .travis.yml file in that repository. Both will work. But one thing to remember that you must have the write access to that repository.

How

,Idea:
It is used in .travis.yml file as an environment variable to successfully build and deploy the application as a Github release.
Backdoor:
The token gives the permission to Travis to deploy the build application in the GitHub release of the repo(if one using to deploy it there only).
Implementation:
Head up to Github and generate a personal access token with scope repo. Copy the generated token in a safe place.

Way 1:

Paste the token in the setting of the repo in Travis in Environment Variable option. Now it will access the Github repository since it has got the permission from the personal token generated from Github.

Way 2:
Open terminal:

cd repo_name				# cd into the cloned repo
travis encrypt secret_token	#replace secret_token with the token generated

or

travis encrypt secret_token -r user/repo 	#if you are not in the repo

Copy that encrypted token and paste it in proper format in the .travis.yml file. Now you enabled Travis giving permission to release the build.

How can this idea be helpful to a developer

A developer can use this to build the Github Release in its repository. One can secure its token using this technique. One can use it to trigger its personal project in Travis using Heroku.

Useful repositories and link which uses this:

I have used the same idea in my project. Do have a look https://github.com/fossasia/meilix-generator
about environment variable
encryption keys
triggering build

Continue ReadingSetting Environment Variables up in Travis and Heroku for Meilix and Meilix-Generator

Building Meilix in Travis using Heroku

Suppose you have to trigger (start) Travis but not through making a commit but through clicking a button on the webapp of the Meilix Generator. Through the webapp of Meilix Generator, we can pass the tag of the build which will be initiated and can also get the build link which is built by Travis.
Heroku is the place where we have deployed our webapp and through a button on the webapp that we used to start the build on the Travis. We have the access to give a tag to the build and with the help of this, we can even predict the URL of the build beforehand. So one can use it for its own personal project in a number of ways. And how I used this feature in Meilix Generator using Meilix script is described below:

How I used this idea

FOSSASIA meilix repository consists the script of a Linux Operating System based on Lubuntu. It uses Travis to build that script to result in a release of an iso file.

Now we thought an idea of building an autonomous system to start this build and get the release and in the meanwhile also make some required changes to the script to get it into the OS. We came up with an idea of a webapp which ask user its email id and tag of the build and till now a picture from the user which will be set as a wallpaper. It means the user would be able to config its distro according to its need through the graphical interface without a single line to code from the user end.

Through the webapp, a build button is taken as an input to go to a build page which triggers the Travis with the same user configuration to build the iso and deploy it on Github page. The user gets the link to the build on the next page only.

How I implemented this idea

Thanks to Travis API without which our idea is impossible to implement. We used a shell script to outframe our idea. The script takes the input of the user’s, repository, and branch to decide to where the trigger to take place.

There are two files one as travis_token as:

fossasia meilix master    # in the format of user repo branch

And script.sh as:  

#!/bin/bash
cat travis_tokens | while read line;     # this lines takes input of the user, repo and branch
do
    array=(${line})
    user="${array[0]}"
    project="${array[1]}"
    len=${#array[@]}
    for ((i=2; i<len; i++)); do
        branch="${array[i]}"            # supplied each value as variable
        body="{\"request\":{
            \"branch\":\"${branch}\",
            \"config\":{
                \"env\":{
                    \"email\":\"${email}\",    # supplied email and travis tag as environment variable
                    \"TRAVIS_TAG\":\"${TRAVIS_TAG}\"
                }
            }
    }}"
    echo "This Link Will be ready in approx 20 minutes"
    echo "https://github.com/fossasia/meilix/releases/download/${TRAVIS_TAG}/meilix-zesty-`date +%Y%m%d`-i386.iso"                  # a pre-predication of the link, we provide tag from user and date from system.
        curl -s -X POST \           # sending an API POST request to Travis to trigger the build of most recent commit 
            -H "Content-Type: application/json" \
            -H "Accept: application/json" \
            -H "Travis-API-Version: 3" \
            -H "Authorization: token ${KEY}" \     # this is stored in Heroku as KEY as environment variable and supplied from there only
            -d "${body}" \
            "https://api.travis-ci.org/repo/${user}%2F${project}/requests"  #%2 is used to interpret user and repo name as a single URL segment.
    done
done

After the trigger, you will get email which consists of a downloadable link to the iso.

How can this idea be helpful to a developer

There are lots of ways a developer can use this idea out. If a developer wants their user to automatically trigger the build and get the release build directly.

One can use it to set even the commit message through the shell script and customizing build configuration like replace, merge or deep_merge a configuration with the original .travis.yml file present in source repo.

Useful repositories and link which uses this:

Know more about Travis API v3:
Triggering the build
API blog

Have a look at our webapp and generate your own iso:
https://melix-generator.herokuapp.com/

Source code here:
https://github.com/fossasia/meilix-generator
https://github.com/fossasia/meilix

Continue ReadingBuilding Meilix in Travis using Heroku

R14 – Memory Quota Exceeded

We, like many other organisations, are using heroku as the deployment server for our project open event organizer server. Things are pretty simple and awesome when your project is in its beginning phase and things run pretty smoothly. But as your project grows, there comes some server problem. And one of the biggest problems as your project grows is memory. Now since various packages have a different amount of memory assigned to you in case of hosting in generic servers such as heroku, so it might result in memory quota exceeded. Recently, we faced such a problem. R14 – Memory Quota Exceeded. Took us quite some time to understand what and why and how this occurred. So let me share a few things I found about this error.

Continue ReadingR14 – Memory Quota Exceeded

GET and POST requests

If you wonder how to get or update page resource, you have to read this article.

It’s trivial if you have basic knowledge about HTTP protocol. I’d like to get you little involved to this subject.

So GET and POST are most useful methods in HTTP protocol.

What is HTTP?

Hypertext transfer protocol – allow us to communicate between client and server side. In Open Event project we use web browser as client and for now we use Heroku for server side.

Difference between GET and POST methods

GET – it allows to get data from specified resources

POST – it allows to submit new data to specified resources for example by html form.

GET samples:

For example we use it to get details about event

curl http://open-event-dev.herokuapp.com/api/v2/events/95

Response from server:

Of course you can use this for another needs, If you are a poker player I suppose that you’d like to know how many percentage you have on hand.

curl http://www.propokertools.com/simulations/show?g=he&s=generic&b&d&h1=AA&h2=KK&h3&h4&h5&h6&_

POST samples:

curl -X POST https://example.com/resource.cgi

You can often find this action in a contact page or in a login page.

How does request look in python?

We use Requests library to communication between client and server side. It’s very readable for developers. You can find great documentation  and a lot of code samples on their website. It’s very important to see how it works.

>>> r = requests.get('https://api.github.com/user', auth=('user', 'pass'))
>>> r.status_code
200

I know that samples are very important, but take a look how Requests library fulfils our requirements in 100%. We have decided to use it because we would like to communicate between android app generator and orga server application. We have needed to send request with params(email, app_name, and api of event url) by post method to android generator resource. It executes the process of sending an email – a package of android application to a provided email address.

data = {
    "email": login.current_user.email,
    "app_name": self.app_name,
    "endpoint": request.url_root + "api/v2/events/" + str(self.event.id)
}
r = requests.post(self.app_link, json=data)


Continue ReadingGET and POST requests

Using Heroku pipelines to set up a dev and master configuration

The open-event-webapp project, which is a generator for event websites, is hosted on heroku. While it was easy and smooth sailing to host it on heroku for a single branch setup, we moved to a 2-branch policy later on. We make all changes to the development branch, and every week once or twice, when the codebase is stable, we merge it to master branch.

So we had to create a setup where  –

master branch –> hosted on –> heroku master

development branch –> hosted on –> heroku dev

Fortunately, for such a setup, Heroku provides a functionality called pipelines and a well documented article on how to implement git-flow


First and foremost, we created two separate heroku apps, called opev-webgen and opev-webgen-dev

To break it down, let’s take a look at our configuration. First step is to set up separate apps in the travis deploy config, so that when development branch is build, it pushed to open-webgen-dev and when master is built, it pushes to opev-webgen app. The required lines as you can see are –

https://github.com/fossasia/open-event-webapp/blob/master/.travis.yml#L25

https://github.com/fossasia/open-event-webapp/blob/development/.travis.yml#L25

Now, we made a new pipeline on heroku dashboard, and set opev-webgen-dev and opev-webgen in the staging and production stages respectively.

Screenshot from 2016-07-31 04-33-30 Screenshot from 2016-07-31 04-34-41

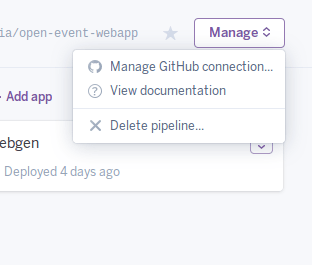
Then, using the “Manage Github Connection” option, connect this app to your github repo.

Screenshot from 2016-07-31 04-36-17

Once you’ve done that, in the review stage of your heroku pipeline, you can see all the existing PRs of your repo. Now you can set up temporary test apps for each PR as well using the Create Review App option.

Screenshot from 2016-07-31 04-37-38

So now we can test each PR out on a separate heroku app, and then merge them. And we can always test the latest state of development and master branches.

Continue ReadingUsing Heroku pipelines to set up a dev and master configuration

Deploying PHP and Mysql Apps on Heroku

This tutorial will help you deploying a PHP and Mysql app.

Prerequisites

  1. a free Heroku account.
  2. PHP installed locally.
  3. Composer installed locally.

Set up

In this step you will install the Heroku Toolbelt. This provides you access to the Heroku Command Line Interface (CLI), which can be used for managing and scaling your applications and add-ons.

To install the Toolbelt for ubuntu/Debian

 wget -O- https://toolbelt.heroku.com/install-ubuntu.sh | sh

After installing Toolbelt you can use the heroku command from your command shell.

$ heroku login
Enter your Heroku credentials.
Email: dz@example.com
Password:
...

Authenticating is required to allow both the heroku and git commands to operate.

Prepare the app

In this step, you will prepare a fossasia/engelsystem application that can be deployed.

To clone the sample application so that you have a local version of the code that you can then deploy to Heroku, execute the following commands in your local command shell or terminal:

$ git clone --recursive https://github.com/fossasia/engelsystem.git
$ cd engelsystem/

If it is not a git repository you follow these steps

$ cd engelsystem/
$ git init

You now have a functioning git repository that contains a simple application now we need to add a composer.json file. Make sure you’ve installed Composer.

The Heroku PHP Support will be applied to applications only when the application has a file named composer.json in the root directory. Even if an application has no Composer dependencies, it must include at least an empty ({}) composer.json in order to be recognized as a PHP application.

When Heroku recognizes a PHP application, it will respond accordingly during a push:

$ git push heroku master
-----> PHP app detected

Define a Procfile

A Procfile is a text file in the root directory of your application that defines process types and explicitly declares what command should be executed to start your app. Your Procfile will look something like this for engelsystem:

web: vendor/bin/heroku-php-apache2 public/

Since our folder named public that contains your JavaScript, CSS, images and index.php file, your Procfile would define the Apache web server with that directory used as document root.

Create the app

In this step you will create the app to Heroku.

Create an app on Heroku, which prepares Heroku to receive your source code:

$ heroku create
Creating sharp-rain-871... done, stack is cedar-14
http://sharp-rain-871.herokuapp.com/ | https://git.heroku.com/sharp-rain-871.git
Git remote heroku added

When you create an app, a git remote (called heroku) is also created and associated with your local git repository.

Heroku generates a random name (in this case sharp-rain-871) for your app, or you can pass a parameter to specify your own app name.

But Once you open http://sharp-rain-871.herokuapp.com/ we will not be able to view the site if there are database connections. We need to migrate the database using Cleardb

ClearDB MySQL

Migrating database

Creating your ClearDB database

To create your ClearDB database, simply type the following Heroku command:

$ heroku addons:create cleardb:ignite
-----> Adding cleardb to sharp-mountain-4005... done, v18 (free)

This will automatically provision your new ClearDB database for you and will return the database URL to access it.

You can retrieve your new ClearDB database URL by issuing the following command:

$ heroku config | grep CLEARDB_DATABASE_URL
CLEARDB_DATABASE_URL: mysql://bda37eff166954:69445d28@us-cdbr-iron-east-04.cleardb.net/heroku_3c94174e0cc6cd8?reconnect=true

After getting the cleardb database url we can import the tables by following command:

$mysql -u bda37eff166954 -h us-cdbr-iron-east-04.cleardb.net -p heroku_3c94174e0cc6cd8

than you well get a mysql prompt with connection to the database. Than you can import the tables using the following commands

mysql> source [path to engelsystem]/engelsystem/db/install.sql;
mysql> source [path to engelsystem]/engelsystem/db/update.sql;
mysql> exit;

Now the tables are migrated successfully.

Declare app dependencies

Since we have added the mysql database we need to add the dependencies also.

{
  "require": {
    "ext-mysql": "*"
  },
   "require": {
      "ext-gettext": "*"
    },
   "require-dev": {
      "heroku/heroku-buildpack-php": "*"
   }
}

The composer.json file specifies the dependencies that should be installed with your application. When an app is deployed, Heroku reads this file and installs the appropriate dependencies into the vendor directory.

Run the following command to install the dependencies, preparing your system for running the app locally:

$ composer update
Loading composer repositories with package information
Updating dependencies (including require-dev)
  - Installing psr/log (1.0.0)
    Loading from cache
...
Writing lock file
Generating autoload files

You should always check composer.json and composer.lock into your git repo. The vendor directory should be included in your .gitignore file.

Using ClearDB with PHP

Connecting to ClearDB from PHP merely requires the parsing of the CLEARDB_DATABASE_URL environment variable and passing the extracted connection information to your MySQL library of choice, e.g. MySQLi:

we need to modify it in the config/config.php file

$url = parse_url(getenv("CLEARDB_DATABASE_URL"));
$server = $url["host"];
$username = $url["user"];
$password = $url["pass"];
$db = substr($url["path"], 1);

$config = array(
    'host' => $server ,
    'user' => $username ,
    'pw' => $password,
    'db' => $db 
);

Deploy the app

All the steps are completed now we need to deploy it. Push the code to Heroku. For pushing pushing development branch we need to follow these commands.

$ git add -A
$ git commit -m "heroku deploy"
$ git push heroku development:master
Initializing repository, done.
Counting objects: 7, done.
Delta compression using up to 4 threads.
Compressing objects: 100% (4/4), done.
Writing objects: 100% (7/7), 1.66 KiB | 0 bytes/s, done.
Total 7 (delta 0), reused 0 (delta 0)

-----> PHP app detected
-----> Setting up runtime environment...
       - PHP 5.5.12
       - Apache 2.4.9
       - Nginx 1.4.6
-----> Installing PHP extensions:
       - opcache (automatic; bundled, using 'ext-opcache.ini')
-----> Installing dependencies...
       Composer version 64ac32fca9e64eb38e50abfadc6eb6f2d0470039 2014-05-24 20:57:50
       Loading composer repositories with package information
       Installing dependencies from lock file
...
         - Installing monolog/monolog (1.9.1)
       Generating optimized autoload files
-----> Building runtime environment...
-----> Discovering process types
       Procfile declares types -> web
-----> Compressing... done, 57.4MB
-----> Launching... done, v3
       http://sharp-rain-871.herokuapp.com/ deployed to Heroku

To git@heroku.com:sharp-rain-871.git
 * [new branch]      development -> master

Now your app is successfully deployed you can view it here http://sharp-rain-871.herokuapp.com/

Englesystem

Development: https://github.com/fossasia/engelsystem

Issues/Bugs: Issues


Continue ReadingDeploying PHP and Mysql Apps on Heroku

Why should you use Heroku?

Last week I’ve dedicated most time to implement new heroku features to Open Event. Due to the fact that wasn’t easy tasks I can share my experience.

What is heroku?

Heroku is a cloud Platform-as-a-Service (PaaS) supporting several programming languages like Java, Node.js, Scala, Clojure, Python, PHP, and Go

Easy to deploy

what you need to do:

  1. Create account on heroku
  2. Download a heroku toolbelt to your enviroment.
  3. Go to your project directory(/open-event-orga-server)
  4. Sign in to heroku in your command line using your credentials
    $ heroku login
  5. Create app with name $
    heroku apps:create your_app_name

    after execution above command you will recive a link to your application

    http://your_app_name.herokuapp.com/
  6. Push latest changes to heroku
    $ git push heroku master
  7. If everythings is ok you can check results http://your_app_name.herokuapp.com/ (sometimes it does not work like we want 🙁 )

Easy to configure

To list/set/get config variables use:

$ heroku config
$ heroku config:set YOUR_VARIABLE=token123
$ heroku config:get YOUR_VARIABLE

or you can go to you application dashboard and make above operations

How you can get access to this variables using python langauges?

$ python

Python 2.7.10 (default, Oct 23 2015, 19:19:21) 

[GCC 4.2.1 Compatible Apple LLVM 7.0.0 (clang-700.0.59.5)] on darwin

Type "help", "copyright", "credits" or "license" for more information.

>>> import os

>>> your_variable  = os.environ.get('YOUR_VARIABLE', None)

>>> print your_variable
token123

I’ve used this to display current release in my python application(You need to generate a special API token and add it to config variables)

os.popen('curl -n https://api.heroku.com/apps/open-event/releases -H 
"Authorization: Bearer ' + token + '" -H 
"Accept: application/vnd.heroku+json; version=3"').read()

Easy to monitor

If something is wrong with your APP you need to use this command

$ heroku logs

it shows all logs

To see 10 latest releases use:

$ heroku releases

How you can set up Open Event to deploy to heroku?

  1. Clone https://github.com/fossasia/open-event-orga-server
  2. Go to directory of open event orga server(/open-event-orga-server)
  3. Add git remote
     heroku git:remote -a open-event
  4. You can check if open event is added to git remote
    $ git remote -v
    heroku https://git.heroku.com/open-event.git (fetch)
    heroku https://git.heroku.com/open-event.git (push)
    origin https://github.com/fossasia/open-event-orga-server.git (fetch)
    origin https://github.com/fossasia/open-event-orga-server.git (push)
  5. Now you can deploy changes to open-event application(You need a permissions 🙂 )

Why should you use a Heroku?

It’s great to deploy apps because you are able to share content in short time what I’ve done. Besides it’s very well documented so you can find there answers for most of your questions. Finally most of things you can configure using Heroku dashboard so it’s the best advantages of this tool.

Continue ReadingWhy should you use Heroku?