Adding swap space to your DigitalOcean droplet, if you run out of RAM

The Open Event Android App generator runs on a DigitalOcean. The deployment runs on a USD 10 box, that has 1 GB of RAM, but for testing I often use a USD 5 box, that has only 512mb of RAM.

When trying to build an android app using gradle and Java 8, there could be an issue where you run out of RAM (especially if it’s 512 only).

What we can do to remedy this problem is creating a swapfile. On an SSD based system, Swap spaces work almost as fast as RAM, because SSDs have very high R/W speeds.

Check hard disk space availability using

df -h

There should be an output like this

Filesystem      Size  Used Avail Use% Mounted on
udev            238M     0  238M   0% /dev
tmpfs            49M  624K   49M   2% /run
/dev/vda1        20G  1.1G   18G   6% /
tmpfs           245M     0  245M   0% /dev/shm
tmpfs           5.0M     0  5.0M   0% /run/lock
tmpfs           245M     0  245M   0% /sys/fs/cgroup
tmpfs            49M     0   49M   0% /run/user/1001

The steps to create a swap file and allocating it as swap are

sudo fallocate -l 1G /swapfile
sudo chmod 600 /swapfile
sudo mkswap /swapfile
sudo swapon /swapfile

We can verify using

sudo swapon --show
NAME      TYPE  SIZE USED PRIO
/swapfile file 1024M   0B   -1

And now if we see RAM usage using free -h , we’ll see

              total        used        free      shared  buff/cache   available
Mem:           488M         37M         96M        652K        354M        425M
Swap:          1.0G          0B        1.0G

Do not use this as a permanent measure for any SSD based filesystem. It can corrupt your SSD if used as swap for long. We use this only for short periods of time to help us build android apks on low ram systems.

Continue ReadingAdding swap space to your DigitalOcean droplet, if you run out of RAM

Doing a table join in Android without using rawQuery

The Open Event Android App, downloads data from the API (about events, sessions speakers etc), and saves them locally in an SQLite database, so that the app can work even without internet connection.

Since there are multiple entities like Sessions, Speakers, Events etc, and each Session has ids of speakers, and id of it’s venue etc, we often need to use JOIN queries to join data from two tables.


Android has some really nice SQLite helper classes and methods. And the ones I like the most are the SQLiteDatabase.query, SQLiteDatabase.update, SQLiteDatabase.insert ones, because they take away quite a bit of pain for typing out SQL commands by hand.

But unfortunately, if you have to use a JOIN, then usually you have to go and use the SQLiteDatabase.rawQuery method and end up having to type your commands by hand.

But but but, if the two tables you are joining do not have any common column names (actually it is good design to have them so – by having all column names prefixed by tablename_ maybe), then you can hack the usual SQLiteDatabase.query() method to get a JOINed query.

Now ideally, to get the Session where speaker_id was 1, a nice looking SQL query should be like this –

SELECT * FROM speaker INNER JOIN session
ON speaker_id = session_speaker_id
WHERE speaker_id = 1

Which, in android, can be done like this –

String rawQuery = "SELECT * FROM " + SpeakerTable.TABLE_NAME + " INNER JOIN " + SessionTable.TABLE_NAME
        + " ON " + SessionTable.EXP_ID + " = " + SpeakerTable.ID
        + " WHERE " + SessionTable.ID + " = " +  id;
Cursor c = db.rawQuery(
        rawQuery,
        null
);

But of course, because of SQLite’s backward compatible support of the primitive way of querying, we turn that command into

SELECT *
FROM session, speaker
WHERE speaker_id = session_speaker_id AND speaker_id = 1

Now this we can write by hacking the terminology used by the #query() method –

Cursor c = db.query(
        SessionTable.TABLE_NAME + " , " + SpeakerTable.TABLE_NAME,
        Utils.concat(SessionTable.PROJECTION, SpeakerTable.PROJECTION),
        SessionTable.EXP_ID + " = " + SpeakerTable.ID + " AND " + SpeakerTable.ID + " = " +  id,
        null,
        null,
        null,
        null
);

To explain a bit, the first argument String tableName can take table1, table2 as well safely, The second argument takes a String array of column names, I concatenated the two projections of the two classes. and finally, put by WHERE clause into the String selection argument.

You can see the code for all database operations in the android app here  https://github.com/fossasia/open-event-android/blob/master/android/app/src/main/java/org/fossasia/openevent/dbutils/DatabaseOperations.java

Continue ReadingDoing a table join in Android without using rawQuery

Getting code coverage in a Nodejs project using Travis and CodeCov

We had set up unit tests on the webapp generator using mocha and chai, as I had blogged before.

But we also need to get coverage reports for each code commit and the overall state of the repo.

Since it is hosted on Github, Travis comes to our rescue. As you can see from our .travis.yml file, we already had Travis running to check for builds, and deploying to heroku.

Now to enable Codecov, simply go to http://codecov.io and enable your repository (You have to login with Github so see your Github repos) .

Once you do it, your dashboard should be visible like this https://codecov.io/github/fossasia/open-event-webapp

We use istanbul to get codecoverage. To try it out just use

istanbul cover _mocha

On the root of your project (where the /test/ folder is ) . That should generate a folder called coverage or lcov. Codecov can read lcov reports. They have provided a bash file which can be run to automatically upload coverage reports. You can run it like this –

bash <(curl -s https://codecov.io/bash)

Now go back to your codecov dashboard, and your coverage report should show up.

Screenshot from 2016-08-29 21-23-00

If all is well, we can integrate this with travis so that it happens on every code push. Add this to your travis.yml file.

script:
  - istanbul cover _mocha
after_success:
- bash <(curl -s https://codecov.io/bash)

This will ensure that on each push, we run coverage first. And if it is successful, we push the result to codecov.

We can see coverage file by file like this

Screenshot from 2016-08-29 21-23-35

And we can see coverage line by line in a file like this

Screenshot from 2016-08-29 21-26-55


Continue ReadingGetting code coverage in a Nodejs project using Travis and CodeCov

Keep your node server running using PM2

The open event webapp generator is a node projects (using an express server), and a copy of it runs all the time on my personal DigitalOcean box (other than our heroku instance).

On a service like Heroku, the platform manages the task of bringing your server process up. But on, say a Linux distro on the DO box, you have to manually do

 npm run server

to be able to run the server.

While that is all good, it is a foreground shell process, which means, you will lose the node server, when you log out (or your internet connection into the ssh breaks).
So we need to be able to keep the process running in the background.

The way we do it in bash on Unix, is that we can do either of the following

 npm run server&

The “&” at the end means it will make a background fork of this task. Or if you’ve already started it without it, you can also do the following.

npm run server # starts in foreground
#Press Ctrl + Z, this pauses task and frees the shell
bg 1 # sends task no 1 to background thread.

Again, both these are hacky methods, will work only on Unix OSs, and are not really recommended for production.
For production, we need a Process Manager, for Node.js the best we can get is pm2 – purpose built process manager for node.

Install pm2 first

sudo npm install -g pm2

Using pm2, we can start any process that can be started with node. We can start the app.js script like this

pm2 start src/app.js

Also, pm2 can run npm tasks too like

pm2 start npm -- start

Pm2 has a pretty status message display window. And we can start, stop, pause, kill and/or restart any process.


Screenshot from 2016-08-28 01-19-29

Continue ReadingKeep your node server running using PM2

File upload progress in a Node app using Socket.io

If you look at the webapp generator, you’ll see that there is an option to upload a zip file containing event data. We wanted to give visual cue to the user when he is uploading to see how much file has uploaded.

We are uploading the file, and giving the generate start command via socket.io events instead of POST requests here.

To observe file upload progress on socket (when sending file using a Buffer), there is an awesome node module available called socketio-upload-progress.

In our webapp you can see we implemented it on the frontend here in the form.js and here in the backend in app.js

Basically on the backend you should add the socketio-file-upload module as a middleware to express

var siofu = require("socketio-file-upload");
var app = express()
    .use(siofu.router)
    .listen(8000);

After a socket is opened, set up the upload directory and start listening for uploads

io.on("connection", function(socket){
    var uploader = new siofu();
    uploader.dir = "/path/to/save/uploads";
    uploader.listen(socket);
});

On the frontend, we’ll listen for an input change on an file input type element whose id is siofu_upload

var socket = io.connect();
var uploader = new SocketIOFileUpload(socket);
uploader.listenOnInput(document.getElementById("siofu_input"));

One thing to note here is that, if you observe percentage of upload on frontend, it’ll give you false values. The correct values of how much data is actually transferred can be found in the backend. So observe progress in backend, and send percentage to frontend using the same socket.

  uploader.on('progress', function(event) {
    console.log(event.file.bytesLoaded / event.file.size)
    socket.emit('upload.progress', {
      percentage:(event.file.bytesLoaded / event.file.size) * 100
    })
});


Continue ReadingFile upload progress in a Node app using Socket.io

Using ftp-deploy in node.js to publish websites over FTP

In the Open Event Webapp Generator, we recently added the functionality for organisers to submit their ftp credentials and when the website is generated, it’ll automatically upload the website to the chosen ftp server (allowing creation of subdirectory internally, if the organiser so wants).

To achieve we used the very useful nodejs module ftp-deploy which is a wrapper on the popular jsftp library

The code dealing with ftp deployment in our webapp generator can be found here  –

https://github.com/fossasia/open-event-webapp/blob/development/src/backend/ftpdeploy.js

As can be seen, deploying using ftp-deploy is pretty straightforward. Primarily we need a config object


  var config = {
    username: ftpDetails.user, //prompted on commandline if not given
    password: ftpDetails.pass, // optional, prompted if none given
    host: ftpDetails.host,
    port: 21,
    localRoot: path.join(__dirname, '/../../dist', appFolder), //local folder containing website
    remoteRoot: ftpDetails.path, //path on ftp server to host website
    exclude: ['.git', '.idea', 'tmp/*'],
    continueOnError: true
};

You can set up some event listeners for events like uploaded uploading and upload-error

Continue ReadingUsing ftp-deploy in node.js to publish websites over FTP

Doing asynchronous tasks serially using ‘async’ in node.js

In the open-event-webapp generator we need to perform a lot of asynchronous tasks in the background like –

  • Downloading images and audio assets
  • Downloading the jsons from the endpoints
  • Generating the html from handelbar templates
  • and so on . .

Sometimes tasks depend on previous tasks, and in such cases we need to perform them serially. Also there are tasks like image downloads, that would be better if done parallelly.

To achieve both these purposes, there is an awesome node.js library called async that helps achieve this.

To perform asynchronous tasks serially (one task, then another task), we can use something like this –


async.series([
    (done) => {
       someAsyncFunction(function () { done () })
    },
    //(done) => {..}, (done) => {..} more tasks here
    (done) => {
       someAsyncFunction(function () { done () })
    });
      
    }
]);

Basically async takes an array of functions. Each function contains a callback that you need to call when the internal task is finished. The 2nd task starts, only after the done() callback of first task is executed.

An example of it’s usage can be seen in the open-event-webapp project here

Continue ReadingDoing asynchronous tasks serially using ‘async’ in node.js

Sending mails using Sendgrid on Nodejs

The open-event webapp generator project needs to send an email to the user notifying him whenever generating the webapp is finished, containing the links to the preview and zip download.

For sending emails, the easiest service we found we could use was SendGrid  which provides upto 15000 free emails a month for students who have a Github Education Pack. (It anyway provides 10000 free emails to all users).

To use sendgrid, it’s best to use the sendgrid npm module that SendGrid officially builds. To get that installed just use the following command –

npm install --save sendgrid

Also, once you have made an account on Sendgrid, create an API key, and save it as an environment variable (so that your API key is not exposed in your code). For example in our project, we save it in the environment variable SENDGRID_API_KEY
To make it permanent you can add it to your ~/.profile file

export SEDGRID_API_KEY=xxxxxxxxxxxxxxxxxxx

The actual sending takes place in the mailer.js script in our project.

Basically we are using the mail helper class provided in the sendgrid module, and the bare minimum code required to send a mail is as follows

  var helper = require('sendgrid').mail
  from_email = new helper.Email('test@example.com')
  to_email = new helper.Email('test@example.com')
  subject = 'Hello World from the SendGrid Node.js Library!'
  content = new helper.Content('text/plain', 'Hello, Email!')
  mail = new helper.Mail(from_email, subject, to_email, content)
 
  var sg = require('sendgrid')(process.env.SENDGRID_API_KEY);
  var request = sg.emptyRequest({
    method: 'POST',
    path: '/v3/mail/send',
    body: mail.toJSON()
  });
 
  sg.API(request, function(error, response) {
    console.log(response.statusCode)
    console.log(response.body)
    console.log(response.headers)
  })

You need to replace the to and from emails to your requirements.

Also as you can see in our project’s code, if you want to send HTML formatted data, you can change the content type from text/plain to text/html and then add any html content (as a string) into the content.

Continue ReadingSending mails using Sendgrid on Nodejs

Using Heroku pipelines to set up a dev and master configuration

The open-event-webapp project, which is a generator for event websites, is hosted on heroku. While it was easy and smooth sailing to host it on heroku for a single branch setup, we moved to a 2-branch policy later on. We make all changes to the development branch, and every week once or twice, when the codebase is stable, we merge it to master branch.

So we had to create a setup where  –

master branch –> hosted on –> heroku master

development branch –> hosted on –> heroku dev

Fortunately, for such a setup, Heroku provides a functionality called pipelines and a well documented article on how to implement git-flow


First and foremost, we created two separate heroku apps, called opev-webgen and opev-webgen-dev

To break it down, let’s take a look at our configuration. First step is to set up separate apps in the travis deploy config, so that when development branch is build, it pushed to open-webgen-dev and when master is built, it pushes to opev-webgen app. The required lines as you can see are –

https://github.com/fossasia/open-event-webapp/blob/master/.travis.yml#L25

https://github.com/fossasia/open-event-webapp/blob/development/.travis.yml#L25

Now, we made a new pipeline on heroku dashboard, and set opev-webgen-dev and opev-webgen in the staging and production stages respectively.

Screenshot from 2016-07-31 04-33-30 Screenshot from 2016-07-31 04-34-41

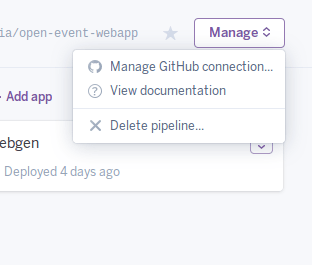
Then, using the “Manage Github Connection” option, connect this app to your github repo.

Screenshot from 2016-07-31 04-36-17

Once you’ve done that, in the review stage of your heroku pipeline, you can see all the existing PRs of your repo. Now you can set up temporary test apps for each PR as well using the Create Review App option.

Screenshot from 2016-07-31 04-37-38

So now we can test each PR out on a separate heroku app, and then merge them. And we can always test the latest state of development and master branches.

Continue ReadingUsing Heroku pipelines to set up a dev and master configuration

Unit testing JSON files in assets folder of Android App

So here is the scenario, your android app has a lot of json files in the assets folder that are used to load some data when in first runs.
You are writing some unit tests, and want to make sure the integrity of the data in the assets/*.json are preserved.

You’d assume, that reading JSON files should not involve using the Android Runtime in any way, and we should be able to read JSON files in local JVM as well. But you’re wrong. The JSONObject and JSONArray classes of Android are part of android.jar, and hence

 
JSONObject myJson = new JSONObject(someString);

The above code will not work when running unit tests on local JVM.

Fortunately, our codebase already using Google’s GSoN library to parse JSON, and that works on local JVM too (because GSoN is a core Java library, not specifically an Android library).

Now the second problem that comes is that when running unit tests on local JVM we do not have the getResources() or getAssets() functions.
So how do we retrieve a file from the assets folder ?

So what I found out (after a bit of trial and error and poking around with various dir paths), is that the tests are run from the app folder (app being the Android application module – it is named app by default by Android Studio, though you might have had named it differently)

So in the tests file you can define at the beginning

    public static final String  ASSET_BASE_PATH = "../app/src/main/assets/";

And also create the following helper function

    public String readJsonFile (String filename) throws IOException {
        BufferedReader br = new BufferedReader(new InputStreamReader(new FileInputStream(ASSET_BASE_PATH + filename)));
        StringBuilder sb = new StringBuilder();
        String line = br.readLine();
        while (line != null) {
            sb.append(line);
            line = br.readLine();
        }

        return sb.toString();
    }

Now wherever you need this JSON data you can just do the following

        Gson gson = new GsonBuilder().create();
        events = gson.fromJson(readJsonFile("events.json"),
                Event.EventList.class);
        eventDatesList = gson.fromJson(readJsonFile("eventDates.json"), EventDates.EventDatesList.class);
Continue ReadingUnit testing JSON files in assets folder of Android App