Adding Code of Conduct in Open Event Web app

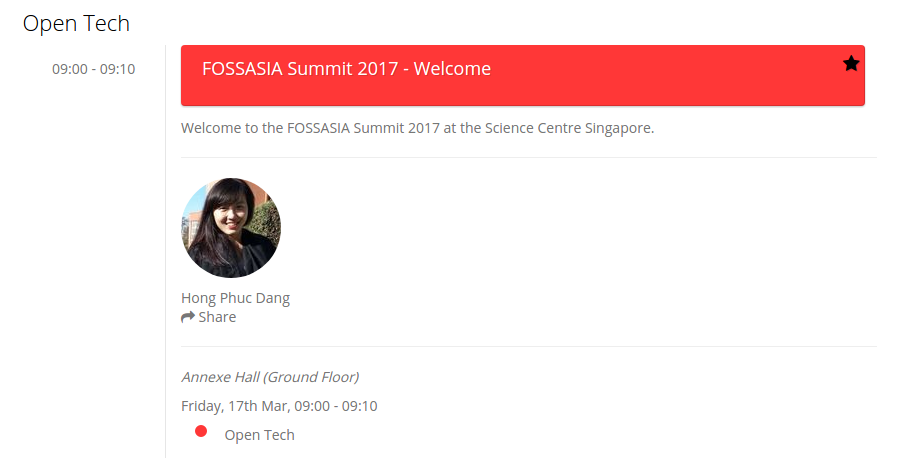
Open Event Server sends JSON data as a response of its REST (Representational State Transfer) API. The main eventyay platform allows organizers to add code of conduct to their event, as a result the JSON data sent by the server contains code of conduct key value pair, this value is extracted from the data and is used to create a separate page for Code of Conduct in any event.

The steps for data extraction and compilation are as follows:

Extracting code of conduct

Since open event server has two types of JSON data formats v1 and v2, both of them contains code of conduct. The key for code of conduct in v1 is code_of_conduct and for v2 is code-of-conduct. The data extraction for v1 data format occurs in fold_v1.js and the main event details are stored in an object urls as shown below:

fold_v1.js

const urls= {
 ....
 ....
 ....

 email: event.email,
 orgname: event.organizer_name,
 location_name: event.location_name,
 featuresection: featuresection,
 sponsorsection: sponsorsection,
 codeOfConduct: event.code_of_conduct
};


fold_v2.js

const urls= {
 ....
 ....
 ....

 email: event.email,
 orgname: event['organizer-name'],
 location_name: event['location-name'],
 featuresection: featuresection,
 sponsorsection: sponsorsection,
 codeOfConduct: event['code-of-conduct']
};

Adding template for CoC

Now we have extracted the data and have stored the value for code of conduct in an object, we need to render this in a template. For this, we created a template named CoC.hbs and the data for code of conduct is accessed via {{{eventurls.codeOfConduct}}} as shown below.

{{>navbar}}
<div class="main-coc-container container">
 <div class="row">
   <div class="middle col-sm-12">
     <h2 class="filter-heading track-heading text-center">
       <span>Code of Conduct</span>
     </h2>
   </div>
 </div>

 <div class="row">
   <div class="col-sm-12 col-md-12">
     <div class="coc">
       {{{eventurls.codeOfConduct}}}
     </div>
   </div>
 </div>
</div>
{{>footer}}

Compiling and minifying

Now we have stored the event details in an object we copy this object as a key to jsonData, this data is passed as an argument for compiling the code of conduct template namely CoC.hbs to a HTML file and is lately minified. For minification purpose gulp module is used.

if(jsonData.eventurls.codeOfConduct) {
 setPageFlag('CoC');
 fs.writeFileSync(distHelper.distPath + '/' + appFolder + '/CoC.html', minifyHtml(codeOfConductTpl(jsonData)));
}

Adding link to CoC page

Till now, we have successfully compiled a HTML page for code of conduct of an event. This page is linked under a heading in the footer section of every page by placing reference to it in footer.hbs.

{{#if eventurls.codeOfConduct}}
 <li><a target="_self" href="CoC.html">Code of Conduct</a></li>
{{/if}}

Customizing the CoC container

The code of conduct page is customized by placing the container in the center and aligning the text. Styling like background-color, padding and margin are set on the container to provide a better appearance to the page.

.coc {
 margin: auto;
 text-align: justify;
 width: 60%;

 a {
   &:hover {
     color: $dark-black;
   }
 }
}

.main-coc-container {
 background-color: $main-background;
 margin-bottom: 4%;
 margin-top: 2%;
 padding-bottom: 50px;
 padding-top: 2%;
}

Resources

Continue ReadingAdding Code of Conduct in Open Event Web app

Implementing Search Functionality In Calendar Mode On Schedule Page In Open Event Webapp

f79b5a2b-b679-4095-8311-cf403193e0cc.png

Calendar Mode

fef75c16-da0a-4145-a2e5-620d63637194.png

The list mode of the page already supported the search feature. We needed to implement it in the calendar mode. The corresponding issue for this feature is here. The whole work can be seen here.

First, we see the basic structure of the page in the calendar mode.

<div class="{{slug}} calendar">
 <!-- slug represents the currently selected date -->
 <!-- This div contains all the sessions scheduled on the selected date -->
 <div class="rooms">
   <!-- This div contains all the rooms of an event -->
   <!-- Each particular room has a set of sessions associated with it on that particular date -->
   <div class="room">
     <!-- This div contains the list of session happening in a particular room -->
     <div class="session"> <!-- This div contains all the information about a session -->
       <div class="session-name"> {{title}} </div> <!-- Title of the session -->
       <h4 class="text"> {{{description}}} </h4> <!-- Description of the session -->
       <!-- This div contains the info of the speakers presenting the session -->
       <div class="session-speakers-list">
         <div class="speaker-name"><strong>{{{title}}}</div> <!-- Name of the speaker -->
           <div class="session-speakers-more"> {{position}} {{organisation}} </div> <!-- Position and organization of speaker-->
         </div>
       </div>
     </div>
   </div>
 </div>
</div>

The user will type the query in the search bar near the top of the page. The search bar has the class fossasia-filter.

c30a84c8-c456-4116-86fa-c5ffc382bdb3.png

We set up a keyup event listener on that element so that whenever the user will press and release a key, we will invoke the event handler function which will display only those elements which match the current query entered in the search bar. This way, we are able to change the results of the search dynamically on user input. Whenever a single key is pressed and lifted off, the event is fired which invokes the handler and the session elements are filtered accordingly.

Now the important part is how we actually display and hide the session elements. We actually compare few session attributes to the text entered in the search box. The text attributes that we look for are the title of the session, the name, position , and organization of the speaker(s) presenting the session. We check whether the text entered by the user in the search bar appears contiguously in any of the above-mentioned attributes or not. If it appears, then the session element is shown. Otherwise, its display is set to hidden. The checking is case insensitive. We also count the number of the visible sessions on the page and if it is equal to zero, display a message saying that no results were found.

For example:- Suppose the user enters the string ‘wel’ in the search bar, then we will iterate over all the different sessions and only those who have ‘wel’ in their title or in the name/ position/organization of the speakers will be visible. Rest all the sessions would be hidden.

Here is the excerpt from the code. The whole file can be seen here

$('.fossasia-filter').change(function() {
 var filterVal = $(this).val(); // Search query entered by user
 $('.session').each(function() { // Iterating through all the sessions. Check for the title of the session and the name of the
   // speaker and its position and organization
if ($(this).find('.session-name').text().toUpperCase().indexOf(filterVal.toUpperCase()) >= 0 ||
 $(this).find('.session-speakers-list a p span').text().toUpperCase().indexOf(filterVal.toUpperCase()) >= 0 || $(this).find('.speaker-name').text().toUpperCase().indexOf(filterVal.toUpperCase()) >= 0) {
     $(this).show(); // Matched so display the session
   } else {
     $(this).hide(); // Hide the Element
   }
 });
 var calFilterLength = $('.calendar:visible').length;
 if((isCalendarView && calFilterLength == 0)) { // No session elements found
   $('.search-filter:first').after('<p id="no-results">No matching results found.</p>');
 }
}).keyup(function() {
 $(this).change();
});

Below is the default view of the calendar mode on the schedule page

471d6b30-d8db-4dea-8593-df0ad68072a6.png

On entering ‘wel’ in the search bar, sessions get filtered

d6eec31e-fde1-4640-881b-a0216b68533d.png

 References:

Continue ReadingImplementing Search Functionality In Calendar Mode On Schedule Page In Open Event Webapp

Implementing ICS/ICAL to sync calendars with the event schedule in Open Event Webapp

As an end result, we want to provide a button to the user which will export the whole data of the event schedule to an ICS file and present it to the user for download after clicking the button. The whole work regarding the feature can be seen here.

Instead of implementing the whole specification ourselves which would be much tougher and time-consuming, we looked for some good open source libraries to do a bit of heavy lifting for us. After searching exhaustively for the solution, we came across this library which seemed appropriate for the job. The heart of the library is a function which takes in an object which contains information about the session. It expects information about the start and end time, subject, description and location of the session. Here is an excerpt from the function. The whole file can be seen here

var addEvent = function (session) {
 var calendarEvent = [
   'BEGIN:VEVENT',
   'UID:' + session.uid,
   'CLASS:PUBLIC',
   'DESCRIPTION:' + session.description,
   'DTSTART;VALUE=DATETIME:' + session.begin,
   'DTEND;VALUE=DATE:' + session.stop,
   'LOCATION:' + session.location,
   'SUMMARY;LANGUAGE=en-us:' + session.subject,
   'TRANSP:TRANSPARENT',
   'END:VEVENT'
 ];
 calendarEvents.push(calendarEvent);
};

We need to call the above function for every session in the event schedule. In the schedule template file, we have the jsonData object available which contain all the information about the event. It contains a field called timeList which contains the chronological order of the different sessions taking place throughout the events. The structure of that sub-object is something like this.

[{'slug': '2017-03-20', 'times': {'caption' : '09:00-09:30', 'sessions': [{'title': 'Welcome', 'description': 'Opening of the event', 'start': '09:00', 'end': '09:30'}]}]

So, we define a function for iterating through every session in the above object and adding it to the calendar. We can use most of the attributes directly but have to modify the date and time fields of the session to an appropriate format before adding it. The specification expects time in the ISO 8601 Format. You can read more about the specification here. For eg – If the date is 2017-03-20 and the time is 09:30 then it should be written as 20170320T093000. Here is some part of the function here

function exportICS() {
 var scheduleArr = {{{json timeList}}};
 // Helper functions for converting time to ISO 8601 Format
 function removeDashFromDate(date) {
   return date.replace(/-/g, '');
 }
 function removeColonFromTime(time) {
   return time.replace(/:/g, '');
 }
 // Iteration through the object and adding every session to the calendar
 scheduleArr.forEach(function(scheduleDay) {
   var date = removeDashFromDate(scheduleDay.slug);
   scheduleDay.times.forEach(function(time) {
     time.sessions.forEach(function(session) {
       var sessObj = {};
       sessObj.begin = date + 'T' + removeColonFromTime(session.start) + '00';
       sessObj.stop = date + 'T' + removeColonFromTime(session.end) + '00';
       sessObj.subject = session.title;
       sessObj.description = session.description;
       sessObj.location = session.location;
       cal.addEvent(sessObj);
     });
   });
 });
 cal.download('calendar', 'ics', false); // Download the ics file of the calendar
}

After defining the function, we add a button for starting the download of the whole schedule of the event. On clicking, we call the function which initiates the download after all the sessions of the event have been added.

<span class="schedule-download">
 <button type="button" class="btn btn-default export-schedule"><i class="fa fa-calendar" aria-hidden="true"></i></button>
</span>

$('.export-schedule').click(function() {
 exportICS();
});

Here is the export schedule button

65203af9-3962-4ab5-9655-3250bf2253a0.png

This is the download pop-up of the ICS file of the event.

Screenshot from 2017-08-10 21-56-16.png

After importing it in the Google calendar

Screenshot from 2017-08-10 23-01-22.png

References

Continue ReadingImplementing ICS/ICAL to sync calendars with the event schedule in Open Event Webapp

Implementing Tracks Filter in Open Event Webapp using the side track name list

4f451d29-c6c2-44be-9ef7-d91a45fc1eb0.png

On Clicking the Design, Art, Community Track

ff85d907-512b-4a41-be49-888bbd17bf83.png

But, it was not an elegant solution. We already had a track names list present on the side of the page which remained unused. A better idea was to use this side track names list to filter the sessions. Other event management sites like http://sched.org follow the same idea. The relevant issue for it is here and the major work can be seen in this Pull Request. Below is the screenshot of the unused side track names list.

5b15a297-fd5e-4c23-bc1b-dbed193db0f4.png

The end behavior should be something like this, the user clicks on a track and only sessions belonging to the track should be visible and the rest be hidden. There should also be a button for clearing the applied filter and reverting the page back to its default view. Let’s jump to the implementation part.

First, we make the side track name list and make the individual tracks clickable.

<div class="track-names col-md-3 col-sm-3"> 
  {{#tracknames}}
    <div class="track-info">
      <span style="background-color: {{color}};" 
      class="titlecolor"></span>
      <span class="track-name" style="cursor: pointer">{{title}}
      </span>
    </div>
  {{/tracknames}}
</div>

f45f1591-937d-4e2f-9245-237cfaf3af0d.png

Now we need to write a function for handling the user click event on the track name. Before writing the function, we need to see the basic structure of the tracks page. The divs with the class date-filter contain all the sessions scheduled on a given day. Inside that div, we have another div with class tracks-filter which contains the name of the track and all the sessions of that track are inside the div with class room-filter.

Below is a relevant block of code from the tracks.hbs file

<div class="date-filter">
  // Contains all the sessions present in a single day
  <div class="track-filter row">
    // Contains all the sessions of a single track
    <div class="row">
      // Contains the name of the track
      <h5 class="text">{{caption}}</h4>
    </div>
    <div class="room-filter" id="{{session_id}}">
      // Contain the information about the session
    </div>
  </div>
</div>

We iterate over all the date-filter divs and check all the track-filter divs inside it. We extract the name of the track and compare it to the name of the track which the user selected. If both of them are same, then we show that track div and all the sessions inside it. If the names don’t match, then we hide that track div and all the content inside it. We also keep a variable named flag and set it to 0 initially. If the user selected track is present on a given day, we set the flag to 1. Based on it, we decide whether to display that particular day or not. If the flag is set, we display the date-filter div of that day and the matched track inside it. Otherwise, we hide the div and all tracks inside it.

$('.track-name').click(function() {
  // Get the name of the track which the user clicked
  trackName = $(this).text();
  // Show the button for clearing the filter applied and reverting to the default view
  $('#filterInfo').show();
  $('#curFilter').text(trackName);
  // Iterate through the divs and show sessions of user selected track
  $('.date-filter').each(function() {
    var flag = 0;
    $(this).find('.track-filter').each(function() {
      var name = $(this).find('.text').text();
      if(name != trackName) {
        $(this).hide();
        return;
      }
      flag = 1;
      $(this).show();
    });
    if (flag) {
     $(this).show();
    } else {
      $(this).hide();
    }
  });
});

On Selecting the Android Track of FOSSASIA Summit, we see something like this

935f208b-c17c-4d41-abb6-7197c003d962.png

Now the user may want to remove the filter. He/she can just click on the Clear Filter button shown in the above screenshot to remove the filter and revert back to the default view of the page.

$('#clearFilter').click(function() {                                                                                                   
  trackFilterMode = 0;                                                                                                                 
  display();                                                                                                                           
  $('#filterInfo').hide();                                                                                                             
});

Back to the default view of the page

2ff61ccf-17cf-4595-9c2f-e6825de549f7.png

References:

Continue ReadingImplementing Tracks Filter in Open Event Webapp using the side track name list

Creating System Images UI in Open Event Frontend

In Open Event Frontend, under the ‘admin/content’ route, ‘system-images’ route is present in which a user can update the image of the event topic he has uploaded at the time of creating an event. We achieved this as follows:

First, we create a route called ‘system/images’.

ember g route admin/content/system-images

This will generate three files:
1) routes/admin/content/system-images.js (route)
2) templates/admin/content/system-images.hbs (template)
3) test/unit/routes/admin/content/system-images-test.js (test file)
We also create a subroute of system-images route so as to render the subtopics queried through API.

ember g route admin/content/system-images/list

This will generate three files:
1) routes/admin/content/system-images/list.js(subroute)
2) templates/admin/content/system-images/list.hbs(template)
3) test/unit/routes/admin/content/system-imageslist-test.js(test file)

From our ‘system-images’ route, we render the ‘system-images’ template. We have a subroute of system-images route called as ‘list’ in which we render the subtopics available to us via API. The left side menu is the content of ‘system-images.hbs’ and the content on the right is it’s subroute i.e ‘list.hbs’. The ‘list’ subroute provides a facility to upload the system image. The API returns an array of objects containing subtopics as follows(single object is shown here, there will be multiple in the array)

{
            id          : 4545,
            name        : 'avatar',
            placeholder : {
              originalImageUrl : 'https://placeimg.com/360/360/any',
              copyright        : 'All rights reserved',
              origin           : 'Google Images'
            }
          },

Following is the content of our uploader i.e ‘list.hbs’ which is a subroute of the system-images.hbs.

<div class="ui segment">
  {{#each model as |subTopic|}}
    <h4>{{subTopic.name}}</h4>
    <img src="{{subTopic.placeholder.originalImageUrl}}" class="ui fluid image" alt={{subTopic.name}}>
    <div class="ui hidden divider"></div>
    <button class="ui button primary" {{action 'openModal' subTopic}} id="changebutton">{{t 'Change'}}</button>
  {{/each}}
</div>
{{modals/change-image-modal isOpen=isModalOpen subTopic=selectedSubTopic}}

We can see from the above template that we are iterating the response(subtopics) from the API. For now, we are just using the mock server response since we don’t have API ready for it. There is one ‘upload’ button which opens up the ‘change-image-modal’ to upload the image which looks as follows:

The ‘change-image-modal.hbs’ has a content as follows:

<div class="sixteen wide column">
        {{widgets/forms/image-upload
          needsCropper=true
          label=(t 'Update Image')
          id='user_image'
          aspectRatio=(if (eq subTopic.name 'avatar') (array 1 1))
          icon='photo'
          hint=(t 'Select Image')
          maxSizeInKb=10000
          helpText=(t 'For Cover Photos : 300x150px (2:1 ratio) image.
                    For Avatar Photos : 150x150px (1:1 ratio) image.')}}

        <form class="ui form">
          <div class="field">
            <label class="ui label">{{t 'Copyright information'}}</label>
            <div class="ui input">
              {{input type="text"}}
            </div>
          </div>
          <div class="field">
            <label class="ui label">{{t 'Origin information'}}</label>
            <div class="ui input">
              {{input type="text"}}
            </div>
          </div>
        </form>

      </div>

The above uploader has a custom ‘image-upload’ widget which we are using throughout the Open Event Frontend. Also, there are two input fields i.e ‘copyright’ and ‘origin’ information of the image. On clicking the ‘Select Image’ button and after selecting our image from the file input, we get a cropper for the image to be uploaded. The image can be cropped there according to the aspect ration maintained for it. The cropper looks like:

Thus, a user can update the image of the Event Topic that he created.

Resources:

Ember JS Official guide.

Mastering modals in Ember JS by Ember Guru.

Source codehttps://github.com/fossasia/open-event-frontend


Continue ReadingCreating System Images UI in Open Event Frontend

Custom Handlebar Helpers used in Open Event Frontend

In Open Event Frontend, we are using custom handlebars like ‘confirm’, ‘css’, ‘includes’, ‘sanitize’, ‘text-color’, etc. Custom helpers are used to format any quantity for example ‘capitalizing the first letter of a word’, ‘reducing a number’s fractional part’, ‘making a text bold’, etc. Thus, with the help of Custom Helpers we can avoid manipulating data in controllers. We use Custom Helpers in the Handlebars’ braces before the property to be formatted. In this blog, I will be explaining one of the custom helpers used in Open Event Frontend.

Creation of custom helper :

Since ember provides an efficient and easy way to create components, controllers, routes through it’s ember-cli, we can also create helpers through a single command.

ember g helper url-encode

This will generate a helper in our app i.e two files. First one url-encode.js where all of our logic goes for helper and the other one url-encode-test.js where the tests for it are written.

Following are the two files you are going to see once you run above commands.

import Ember from 'ember';

const { Helper } = Ember;

export function urlEncode(params) {
  
}

export default Helper.helper(urlEncode);

      url-encode.js

import { test } from 'ember-qunit';
import moduleForComponent from 'open-event-frontend/tests/helpers/component-helper';
import hbs from 'htmlbars-inline-precompile';

moduleForComponent('url-encode', 'helper:url-encode');

test('it renders', function(assert) {
  this.set('inputValue', 'hello world');
  this.render(hbs`{{url-encode inputValue}}`);
  assert.equal(this.$().text().trim(), 'hello%20world');
});

        url-encode-test.js

Now all the logic for the helper goes in url-encode.js. But before that, we pass the helper in the template and pass the params to the url-encode.js to process the data and return it.

Use in template:

<a target="_blank" rel="noopener noreferrer" href="https://www.facebook.com/sharer.php?u={{url-encode event.url}}"></a>

      Fig. Use of helpers

So, basically in the above code, we have used the helper “url-encode” and have passed the parameter “event.url” to it which we are getting from the model. Now we need to get this parameter in the url-encode.js file where we will encode it and return.

Accessing the params in helper:

import Ember from 'ember';

const { Helper } = Ember;

/**
 * Helper to URL encode a string
 * @param params
 * @returns {*}
 */
export function urlEncode(params) {
  if (!params || params.length === 0) {
    return '';
  }
  return encodeURIComponent(params[0]);
}

export default Helper.helper(urlEncode);

The above code shows how we can access the params in the url-encode.js. ‘params’ is an array passed which can be accessed in the function directly. Now we just need to perform the action on the params and return it to the template. Here we are using ‘encodeURIComponent’ method to encode the URL and then returning it.
This is how the helpers work. They are a better way to reduce redundancy and help code structure better.

Resources:

Ember JS Official guide

Blog on DockYard about Helpers by Lauren Tan

Source code:

https://github.com/fossasia/open-event-frontend/blob/development/app/helpers/url-encode.js

https://github.com/fossasia/open-event-frontend/blob/development/tests/integration/helpers/url-encode-test.js

Continue ReadingCustom Handlebar Helpers used in Open Event Frontend

Handlebars.js used in Open Event Web App

I recently started working in the Open Event Webapp project. One of the initial issues that I took up was a trivial UI bug. It was about adding sponsor names beneath sponsor images for better representation. The issue can be found here. On reading up the code base and exploring the project a bit, I came across a new template – Handlebars.js. Handlebars is a template which has it’s base with the Mustache templating language. One of the early discoveries that I made with Handlebars.js was the use of {{ }} and {{{ }}} and the basic difference between them. In general, all Handlebar.js expressions, just like in Mustache templating, are written between {{ }} or {{{ }}} type of brackets. That is how I learned to identify and distinguish Handlebars from core HTML, even though they are inter-linked. The official Handlebars documentation describes Handlebars expressions in the following way:

A handlebars expression is a {{, some contents, followed by a }} ”

Getting started with Handlebars.js

Installation:

For a basic Linux installation, type the following in your command line:

npm install --save handlebars

Including Handlebars in HTML:

<script src="handlebars-v4.0.10.js"></script>

Handlebars templates are often stored in .hbs files for better readability and accessibility. The Open Event Webapp project consists of a handlebars .hbs file for each of the tracks, events, rooms, schedule, sessions and speakers templates. These can be found here, that is under src/backend/templates folder.

Difference between {{ }} and {{{ }}}: 

Handlebars enables developers to print raw HTML tags or code with the help of {{{ }}}. On the contrary, if you don’t want to print HTML (which is usually the case), use {{ }}. For better understanding, let’s take an example.

If our JS has an object that looks something like:

$(function () {
   var templateScript = $("#title-template").html();

   var temp = Handlebars.compile(templateScript);

var Title= {
“title”: <a> Handlebars</a>
}

Then, HTML of the following kind will help to distinguish the {{ }} and {{{ }}} brackets.

<script id=”title-template” type=”text/x-handlebars-template”>
{{title}}
{{{title}}}
</script>

//the first line will contain an anchor tag with the name “Handlebars”
//the second line will contain “<a>Handlebars</a>”

Block helpers in Handlebars:

Block helpers are identified by a ‘ #’ and they help to define and access custom iterators.

Handlebars allow calling JavaScript functions with the help of ‘helpers’. It doesn’t allow direct JavaScript code in the HTML with templates. We can create our own helpers using Handlebars.registerHelper () in our JavaScript. We generally pass a function to the helper. A good example was provided in the Handlebars.js documentation:

Handlebars.registerHelper('noop', function(options) {
  return options.fn(this);
});

By default, Handlebars helpers take the current context as the context to pass(“this”). Other fields are overshadowed. Incase, we want to access one of the fields that is masked by the default “this” context, we have to use a path reference.

Iterations using helpers:

Helpers can be a great way  to iterate over lists or objects. I will demonstrate it with an example from the Open Event Webapp project. To display all the sponsors of an event in the home page of the event Webapp, we use the following handlebars code, where we iterate over the object list “sponsorpics” that we have. It looks something like this:

{'1': ['Oreilly', 'Amazon'], '2': ['Huawei', 'Google'],'3': ['RedHat', 'GitHub']}
     
{{#if eventurls.sponsorsection}}
<div class="sponsor-container">
       <section class="sponsorscont">
         <div class="row sponsor-row">
           <div class="col-sm-12 col-md-12 col-xs-12 text-center">
             <h1 class="section-header">Proudly supported by</h1><br>
           </div>
         </div>
         <div class="row">
           <div class="col-sm-10 col-sm-offset-1">


             <div class="row">
               {{#each sponsorpics}}
                 {{#each this}}
                   <div class="{{{divclass}}}">
                     <div class=" {{{sponsorimg}}} text-center">
                       <a href="{{{url}}}" data-toggle="tooltip" title="{{{type}}}">
                         <img class="lazy centre {{{imgsize}}}" alt="{{{name}}}" data-original="{{{logo}}}">
                       </a>
                       {{{name}}}
                     </div>
                   </div>
                 {{/each}}
               {{/each}}
             </div> <!-- sponsor-row -->
           </div>
         </div>
       </section>
     </div>
   {{/if}}

For your reference, you can view a sample Webapp for the OSCON 2017 event here.
For further information, please refer to Handlebars.js .
An interesting tutorial about Handlebars in 10 mins or less can be found here.

Continue ReadingHandlebars.js used in Open Event Web App

Maintaining Aspect Ratio of Images while Uploading in Open Event Frontend

In Open Event Frontend, we are using the image-upload at many places such as the cover photo of the event on the create event page, also at the system images (in the admin routes) where the user gets to change the image uploaded by him earlier, and also at the ‘profile’ route where the user can change his photo. But at different places, different dimensions of photos are needed since we are keeping standard in Open Event Frontend.

Therefore the image needs to be in a size with the correct ratio at the time of uploading. We are using the cropper component  for achieving this. The cropper is a modal which pops up after the image upload modal so that a user can crop the image according to the aspect ratio kept specific for that purpose. It looks as follows:

While dealing with an issue in Open Event Frontend, we had to have change in aspect ratio for ‘avatar’ images, unlike the other images. So, we had to modify our cropper modal so as to have different aspect ratios for different images when needed.

We solved the above problem as follows:

In our image-modal, we pass the aspect ratio as a parameter. So in our case, we wanted to set the aspect ratio 1:1 for the ‘avatar’ images only. Following is the code snippet of what we wanted:

{{widgets/forms/image-upload
needsCropper=true
label=(t 'Update Image')
id='user_image'
aspectRatio=(if (eq subTopic.name 'avatar') (array 1 1))
icon='photo'
hint=(t 'Select Image')
maxSizeInKb=10000
helpText=(t 'For Cover Photos : 300x150px (2:1 ratio) image.
For Avatar Photos : 150x150px (1:1 ratio) image.')}}

Thus, we passed the ‘aspectRatio’ as a parameter to the ‘image-upload’ modal. The image-upload further calls the cropper modal and passes ‘aspectRatio’.

{{#if needsCropper}}
{{modals/cropper-modal isOpen=cropperModalIsShown imgData=imgData onImageCrop=(action 'imageCropped') aspectRatio=aspectRatio}}
{{/if}}

Thus, we can use the passed param i.e ‘aspectRatio’ in our cropper to modify the logic for the aspect ratio. Following is what we did so as to obtain the aspect Ratio of 1:1 for ‘avatar’ images only. The default aspect ratio for all other images is 2:1.

onVisible() {
let viewPort = {};
let factor = 150;
const aspectRatio = this.getWithDefault('aspectRatio', [2, 1]);
viewPort.width = aspectRatio[0] * factor;
viewPort.height = aspectRatio[1] * factor;
viewPort.type = 'square';
this.$('.content').css('height', '300px');
this.$('img').croppie({
customClass : 'croppie',
viewport : viewPort,
boundary : {
height: 250
}
});
},

As shown above, we have kept a multiplying factor which is fixed. According to the aspect ratio specified, we calculate and set the width and height in the viewport object.

Thus, following is the thing (Aspect Ratio 1:1 ) we achieved for the ‘avatar’ images:


Resources
Official Ember JS guide: https://guides.emberjs.com/v1.10.0/templates/actions/

Blog on making our own modals: http://ember.guru/2014/master-your-modals-in-ember-js

Source code: https://github.com/sumedh123/open-event-frontend/tree/system-images

Continue ReadingMaintaining Aspect Ratio of Images while Uploading in Open Event Frontend

Rendering Child Route Templates Independent of Parent Template in Open Event Frontend

In the Open Event Frontend, we are having routes and it’s child routes so as to render our content on the webpage. Child routes are needed when we want to have multiple routes under a single route as a subroute. In Ember js, the child routes of a route inherit the parent content in them by default . But, in some cases, we may not want the parent template’s content to get rendered into the child route and may want the child template to be entirely different. This issue deals with the same that how can we achieve the child template entirely different from the parent one.

                                                  events/tickets/index

                                                   events/tickets/attendees

                                                   events/tickets/orders

Above screenshots show the ‘events/tickets’ and it’s child routes. Since the ‘tickets’ is the parent and it contains the left side menu as it’s content which is common in all the child routes shown (orders, attendees, index). The content on the right of the side menu is the child’s own content. Now let’s take the case of ‘tickets/access-codes’ route which has a child route ‘tickets/access-codes/create’ where we do not want to have the parent content in it.

Following screenshots show the above thing that we want to replicate:

                                                 events/tickets/access-codes

This is the parent template (in the issue) whose child template had to be entirely different which is shown as follows:

                                                events/tickets/access-codes/create

By default, the content of the parent template i.e ‘tickets/access-codes’ would have been rendered in create.hbs which is it’s child as shown above.

To avoid this behavior, I used the current route path which helps to customize the contents to be rendered in the child. For this I implemented a check which matches the currentRouteName with the one which we want to render (child). If it does not match, then the content of the parent will be rendered along with the child, otherwise, a separate template (only child) without the parent’s content will be rendered. Following code illustrates the same:

{{#if (not-includes session.currentRouteName 'events.view.tickets.access-codes.create')}}
<!-- Things you want to show with the parent content in it.-->
{{else}}
<!-- Things you don't want parent to be in.-->
 {{outlet}}
{{/if}}


Conclusion:

In this way we can customize whether to include the parent’s content in child routes or completely render different child route independent of parent’s content in it.

Resources:

Continue ReadingRendering Child Route Templates Independent of Parent Template in Open Event Frontend

Implementing Single Session Pages in Open Event Webapp

Recently, we implemented a feature request in the Open Event Webapp which allows the organizers of an event to choose the style of the sessions displayed on the event web site. Before this feature of individual session pages was implemented, we had a single default style of displaying collapsible session elements on the page. A small preview of the session containing its title, type, name, position, and picture of the speaker(s) presenting it would be shown on the different pages. When the user will click on this session element, it would collapse showing detailed information about it.

Before Clicking

2c12db41-d999-423a-bdee-6b639cbdbb0b.png

After Clicking on the first session element

fe1a3362-ebad-42a0-ba9d-0909c2de21a9.png

While this default behavior of collapse of session element on click (shown above) works well in most of the cases, it might not be apt in situations where the session contains a large amount of detail and a higher number of speakers presenting it. Single session pages would work better in that case.

So, we provided an option to select it on the generator form itself. We provided an input field asking which session style does the organizer want? Is it the single session style or the expandable session? The organizer can then select one of them and the site will be generated according to that!!

2989ee1f-509c-400d-94cd-023a06a3601d.png

The whole work was huge and you can view all of it here. I will only be describing the major parts of it here.

The first challenge was to make a template (handlebars) file for the individual sessions. This template would take a single session object as an input. The object would contain all the details about the session and after compilation during generation, a unique individual page for that session would be created.

Here is the basic structure of the template. You can view the whole file here

<div class="container session-container">
 <!-- Contains all the information about the session -->
 <div class="row single-session" id="{{session_id}}">
   <!-- Displaying the date, start and end time of the session -->
   <h3> {{startDay}} </h3>
   <div class = "eventtime"><span class="time-track">{{start}} - {{end}}</span></div>
   <div class="session-content">
     <div class="sizeevent event" id="event-title">
       <!-- Display the title, type and the track of the session -->
     </div>
     <div>
       <!-- Short abstract of the session -->
       {{{description}}}
       <div class="session-speakers-list">
         <!-- Contains detailed information about the speakers of the session. Display their picture, show their position, short biography and social links links like Github, Twitter and LinkedIn -->
       </div>
     </div>
   </div>
 </div>
</div>

But the work is not completed yet. We have to check the style of the session selected by the organizer and if he/she has selected the single session option, then we have to pass all the sessions to this template file during the generation process and create the pages. If the mode selected is expandable, then we carry out the normal generation procedure. Else, we extract every session from the JSON data and feed into to the above template. Since the number of sessions can be quite large, we don’t generate them alongside the other pages like tracks, schedule, rooms, speakers and so on. Instead, we create a new folder named sessions and put in all of the new individual pages there in one place. It helps to keep the directory clean and modularized. Also, since we are placing it inside of a session folder, we will have to update the links to the main pages in the navbar section. Like, instead of track.html, it will be ../tracks.html now. The file is given a common format name of session_sessionId where sessionId is the id of that particular session.

Here is the related code. It is taken from generator.js file in the project

function templateGenerate() {
 if(mode == 'single') {
   function checkLinks() {
     // Made necessary modifications in the links to the main pages
   }
   //jsonData contains all the information about the event
   var trackArr = jsonData.tracks;
   for(var i = 0; i < trackArr.length; i++) {
     var sessionArr = trackArr[i].sessions;
     for(var j = 0; j < sessionArr.length; j++) {
       var sessionObj = JSON.parse(JSON.stringify(sessionArr[j]));
       // Do some modifications in the sessionObj to include the track background and font color and additional links
     } 
   }
   var data = {session: sessionObj};
   checkLinks();
   // Pass the session object to the template, compile and minify the HTML file and place into the sessions folder
   fs.writeFileSync(distHelper.distPath + '/' + appFolder + '/sessions/session_' + sessionId + '.html', minifyHtml(sessiontpl(data)));
 }
}

Ok, most of the things are done now. Just one simple step is missing. When the user clicks on the small session element on the tracks, rooms or the schedule page, then we collapse the session element or open up a brand new session page for showing detailed information about the session depending upon what option the organizer has selected. So, we will have to make little appropriate change for handling this as well. Below code is taken from the tracks page template file

<div class = "room-filter">
 {{#if ../../../mode}}
   <div class="sizeevent event">
 {{else}}
   <div class="sizeevent event" data-toggle="collapse" data-target="#desc-{{session_id}}, #desc2-{{session_id}}">
 {{/if}}
</div>

$('.room-filter').click(function () {
 var sessionMode = "{{mode}}";
 var id =  $(this).attr('id');
 if(sessionMode == 'single') {
   var curUrl = window.location.href;
   var newUrl = curUrl.substring(0, curUrl.lastIndexOf('/') + 1) + 'sessions/session_' + id + ".html";
   window.location.href = newUrl;
 }
});

We are simply checking the mode and if it is set, it means that the session style is a single page. So, we don’t include the bootstrap collapse classes in that case. We handle that click event in the javascript part and appropriate redirect the user to the unique page for that session.

So, after all this hard work, this is how it looks like.

Before clicking

0fdb3641-2579-4537-8f36-910c636cf172.png

After clicking on the first session element, a new page is opened

e5d2ed0d-c54a-44fd-b30c-af440936c8ed.png

Resources

Continue ReadingImplementing Single Session Pages in Open Event Webapp