Showing Pull Request Build logs in Yaydoc

In Yaydoc, I added the feature to show build status of the Pull Request. But there was no way for the user to see the reason for build failure, hence I decided to show the build log in the Pull Request similar to that of TRAVIS CI. For this, I had to save the build log into the database, then use GitHub status API to show the build log url in the Pull Request which redirects to Yaydoc website where we render the build log.

StatusLog.storeLog(name, repositoryName, metadata,  `temp/admin@fossasia.org/generate_${uniqueId}.txt`, function(error, data) {
                            if (error) {
                              status = "failure";
                            } else {
                              targetBranch = `https://${process.env.HOSTNAME}/prstatus/${data._id}`
                            }
                            github.createStatus(commitId, req.body.repository.full_name, status, description, targetBranch, repositoryData.accessToken, function(error, data) {
                              if (error) {
                                console.log(error);
                              } else {
                                console.log(data);
                              }
                            });
                          });

In the above snippet, I’m storing the build log which is generated from the build script to the mongodb and I’m appending the mongodb unqiueID to the `prstatus` url so that we can use that id to retrieve build log from the database.

exports.createStatus = function(commitId, name, state, description, targetURL, accessToken, callback) {
  request.post({
    url: `https://api.github.com/repos/${name}/statuses/${commitId}`,
    headers: {
      'User-Agent': 'Yaydoc',
      'Authorization': 'token ' + crypter.decrypt(accessToken)
    },
    "content-type": "application/json",
    body: JSON.stringify({
      state: state,
      target_url: targetURL,
      description: description,
      context: "Yaydoc CI"
    })
  }, function(error, response, body) {
    if (error!== null) {
      return callback({description: 'Unable to create status'}, null);
    }
    callback(null, JSON.parse(body));
  });
};

After saving the build log, I’m sending the request to GitHub for showing the status of the build along with build log url where user can click the detail link and can see the build log.

Resources:

Continue ReadingShowing Pull Request Build logs in Yaydoc

Showing Pull Request Build Status in Yaydoc

Yaydoc is integrated to various open source projects in FOSSASIA.  We have to make sure that the contributors PR should not break the build. So, I decided to check whether the PR is breaking the build or not. Then, I would notify the status of the build using GitHub status API.

exports.registerHook = function (data, accessToken) {
  return new Promise(function(resolve, reject) {
    var hookurl = 'http://' + process.env.HOSTNAME + '/ci/webhook';
    if (data.sub === true) {
      hookurl += `?sub=true`;
    }
    request({
      url: `https://api.github.com/repos/${data.name}/hooks`,
      headers: {
        'User-Agent': 'Yaydoc',
        'Authorization': 'token ' + crypter.decrypt(accessToken)
      },
      method: 'POST',
      json: {
        name: "web",
        active: true,
        events: [
          "push",
          "pull_request"
        ],
        config: {
          url: hookurl,
          content_type: "json"
        }
      }
    }, function(error, response, body) {
      if (response.statusCode !== 201) {
        console.log(response.statusCode + ': ' + response.statusMessage);
        resolve({status: false, body:body});
      } else {
        resolve({status: true, body: body});
      }
    });
  });
};

I’ll register the webhook, when user registers the repository to yaydoc for push and pull request event. Push event will be for building documentation and hosting the documentation to the GitHub pages. Pull_request event would be for checking the build of the pull request.

github.createStatus(commitId, req.body.repository.full_name, "pending", "Yaydoc is checking your build", repositoryData.accessToken, function(error, data) {
                    if (!error) {
                      var user = req.body.pull_request.head.label.split(":")[0];
                      var targetBranch = req.body.pull_request.head.label.split(":")[1];
                      var gitURL = `https://github.com/${user}/${req.body.repository.name}.git`;
                      var data = {
                        email: "admin@fossasia.org",
                        gitUrl: gitURL,
                        docTheme: "",
                        debug: true,
                        docPath: "",
                        buildStatus: true,
                        targetBranch: targetBranch
                      };
                      generator.executeScript({}, data, function(error, generatedData) {
                        var status, description;
                        if(error) {
                          status = "failure";
                          description = error.message;
                        } else {
                          status = "success";
                          description = generatedData.message;
                        }
                        github.createStatus(commitId, req.body.repository.full_name, status, description, repositoryData.accessToken, function(error, data) {
                          if (error) {
                            console.log(error);
                          } else {
                            console.log(data);
                          }
                       });
                 });
              }
        });

When anyone opens a new PR, GitHub will send  a request to yaydoc webhook. Then, I’ll send the status to GitHub saying that “Yaydoc is checking your build” with status `pending`. After, that I’ll documentation will be generated.Then, I’ll check the exit code. If the exit code is zero,  I’ll send the status `success` otherwise I’ll send `error` status.
Resources:

Continue ReadingShowing Pull Request Build Status in Yaydoc

Preparing for Automatic Publishing of Android Apps in Play Store

I spent this week searching through libraries and services which provide a way to publish built apks directly through API so that the repositories for Android apps can trigger publishing automatically after each push on master branch. The projects to be auto-deployed are:

I had eyes on fastlane for a couple of months and it came out to be the best solution for the task. The tool not only allows publishing of APK files, but also Play Store listings, screenshots, and changelogs. And that is only a subset of its capabilities bundled in a subservice supply.

There is a process before getting started to use this service, which I will go through step by step in this blog. The process is also outlined in the README of the supply project.

Enabling API Access

The first step in the process is to enable API access in your Play Store Developer account if you haven’t done so. For that, you have to open the Play Dev Console and go to Settings > Developer Account > API access.

If this is the first time you are opening it, you’ll be presented with a confirmation dialog detailing about the ramifications of the action and if you agree to do so. Read carefully about the terms and click accept if you agree with them. Once you do, you’ll be presented with a setting panel like this:

Creating Service Account

As you can see there is no registered service account here and we need to create one. So, click on CREATE SERVICE ACCOUNT button and this dialog will pop up giving you the instructions on how to do so:

So, open the highlighted link in the new tab and Google API Console will open up, which will look something like this:

Click on Create Service Account and fill in these details:

Account Name: Any name you want

Role: Project > Service Account Actor

And then, select Furnish a new private key and select JSON. Click CREATE.

A new JSON key will be created and downloaded on your device. Keep this secret as anyone with access to it can at least change play store listings of your apps if not upload new apps in place of existing ones (as they are protected by signing keys).

Granting Access

Now return to the Play Console tab (we were there in Figure 2 at the start of Creating Service Account), and click done as you have created the Service Account now. And you should see the created service account listed like this:

Now click on grant access, choose Release Manager from Role dropdown, and select these PERMISSIONS:

Of course you don’t want the fastlane API to access financial data or manage orders. Other than that it is up to you on what to allow or disallow. Same choice with expiry date as we have left it to never expire. Click on ADD USER and you’ll see the Release Manager created in the user list like below:

Now you are ready to use the fastlane service, or any other release management service for that matter.

Using fastlane

Install fastlane by

sudo gem install fastlane

Go to your project folder and run

fastlane supply init

First it will ask the location of the private key JSON file you downloaded, and then the package name of the application you are trying to initialize fastlane for.

Then it will create metadata folder with listing information excluding the images. So you’ll have to download and place the images manually for the first time

After modifying the listing, images or APK, run the command:

fastlane supply run

That’s it. Your app along with the store listing has been updated!

This is a very brief introduction to the capabilities of the supply service. All interactive options can be supplied via command line arguments, certain parts of the metadata can be omitted and alpha beta management along with release rollout can be done in steps! Make sure to check out the links below:

Continue ReadingPreparing for Automatic Publishing of Android Apps in Play Store

Deploying preview using surge in Yaydoc

In Yaydoc, we save the preview of the documentation in our local server and then we show the preview using express’s static serve method. But the problem is that Heroku doesn’t support persistent server, so our preview link gets expired within a few minutes. In order to solve the problem I planned to deploy the preview to surge so that the preview doesn’t get expired. For that I made a shell script which will deploy preview to the surge and then I’ll invoke the shell script using child_process.

#!/bin/bash

while getopts l:t:e:u: option
do
 case "${option}"
 in
 l) LOGIN=${OPTARG};;
 t) TOKEN=${OPTARG};;
 e) EMAIL=${OPTARG};;
 u) UNIQUEID=${OPTARG};;
 esac
done

export SURGE_LOGIN=${LOGIN}
export SURGE_TOKEN=${TOKEN}

./node_modules/.bin/surge --project temp/${EMAIL}/${UNIQUEID}_preview --domain ${UNIQUEID}.surge.sh

In the above snippet, I’m initializing the SURGE_LOGIN and SURGE_TOKEN environmental value, so that surge will deploy to the preview without asking any credentials while I am deploying the project. Then I’m executing surge by specifying the preview path and preview domain name.

exports.deploySurge = function(data, surgeLogin, surgeToken, callback) {
  var args = [
    "-l", surgeLogin,
    "-t", surgeToken,
    "-e", data.email,
    "-u", data.uniqueId
  ];

  var spawnedProcess = spawn('./surge_deploy.sh', args);
  spawnedProcess.on('exit', function(code) {
    if (code === 0) {
      callback(null, {description: 'Deployed successfully'});
    } else {
      callback({description: 'Unable to deploy'}, null);
    }
  });
}

Whenever the user generates documentation, I’ll invoke the shell script using child_process and then if it exits with exit code 0 I’ll pass the preview url via sockets to frontend and then the user can access the url.

Resource:

Continue ReadingDeploying preview using surge in Yaydoc

Scheduling Jobs to Check Expired Access Token in Yaydoc

In Yaydoc, we use the user access token to do various tasks like pushing documentation, registering webhook and to see it’s status.The user access token is very important to us, so I decided of adding Cron job which checks whether the user token has expired or not. But then one problem was that, if we have more number of users our cron job will send thousands of request at a time so it can break the app. So, I thought of queueing the process. I used `asyc` library for queuing the job.

const github = require("./github")
const queue = require("./queue")

User = require("../model/user");

exports.checkExpiredToken = function () {
  User.count(function (error, count) {
    if (error) {
      console.log(error);
    } else {
      var page = 0;
      if (count < 10) {
        page = 1;
      } else {
        page = count / 10;
        if (page * 10 < count) {
          page = (count + 10) /10;
        }
      }
      for (var i = 0; i <= page; i++) {
        User.paginateUsers(i, 10,
        function (error, users) {
          if (error) {
            console.log(error);
          } else {
            users.forEach(function(user) {
              queue.addTokenRevokedJob(user);
            })
          }
        })
      }
    }
  })
}

In the above code I’m paginating the list of users in the database and then I’m adding each user to the queue.

var tokenRevokedQueue = async.queue(function (user, done) {
  github.retriveUser(user.token, function (error, userData) {
    if (error) {
      if (user.expired === false) {
        mailer.sendMailOnTokenFailure(user.email);
        User.updateUserById(user.id, {
          expired: true
        }, function(error, data) {
          if (error) {
            console.log(error);
          }
        });
      }
      done();
    } else {
      done();
    }
  })
}, 2);

I made this queue with the help of async queue method. In the first parameter, I’m passing the logic and in second parameter, I’m passing how many jobs can be executed asynchronously. I’m checking if the user has revoked the token or not by sending API requests to GitHub’s user API. If it gives a response ‘200’ then the token is valid otherwise it’s invalid. If the user token is invalid, I’m sending email to the user saying that “Your access token in revoked so Sign In once again to continue the service”.

Resources:

Continue ReadingScheduling Jobs to Check Expired Access Token in Yaydoc

Continuous Integration in Yaydoc using GitHub webhook API

In Yaydoc,  Travis is used for pushing the documentation for each and every commit. But this leads us to rely on a third party to push the documentation and also in long run it won’t allow us to implement new features, so we decided to do the continuous documentation pushing on our own. In order to build the documentation for each and every commit we have to know when the user is pushing code. This can be achieved by using GitHub webhook API. Basically we have to register our api to specific GitHub repository, and then GitHub will send a POST request to our API on each and every commit.

“auth/ci” handler is used to get access of the user. Here we request user to give access to Yaydoc such as accessing the public repositories , read organization details and write permission to write webhook to the repository and also I maintaining state by keeping the ci session as true so that I can know that this callback is for gh-pages deploy or ci deployOn

On callback I’m keeping the necessary informations like username, access_token, id and email in session. Then based on ci session state, I’m redirecting to the appropriate handler. In this case I’m redirecting to “ci/register”.After redirecting to the “ci/register”, I’m getting all the public repositories using GitHub API and then I’m asking the users to choose the repository on which users want to integrate Yaydoc CI

After redirecting to the “ci/register”, I’m getting all the public repositories using GitHub API and then I’m asking the users to choose the repository on which users want to integrate Yaydoc CI

router.post('/register', function (req, res, next) {
      request({
        url: `https://api.github.com/repos/${req.session.username}/${repositoryName}/hooks?access_token=${req.session.token}`,
        method: 'POST',
        json: {
          name: "web",
          active: true,
          events: [
            "push"
          ],
          config: {
            url: process.env.HOSTNAME + '/ci/webhook',
            content_type: "json"
          }
        }
      }, function(error, response, body) {
        repositoryModel.newRepository(req.body.repository,
          req.session.username,
          req.session.githubId,
          crypter.encrypt(req.session.token),
          req.session.email)
          .then(function(result) {
            res.render("index", {
              showMessage: true,
              messages: `Thanks for registering with Yaydoc.Hereafter Documentation will be pushed to the GitHub pages on each commit.`
            })
          })
      })
    }
  })

After user choose the repository, they will send a POST request to “ci/register” and then I’m registering the webhook to the repository and I’m saving the repository, user details in the database, so that it can be used when GitHub send request to push the documentation to the GitHub Pages.

router.post('/webhook', function(req, res, next) {
  var event = req.get('X-GitHub-Event')
  if (event == 'Push') {
      repositoryModel.findOneRepository(
        {
          githubId: req.body.repository.owner.id,
          name: req.body.repository.name
        }
      ).
      then(function(result) {
        var data = {
          email: result.email,
          gitUrl: req.body.repository.clone_url,
          docTheme: "",
        }
        generator.executeScript({}, data, function(err, generatedData) {
            deploy.deployPages({}, {
              email: result.email,
              gitURL: req.body.repository.clone_url,
              username: result.username,
              uniqueId: generatedData.uniqueId,
              encryptedToken: result.accessToken
            })
        })
      })
      res.json({
        status: true
      })
   }
})

After you register on webhook, GitHub will send a request to the url which we registered on the repository. In our case “https:/yaydoc.herokuapp.com/ci/auth” is the url. The type of the event can be known by reading ‘X-GitHub-Event’ header. Right now I’m registering only for the push event. So we’ll only be getting the push event. GitHub also gives us the repository details in the request body.

When the user makes a commit to the repository, GitHub will send a POST request to the Yaydoc’s server. Then, we’ll get the repository name and Github’s user ID from the request body. By use of this, I’ll retrieve the access token from the database which we already registered while the user registers the repository to the CI. The documentation will be generated using generate script and pushed to GitHub pages using deploy script.

Now Yaydoc generates documentation on every push when the user commits to the repository and also it will enable us to integrate new features in our own custom environment. We also plan to build a full featured CI platform.

Resources:

Continue ReadingContinuous Integration in Yaydoc using GitHub webhook API

Read and Understand Codacy Reports

To begin understanding reports, let’s start with what Codacy is.

So. What is Codacy?

Codacy is an automated code review tool that helps developers to save time in code reviews and to tackle technical debt. It centralises customizable code patterns and enforces them within engineering teams. Codacy tracks new issues by severity level for every commit and pull request.

It can be integrated with the GitHub repository to review every commit and pull request in terms of quality and errors. It checks code style, security, duplication, complexity and coverage on every change while tracking code quality throughout your sprints.

You can integrate Codacy in your private/public repository by going here. Sign up with your Github account and follow the steps mentioned. More information regarding GitHub integration can be found here.

Features of Codacy:

  • SAVE TIME IN CODE REVIEWS
  • INTEGRATED IN YOUR WORKFLOW
  • TRACK YOUR PROJECT QUALITY EVOLUTION

Now we get to understanding Codacy reports.

Below shows and image of how a Codacy dashboard looks like, to evaluate a project. To evaluate a project we should know what are the Software Metrics”.

download

A software metric is a standard of measure of a degree to which a software system or process possesses some property. Even if a metric is not a measurement (metrics are functions, while measurements are the numbers obtained by the application of metrics), often the two terms are used as synonymous. Since quantitative measurements are essential in all sciences, there is a continuous effort by computer science practitioners and theoreticians to bring similar approaches to software development. The goal is obtaining objective, reproducible and quantifiable measurements, which may have numerous valuable applications in the schedule and budget planning, cost estimation, quality assurance testing, software debugging, software performance optimization, and optimal personnel task assignments. You can learn about software metrics by visiting here.

A Codacy Dashboard provides answer to the following 3 main things:

  • What is the state of your projects code quality?
  • How is it evolving throughout time?
  • What are the hotspots in your code?

Component of the Dashboard:

  • Introduction: The Dashboard is the central screen of any project on Codacy.
  • Project Certification: After running a complete on the project or the GitHub repository, Codacy provides an overall grade to the project from A-F. The grade depends on the following parameters.
    • Error Prone
    • Code Complexity
    • Code Style
    • Unused Code
    • Security
    • Compatibility
    • Documentation
    • Performancedashboard-certification
  • Issues Breakdown: Issues breakdown represents the different issues from different areas in a pictorial representation. It provides a quick overview of the total number of issues in the repository and the breakdown per category.
    Issues Brakedown
    Users can click on the specific category for more details.
  • Code Coverage: If you setup the code coverage on your repository, you will be able to see the overall covered percentage on the dashboard. It will also show the files with the worst code coverage allowing you to directly jump to the file to see the details.
    Coverage
  • Goals: Users can define individual goals to remove errors and get better grades for their projects.
  • Historic data: Codacy dashboard also provides an analysis of the Historic data, so as to keep a track of the progress on improving the code, milestones covered in reaching the goal.
    dashboard-historic-issues

Codacy provides a nice dashboard showing the metrics. Codacy saves hours in code review and code quality monitoring, from small teams to big companies. And as the Codacy team itself says “LOVED BY DEVELOPERS”, being a developer I wouldn’t deny this statement. It helped a lot in improving the code quality of my project Engelsystem.

Development: https://github.com/fossasia/engelsystem Issues/Bugs:https://github.com/fossasia/engelsystem/issues

Continue ReadingRead and Understand Codacy Reports

[Tutorial] Continuous Integration Automated Build for your Pharo Application

reposted from jigyasagrover.wordpress.com/ci-automated-build-for-your-pharo-application

Hello Fellas !

This post aims to put forward the basics of Build Automation and also brief the steps required to put up a Pharo application on Continuous Integration, Inria which is a platform for Scheduled Automated Build.
For simplicity, Build automation is the act of scripting or automating a wide variety of tasks that software developers do in their day-to-day activities including things like:
  • compiling computer source code into binary code
  • packaging binary code
  • running automated tests
  • deploying to production systems
  • creating documentation and/or release notes

Various types of automation are as:

  • On-Demand automation such as a user running a script at the command line
  • Scheduled automation such as a continuous integration server running a nightly build
  • Triggered automation such as a continuous integration server running a build on every commit to a version control system.
In recent years, build management tools have provided relief when it comes to automating the build process.
The dominant benefits of continuous integration include:
  • Improvement of product quality
  • Acceleration of compile and link processing
  • Elimination of redundant tasks
  • Minimization of ‘bad builds’
  • Have history of builds and releases in order to investigate issues
  • Save time and money – because of above listed reasons.

A build system should fulfill certain requirements.

Basic requirements:

  1. Frequent or overnight builds to catch problems early.
  2. Support for Source Code Dependency Management
  3. Incremental build processing
  4. Reporting that traces source to binary matching
  5. Build acceleration
  6. Extraction and reporting on build compile and link usage

Optional requirements:

  1. Generate release notes and other documentation such as help pages
  2. Build status reporting
  3. Test pass or fail reporting
  4. Summary of the features added/modified/deleted with each new build

Considering the above mentioned advantages of automated build, the below enlisted steps will help to put up your own Pharo application hosted on github on the CI server for continuous integration/scheduled build.
 1. Log on to Continuous Integration, Inria website (https://ci.inria.fr/).

Screenshot from 2015-08-08 15:53:49
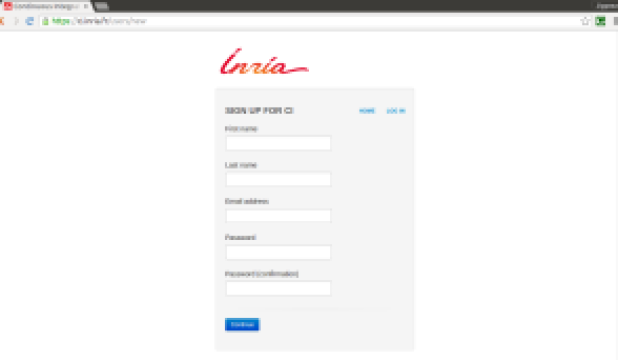
2. Click on ‘Sign Up‘ at the top-right corner, enter the required details and register for CI.

Screenshot from 2015-08-08 15:54:02
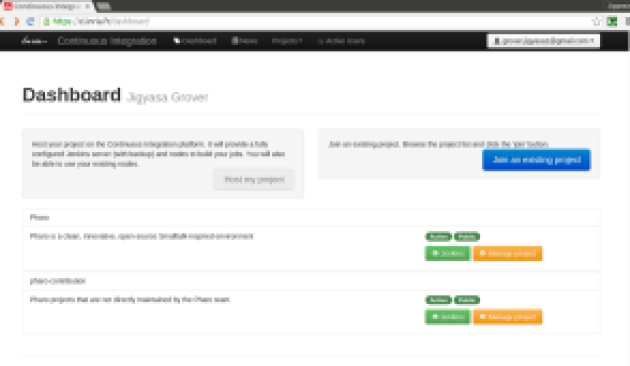
3. From the ‘Dashboard‘ option located at the top most of the screen click on ‘Join an existing project‘ blue button as shown .

Screenshot from 2015-08-08 15:59:22
4. Search ‘pharo-contribution‘ in the enlisted public projects and click on ‘Join

5. On clicking the ‘Join‘ button, a message stating: “Request to join the project ‘pharo-contribution’ sent.” appears.

6. It might take a day or two for the request approval mail to deliver at your registered Email ID.

The E-Mail content is as follows:
        Your request to join pharo-contribution has been accepted
        Hi _ _ _,
        Your request to join the project pharo-contribution has been accepted !
        Regards,
        Support team.

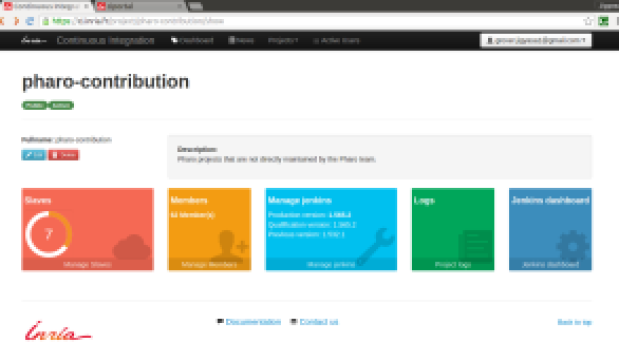
7. Click on ‘My Account‘ option and under ‘My Projects‘ check the status of pharo-contribution project. It should state ‘member‘.

Screenshot from 2015-08-08 16:17:55
8. Now, visit the LINK: https://ci.inria.fr/pharo-contribution/job/JobTemplate/  to create a ‘New Job

Screenshot from 2015-08-08 16:21:06
9. Read all the steps mentioned carefully. After going through all the points, click on the ‘New Job‘ mentioned in point 2 on the Project Job Template web page.

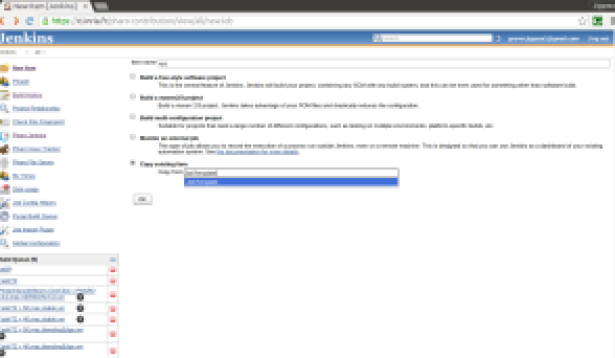
10. Enter the ‘Project Name‘ in the ‘Item Name: ‘ box and choose ‘Copy from existing item‘ option and fill ‘JobTemplate

Screenshot from 2015-08-08 16:30:01
11. After clicking OK, You will be directed to your project configuration.

12. Fill in the description of the project in the desired box.

Screenshot from 2015-08-08 16:32:31
13. Fill int the configuration details of your project like:

* Maximum number of builds
*  Link to GitHub Project
*  Source Code Manager
* Build Triggers
*  Schedule of build (@hourly, @daily, @weekly, @fortnightly, @monthly, @yearly etc.)
*  Configuration Matrix (User Defined Axis: Name && Version Values- stable, development etc.)
* Build environment options
* Post-build actions
*  Report regressed tests

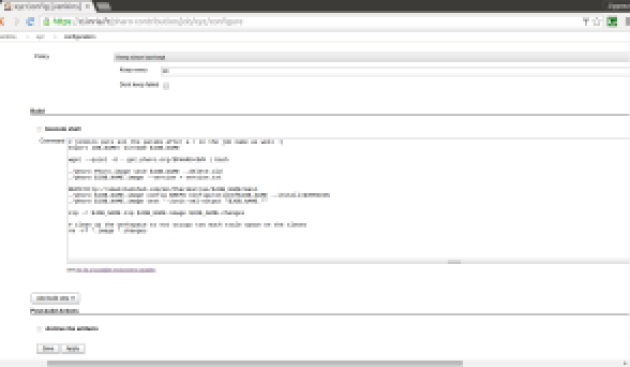
14. The main task is to carefully write the commands in the ‘Execute Shell
The default commands are as:

Screenshot from 2015-08-08 16:39:06
15. After saving and applying the changes, the application is all set for automated build.

16. Each build’s ‘Console Output‘ can be used to analyse the steps and highlight the weak areas of the project.
For instance: The below output is of a project whose stable version build was successful.

Screenshot from 2015-08-08 16:49:05

TIP: Keep a regular tab on the build results and analyze each line of the Console Output with utmost care.

Hope this post was able to help you start with the automation build process of Pharo Application.

Do like if it was worth a read !
Post queries/suggestions as comments 🙂 Looking forward to them.


UPCOMING: Next, I plan to share experience of putting up my Pharo application searchQuick on CI Inria for automated build. I intend to detail about the various configuration settings applied along with the Execute Shell commands utilized for a GitHub project 🙂


Introduction Accredits: Wikipedia 
Resources:  Build Automation and Continuous Integration .


Continue Reading[Tutorial] Continuous Integration Automated Build for your Pharo Application