Configuring Document Root Apache2 Ubuntu

In this post I will explain how to setup document root for apache server.

Initially the document root is set to /var/www/html by default. We need to change it when we have web applications in /var/www/html/folder.

I will show an example how to configure document root for our project engelsystem. Engelsystem is downloaded to /var/www/html/ . We must make sure to point our apache2 document root to the Engelsystem directory to prevent any user from accessing anything other than the public/ directory for security reasons.

Changing apache2 document root

The default document root is set in the 000-default.conf file that is under /etc/apache2/sites-available folder.

$ cd /etc/apache2/sites-available
$ sudo nano 000-default.conf

While the file is opened change DocumentRoot /var/www/ with your new folder e.g DocumentRoot /var/www/html/engelsystem/public where your index.php file resides

Set the right Apache configuration

The configuration of the /var/www folder is under /etc/apache2/apache2.conf. Edit this file to add the configuration of your new document root.

$ sudo nano/etc/apache2/apache2.conf

Copy the following:

<Directory /var/www/>
Options Indexes FollowSymLinks
AllowOverride None
Require all granted
</Directory>

and change the directory path:

<Directory /var/www/html/engelsystem/public>
Options Indexes FollowSymLinks
AllowOverride None
Require all granted
</Directory>

Restart Apache

Now we can view the engelsystem at localhost/ or http://[i.p.address]/

$ sudoservice apache2 restart
Continue ReadingConfiguring Document Root Apache2 Ubuntu

PayPal Express Checkout in Python

As per the PayPal documentation …

Express Checkout is a fast, easy way for buyers to pay with PayPal. Express Checkout eliminates one of the major causes of checkout abandonment by giving buyers all the transaction details at once, including order details, shipping options, insurance choices, and tax totals.

The basic steps for using express checkout to receive one-time payments are:

  1. Getting the PayPal API credentials.
  2. Making a request to the API with the transaction details to get a token
  3. Using the token to send the users to the PayPal payment page
  4. Capturing the payment and charging the user after the user completes the payment at PayPal.

We will be using PayPal’s Classic NVP (Name-value pair) API for implementing this.

Getting PayPal API Credentials

To begin with, we’ll need API Credentials.
We’ll be using the Signature API credentials which consists of

  • API Username
  • API Password
  • Signature

To obtain these, you can follow the steps at Creating and managing NVP/SOAP API credentials – PayPal Developer.

You’ll be getting two sets of credentials. Sandbox and Live. We’ll just stick to the Sandbox for now.

Now, we need sandbox test accounts for making and receiving payments. Head over to Creating Sandbox Test Accounts – PayPal Developer and create two sandbox test accounts. One would be the facilitator and one would be the buyer.

PayPal NVP Servers

All the API actions will take place by making a request to the PayPal server. PayPal has 4 different NVP servers for 4 different purposes.

  1. https://api-3t.sandbox.paypal.com/nvp – Sandbox “testing” server for use with API signature credentials.
  2. https://api-3t.paypal.com/nvp– PayPal “live” production server for use with API signature credentials.
  3. https://api.sandbox.paypal.com/nvp – Sandbox “testing” server for use with API certificate credentials.
  4. https://api.paypal.com/nvp – PayPal “live” production server for use with API certificate credentials.

We’ll be using the Sandbox “testing” server for use with API signature credentials.

Creating a transaction and obtaining the token

To create a transaction, we’ll need to make a request with all the transaction details. We can use Python requests library to easily make the requests. All requests are POST.

We’ll be calling the SetExpressCheckout method of the NVP API to obtain the token.

import requests  
import urlparse

data = {  
    'USER': credentials['USER'],
    'PWD': credentials['PWD'],
    'SIGNATURE': credentials['SIGNATURE'],
    'SUBJECT': credentials['FACILITATOR_EMAIL'],
    'METHOD': 'SetExpressCheckout',
    'VERSION': 93,
    'PAYMENTREQUEST_0_PAYMENTACTION': 'SALE',
    'PAYMENTREQUEST_0_AMT': 100,
    'PAYMENTREQUEST_0_CURRENCYCODE': 'USD',
    'RETURNURL': 'http://localhost:5000/paypal/return/',
    'CANCELURL': 'http://localhost:5000/paypal/cancel/'
}
response = requests.post('https://api-3t.sandbox.paypal.com/nvp', data=data)  
token = dict(urlparse.parse_qsl(response.text))['TOKEN']

Here,

  • USER represents your Sandbox API Username.
  • PWD represents your Sanbox API Password.
  • SIGNATURE represents your Sandbox Signature.
  • SUBJECT represents the facilitator’s email ID.
  • PAYMENTREQUEST_0_AMT is the total transaction amount.
  • PAYMENTREQUEST_0_CURRENCYCODE is the 3 digit ISO 4217 Currency code.
  • RETURNURL is where the user will be sent to after the transaction
  • CANCELURL is where the user will be sent to if he/she cancels the transaction.

A URL-Encoded, Name-value pair response would be obtained. We can decode that into a dict by using Python’s urlparse modules.

From the response, we’re extracting the TOKEN which we will use to generate the payment URL for the user.

This token has to be retained since we’ll be using it in further steps of the process.

Redirecting the user to PayPal for Approval

With the token we obtained, we can form the payment URL.

https://www.sandbox.paypal.com/cgi-bin/webscr?cmd=_express-checkout&token=<TOKEN>

We’ll have to send the user to that URL. Once the user completes the transaction at PayPal, he/she will be returned to the RETURNURL where we’ll further process the transaction.

Obtaining approved payment details and capturing the payment

Once the user completes the transaction and gets redirected back to RETURNURL, we’ll have to obtain the confirmed payment details from PayPal. For that we can again use the token ID that we obtained before.

We’ll now be making a request to the GetExpressCheckoutDetails method of the API.

import requests  
import urlparse

data = {  
    'USER': credentials['USER'],
    'PWD': credentials['PWD'],
    'SIGNATURE': credentials['SIGNATURE'],
    'SUBJECT': credentials['FACILITATOR_EMAIL'],
    'METHOD': 'GetExpressCheckoutDetails',
    'VERSION': 93,
    'TOKEN': TOKEN
}

response = requests.post('https://api-3t.sandbox.paypal.com/nvp', data=data)  
result = dict(urlparse.parse_qsl(response.text))  
payerID = result['PAYERID']

A URL-Encoded, Name-value pair response would be obtained. We can decode that into a dict by using Python’s urlparse modules.

This will provide us with information about the transaction such as transaction time, transaction amount, charges, transaction mode, etc.

But, we’re more interested in the PAYERID which we’ll need to capture/collect the payment. The money is not transferred to the facilitators account until it is captured/collected. So, be sure to collect it.

To collect it, we’ll be making another request to the DoExpressCheckoutPaymentmethod of the API using the token and the PAYERID.

import requests  
import urlparse

data = {  
    'USER': credentials['USER'],
    'PWD': credentials['PWD'],
    'SIGNATURE': credentials['SIGNATURE'],
    'SUBJECT': credentials['FACILITATOR_EMAIL'],
    'METHOD': 'DoExpressCheckoutPayment',
    'VERSION': 93,
    'TOKEN': TOKEN,
    'PAYERID': payerID,
    'PAYMENTREQUEST_0_PAYMENTACTION': 'SALE',
    'PAYMENTREQUEST_0_AMT': 100,
    'PAYMENTREQUEST_0_CURRENCYCODE': 'USD',
}

response = requests.post('https://api-3t.sandbox.paypal.com/nvp', data=data)  
result = dict(urlparse.parse_qsl(response.text))  
status = result['ACK']

All the details have to be the same as the ones provided while obtaining the token. Once we make the request, we’ll again get a URL-Encoded, Name-value pair response. We can decode that into a dict by using Python’s urlparsemodules.

From the response, ACK (Acknowledgement status) will provide us with the status of the payment.

  • Success — A successful operation.
  • SuccessWithWarning — A successful operation; however, there are messages returned in the response that you should examine.
  • Failure — The operation failed; the response also contains one or more error messages explaining the failure.
  • FailureWithWarning — The operation failed and there are messages returned in the response that you should examine.

And, we have completed the PayPal transaction flow for Express Checkout. These are just the basics and might miss a few stuff. I suggest you go through the following links too for a better understanding of everything:

For Reference:
  1. PayPal Name-Value Pair API Basics – PayPal Developer
  2. How to Create One-Time Payments Using Express Checkout – PayPal Developer
Continue ReadingPayPal Express Checkout in Python

CommonNet – how to set up tests

Setting up tests’ environment wasn’t easy

Have you ever tried to set up your tests’ environment using Protractor on Vagrant?

I must admit that it was a very difficult task for me. I have recently spent almost three days trying to prepare my tests’ environment for CommonsNet project, and read many different resources. Fortunately, I have finally done it, so now I want to share with you my experience and give you some tips how to do it.

Protractor

Firstly, I will explain you why I have decided to use Protractor. It is mainly because Proractor is especially designed for end-to-end testing  AngularJS application. Protractor runs tests against your application running in a real browser, interacting with it as a user would.

Writing tests using Protractor is quite easy because you can find working examples in AngularJS docs. Each sample of AngularJS code is enriched by Protractor’s test. It’s amazing.

Selenium

Selenium is a browser automation library. It is most often used for testing web-applications, and may be used for any task that requires automating interaction with the browser. You can download it from here. You have to choose Selenium for a language you use. I have used Selenium for NodeJS.

Vagrant

You don’t have to necessary use Vagrant to run your tests, but I have implemented it, because I run my local environment on Vagrant and it’s more comfortable for me to use it.

Setting up testing environment

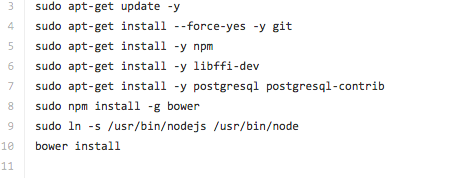
Now I will share with you how to run tests. So first all of, I have created a file called install.sh and put all necessary commends there. I have put there several commands. Please take a look at this file.  It helps you to install all of these necessary dependencies using only one command instead of several ones. 

install

Next, I have prepared provision folder, where I put files to install selenium standalone and chromium driver. You can copy these file from here

Then I have created a simple test case. It’s quite easy at the beginning. You just need two files first – conf. js and next- todo_spec.js  Below, I will provide you with my conf.js As you can see it’s not complicated and really short. It’s a basic configuration file and of course you can adjust it to your needs. You can find many examples of conf.js file in Internet.

conf

And finally a simple test, which I have placed in todo_spec.js file. It’s a ProtracotrJS example available on their website

todo-spec.png

Now, let me to write a step by step todo list now.

  • Install Vagrant in your folder
vagrant up
  • Connect to Vagrant
vagrant ssh
  • Open your Vagrant folder
cd /vagrant 
  • Then run selenium file
sh selenium_install.sh 
  • Next open provision folder
cd provision
  • Install java-jar
DISPLAY=:1 xvfb-run java -jar selenium-server-standalone-2.41.0.jar 

Your selenium server should be up and running

  • Then open a new terminal – remember not to close the first one!
  • Open your CommonsNet repository again
cd CommonsNet
  • Connect to Vagrant again
vagrant ssh
  • Open Vagrant folder again
cd /vagrant
  • Then open tests folder
cd tests
  • And finally run Protractor test
protractor conf.js 

That’s it. You should see a result of your test in a terminal.


Continue ReadingCommonNet – how to set up tests

Integrating Stripe in the Flask web framework

{ Repost from my personal blog @ https://blog.codezero.xyz/integrating-stripe-in-flask }

Stripe is a developer and a user-friendly payment infrastructure provider. Stripe provides easy to use SDKs in different programming languages allowing us to easily collect payments on our website or mobile application.

Flask is a web microframework for Python based on Werkzeug, Jinja 2. Flask makes building web applications in python a breeze.

Make sure you have your Flask app ready. Let’s start with installing the required dependency. The Stripe python SDK. You can get it by running.

pip install stripe

Don’t forget to add the same in your requirements.txt. (if you have one that is.)

Now, head over to Stripe: Register and create a new Stripe account to get your test keys. If you don’t wish to create an account at this time, you can use the following test keys, but you’ll not be able to see the payments in the stripe dashboard.

  • Publishable Key: pk_test_6pRNASCoBOKtIshFeQd4XMUh
  • Secret Key: sk_test_BQokikJOvBiI2HlWgH4olfQ2

We’ll need to set the secret key in the SDK.

import stripe

STRIPE_PUBLISHABLE_KEY = 'pk_test_6pRNASCoBOKtIshFeQd4XMUh'  
STRIPE_SECRET_KEY = 'sk_test_BQokikJOvBiI2HlWgH4olfQ2'

stripe.api_key = STRIPE_SECRET_KEY

Let’s create a page with a form for us to handle the Stripe payment.

<!DOCTYPE html>  
<html>  
<head>  
    <title>Pay now</title>
</head>  
<body>  
    <h4>Pay $250.00 by clicking on the button below.</h4>
    <form action="/payment" method="POST">
        <script src="https://checkout.stripe.com/checkout.js" 
                class="stripe-button"
                data-key="pk_test_6pRNASCoBOKtIshFeQd4XMUh"
                data-description="A payment for the Hello World project"
                data-name="HelloWorld.com"
                data-image="/images/logo/hw_project.png"
                data-amount="25000"></script>
    </form>
</body>  
</html>

We’re using Stripe’s Checkout library to get the payment details from the user and process. Also, keep in mind that the checkout library has to be loaded directly from https://checkout.stripe.com/checkout.js. Downloading it and serving locally will not work.

The script tag, accepts a lot of parameters. A few important ones are,

  • data-key – The Publishable Key.
  • data-amount – The amount to be charged to the user in the lowest denomination of the currency. (For example, 5 USD should be represented as 500 cents)
  • data-name – The name of your site or company that will be displayed to the user.
  • data-image – The path to an image file (maybe a logo) that you’d like to be displayed to the user.

More configuration options can be seen at Stripe: Detailed Checkout Guide.

This script would automatically create a Pay with Card button which would open the stripe Checkout lightbox when clicked by the user.

Once the payment process is completed the following parameters are submitted to the form’s action endpoint (the form inside which this script is located), along with any other elements that were in the form.

  • stripeToken – The ID of the token representing the payment details
  • stripeEmail – The email address the user entered during the Checkout process

Along with the Billing address details and Shipping address details if applicable and enabled

We’ll need to write a Flask method to handle the input that were submitted by Stripe to proceed with the transaction and charge the user.

Let’s add a new Flask route to respond when submitting the form.

@app.route('/payment', methods=['POST'])
def payment_proceed():  
    # Amount in cents
    amount = 25000

    customer = stripe.Customer.create(
        email=request.form['stripeEmail'],
        source=request.form['stripeToken']
    )

    charge = stripe.Charge.create(
        amount=amount,
        currency='usd',
        customer=customer.id,
        description='A payment for the Hello World project'
    )

    return render_template('payment_complete.html')

We’re now creating a new Stripe customer along with the stripeToken as the source parameter. The card details are stored by stripe as a token. And using this token ID, Stripe will be able to retrieve it to make the charge.

We’re creating a charge object with the amount in the lowest denomination of the currency, the currency name, the customer ID, and an optional description. This will charge the customer. On a successful transaction, a charge object would be returned. Else, an exception will be thrown.

For more information regarding the Charge object and the various other APIs available fro consumption in Stripe, checkout the Stripe API Guide.

Continue ReadingIntegrating Stripe in the Flask web framework

Creating an API in PHP

One of the key components of my GSoC Project was to have a POST API for the Android App generator.

This was required so that the app generator could be plugged into the server and can be called directly instead of someone manually visiting the webpage and entering his/her details.

It takes in a JSON input and compiles and emails the app to the organizer based on his email address in the input JSON.

The input to the API will look something like this :

{
“email”: “harshithdwivedi@gmail.com”,
“app_name”: “MyApp”,
“endpoint”: “https://open-event-dev.herokuapp.com/api/v2
}

Once the data is sent, on the server I have a php file which intercepts the requests and performs an action based on the request.

<?php
function sendResponse($data) {
    header('Content-type: application/json');
    echo json_encode($data);
    die();
}
/* If the request isn't a POST request then send an error message*/
if ($_SERVER['REQUEST_METHOD'] != 'POST') {
    sendResponse([
        "status"=>"error",
        "code"=>405,
        "message"=>"Method Not Allowed",
    ]);
}
/* Store the input received in a variable named body */
$body = json_decode(file_get_contents('php://input'), true);
/* If the user is nissing any important input parameters, don't process the request */
if (!array_key_exists('email', $body) || !array_key_exists('app_name', $body) || !array_key_exists('endpoint', $body)) {
    sendResponse([
        "status"=>"error",
        "code"=>422,
        "message"=>"Unprocessable entity",
    ]);
}
$uid = mt_rand(1000,9999). "_" .time();  //A random User ID
/* Extracting variables from the body */
$email = escapeshellcmd($body['email']);
$appName = escapeshellcmd($body["app_name"]); 
$endpoint = escapeshellcmd($body["endpoint"]);

/* Run a script based on the input parameters */
exec("sudo python /var/www/html/api/appgenserver.py $email $appName $endpoint");

The code above is pretty much self explanatory.

So basically, first we check for a valid request (GET/POST) and throw an error if it is invalid.

Next up, for a valid request we store the body into a variable and then execute a followup script as per our needs using data from this response.

This PHP file should be located in the public-html (/var/www/data) of the server so as to be accessible from outside of the server.

You can test out this API by calling it directly by prepending the server’s ip address to the name of php file containing this code.

Something like :

domain-name.com/api/api.php

You can also use Postman for Chrome or RESTClient for Firefox for making API calls easily.

Well, that’s it then!

You can easily modify the PHP code provided and modify it to suite your needs for making you own API.

Let me know your thoughts and your queries in the “response” 😉 below.

Until next time.

Continue ReadingCreating an API in PHP

Creating a Widget for your Android App

Having a widget for your app, not only helps it to stand out among its alternatives but also provides user information on the go without having to open the app. Keeping this thought in mind, I decided to make a widget for my GSoC project. Let’s go through the steps involved.

Step 1:

Creating a new widget from Android Studio.

Open up your project for which you need a widget and navigate to the project’s Java source. Create a new sub-package there named widget. Right click on the newly created sub-package and select the New->Widget option from there.

new_widget

Follow the instructions on the next screen.

screenshot-area-2016-07-30-002554
Most of the fields here are pretty much self explanatory. After doing this and running the app in your device, you will be able to see a widget for your app in the widget picker.
Screenshot_20160730-003515_01


Just kidding, this was the easy part, off to more harder things now!

Step 2:

Populating the widget with data.

Now, there can be 2 broad type of widgets Information Widgets and Collection Widgets.

Information widgets are simple widgets that are used to display an information that changes with time, for example Weather Widget or a Clock Widget.

Whereas, collection widgets are widgets which display a collection of data, for example the GMail widget is a collection widget.
These are relatively complex and harder than the Information Widgets.

In this post, we will focus on making a Collection Widget.

For Collection widgets, we need two layout files, one for the widget and one for each item in the widget collection.

Go ahead and create the two layout files. The wizard automatically generates the widget_layout.xml for you, you just need to edit it up.

stock_layout.xml
<LinearLayout xmlns:android="http://schemas.android.com/apk/res/android"
    android:layout_width="match_parent"
    android:layout_height="match_parent"
    android:orientation="vertical">

    <LinearLayout
        android:layout_width="match_parent"
        android:id="@+id/widget_toolbar"
        android:layout_height="?android:attr/actionBarSize"
        android:background="@color/colorPrimary">

        <ImageView
            android:layout_width="wrap_content"
            android:layout_height="match_parent"
            android:layout_gravity="center"
            android:src="@drawable/stock_up"
            android:contentDescription="@string/stock_widget" />

        <ImageView
            android:layout_width="wrap_content"
            android:layout_height="match_parent"
            android:layout_gravity="center"
            android:src="@drawable/stock_down"
            android:contentDescription="@string/stock_widget" />

        <TextView
            android:layout_width="0dp"
            android:layout_height="match_parent"
            android:layout_weight="1"
            android:layout_marginStart="32dp"
            android:gravity="center_vertical"
            android:text="@string/your_stocks"
            android:textAppearance="@android:style/TextAppearance.DeviceDefault.Widget.ActionBar.Title"
            android:layout_marginLeft="32dp" />
    </LinearLayout>

    <ListView
        android:id="@+id/widget_listView"
        android:layout_width="match_parent"
        android:layout_height="wrap_content"
        android:background="@color/backGround"></ListView>

</LinearLayout>
list_item.xml
<?xml version="1.0" encoding="utf-8"?>
<LinearLayout xmlns:android="http://schemas.android.com/apk/res/android"
    xmlns:tools="http://schemas.android.com/tools"
    android:layout_width="match_parent"
    android:layout_height="72dp"
    android:gravity="center_vertical"
    android:orientation="horizontal"
    android:paddingLeft="16dp"
    android:paddingRight="16dp"
    >
  <TextView
      android:id="@+id/stock_symbol"
      style="@style/StockSymbolTextStyle"
      android:layout_width="wrap_content"
      android:layout_height="wrap_content"
      android:gravity="start|center_vertical"
      tools:text="List Item"
      />
</LinearLayout>

Next up, having a look at the modified files, we can see that the Widget creation wizard added some stuff into out AndroidManifest.xml and created a new java file.

Upon taking a closer look at the manifest, we can see that the widget’s java class has been registered as a <receiver/>

Next, opening up the NewAppWidget.java, we will see that it extends AppWidgetProvider and some methods are already overridden for you.

Time to edit up this file to reference to the layouts we have just created.

import android.annotation.TargetApi;
import android.app.PendingIntent;
import android.appwidget.AppWidgetManager;
import android.appwidget.AppWidgetProvider;
import android.content.Context;
import android.content.Intent;
import android.os.Build;
import android.support.annotation.NonNull;
import android.widget.RemoteViews;

/**
 * Implementation of App Widget functionality.
 */
public class StockWidgetProvider extends AppWidgetProvider {

    private static void updateAppWidget(Context context, AppWidgetManager appWidgetManager,
                                        int appWidgetId) {
        // Construct the RemoteViews object which defines the view of out widget
        RemoteViews views = new RemoteViews(context.getPackageName(), R.layout.widget_layout);
        // Instruct the widget manager to update the widget
        if (Build.VERSION.SDK_INT >= Build.VERSION_CODES.ICE_CREAM_SANDWICH) {
            setRemoteAdapter(context, views);
        } else {
            setRemoteAdapterV11(context, views);
        }
        /** PendingIntent to launch the MainActivity when the widget was clicked **/
        Intent launchMain = new Intent(context, MainActivity.class);
        PendingIntent pendingMainIntent = PendingIntent.getActivity(context, 0, launchMain, 0);
        views.setOnClickPendingIntent(R.id.widget, pendingMainIntent);
        appWidgetManager.notifyAppWidgetViewDataChanged(appWidgetId,R.id.widget_listView);
        appWidgetManager.updateAppWidget(appWidgetId, views);
    }

    @Override
    public void onUpdate(Context context, AppWidgetManager appWidgetManager, int[] appWidgetIds) {
        // There may be multiple widgets active, so update all of them
        for (int appWidgetId : appWidgetIds) {
            updateAppWidget(context, appWidgetManager, appWidgetId);
        }

        super.onUpdate(context, appWidgetManager, appWidgetIds);
    }

    @Override
    public void onEnabled(Context context) {
        // Enter relevant functionality for when the first widget is created
    }

    @Override
    public void onDisabled(Context context) {
        // Enter relevant functionality for when the last widget is disabled
    }

  /** Set the Adapter for out widget **/

    @TargetApi(Build.VERSION_CODES.ICE_CREAM_SANDWICH)
    private static void setRemoteAdapter(Context context, @NonNull final RemoteViews views) {
        views.setRemoteAdapter(R.id.widget_listView,
                new Intent(context, StockWidgetService.class));
    }

    
    /** Deprecated method, don't create this if you are not planning to support devices below 4.0 **/
    @SuppressWarnings("deprecation")
    private static void setRemoteAdapterV11(Context context, @NonNull final RemoteViews views) {
        views.setRemoteAdapter(0, R.id.widget_listView,
                new Intent(context, StockWidgetService.class));
    }

}

Now, create a WidgetDataProvider which will provide us with data to be displayed inside the widget.

You can use a static data for now (like a prefilled ArrayList, but make sure that this data should be dynamic for making the widget meaningful)

import android.content.Context;
import android.content.Intent;
import android.database.Cursor;
import android.os.Binder;
import android.widget.RemoteViews;
import android.widget.RemoteViewsService;

/**
 * Created by the-dagger on 24/7/16.
 */

public class WidgetDataProvider implements RemoteViewsService.RemoteViewsFactory {

    private Context context;
    private Cursor cursor;
    private Intent intent;

    //For obtaining the activity's context and intent
    public WidgetDataProvider(Context context, Intent intent) {
        this.context = context;
        this.intent = intent;
    }

    private void initCursor(){
        if (cursor != null) {
            cursor.close();
        }
        final long identityToken = Binder.clearCallingIdentity();    
        /**This is done because the widget runs as a separate thread 
        when compared to the current app and hence the app's data won't be accessible to it
        because I'm using a content provided **/
        cursor = context.getContentResolver().query(QuoteProvider.Quotes.CONTENT_URI,
                new String[]{QuoteColumns._ID, QuoteColumns.SYMBOL, QuoteColumns.BIDPRICE,
                        QuoteColumns.PERCENT_CHANGE, QuoteColumns.CHANGE, QuoteColumns.ISUP},
                QuoteColumns.ISCURRENT + " = ?",
                new String[]{"1"},null);
        Binder.restoreCallingIdentity(identityToken);
    }

    @Override
    public void onCreate() {
        initCursor();
        if (cursor != null) {
            cursor.moveToFirst();
        }
    }

    @Override
    public void onDataSetChanged() {
        /** Listen for data changes and initialize the cursor again **/
        initCursor();
    }

    @Override
    public void onDestroy() {
    cursor.close();
    }

    @Override
    public int getCount() {
        return cursor.getCount();
    }

    @Override
    public RemoteViews getViewAt(int i) {
        /** Populate your widget's single list item **/
        RemoteViews remoteViews = new RemoteViews(context.getPackageName(), R.layout.list_item_quote);
        cursor.moveToPosition(i);
        remoteViews.setTextViewText(R.id.stock_symbol,cursor.getString(cursor.getColumnIndex(QuoteColumns.SYMBOL)));
        remoteViews.setTextViewText(R.id.bid_price,cursor.getString(cursor.getColumnIndex(QuoteColumns.BIDPRICE)));
        remoteViews.setTextViewText(R.id.change,cursor.getString(cursor.getColumnIndex(QuoteColumns.CHANGE)));
        if (cursor.getString(cursor.getColumnIndex(QuoteColumns.ISUP)).equals("1")) {
            remoteViews.setInt(R.id.change, "setBackgroundResource", R.drawable.percent_change_pill_green);
        } else {
            remoteViews.setInt(R.id.change, "setBackgroundResource", R.drawable.percent_change_pill_red);
        }
        return remoteViews;
    }

    @Override
    public RemoteViews getLoadingView() {
        return null;
    }

    @Override
    public int getViewTypeCount() {
        return 1;
    }

    @Override
    public long getItemId(int i) {
        return i;
    }

    @Override
    public boolean hasStableIds() {
        return true;
    }
}

Let’s also create a service that invokes the WidgetDataProvider after a fixed interval

import android.content.Intent;
import android.widget.RemoteViewsService;

/**
 * Created by the-dagger on 24/7/16.
 */

public class StockWidgetService extends RemoteViewsService {
    @Override
    public RemoteViewsFactory onGetViewFactory(Intent intent) {
        return new WidgetDataProvider(this,intent);
    }
}

Phew.. almost done with this now.

Finally edit up the widget_info.xml located inside /res/values/xml/ of your project.

Edit it to reference the time after which your widget will be updated, the preview image which should show up in the widget picker and minimum width and height of the widget.

<?xml version="1.0" encoding="utf-8"?>
<appwidget-provider xmlns:android="http://schemas.android.com/apk/res/android"
    android:initialKeyguardLayout="@layout/app_widget"
    android:initialLayout="@layout/app_widget"
    android:minHeight="110dp"
    android:minWidth="170dp"
    android:previewImage="@drawable/example_appwidget_preview"
    android:resizeMode="horizontal|vertical"
    android:updatePeriodMillis="86400000"
    android:widgetCategory="home_screen"></appwidget-provider>

Well, once this is done, go ahead and fire up your app. You will be able to see the newly created and updated widget in your homescreen.

 widget

Pretty awesome right!
Congratulations on making your first widget.

For now the app only opens a specific activity on clicking it, but you can read up a bit on how to execute a separate task on clicking each item on the list by using a pendingIntent.

Continue ReadingCreating a Widget for your Android App

Collecting information. What to choose?

Internet legal restrictions

Our idea in CommonsNet project is to make a  wireless connection transparent. Apart from typical details like ssid, password, security, speed, time limit etc. we think to make also clear  legal restrictions which vary across the world. Because we all know permanent value of the famous maxim ‘Ignorantia iuris nocet’,  we want to provide a great, widespread tool, and make complex law easy-to-understand for an average Internet user. In today’s world more and more people travel a lot, and visit different countries. As Internet is a main part of our life we want to use it everywhere. And we do it, but it may sometimes happen that we use the Internet , thoughtlessly without realizing that somewhere in the world something normal for us may be banned. In this case, we are even exposure to unpleasant consequences . Therefore we believe that access to understandable information is a fundamental human right and can influence on our life much.

Collecting is not an easy task, and it is a place where we need your help. If we want to create a huge database of law restrictions in different countries all over the world we need your support, because you are who understands your country and your language best. And you are able to ask people who are engaged in a law. We simply need information what is the law related to Internet and/or wireless connection, and mainly – what is forbidden.

Poland example

Let me explain it based on Poland example. We are going to focus on downloading music, movies, books from the Internet. In Poland you are allowed to do that for your personal use. It means that you can do it to use them in privacy, but on condition that movie, song or a book has been already made available to the public. If not – it’s illegal. A private use means also that you can share that resources with your family or friends and that you can do single copies of what you download. Very popular peer to peer networks which enable to share our resources with other users at the time we download a file, are unfortunately not defined as private use and are illegal either.

When it comes to uploading files, if we are authors of a song, or a movie, or a book and so on, we can share what and how we only want. But if we want to share our downloaded resources, we have to be very careful. We can do it only in our private area – for our friends and family but we cannot share it in public.

Law is unfortunately silent in regards of downloading files illegaly available in Internet (when someone shares a song, or a book before it has been make available to the public), but many lawyers claim that in the light of law it is permitted only for a personal use.

One of the most protected under polish law group of resources are computer games and various programs. They cannot be downloaded, copied, shared even for a personal use. It’s defined as a criminal offense and is strictly forbidden. Possible punishment are a fine, restriction of liberty and even imprisonment.

As you can see, it’s not difficult to gather all these details. You can do the same in your country, translate it in English and write to us  on Facebook, and become a member of our open source community to build big things together!

Database

The technical question here is how to collect all of these information. This week, i have had many ideas how to solve that problem ranging from PostgreSQL database, through MongoDB (since we use NodeJS) to JSON file. Now, I am going to provide you with a quick and valuable overview each of these options.

PosgreSQL

PostgreSQL is a powerful, open source object-relational database system.It runs on all major operating systems. It is fully ACID compliant, has full support for foreign keys, joins, views, triggers, and stored procedures (in multiple languages). It includes most SQL:2008 data types, including INTEGER, NUMERIC, BOOLEAN, CHAR, VARCHAR, DATE, INTERVAL, and TIMESTAMP.

I have implemented it to CommonsNet project because I thought that if I want to collect all of details provided above I need it. That’s how I have done it. Because I work on Vagrant I have added all these lines of code to my install.sh (provision.sh file)

  1.  sudo apt-get install -y postgresql postgresql-contrib
  2. sudo apt-get install -y libffi-dev

and then I have defined database name, user name and password


APP_DB_USER=user
APP_DB_PASS=pass
APP_DB_NAME=dbname

and then I have created a database

cat << EOF | sudo -u postgres psql
— Create the database user:
CREATE USER $APP_DB_USER WITH PASSWORD ‘$APP_DB_PASS’;

— Create the database:
CREATE DATABASE $APP_DB_NAME WITH OWNER=$APP_DB_USER§
LC_COLLATE=’en_US.utf8′
LC_CTYPE=’en_US.utf8′
ENCODING=’UTF8′
TEMPLATE=template0;
EOF

echo “exporting database url for app”
export DATABASE_URL=postgresql://$APP_DB_USER:$APP_DB_PASS@localhost:5432/$APP_DB_NAME

echo “export DATABASE_URL=$DATABASE_URL” >> /home/vagrant/.bashrc

sudo chown -R $(whoami) ~/.npm

Then i have added a new dependency to my package.json file.

“devDependencies”: {
“pg”: “~6.0.3”
}

And that’s it. My database works. But then, I have realised – thanks to my mentor’s – Mario Behling help – that’s not a good solution for my needs, because CommonsNet is not a huge project and we don’t need to complicate it. What’s more, we need to remember that if database exists it needs to be updated and maintained. I don’t know who can care about it especially if our team is not extended yet. That’s why I have got interested in MongoDB, especially because I use NodeJS in my project, but happily enough my mentor has suggested me take a look at JSON file.

JSON file

Finally I have made the best decision. I have chosen a JSON file, which seems to be enough for my needs. It’s a perfect solution, easy to implement. Take a look at my steps:

  1. First of all I have created a simple .txt file – legalrestrictions.txt. It looks like this: [{ “country”:”Poland”, “restrictions”:[“Poland restrictions1”, “Poland restrictions 2”] }]  It’s of course only a sample of my file. You can extend it as you want to. As you can see ‘restrictions’ are an array, so it helps us to put here a list of legal restrictions. It is simple, isn’t it ?
  2. Then I have written my code and put it in a website.js file. Because I use AngularJS I have had to do it like that. I am sure it is easy to understand.
    $scope.countries = [
    {name:’France’ },
    {name:’Poland’ },
    {name:’Germany’ },
    {name:’USA’ },
    {name:’Russia’ }
    ];// getting data from JSON file on ng-change select
    $scope.update = function() {
    var country = vm.countries.name;
    console.log(country);var table = [];
    $http.get(‘restrictions.txt’).success(function(data) {
    table=data
    for (var i=0; i<table.length; i++) {
    console.log(table[i].country);
    if (country === table[i].country) {
    vm.legalrestrictions = table[i].restrictions;
    }
    }
    });

    The HTML file looks like that:

    <select type=”text” class=”form” ng-model=”vm.countries” ng-options=”x.name for x in countries” ng-change=”update()”>
    <!– <option ng-repeat=”x.name for x in countries” value=”{{x.name}}”>{{x.name}</option> –>
    </select>
    <label for=”male”>Does your country have any legal restrictions? Type them.</label>
    <!– form group start –>

    <textarea name=”message” id=”legalarea” class=” form textarea” ng-model=”vm.legalrestrictions” placeholder=”You are not allowed to…”></textarea>


And that’s all. Easy to maintain and very transparent solution. I recommend you to use it as well. A perfect tutorial you can find  here:  http://www.w3schools.com/json/

Continue ReadingCollecting information. What to choose?

[Tutorial] Continuous Integration Automated Build for your Pharo Application

reposted from jigyasagrover.wordpress.com/ci-automated-build-for-your-pharo-application

Hello Fellas !

This post aims to put forward the basics of Build Automation and also brief the steps required to put up a Pharo application on Continuous Integration, Inria which is a platform for Scheduled Automated Build.
For simplicity, Build automation is the act of scripting or automating a wide variety of tasks that software developers do in their day-to-day activities including things like:
  • compiling computer source code into binary code
  • packaging binary code
  • running automated tests
  • deploying to production systems
  • creating documentation and/or release notes

Various types of automation are as:

  • On-Demand automation such as a user running a script at the command line
  • Scheduled automation such as a continuous integration server running a nightly build
  • Triggered automation such as a continuous integration server running a build on every commit to a version control system.
In recent years, build management tools have provided relief when it comes to automating the build process.
The dominant benefits of continuous integration include:
  • Improvement of product quality
  • Acceleration of compile and link processing
  • Elimination of redundant tasks
  • Minimization of ‘bad builds’
  • Have history of builds and releases in order to investigate issues
  • Save time and money – because of above listed reasons.

A build system should fulfill certain requirements.

Basic requirements:

  1. Frequent or overnight builds to catch problems early.
  2. Support for Source Code Dependency Management
  3. Incremental build processing
  4. Reporting that traces source to binary matching
  5. Build acceleration
  6. Extraction and reporting on build compile and link usage

Optional requirements:

  1. Generate release notes and other documentation such as help pages
  2. Build status reporting
  3. Test pass or fail reporting
  4. Summary of the features added/modified/deleted with each new build

Considering the above mentioned advantages of automated build, the below enlisted steps will help to put up your own Pharo application hosted on github on the CI server for continuous integration/scheduled build.
 1. Log on to Continuous Integration, Inria website (https://ci.inria.fr/).

Screenshot from 2015-08-08 15:53:49
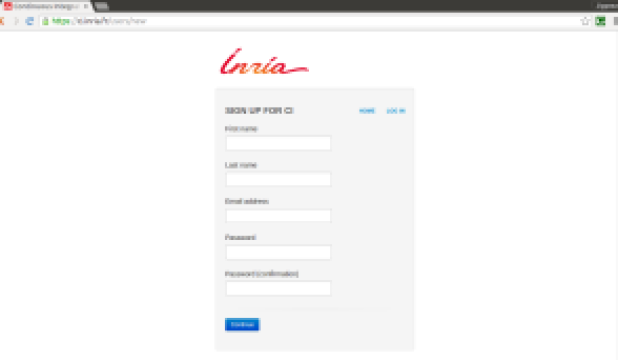
2. Click on ‘Sign Up‘ at the top-right corner, enter the required details and register for CI.

Screenshot from 2015-08-08 15:54:02
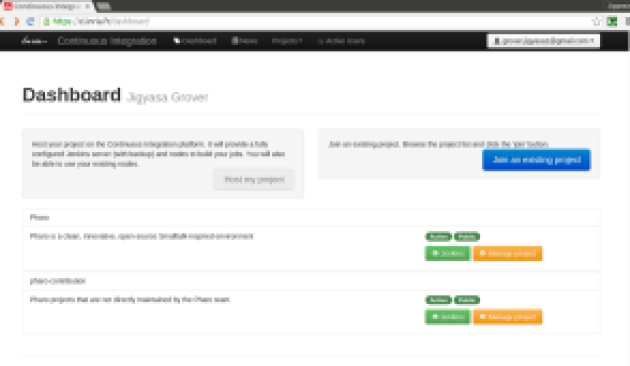
3. From the ‘Dashboard‘ option located at the top most of the screen click on ‘Join an existing project‘ blue button as shown .

Screenshot from 2015-08-08 15:59:22
4. Search ‘pharo-contribution‘ in the enlisted public projects and click on ‘Join

5. On clicking the ‘Join‘ button, a message stating: “Request to join the project ‘pharo-contribution’ sent.” appears.

6. It might take a day or two for the request approval mail to deliver at your registered Email ID.

The E-Mail content is as follows:
        Your request to join pharo-contribution has been accepted
        Hi _ _ _,
        Your request to join the project pharo-contribution has been accepted !
        Regards,
        Support team.

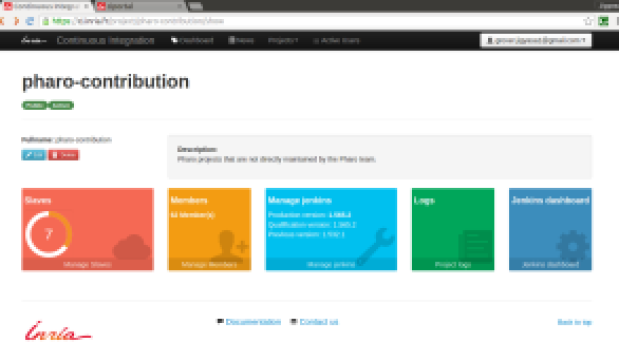
7. Click on ‘My Account‘ option and under ‘My Projects‘ check the status of pharo-contribution project. It should state ‘member‘.

Screenshot from 2015-08-08 16:17:55
8. Now, visit the LINK: https://ci.inria.fr/pharo-contribution/job/JobTemplate/  to create a ‘New Job

Screenshot from 2015-08-08 16:21:06
9. Read all the steps mentioned carefully. After going through all the points, click on the ‘New Job‘ mentioned in point 2 on the Project Job Template web page.

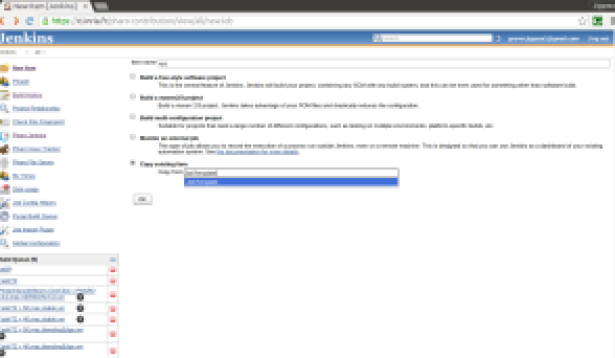
10. Enter the ‘Project Name‘ in the ‘Item Name: ‘ box and choose ‘Copy from existing item‘ option and fill ‘JobTemplate

Screenshot from 2015-08-08 16:30:01
11. After clicking OK, You will be directed to your project configuration.

12. Fill in the description of the project in the desired box.

Screenshot from 2015-08-08 16:32:31
13. Fill int the configuration details of your project like:

* Maximum number of builds
*  Link to GitHub Project
*  Source Code Manager
* Build Triggers
*  Schedule of build (@hourly, @daily, @weekly, @fortnightly, @monthly, @yearly etc.)
*  Configuration Matrix (User Defined Axis: Name && Version Values- stable, development etc.)
* Build environment options
* Post-build actions
*  Report regressed tests

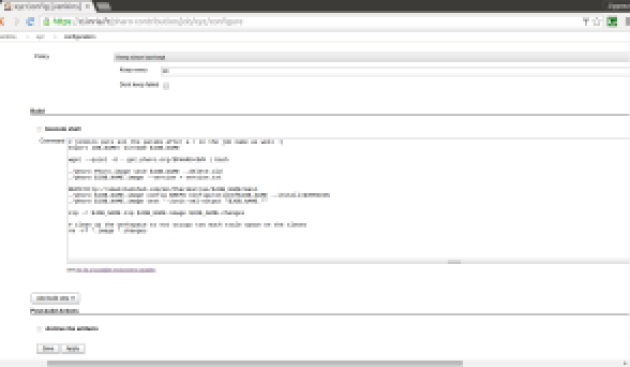
14. The main task is to carefully write the commands in the ‘Execute Shell
The default commands are as:

Screenshot from 2015-08-08 16:39:06
15. After saving and applying the changes, the application is all set for automated build.

16. Each build’s ‘Console Output‘ can be used to analyse the steps and highlight the weak areas of the project.
For instance: The below output is of a project whose stable version build was successful.

Screenshot from 2015-08-08 16:49:05

TIP: Keep a regular tab on the build results and analyze each line of the Console Output with utmost care.

Hope this post was able to help you start with the automation build process of Pharo Application.

Do like if it was worth a read !
Post queries/suggestions as comments 🙂 Looking forward to them.


UPCOMING: Next, I plan to share experience of putting up my Pharo application searchQuick on CI Inria for automated build. I intend to detail about the various configuration settings applied along with the Execute Shell commands utilized for a GitHub project 🙂


Introduction Accredits: Wikipedia 
Resources:  Build Automation and Continuous Integration .


Continue Reading[Tutorial] Continuous Integration Automated Build for your Pharo Application