Deploy SUSI.AI to a Messenger

Integration of SUSI AI to messenger platform has become a vital step as to enhance the popularity of this chatbot and to target a large base of users. For example – Viber claims that it has a user base of 800 million. So just integrating SUSI AI to Viber can increase its user base exponentially. This integration also proves to be a big boon, if the chat bot learns with the number and variations in the questions being asked. Like in the case of the web chat client (Susi AI).

This blog post will walk you through on how to deploy SUSI.AI to a messenger platform (Viber and Line messengers are used as an example in this post). We will be using Node.js and REST API technology in our example integrations. The repository of deployment of Susi AI to Viber can be found at susi_viberbot, and to Line messenger at susi_linebot. The SUSI AI Viberbot can be followed from here and Linebot by scanning this QR code.

The diagram below will give you an overview on what flow is followed to deploy SUSI AI chatbot to various messenger platforms.

Fig: Integration of Susi AI to chat messengers.

Let’s walk through each of the steps mentioned in the above diagram.

  1. To get familiar with SUSI.AI chatbot.

We have an API from where we fetch answers. To get a reply for the query ‘hi’, we can visit the API link with the query ‘hi’ appended to it (http://api.susi.ai/susi/chat.json?q=hi). You can chat with SUSI AI here.

  1. To set up a private SUSI AI chatbot account.

A account must be set up in the messenger platform, so that the user can message in that account to get a reply by the chatbot. Steps to set up the chatbot account is dependent on the messenger platform.

  1. To set up a webhook url.

The message sent to the chatbot account, must somehow connect to the chatbot. This message can be fed as a query to the chatbot, so that accordingly chatbot can think of a reply. To achieve this we need a url referred to as the webhook url.

The messages sent by the user, to the SUSI AI chatbot account on the messenger, can then be redirected to this url.

(Heroku platform allows 5 apps to be hosted on its platform for free, so you can check this documentation on how to host a node js app there.)

Now we need to think on how to handle these messages.

  1. To host code on our webhook url

As said earlier, we will be using Node js technology.

Generally, the messages from our SUSI AI chatbot account on the messenger will travel as requests to our webhook url. These come as POST requests to our url. To handle that we can use this piece of code:

app.post('/', function(request, response) {
    response.writeHead(200);

    // first step here, getting the message string from the request body

    // second step, calling the chatbot to get the reply to this message

    // third step, to send this reply back to our messenger's API
    
    response.end();
}

Let’s go through the three steps:

  • Getting the message string from the request body:

Request body is in JSON in case of REST API. To be extra sure, we use:

var reqBody = JSON.parse(request.body);

What property of this reqBody has our message string is dependent on the messenger platform. Suppose we have our message in the actions property of the reqBody, we can access that by:

var message = reqBody.actions;

For example in Viber, we need to use this piece of code:

app.post('/', function(req, response) {
    response.writeHead(200);

    // If user sends a message in 1-on-1 chat to the susi public account
    if(req.body.event === 'message'){
        // call chatbot or it’s API with event.message.text as the message string.
    }
}

In Line messenger, we accept the request at ‘/webhook’:

// register a webhook handler with middleware
app.post('/webhook', line.middleware(config), (req, res) => {
  // here events property has our message string somewhere nested in it.
  Promise
      .all(req.body.events.map(handleEvent))
      .then((result) => res.json(result));
});

// event handler
function handleEvent(event) {
  if (event.type !== 'message' || event.message.type !== 'text') {
      // ignore non-text-message event
      return Promise.resolve(null);
  }
  // call chatbot API with event.message.text as the query string.
}

So the code is dependent on the messenger platform.

  • Calling the SUSI AI chatbot API to get the reply to this message(‘hi susi’ in this case).

This part of our code will remain constant, for any messenger platform.

Let’s first see SUSI API’s answer to query “hi susi” and get familiar with it. Visit http://api.asksusi.com/susi/chat.json?q=hi susi from the browser and get familiar with the JSON object returned.

We get a JSON object as follows:

The answer can be found as the value of the key named expression. In this case it is “Hi, I’m Susi”.

To fetch the answer through coding, we can use this code snippet in Node js:

// including request module
var request = require(‘request’);

// setting options to make a successful call to Susi API.
var options = {
    method: 'GET',          
    url:'http://api.asksusi.com/susi/chat.json',
    qs:
    {
        timezoneOffset: '-330',
        q:'hi susi'
    }
};

// A request to the Susi bot
request(options, function (error, response, body) {
    if (error)
        throw new Error(error);
    // answer fetched from susi
    ans = (JSON.parse(body)).answers[0].actions[0].expression;
}

The properties required for the call are set up through a json object (i.e. options). Pass the options object to our request function as its first parameter. The response by the API will be stored in ‘body’ variable. We need to parse this body, to be able to access the properties of that body object. Hence, fetching the answer from Susi API.

  • To send the answer fetched from our SUSI API, back to our messenger.

This feature too is dependent on the messenger platform. Initially as the messenger platform requests us with a request which has the user message string. Now, it’s our time to send a request back to our messenger platform with a reply(i.e. the answer we will fetch from our chat bot’s API).

Generally, it is sent as a POST request.

The basic code to send a message to the messenger API:

// Assuming ans variable has the reply by our chatbot.
// setting options to request the chat api of viber.
var options1 = {
    method: 'POST',
    url: MESSENGER_API_URL,
    headers: headerBody,
    body:
    {
        // other properties dependent to the messenger
        text: ans
        // the property name can be different from 'text'
    },
    json: true
};

// request to the api of messenger.
request(options1, function (error1, res, body1) {
    if (error1) 
        throw new Error(error1);
    console.log(body1);
});

In case of Viber, we set up an options variable and request Viber’s chat API:

// setting options to request the chat api of viber.
var options1 = {
    method: 'POST',
    url: 'https://chatapi.viber.com/pa/send_message',
    headers: headerBody,
    body:
    {
        receiver: req.body.sender.id,
        min_api_version: 1,
        sender:
        {
            name: 'Susi',
            avatar: ''
        },
        tracking_data: 'tracking data',
        type: 'text',
        text: ans
    },
    json: true
};

// request to the chat api of viber.
request(options1, function (error1, res, body1) {
    if (error1) throw new Error(error1);
        console.log(body1);
});

In case of Line messenger, we use it’s reply API:

const answer = {
    type: 'text',
    text: ans
};

// use reply API
return client.replyMessage(event.replyToken, answer);
Continue ReadingDeploy SUSI.AI to a Messenger

Using react-url-query in SUSI Chat

For SUSI Web Chat, I needed a query parameter which can be passed to the components directly to activate the SUSI dreams in my textarea using just the URL which is not easy when one is using react-router. React URL Query is a package for managing state through query parameters in the URL in React. It integrates well with React Router and Redux and provides additional tools specifically targeted at serializing and deserializing state in URL query parameters. So for example, if one wants to pass some parameters to populate in your component directly through the URL, you can use react-url-query. Eg. http://chat.susi.ai/?dream=fossasia will populate fossasia in our textarea section without actually typing the term textarea.

So this in the URL,
Screenshot from 2017-06-29 09.46.33

Will produce this in the textarea,

To achieve this. the following steps are required:

  1. First we proceed with installing the packages (Dependencies  – history)
npm install history --save
npm install react-url-query --save
  1.   We then instantiate a history in our component where we want to listen to the parameters like the following code. Our class ChatApp is where we want to pass the params.

ChatApp.react.js

import history from '../history'; 
//Import the history object from the History package.
    
 // force an update if the URL changes inside the componentDidMount function
  componentDidMount() {
      history.listen(() => this.forceUpdate());
   }
  1.  Next, we define the props of the parameters in our Message Section. For that we need the following props-
  • urlPropsQueryConfig – this is where we define our URLConfig
  • Static proptypes – the query param to which we want to pass the value, so for me it’s dream.
  • The defaultProps when no such value is being passed to our param should be left a blank.
  • And then we finally assign the props.
  • This is then passed to the Message Composer Section from where we receive the value passed.

MessageSection.react.js

// Adding the UrlConfig
const urlPropsQueryConfig = {
  dream: { type: UrlQueryParamTypes.string }
};

 // Defining the query param inside our ClassName
  static propTypes = {
    dream: PropTypes.string
  }
// Setting the default param

  static defaultProps = {     
dream: ''
  }

 //Assigning the props inside the render() function
    const {
      dream
    } = this.props;
 //Passing the dream to the MessageComposer Section

                  <MessageComposer
                    threadID={this.state.thread.id}
                    theme={this.state.darkTheme}
                    dream={dream} />                
//Exporting our Class

export default addUrlProps({ urlPropsQueryConfig })(ClassName);
  1. Next we update the Message Composer section by the props we had passed. For this we first check if the props are null, we don’t populate it in our textarea if it is, otherwise we populate the textarea with the value ‘dream + props.dream’ so the value passed in the URL will be prepend by a word dream to enable the ‘dream value’ in our textarea.

The full file is available at MessageComposer.js

 //Add Check to the constructor
 constructor(props) {
    super(props);
    this.state = {text: ''};
    if(props.dream!==''){   //Setting the text as received ‘dream dreamPassed’
      this.state= {text: 'dream '+ props.dream}
    }
  }
// Populate the textarea
        <textarea
          name="message"
          value={this.state.text}
          onChange={this._onChange.bind(this)}
          onKeyDown={this._onKeyDown.bind(this)}
          ref={(textarea)=> { this.nameInput = textarea; }}
          placeholder="Type a message..."
        />
// Add props to the component
MessageComposer.propTypes = {
  /* other props */,
  dream: PropTypes.string //Setting Proptypes to receive the prop from the MessageSection
};

Now we have the full code working for querying any dream. Head over to chat.susi.ai?dream=fossasia Change fossasia to see the text change.

Resources

Continue ReadingUsing react-url-query in SUSI Chat

Using SUSI as your dictionary

SUSI can be taught to give responses from APIs as well. I made use of an API called Datamuse which is a premier search engine for English words, indexing 10 million unique words and phrases in more than 1000 dictionaries and glossaries.

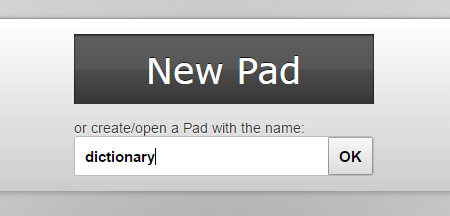
1. First, we head towards creating our dream pad for creating rules for the skill. To do this we need to create a dream at dream.susi.ai and give it a name, say dictionary.

2. After that one needs to go to the API and check the response generated.

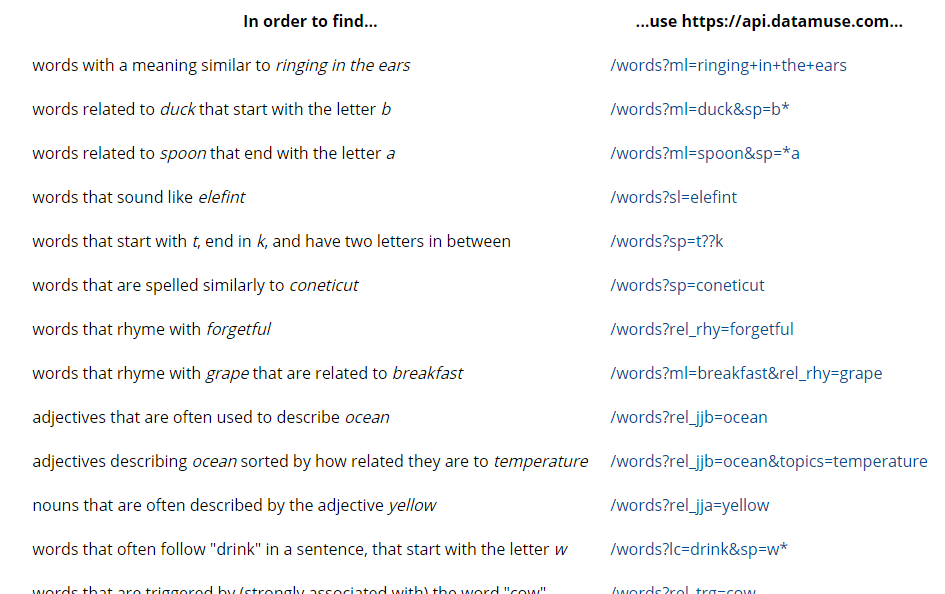
3. Going through the docs of the API, one can create various queries to produce informative responses as follows –

  • Word with a similar meaning.

define *| Meaning of *| one word for *

!console: $word$
{
"url":"https://api.datamuse.com/words?ml=$1$",
"path":"$.[0]"
}
eol
  • Word related to something that start with a given letter.

word related to * that start with the letter *

!console: $word$
{
"url":"https://api.datamuse.com/words?ml=$1$&sp=$2$*",
"path":"$.[0]"
}
eol

  • Word that sound like a given word..

word that sound like *|sounding like *

!console: $word$
{
"url":"https://api.datamuse.com/words?sl=$1$",
"path":"$.[0]"
}
eol

  • Words that are spelled similarly to a given word.

words that are spelled similarly to *| similar spelling to *| spelling of *

!console: $word$
{
"url":"https://api.datamuse.com/words?sp=$1$",
"path":"$.[0]"
}
eol

  • Word that rhyme with a given word.

rhyme *| word rhyming with *

!console: $word$
{
"url":"https://api.datamuse.com/words?rel_rhy=$1$",
"path":"$.[0]"
}
eol

  • Adjectives that are often used to describe a given word.

adjective to describe *|show adjective for *|adjective for *

!console: $word$
{
"url":"https://api.datamuse.com/words?rel_jjb=$1$",
"path":"$.[0]"
}
eol

  • Suggestions for a given word.

suggestions for *| show words like *| similar words to * | words like *

!console: $word$
{
"url":"https://api.datamuse.com/sug?s=$1$",
"path":"$.[0]"
}
eol

This is a sample query response for define *

To create more dictionary skills go to http://dream.susi.ai/p/dictionary and add skills from the API. To contribute by adding more skills, send a pull request to the susi_skill_data.  To test the skills, you can go to chat.susi.ai

Continue ReadingUsing SUSI as your dictionary

20 Amazing Things SUSI can do for You

SUSI.AI has a collection of varied skills in numerous fields such as knowledge, entertainment, problem solving, small-talk, assistants etc. Here’s a list of top skills which SUSI possesses.

Knowledge Based

  1. Ask SUSI to describe anything.

Sample Queries describe *

  1. Ask SUSI the distance between any two cities.

Sample queries – distance between * and *|What is distance between * and * ?| What is distance between * and *         

  1. Ask SUSI about your site’s rank.

Sample Query – site rank of *                

  1. Ask SUSI to know the location of any place.

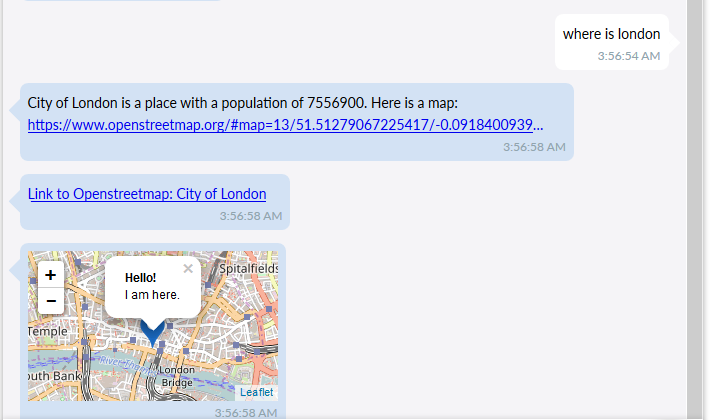
Sample Queries – where is *


  1. Ask SUSI the time in any city.

 Sample Query – current time in *


  1. Ask SUSI the weather information of any city.

Sample Queries – temperature in * , hashtags * *, mentions * *, weather in *, Tell me about humidity in *|What is humidity in *|Humidity in *|* Humidity, Tell me tomorrow’s weather in *|Weather forecast of *


  1. Ask SUSI to wiki about anything.

Sample Query – wiki *


  1. Ask SUSI about any word, words etc.

Sample Queries – define *| Meaning of *| one word for *, word related to * that start with the letter *, word that sound like *|sounding like *, words that are spelled similarly to *| similar spelling to *| spelling of *, rhyme *| word rhyming with *, adjective to describe *|show adjective for *|adjective for *, suggestions for *| show words like *| similar words to * | words like *

  1. Ask SUSI about a day in the calendar.

Sample Queries – Date * ?, Day * ?, Day on year * month * date *?


  1. Ask to convert a currency to USD for you. 

Sample Queries –  convert * to USD


Problem Solving Based

  1. Ask SUSI to solve a problem for you in Mathematics.

  Sample Queries – compute *| Compute *| Calculate *| calculate *


Entertainment Based

  1. Ask SUSI to draw a card for you.

Sample Query – draw a card


  1. Ask SUSI to toss a coin for you.

Sample Query – flip a coin


  1. Ask SUSI to tell you a Big Bang Theory Joke.

Sample Query – * big bang theory| tell me about big bang theory|geek jokes|geek joke|big bang theory *

  1. Ask SUSI to generate a meme for you.

 Sample Query – get me a meme


  1. Ask SUSI to give you a recipe. 

Sample Queries – * cook *, cook *|how to cook *|recipe for


  1. Ask SUSI to tell you a random joke.

Sample Queries – tell me a joke|recite me a joke|entertain me

  1. Ask SUSI to give you a random gif.

Sample Query – random gif


Assistants

  1. Ask SUSI to translate something for you

Sample Queries – What is * in french|french for * , What is * in german|german for *, What is * in spanish|spanish for *,  What is * in hindi|hindi for *

  1. Ask SUSI to search anything for you.

Sample Queries – search *|query *|duckduckgo *


To contribute to the above skills you can follow the tutorial here. To test or chat with SUSI you can go to chat.susi.ai

Continue Reading20 Amazing Things SUSI can do for You

Using Flux to embed SUSI’s API Service in a Chat System.

To embed SUSI’s API Service in a chat-like system, I needed a view which could populate the content dynamically and maintain the state of the Application at the same time. Flux follows a unidirectional data flow path and I used this feature to the advantage of the Chat Application to maintain the real time state of the Chat View.

A Flowchart model of Flux looks like

flux flowchart


src: https://github.com/facebook/flux

Flux uses a dispatcher service to render its views, thus making the data flow in a unidirectional path. When a user reacts with a React view (here through the TextArea in the chat system), the view propagates an action through the dispatcher service, to the various stores that hold the application’s data and finally update the views that are affected. Here’s another flowchart model from the website which helps one understand the model in a better way.

flux flow

For the current Chat Application, I used a single Message Store which contained all the event listeners to detect any change in the view. For example, when I send a “Hey” to SUSI, an action is called to Dispatch this message to the Message Store with an ActionType  “CREATE_MESSAGE”. This store then renders the message in the Message Section View.

Here is an example snippet from the Actions.js file which performs an action of type CREATE_MESSAGE and dispatches the messages to the MessageStore.js.

export function createMessage(text, currentThreadID) {
let message = ChatMessageUtils.getCreatedMessageData(text, currentThreadID);
ChatAppDispatcher.dispatch({
type: ActionTypes.CREATE_MESSAGE,
message
});
ChatWebAPIUtils.createMessage(message);
};

The response from the message is generated as soon as another ActionType named

“CREATE_SUSI_MESSAGE” is dispatched to the store, thereby rendering the SUSI’s response generated in the view.

The file ChatConstants.js which declares all the ActionTypes.

import keyMirror from 'keymirror';

export default {

  ActionTypes: keyMirror({
    CREATE_MESSAGE: null,
    RECEIVE_RAW_CREATED_MESSAGE: null,
    CREATE_SUSI_MESSAGE: null,
    RECEIVE_SUSI_MESSAGE: null,
    RECEIVE_RAW_MESSAGES: null
  })

};

To get the message up on the view, I have used the following utils to call the API, render the messages to the view and call the different actions. Here’s a code snippet from ChatMessageUtils.js

export function createMessage(message) {
  ChatExampleDataServer.postMessage(message, createdMessage => {
    Actions.receiveCreatedMessage(createdMessage, message.id);
  });
  ChatExampleDataServer.postSUSIMessage(message, createdMessage => {
    Actions.createSUSIMessage(createdMessage, message.threadID);
  });
};

To know more about the project join us on Gitter at gitter.im/fossasia/susi_webchat, or to contribute go to https://github.com/fossasia/chat.susi.ai/.

A demo application can be found running at http://chat.susi.ai.

Resources –

To know more about Flux you can visit the following websites.

Continue ReadingUsing Flux to embed SUSI’s API Service in a Chat System.

Using Picasso library in SUSI Android

SUSI is an artificial intelligence for chatbots which have the ability to reply in most intuitive way through different types of answers such as images, charts, maps and text. Hence for the image displays in the SUSI Android client we need an image loading library which can help us to cache the images in the app. There are a few options available which include Glide and Picasso. Both of these libraries are open sourced. After some research we finally came up to use Picasso as it provides more additional features in comparison to Glide.

Picasso is an image downloading library. It is an open source library. It is published and maintained by Square. It allows the developer to display an image from the external URL of the image. It provides caching of image in just a few lines of code. Previously without this library it was very difficult to download and display the image and required a lot more lines of code. But with the help of Picasso this task is reduced to just a few lines of code.

How to use Picasso?

To use Picasso in our project we must add the dependency of the library in build.gradle file.

dependencies {
  ...
  compile "com.squareup.picasso:picasso:2.4.0"
  ...
}

Let us define an imageView in which we want to load the image with the help of Picasso Library.

<ImageView
   android:layout_width="wrap_content"
   android:layout_height="wrap_content"
   android:id="@+id/imageView"
   android:layout_alignParentTop="true"
   android:layout_centerHorizontal="true">
</ImageView>


Now we are all set to download the image with the help of Picasso library in the following way:-

//Initialize ImageView
ImageView imageView = (ImageView) findViewById(R.id.imageView);

//Loading image from below url into imageView

Picasso.with(this)
  .load("IMAGE URL")
  .into(imageView);

Picasso also provide the function for setting placeholders and error images to be shown if there is any problem in the downloading of the image.

Picasso.with(this)
   .load("YOUR IMAGE URL HERE")
   .placeholder(R.drawable.ic_placeholder) 
   .error(R.drawable.ic_error_fallback)         
   .into(imageView);

Now let us see the implementation of Picasso in Susi Android

In the Susi app we are storing the link of images coming from response in the imageList.

if (imageList == null || imageList.size() == 0) {

  holder.linkPreviewImageView.setVisibility(View.GONE);

} else {

  Picasso.with(context).load(imageList.get(0))

          .fit().centerCrop()

          .into(holder.linkPreviewImageView);
  }

Here we are passing the activity context to the Picasso library. We can use additional features like fit() and centerCrop() method the way we are using in the Susi app. These methods are fit the image at the center of the imageView.

Screenshots from the Susi App

Picasso Library also provides some additional functions as well like:-

Picasso.with(this)
    .load("YOUR IMAGE URL HERE")        
    .placeholder(R.drawable.ic_placeholder)   // optional        
    .error(R.drawable.ic_error_fallback)      // optional        
    .resize(250, 200)                        // optional        
    .rotate(90)                             // optional        
    .into(imageView);

You can find more about Picasso from this link.

Continue ReadingUsing Picasso library in SUSI Android

Implementing DuckDuckGo Api in SUSI Android

As we know that Susi is an open source intelligent chatbot, it must be able to reply with user’s query on any topic. Therefore we have implemented DuckDuckGo API in Susi Android(https://github.com/fossasia/susi_android) which will help us to generate search result for the query asked by the user.


DuckDuckGo is an API which provides instant search results. This basically works as a search engine having information about various things. The most important thing about DuckDuckGo is that it is non tracking. It does not track its users and show results based on their search history. Thus the search results remain uniform across all the clients irrespective of their search history. The information inside the API is fed from more than 120 different independent sources. This is what makes it different from other search engines. The response in the form of answers include different types of links, description, categories, and definition about various stuffs.

For more details about the Api please check this link.


API endpoints:

http://api.duckduckgo.com/?q=DuckDuckGo&format=json

This is one of the links generated to test the api. Here we can see different parameters, the parameter q is the query parameter where we write our question/query to get the response from the API. The format here defines the format in which we want the response to be. Here in this case we are obtaining the response in the form of JSON which can be parsed to obtain the desired result in the client.

The response obtained by the following query is as follow:-

{  

  "DefinitionSource":"",

  "Heading":"DuckDuckGo",

  "ImageWidth":340,

  "RelatedTopics":[  

     {  

        "Result":"<a href=\"https://duckduckgo.com/Names_Database\">Names Database</a> - The Names Database is a partially defunct social network, owned and operated by Classmates.com, a wholly owned subsidiary of United Online. The site does not appear to be significantly updated since 2008, and has many broken links and display issues.",

        "Icon":{  

           "URL":"",

           "Height":"",

           "Width":""

        },

        "FirstURL":"https://duckduckgo.com/Names_Database",

        "Text":"Names Database - The Names Database is a partially defunct social network, owned and operated by Classmates.com, a wholly owned subsidiary of United Online. The site does not appear to be significantly updated since 2008, and has many broken links and display issues."

     }

}


Implementation in Susi android

In Susi Android we are using Retrofit library by Square for API calling. Retrofit is one of the best libraries present for the network calling. It helps the developer to migrate from the old way of using AsyncTask in the Android app which creates a lot of mess and ugly code.

For the implementation in Susi Android, we have made a WebSearchClient class that stores the base address for the API calling.

public class WebSearchClient {

  public static final String BASE_URL = "http://api.duckduckgo.com";

  private static Retrofit retrofit = null;


  public static Retrofit getClient() {

      if (retrofit==null) {

          retrofit = new Retrofit.Builder()

                  .baseUrl(BASE_URL)

                  .addConverterFactory(GsonConverterFactory.create())

                  .build();

      }

      return retrofit;

  }

}

To get the response we call the API with get method passing the query and format parameter in the following way.


public interface WebSearchService {


  @GET("/?format=json&pretty=1")

  Call<WebSearch> getresult(@Query("q") String query);

}


The results obtained from the server in the form of JSON is parsed in the form of objects in this way:-


public class WebSearch{


  @SerializedName("Heading")

  @Expose

  private String heading;


  @SerializedName("RelatedTopics")

  @Expose

  private List<RelatedTopics> relatedTopics;


  public WebSearch(String heading, List<RelatedTopics> relatedTopics) {

      this.heading = heading;

      this.relatedTopics = relatedTopics;

  }


public class RelatedTopics {


  @SerializedName("FirstURL")

  @Expose

  private String url;


  @SerializedName("Text")

  @Expose

  private String text;


  @SerializedName("Icon")

  @Expose

  private WebIcon icon;


  @SerializedName("Result")

  @Expose

  private String result;


  public RelatedTopics(String url, String text, WebIcon icon) {

      this.url = url;

      this.text = text;

      this.icon = icon;

  }


At the end after setting up all the above things, we call the API and store the result in the realm or local storage.

final WebSearchService apiService = WebSearchClient.getClient().create(WebSearchService.class);


Call<WebSearch> call = apiService.getresult(webquery);


call.enqueue(new Callback<WebSearch>() {

  @Override

  public void onResponse(Call<WebSearch> call, Response<WebSearch> response) {

      Log.e(TAG, response.toString());

      if (response.body() != null ) {

          realm.beginTransaction();

          RealmList<WebSearchModel> searchResults = new RealmList<>();


    }
}

This completes the calling of DuckDuckGo API and storing the results in the database.

To know more about API calling using Retrofit you can refer to this link.

Continue ReadingImplementing DuckDuckGo Api in SUSI Android

Custom Views in Susi Android App

Android provides us with the ability to have different views for your App. These views help in the formation of the UI element of the application. These includes imageView, textView and layouts such as LinearLayout and FrameLayout etc. The view hierarchy of Android looks something like this.

The problem with these views is that we cannot modify them according to our own need inside the application. This is what we faced during the making of chat bubble layout for Susi Android App (https://github.com/fossasia/susi_android). We wanted to implement the chat bubble similar to Whatsapp that resizes and position the time textView according to size of the response coming from the server ie something like this as shown in the screenshot. Therefore we finally came up the solution of using Custom views inside the app that allowed us to modify the view the way we wanted.


So now lets us understand how we can make custom views by extending existing views

So first question that comes in our mind is why are we extending existing views if we want to make our own. The reason behind this is that extending an existing view provides us with ability to have all the features that are there in an existing view.

On top of that we can add our own functionality into it. Now see below how we can implement it.

It’s time for some actual code.

As we can see in the code below that here we made our own custom class called ValueSelector. This class is extending the existing layout which is RelativeLayout. The first constructor used in the above class which takes context as the parameter is used to create an instance of the view programmatically. The second constructor used which takes context and AttributeSet as parameters is used to inflate the view from the XML.

While the third constructor is used to define the base classes.

public class ValueSelector extends RelativeLayout {

   View rootView;
   TextView valueTextView;
   View minusButton;
   View plusButton;

   public ValueSelector(Context context) {
       super(context);
       init(context);
   }

   public ValueSelector(Context context, AttributeSet attrs) {
       super(context, attrs);
       init(context);
   }

   private void init(Context context) {
       //do setup work here
   }

The init method used here is to inflate the views and to get the reference of all the child view.

private void init(Context context) {
   rootView = inflate(context, R.layout.value_selector, this);
   valueTextView = (TextView) rootView.findViewById(R.id.valueTextView);

   minusButton = rootView.findViewById(R.id.minusButton);
   plusButton = rootView.findViewById(R.id.plusButton);

   minusButton.setOnClickListener(new View.OnClickListener() {
       @Override
       public void onClick(View v) {
           decrementValue(); //we'll define this method later
       }
   });

   plusButton.setOnClickListener(new View.OnClickListener() {
       @Override
       public void onClick(View v) {
           incrementValue(); //we'll define this method later        }
   });
}

Let’s now see the implementation of CustomViews in Susi Android.


public class ChatBubbleLayout extends FrameLayout {


  public ChatBubbleLayout(Context context) {

      super(context);

  }


  public ChatBubbleLayout(Context context, AttributeSet attrs) {

      super(context, attrs);

  }


  public ChatBubbleLayout(Context context, AttributeSet attrs, int defStyleAttr) {

      super(context, attrs, defStyleAttr);

  }


  @TargetApi(21)

  public ChatBubbleLayout(Context context, AttributeSet attrs, int defStyleAttr, int defStyleRes) {

      super(context, attrs, defStyleAttr, defStyleRes);

  }


  @Override

  protected void onMeasure(int widthMeasureSpec, int heightMeasureSpec) {

      super.onMeasure(widthMeasureSpec, heightMeasureSpec);

  }


In Susi Android app we are making our own custom view for the chat bubble layout, the view is extending the FrameLayout. Here we are overriding onMeasure method. This method is used for defining the constraint of the layout relative to that of the parent view. With the help of this we can set how big or small our layout will be.

Now lets us see the design of the custom view in Susi app.


      You can learn more about the custom views from this link.

Continue ReadingCustom Views in Susi Android App

Deploy SUSI AI to Viber messenger

Prerequisites

  1. Basic knowledge about calling API’s and fetching data or posting data to the API.
  2. Node.js language.
  3. Github
  4. Heroku

FigArchitecture for running all different messaging services.

To integrate Susi AI chat to Viber, a public account is needed, messaging to which users can chat with Susi.

We need to have a webhook url. Webhook url is a url which serves our Node.js code i.e. the code we will write to serve requests from Viber and to respond back to it.

Whenever a user messages to the SUSI AI public account, these messages come as post requests to our webhook url. The url then requests Susi API to give an answer for the (question based) message received from Viber. The answer fetched from Susi API is sent to the messenger platform’s API by the webhook url, to show it to the user on Viber.

As said we need a public account for our chat bot. The steps to be followed can be seen from here (Steps 2 and 3).

The REST API helps to make applications follow a RESTful way. In this way, the requests and response are in the form of JSON objects. Any language can be used to make an application follow a RESTful way.

In this blog, I will be using Node.js language.

The Rest API Viber, is the document to be followed for integration of a chatbot to Viber. Let’s go through each of the steps:

  1. To call Susi API and fetch an answer from it for a query (‘hi’ in this case). Let’s first visit http://api.asksusi.com/susi/chat.json?q=hi from the browser. We will get a JSON object as follows:

The answer can be found as the value of the key named expression. In this case it is “Hallo!”.

To fetch the answer through coding, we can use this code snippet in Node js:

// including request module
var request = require(‘request’);

// setting options to make a successful call to Susi API.
var options = {
    method: 'GET',
    url: 'http://api.asksusi.com/susi/chat.json',
    qs: 
    {
        timezoneOffset: '-330',
        q:'hi'
    }
};

// A request to the Susi bot
request(options, function (error, response, body) {
    if(error)
        throw new Error(error);
    //answer fetched from susi
    ans = (JSON.parse(body)).answers[0].actions[0].expression;
}

The properties required for the call are set up through a json object (i.e. options). Pass the options object to our request function as its 1st parameter. The response by the API will be stored in ‘body’ variable. We need to parse this body, to be able to access the properties of that body object. Hence, fetching the answer from Susi API.

  1. Let’s set the webhook url for our Susi public account. The folder containing our Node.js code must be pushed to a repo in github. We need to do some changes to the default package.json file in our project.

This file has a code portion:

The “test” key and its value must be replaced with “start”: “node index.js” i.e. node followed by the name of the main file which has to accept the requests from Viber and responds to it. In my case it is index.js . So the resultant code of package.json file should look like this:

Now, even on the local system you can run the node application by running “npm start” command from our project folder.

  • Push this project to github.
  • Create a new heroku app for Node js, following the steps here.
  • Then link this app to the repository where you pushed your code. For reference, follow the steps 7 and 8 here.

To set a webhook for our account, we can use this code snippet.

var headerBody = { 
                     'cache-control': 'no-cache',
                     'content-type': 'application/json',
                     'x-viber-auth-token': 'YOUR_X_VIBER_AUTH_TOKEN'
                 };

var options = {
                  method: 'POST',
                  url: 'https://chatapi.viber.com/pa/set_webhook',
                  headers: headerBody,
                  body:
                       { 
                           url: 'YOUR_WEBHOOK_URL',
                           event_types: ['delivered', 'seen', 'failed', 'subscribed', 'unsubscribed','conversation_started']
                       },
                  json: true 
              };

// request to the chat api of viber.
request(options, function(error, res, body) {
    if (error)
        throw new Error(error);
    response.write("The status message - " + body.status_message);
    response.end(); 
});

To set the webhook url, we need to post info to the viber chat api i.e. https://chatapi.viber.com/pa/set_webhook. The headers key present in our options object must have the Viber authentication key in the object passed to it. So we have passed a headerBody object to it, which contains our x-viber-auth-token. This property helps Viber to set webhook url for the account that corresponds to this passed Viber authentication token. The format of the body of options object is according to this(as stated in the doc):

{  
    "url": "https://my.host.com",  
    "event_types": ["delivered", "seen", "failed", "subscribed", "unsubscribed", "conversation_started"]  
}

We can wrap up this code in a app.get() block. So that whenever we visit our webhook url from a browser, we initiate a get request. This request as seen below, initiates a request to the chat api of Viber to set this url as a webhook url for our Susi AI public account.

app.get('/',function(req, response){
    response.writeHead(200,{'content-type': 'text/plain'});
    response.write("To chat with Susi through Viber, visit this link - chats.viber.com/chatauto and click on the 'Have a look' button\n\n");

    // setting options to request the chat api of viber.
    var options = {
                      method: 'POST',
                      url:'https://chatapi.viber.com/pa/set_webhook',
                      headers: headerBody,
                      body: 
                      {
                          url:'https://intense-crag-83953.herokuapp.com',
                          event_types: ['delivered', 'seen', 'failed', 'subscribed', 'unsubscribed', 'conversation_started']
                      },
                      json: true 
    };

    // request to the chat api of viber.
    request(options, function(error, res, body) {
        if (error) 
            throw new Error(error);
        response.write("The status message received for set Webhook request is - " + body.status_message);
        response.end();
    });
});

Now after setting up a webhook url, the messages sent to our account will come as post requests to this webhook url.

Let’s work with some of the events, for which Viber callbacks our webhook url.

First, let’s talk about the message event request.

According to Viber, this will be the body of the request:

{
    "event": "message",
    "timestamp": 1457764197627,
    "message_token": 4912661846655238145,
    "sender": {
        "id": "01234567890A=",
        "name": "John McClane",
        "avatar": "http://avatar.example.com",
        "country": "UK",
        "language": "en",
        "api_version": 1
    },
    "message": {
       "type": "text",
       "text": "a message to the service",
       "media": "http://example.com",
       "location": {
          "lat": 50.76891,
          "lon": 6.11499
       },
       "tracking_data": "tracking data"
    }
}

We check if the value of ‘event’ key is equal to ‘message’:

app.post('/', function(req, response) {
    response.writeHead(200);

    // If user sends a message in 1-on-1 chat to the susi public account
    if(req.body.event === 'message'){

If it is, then the body of if block can be populated with the code to handle messages by the user.

Assuming we have a reply by Susi API in the ans variable. We can include this code further:

// setting options to request the chat api of viber.
    var options1 = {
                       method: 'POST',
                       url: 'https://chatapi.viber.com/pa/send_message',
                       headers: headerBody,
                       body: 
                            {
                                receiver: req.body.sender.id,
                                min_api_version: 1,
                                sender: 
                                       {
                                           name: 'Susi',
                                           avatar: '' 
                                       },
                                tracking_data: 'tracking data',
                                type: 'text',
                                text: ans 
                   },
                   json: true 
   };

// request to the chat api of viber.
request(options1, function (error1, res, body1) {
    if (error1)
        throw new Error(error1);
    console.log(body1);
});

This above code can help us send a response to the user. To send a message to the user, our body object in options1 must be similar to:

{
    "receiver": "01234567890A=",
    "min_api_version": 1,
    "sender": {
       "name": "John McClane",
       "avatar": "http://avatar.example.com"
    },
    "tracking_data": "tracking data",
    "type": "text",
    "text": "a message from pa"
}

receiver key should have a value of the id of the user to which message needs to sent, which will be shown on our account interface. The user id can be easily fetched from request by ‘req.body.sender.id’ as the reply is to be sent to the same user from where we received the message.

The sender key’s value is an object which indicates the sender’s name, which in our case is Susi. Also we can pass an avatar url along with the name.

The text key must have our answer as the value i.e. the ‘ans’ variable (in this case).

The whole code to accept the request, and reply accordingly:

// If user sends a message in 1-on-1 chat to the susi public account
if(req.body.event === 'message'){
    // Susi answer to a user message
    var ans;
    // setting options to request susi bot.
    var options1 = { 
                       method: 'GET',
                       url:'http://api.asksusi.com/susi/chat.json',
                       qs: { 
                            timezoneOffset: '-330',
                            q:req.body.message.text 
                           }
    };

    // A request to the Susi bot
    request(options1, function (error1, response1, body1) {
        if (error1)
            throw new Error(error1);
        // answer fetched from susi
        ans = (JSON.parse(body1)).answers[0].actions[0].expression;
        var options = {
                          method: 'POST',
                          url:'https://chatapi.viber.com/pa/send_message',
                          headers: headerBody,
                          body: 
                               {
                               receiver: req.body.sender.id,
                               min_api_version: 1,
                               sender: 
                                      {
                                           name: 'Susi',
                                           avatar: '' 
                                      },
                               tracking_data:'tracking data',
                               type: 'text',
                               text: ans 
                      },
        json: true 
    };

    // request to the chat api of viber.
    request(options, function (error, res, body) {
        if (error)
            throw new Error(error);
        console.log(body);
    });
}

The same way we can handle “conversation started” type of event:

if(req.body.event === 'conversation_started'){
    // Welcome Message
    var request = require("request");
    var options = {
                      method: 'POST',
                      url:'https://chatapi.viber.com/pa/send_message',
                      headers: headerBody,
                      body: 
                          {
                              receiver: req.body.user.id,
                              min_api_version: 1,
                              sender: 
                                    {
                                        name: 'Susi',
                                        avatar: '' 
                                    },
                              tracking_data: 'tracking data',
                              type: 'text',
                              text:'Hi from your favourite, Susi!' 
                          },
                      json: true 
    };

    request(options, function (error, res, body) {
        if (error)
            throw new Error(error);
        console.log(body);
    });
}

This way our Susi AI chatbot can reply to messages from Viber.

The repository which contains whole project of Susi AI’s integration to Viber can be found here.

Continue ReadingDeploy SUSI AI to Viber messenger

Auto Deploying accounts.susi.ai on gh-pages

While migrating web apps from susi server repository to accounts.susi.ai repository. Our team autodeployed accounts.susi.ai on gh-pages branch i.e., each time changes are made to code, it gets auto deployed on gh-pages branch. And changes are automatically live and visible on site.

To do this we have to setup travis in our repository. Travis can be easily set in github repository just by adding .travis.yml file into root directory your repo. Depending on type of repository you are dealing with, the configuration of travis changes. For accounts.susi.ai, It is a written on top of ReactJs framework. So we used the following code.

sudo: required
dist: trusty
language: node_js
node_js:
  - 6
script:
  - npm test
deploy:
  provider: script
  script: "./deploy.sh"
  env:
  global:
  - ENCRYPTION_LABEL: "<.... encryption label from previous step ....>"
  - COMMIT_AUTHOR_EMAIL: "you@example.com"
cache:
  directories:
    - node_modules
branches:
  only:
    - master


The above travis configuration file, After every commit checks whether the build is passing or not by running npm test command. After checking the commit, next script deploy.sh is run on the commit. The last line tells us to only execute this script for commits in master branch. deploy.sh can be placed anywhere, we jus need to modify its path in .tavis.yml file. Here is code of deploy.sh :

#!/bin/bash
set -e 

SOURCE_BRANCH="master"
TARGET_BRANCH="gh-pages"

if [ "$TRAVIS_PULL_REQUEST" != "false" -o "$TRAVIS_BRANCH" != "$SOURCE_BRANCH" ]; then
    echo "Skipping deploy; just doing a build."
    doCompile
    exit 0
fi
# Save some useful information
REPO=`git config remote.origin.url`
SSH_REPO=${REPO}
SHA=`git rev-parse --verify HEAD`

git clone $REPO out
cd out
git checkout $TARGET_BRANCH || git checkout --orphan $TARGET_BRANCH
cd ..
git config user.name "Travis CI"
git config user.email "travis-ci@github.com"

if git diff --quiet; then
    echo "No changes to the output on this push; exiting."
    exit 0
fi

# Commit the "changes", i.e. the new version.
# The delta will show diffs between new and old versions.
git add -A .
git commit -m "Deploy to GitHub Pages: ${SHA}"

# Get the deploy key by using Travis's stored variables to decrypt deploy_key.enc
ENCRYPTED_KEY_VAR="encrypted_${ENCRYPTION_LABEL}_key"
ENCRYPTED_IV_VAR="encrypted_${ENCRYPTION_LABEL}_iv"
ENCRYPTED_KEY=${!ENCRYPTED_KEY_VAR}
ENCRYPTED_IV=${!ENCRYPTED_IV_VAR}
openssl aes-256-cbc -K $ENCRYPTED_KEY -iv $ENCRYPTED_IV -in ../deploy_key.enc -out ../deploy_key -d
chmod 600 ../deploy_key
eval `ssh-agent -s`
ssh-add deploy_key

# Now that we're all set up, we can push.
git push $SSH_REPO $TARGET_BRANCH


deploy.sh is automatically deploying master on gh pages branch. To perform this task, it needs admin authorisation of github repo. We do this authentication by encrypted keys.
To create encrypted keys we need to generate a new SSH key, SSH keys can be generated by running following command in terminal.

ssh-keygen -t rsa -b 4096 -C "your_email@example.com"


Then add this key to your project’s git repository at the github repo of project.

https://github.com/<your name>/<your repo>/settings/keys

Now, We can generate encrypted keys by running following command.

travis encrypt-file deploy_key


This command generates deploy_key.enc file, which shall be placed in the repo. Its location needs to be updated in the placeholders of .travis.yml and deploy.sh.

Hence, we achieved the task of auto deployment to gh-pages in accounts.susi.ai. Please ensure that account through which encrypted keys are created, always have admin access to repository for continued deployment.

Continue ReadingAuto Deploying accounts.susi.ai on gh-pages