Generating responsive email using mjml in Yaydoc

In Yaydoc, an email with a download, preview and deploy link will be sent to the user after documentation is generated. But then initially, Yaydoc was sending email in plain text without any styling, so I decided to make an attractive HTML email template for it. The problem with HTML email is adding custom CSS and making it responsive, because the emails will be seen on various devices like mobile, tablet and desktops. When going through the GitHub trending list, I came across mjml and was totally stunned by it’s capabilities. Mjml is a responsive email generation framework which is built using React (popular front-end framework maintained by Facebook) Install mjml to your system using npm. npm init -y && npm install mjml Then add mjml to your path export PATH="$PATH:./node_modules/.bin” Mjml has a lot of react components pre-built for creating the responsive email. For example mj-text, mj-image, mj-section etc… Here I’m sharing the snippet used for generating email in Yaydoc. <mjml> <mj-head> <mj-attributes> <mj-all padding="0" /> <mj-class name="preheader" color="#CB202D" font-size="11px" font-family="Ubuntu, Helvetica, Arial, sans-serif" padding="0" /> </mj-attributes> <mj-style inline="inline"> a { text-decoration: none; color: inherit; } </mj-style> </mj-head> <mj-body> <mj-container background-color="#ffffff"> <mj-section background-color="#CB202D" padding="10px 0"> <mj-column> <mj-text align="center" color="#ffffff" font-size="20px" font-family="Lato, Helvetica, Arial, sans-serif" padding="18px 0px">Hey! Your documentation generated successfully<i class="fa fa-address-book-o" aria-hidden="true"></i> </mj-text> </mj-column> </mj-section> <mj-section background-color="#ffffff" padding="20px 0"> <mj-column> <mj-image src="https://res.cloudinary.com/template-gdg/image/upload/v1498552339/play_cuqe89.png" width="85px" padding="0 25px"> </mj-image> <mj-text align="center" color="#EC652D" font-size="20px" font-family="Lato, Helvetica, Arial, sans-serif" vertical-align="top" padding="20px 25px"> <strong><a>Preview it</a></strong> <br /> </mj-text> </mj-column> <mj-column> <mj-image src="https://res.cloudinary.com/template-gdg/image/upload/v1498552331/download_ktlqee.png" width="100px" padding="0 25px" > </mj-image> <mj-text align="center" color="#EC652D" font-size="20px" font-family="Lato, Helvetica, Arial, sans-serif" vertical-align="top" padding="20px 25px"> <strong><a>Download it</a></strong> <br /> </mj-text> </mj-column> <mj-column> <mj-image src="https://res.cloudinary.com/template-gdg/image/upload/v1498552325/deploy_yy3oqw.png" width="100px" padding="0px 25px" > </mj-image> <mj-text align="center" color="#EC652D" font-size="20px" font-family="Lato, Helvetica, Arial, sans-serif" vertical-align="top" padding="20px 25px"> <strong><a>Deploy it</a></strong> <br /> </mj-text> </mj-column> </mj-section> <mj-section background-color="#333333" padding="10px"> <mj-column> <mj-text align="center" color="#ffffff" font-size="20px" font-family="Lato, Helvetica, Arial, sans-serif" padding="18px 0px">Thanks for using Yaydoc<i class="fa fa-address-book-o" aria-hidden="true"></i> </mj-column> </mj-text> </mj-section> </mj-container> </mj-body> </mjml> The main goal of this example is to make a responsive email which looks like the image given below. So, In mj-head tag, I have imported all the necessary fonts using the mj-class tag and wrote my custom CSS in mj-style. Then I made a container with one row and one column using mj-container, mj-section and mj-column tag and changed the container background color to #CB202D using background-color attribute, then In that container I wrote a heading which says `Hey! Your documentation generated successfully`  with mj-text tag, Then you will get the red background top bar with the success message. Then moving on to the second part, I made a container with three columns and added one image to each column using mj-image tag by specifying image URL as src attribute, added the corresponding text below the mj-image tag using the mj-text tag. At last,  I  made one more container as the first one with different message saying `Thanks for using yaydoc`  with background color #333333 At last, transpile your mjml code to HTML by executing the following…

Continue ReadingGenerating responsive email using mjml in Yaydoc

The Mission Mars Challenge with NodeJS and Open Source Bot Framework Emulator

Commissioned under the top-secret space project, our first human team had set foot months ago. This mission on the red planet begun with the quest to establish civilization by creating our first outpost on an extraterrestrial body. Not so long ago, the mission control lost contact with the crew, and we are gathering the best of mankind to help save this mission. In this rescue mission, you will learn to create a bot using an open source framework and tools. You will be given access to our code repositories and other technical resources. We have 3 mission and 2 code challenge to solve in order to bring the Mars mission back on track. We need you! Be the first to crack the problems and rescue the compromised mission! Your bounty awaits! Receive your mission briefing at the control centre after checking-in at the FOSS Asia Summit! How to enter: Join us on March 18 at Foss Asia Summit (Singapore Science Center), Tinker Lab (Hall E) at the following timeslots:3 9:30 11:30 13:30 Bring your own PC or load one from the mission control. We provide internet access at the lab room. Fill up the registration form and check in with the form at the Mission Control. Mission briefing will be provided, you will be given access to the github where you mission resources will be provided, and you can proceed to crack the challenges. Badge of honors to be earned and bounty awaits the team with the best-time! Winners to be announced at 17:30! Be there! Installations needed: NodeJS (https://nodejs.org/en/) Any Code Editor (Visual Studio Code/Atom/Sublime Text etc.) Open Source Bot Framework Emulator (https://emulator.botframework.com/)

Continue ReadingThe Mission Mars Challenge with NodeJS and Open Source Bot Framework Emulator

FOSSASIA Summit 2017 Singapore – Call for Speakers

The FOSSASIA OpenTechSummit is Asia's leading Open Technology conference for developers, startups, and IT professionals. In 2017 the event will take place from March 17th - 19th at the Science Centre Singapore. During three days, thousands of developers, technologists, scientists, entrepreneurs and artists get together to showcase latest technologies, communicate, exchange ideas, learn from each other, and collaborate. Topics range from information technology and Open Source software development to hardware and maker projects, open design tools, machine learning, DevOps, knowledge tools, and citizen science. For our 2017 feature event we are looking for speaker submissions for the following tracks: * Open Source Software * Design, Art & Culture, * Internet, Society & Politics, * Hardware & Making, * Health and Technology * Science * Kernel Track and * Startup and Business Development Apart from the conference program, the FOSSASIA Summit offers an exhibition space for company and project stands and areas for community assemblies, and developer meetings. Submission Guidelines Please propose your session as early as possible and include a description of your session proposal that is as complete as possible. The description is of particular importance for the selection. Once accepted, speakers will receive a code for a speakers ticket. Please indicate on the submissions form if you would like to apply for a sponsored community ticket. Submission Link: 2017.fossasia.org/speaker-registration Dates & deadlines Please send us your proposal as soon as possible via the FOSSASIA Summit speaker registration. December 20th, 2016: Deadline for submissions January 18th, 2017: Notification of acceptance March 17th - 19th, 2017: FOSSASIA OpenTechSummit Sessions and Tracks Talks and Workshops Talk slots are 20 minutes long plus 5-10 minutes for questions and answers. You can also sign up for either a 1-hour long or a 2-hours workshop. Longer sessions are possible in principle. Please tell us the proposed length of your session at the time of submission. Lightning talks You have some interesting ideas but do not want to submit a full talk? We suggest you go for a lightning talk which is a 5 minutes slot to present your idea or project. You are welcome to continue the discussion in break out areas. There are tables and chairs to serve your get-togethers. Stands and assemblies We offer spaces in our exhibition area for companies, community projects, installations, workshops, team gatherings and other fun activities. We are curious to know what you would like to make, bring or show. Please add details in the submission form. Developer Rooms/Track Hosts Get in touch early if you plan to organize a developer room at the event. FOSSASIA is also looking for team members who are interested to co-host and moderate tracks. Please sign up to become a host here. Publication Audio and video recordings of the lectures will be published in various formats under the Creative Commons Attribution 4.0 International (CC BY 4.0) license. This license allows commercial use by media institutions as part of their reporting. If you do not wish for material from your lecture to be published or streamed, please let us know in your submission. Sponsorship & Contact If you would like to sponsor FOSSASIA…

Continue ReadingFOSSASIA Summit 2017 Singapore – Call for Speakers

PayPal Express Checkout in Python

As per the PayPal documentation ... Express Checkout is a fast, easy way for buyers to pay with PayPal. Express Checkout eliminates one of the major causes of checkout abandonment by giving buyers all the transaction details at once, including order details, shipping options, insurance choices, and tax totals. The basic steps for using express checkout to receive one-time payments are: Getting the PayPal API credentials. Making a request to the API with the transaction details to get a token Using the token to send the users to the PayPal payment page Capturing the payment and charging the user after the user completes the payment at PayPal. We will be using PayPal's Classic NVP (Name-value pair) API for implementing this. Getting PayPal API Credentials To begin with, we'll need API Credentials. We'll be using the Signature API credentials which consists of API Username API Password Signature To obtain these, you can follow the steps at Creating and managing NVP/SOAP API credentials - PayPal Developer. You'll be getting two sets of credentials. Sandbox and Live. We'll just stick to the Sandbox for now. Now, we need sandbox test accounts for making and receiving payments. Head over to Creating Sandbox Test Accounts - PayPal Developer and create two sandbox test accounts. One would be the facilitator and one would be the buyer. PayPal NVP Servers All the API actions will take place by making a request to the PayPal server. PayPal has 4 different NVP servers for 4 different purposes. https://api-3t.sandbox.paypal.com/nvp - Sandbox "testing" server for use with API signature credentials. https://api-3t.paypal.com/nvp- PayPal "live" production server for use with API signature credentials. https://api.sandbox.paypal.com/nvp - Sandbox "testing" server for use with API certificate credentials. https://api.paypal.com/nvp - PayPal "live" production server for use with API certificate credentials. We'll be using the Sandbox "testing" server for use with API signature credentials. Creating a transaction and obtaining the token To create a transaction, we'll need to make a request with all the transaction details. We can use Python requests library to easily make the requests. All requests are POST. We'll be calling the SetExpressCheckout method of the NVP API to obtain the token. import requests import urlparse data = { 'USER': credentials['USER'], 'PWD': credentials['PWD'], 'SIGNATURE': credentials['SIGNATURE'], 'SUBJECT': credentials['FACILITATOR_EMAIL'], 'METHOD': 'SetExpressCheckout', 'VERSION': 93, 'PAYMENTREQUEST_0_PAYMENTACTION': 'SALE', 'PAYMENTREQUEST_0_AMT': 100, 'PAYMENTREQUEST_0_CURRENCYCODE': 'USD', 'RETURNURL': 'http://localhost:5000/paypal/return/', 'CANCELURL': 'http://localhost:5000/paypal/cancel/' } response = requests.post('https://api-3t.sandbox.paypal.com/nvp', data=data) token = dict(urlparse.parse_qsl(response.text))['TOKEN'] Here, USER represents your Sandbox API Username. PWD represents your Sanbox API Password. SIGNATURE represents your Sandbox Signature. SUBJECT represents the facilitator's email ID. PAYMENTREQUEST_0_AMT is the total transaction amount. PAYMENTREQUEST_0_CURRENCYCODE is the 3 digit ISO 4217 Currency code. RETURNURL is where the user will be sent to after the transaction CANCELURL is where the user will be sent to if he/she cancels the transaction. A URL-Encoded, Name-value pair response would be obtained. We can decode that into a dict by using Python's urlparse modules. From the response, we're extracting the TOKEN which we will use to generate the payment URL for the user. This token…

Continue ReadingPayPal Express Checkout in Python

Writing linux commands

sTeam includes a number of tools namely steam-shell, debug, edit, import and export from git. These tools are only accessible from the tools folder in the sTeam installation. My task is to make a steam command for linux so that all these tools can be accessible from anywhere just like any other linux application. Problem: https://github.com/societyserver/sTeam/issues/126 The command structure decided is that we have a global sTeam command and sub commands for each of the tools. This structure can be though of as similar to the structure of the git command. The central git command has many sub commands like branch, checkout, reset, merge, etc. I started with making a pike executable and then changing the installation files to copy this executable to /usr/bin. Now this pike executable becomes accessible from anywhere in the system and acts like a linux command. https://github.com/societyserver/sTeam/pull/127 I wrote the main function to accept the command line arguments and passed them to a function named resolveParam. In this function I am using an if-else structure to segregate the different sub commands. For shell and debug I started a child process to execute the file for these tools present in /usr/local/lib/steam/tools. The following code snippet gives an example. void resolveParam(int argc,array(string) argv) { if(argv[1]=="shell") { array command =({"/usr/local/lib/steam/tools/steam-shell.pike"}); object shell = Process.create_process(command, (["stdin":Stdio.stdin,"stdout":Stdio.stdout,"stderr":Stdio.stderr])); shell->wait(); } } I had some problem when I had to accept more arguments than just the sub command. Foe example the edit command works as ./edit <filename1> <filename2> <filename3>… Using the global command it becomes steam edit <filename1> <filename2> <filename3>… I had to pass all the rest of the arguments to the edit scripts. I had to add them in the command array. The first solution would be to loop through the arguments array and add them all, however pike has a very easy and elegant way of doing it in one sentence. array command = ({"/usr/local/lib/steam/tools/edit.pike"})+argv[2..]; This gets our global command up and running. Rest of the time I spend on resolving merge conflicts while merging all my previous Pull Requests. https://github.com/Siddhant085/sTeam/tree/gsoc2016

Continue ReadingWriting linux commands

Building a logger interface for FlightGear using Python: Part One

{ Repost from my personal blog @ https://blog.codezero.xyz/python-logger-interface-for-flightgear-part-one/ } The FlightGear flight simulator is an open-source, multi-platform, cooperative flight simulator developed as a part of the FlightGear project. I have been using this Flight simulator for a year for Virtual Flight testing, running simulations and measuring flight parameters during various types of maneuvers. I have noticed that, logging the data, (figuring out how to log in the first place) has been quite difficult for users with less technical knowledge in such softwares. Also, the Property Tree of FlightGear is pretty extensive making it difficult to properly traverse the huge tree to get the parameters that are actually required. That's when I got the idea of making a simple, easy to use, user friendly logging interface for FlightGear. I gave it a name 'FlightGear Command Center' and the project was born at github.com/niranjan94/flightgear-cc. After 44 commits, this is what I have now. 1. A simple dashboard to connect to FlightGear, open FlightGear with a default plane, Getting individual parameter values or to log a lot of parameters continuously 2. An interface to choose the parameters to log and the interval The User interface is a web application written in HTML/javascript. The Web application communicates with a python bridge using WebSockets. The python bridge communicates with FlightGear via telnet. The data is logged to a csv file continuously (until the user presses stop) by the bridge once the web application requests it. The interface with FlightGear FlightGear has an internal "telnet" command server which provides us "remote shell" into the running FlightGear process which we can exploit to interactively view or modify any property/variable of the simulation. FlightGear can be instructed to start the server and listen for commands by passing the --telnet=socket,out,60,localhost,5555,udp command line argument while starting FlightGear. (The argument is of format --telnet=medium,direction,speed_in_hertz,localhost,PORT,style.) Communication with that server can be done using any simple telnet interface. But FlightGear also provides us with a small wrapper class that makes retrieving and setting properties using the telnet server even more easier. The wrapper can be obtained from the official repository atsourceforge.net/p/flightgear/flightgear/ci/master/tree/scripts/python/FlightGear.py Using the wrapper is straightforward. Initialize an instance of the class with the hostname and port. The class will then make a connection to the telnet server. from FlightGear import FlightGear flightgear_server = 'localhost' flightgear_server_port = 5555 fg = FlightGear(flightgear_server, flightgear_server_port) The wrapper makes use of python's magic methods __setitem__ and __getitem__ to make it easy for us to read or manipulate the property tree. For example, getting the current altitude of the airplane is as easy as print fg['/position[0]/altitude-ft'] and setting the altitude is as simple as fg['/position[0]/altitude-ft'] = 345.2 But the important thing here is, knowing the path to the data you want in the FlightGear property tree. Most of the commonly used properties are available over at Aircraft properties reference - FlightGear Wiki. Now that we have basic interface between python and FlightGear in place, the next step would be to setup a link between the user interface (a small…

Continue ReadingBuilding a logger interface for FlightGear using Python: Part One

CommonsNet – WiFi Standards

Introduction There is no doubt that WiFi is a crucial technology that most of us use every day. But have you ever  noticed on wifi router that there are a few different number and letter tagged on the end?  These designations present different properties of the WiFi like speed, allowed devices, range and frequency and they create WiFi standards. If you know what standard you have, you can tell much about your wireless connection, and use it in the way you want. CommonsNet team focuses on providing users with transparent wifi information so let’s talk today about them. WIFI Standards 802 – this strange number means naming system which is used by networking standards. WiFi uses 802.11. All WiFi varieties has this number, followed by a letter or two which, is very useful for consumers, because as mentioned above it helps to identify wifi properties life maximum speed, range and required devices. Specific router may support not only single, but multiple standards at the same time. It happens in order to ensure compatibility with different pieces of hardware and network.   802.11 This standard was created In 1997 by the Institute of Electrical and Electronics Engineers (IEEE).  It was used for medicine and industrial purposes. Unfortunately, 802.11 supported a maximum network bandwidth up to 1 or 2 Mbps – not fast enough for applications. Therefore this standard was rapidly supplanted and is no longer used. 802.11b This standard became the most commonly adopted in consumer devices, especially because of its low-cost. It supports bandwidth up to 11 Mbps. 802.11b uses radio signaling frequency  – 2.4 GHz, and due to this, its signal has good range – about 100m – and is not easily obstructed, but due to the fact that it works on 2, GHz it may interfere with home appliances. 802.11a This standard bandwidth is up to 54 Mbps and has signals in a regulated frequency  around 5 GHz. There is no doubt that this higher frequency shortens the range, and needs more power to work correctly. This also means that signal has more difficulties while penetrating obstructions like walls, doors, windows. This standard due to working on different frequency is incompatible with 802.11b standard. 802.11g In 2002 products supporting a new standard emerged on the market.I t’s actually the most popular WiFi standard. It focuses on combining the best of both 802.11a and 802.11b. It supports bandwidth up to 54Mbps, and it uses the 2.4 Ghz frequency for greater range. It is compatible with other standards. But it’s impossible to use it in older devices. If you try to do it, the speed will be 4 times slower. 802.11n This standard was designed  to improve  802.11g  by utilizing multiple wireless signals and antennas (called MIMO technology) instead of one. It provides up to 600 Mbps  of network bandwidth, but in reality it usually reaches up to 150 Mbps. 802.11n also offers  better range over earlier Wi-Fi standards due to its increased signal intensity, and it is backward-compatible with 802.11b/g gear. 802.11ac The newest generation of Wi-Fi signaling in popular…

Continue ReadingCommonsNet – WiFi Standards

AngularJS makes coding CommonsNet easy

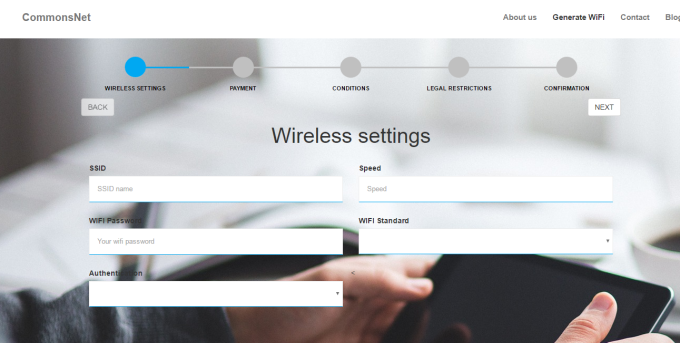
Wizard form Have you seen a wizard form? I am sure you have.  I think the usage of it is very common these days. I like it very much, too. I think its structure is extremely user-friendly, because it can help us to avoid discouraging users from filling the form with all data. As a user I don’t want to be pushed to fill long forms. It’s annoying. But while you use the wizard no matter how long the form is, firstly you can quickly see the progress of you work and then,  don’t see it at once, just fill one field at a time. That’s the result why have I decided to use it in CommonsNet project, too. Angular JS To implement this on CommonsNet website I have decided to use AngularJS which makes it easy. I have used Model View Controller which  is a software design pattern for developing web applications. A Model View Controller pattern is made up of the following three parts Model − It is the lowest level of the pattern responsible for maintaining data View − It is responsible for displaying all or a portion of the data to the user Controller − It is a software Code that controls the interactions between the Model and View. This model helps us to isolate the application logic from the user interface layer and supports separation of concerns. The ng-controller directive defines the application controller. A controller is a JavaScript Object Steps to create AngularJS app 1. Load AngularJS on your webiste. src = "http://ajax.googleapis.com/ajax/libs/angularjs/1.3.14/angular.min.js"> 2. Define AngularJS app using ng-app. <body ng-app = "app"> ... </body> 3. Then I have created views – five different html files for each wizard step. Please take a look at partials folder where you can find them. 4. Next, I have created a .Controller –  WizardController in AngularJS. var WizardController = app.controller("WizardController", function ($scope) { // controller logic goes here } );   It is a JavaScript function. I have defined which  view has to be displayed by .controller on each step. As you can see it’s quite easy and clear. You can quickly define and see which step is it , how is its name and which template should be used. It definitely enables you to maintain your app easier, because changes can be made quickly and does not influence on other part of code so you can take control over your code. 5. Then I have used  this line of code to call to my WizardController to display and maintain my views and that’s it.  See the progress on CommonsNet <div id="wizard-container" ng-controller="WizardController as vm">

Continue ReadingAngularJS makes coding CommonsNet easy

One step at a time – The beginnings of CommonsNet

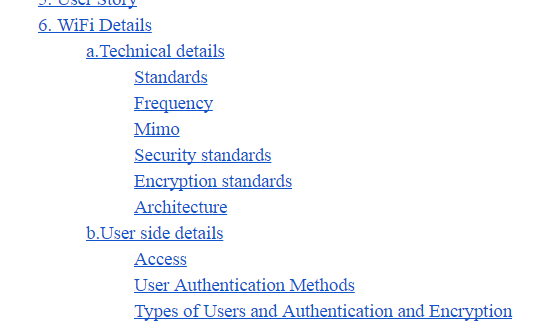
The beginnings If you have been accepted to a serious project like Google Summer of Code is, you can feel lost and scared. I think it's nothing special and probably everyone experiences it. You can feel that pressure because you want to fulfill all expectations, follow your obligations and to do your best, but working in such project is something different from working on your own, private and small one.  Your organisation and mentors require something from you, and they can even provide you with a detailed guideline how to behave but doubts may occur anyway. My advice is not to give up and go through that tought period in order to experience the joy of results and sense of satisfaction, and to learn something to be better in the future. I am going to tell about my beginnings and to provide you with some tips  from my own experience CommonsNet CommonsNet (feel free to see it) is a new project of FOSSASIA. It focuses on providing users with transparent information about WiFi they may use in public places like hotels, restaurants, stations. The thing is that for now, if you go to a new place, and want to connect to Internet, you look for a free WIFI sign and as soon as you find it you try to connect. But think about it, how much do you know about this connection? Is is safe for your private data? How fast is it? Does the Internet connection have any legal restrictions?  I suppose that you answer 'no' to all these questions. But what if you know? Or if you can compare details of different WIFI available in a specific public place and connect to more suitable for your needs. I am sure you will appreciate it. I hope to run this project successfully and I am going to tell you more about it in next posts. How to start? Due to the fact that CommonsNet is a new project as I have mentioned before, and for now apart from mentor @agonarch and FOSSASIA leaders @mariobehling @hpdang, I am an only contributor, I am in a good position to tell you what are my steps. Remember not to think about all at once. It will make you crazy. So first of all - prepare your work. Try to get to know about your project as much as possible. Follow group chat, GitHub repositories, do research in Internet about the subject of area of your project or don't be afraid to ask your team member. That's what I have done at first. I have prepared a Google Doc about all WiFi details. I  have tried to get to know as much as possible and to gather this information in a clear, easy-to-understand way. I need it because I will be preparing a wizard form for users to let them provide all important details about their WiFi. I need to think seriously which data are important and have to be used to do it. It is not finished yet and will be changing…

Continue ReadingOne step at a time – The beginnings of CommonsNet

Being a mentor ! #GoogleCodeIn

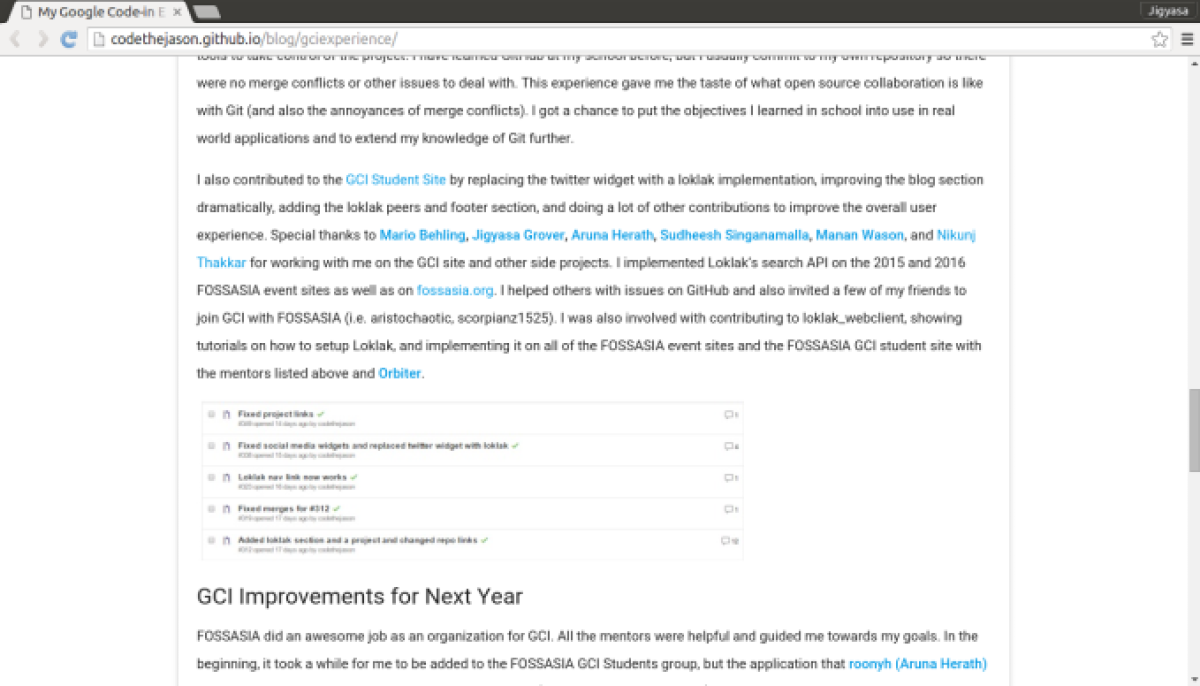
Google Code-In 2015/2016 just concluded and it was an enriching experience to be a prime segment of this cool initiative. It feels great to have worked as a Mentor for Google Code-In 2015/2016 under FOSSASIA organization :) I strongly believe that helping people steer their careers in the right direction is a key element in developing. The esteemed task of mentoring is an essential leadership skill. In addition to managing and motivating people, it's also important that one can help others learn, grow and become more effective in their lives. My experience with mentoring Google Code-In tells me that mentoring is a rewarding experience, both personally and professionally. It not only aids in improving communication skills but also brings about a a great sense of personal satisfaction. One gains a new perspective of thinking and gets to advance technical skills by learning together with the mentee. The mentor-ship experience was a surreal one. I never knew my answers and feedback to simple questions could be the cause of someone's high spirits. It made me realize the impact one's guidance could have on a budding developer. My feeling of immense contentment was augmented by the innocent tweets and blog posts of the mentees expressing their gratitude and happiness. (refer a few screenshots attached :D ) The journey in this field will urge to shed all inhibitions, keep pride aside and dive into this worthy mission of building a powerful community. The small interesting conversations and tasks will sometimes leave a deep impact on the mentor as a person, after-all not everyday one comes across a student submitting "Peace Pledge: No ! To war and distrust" to his/her mentor where both belong to two countries supposedly at 'cold war' ;) I am also of the view that by being a mentor to a newbie, we pay our regards to the entire computing sphere and its fraternity. Helping the mentee have a smooth transition into the tech world helps make long lasting associations and ensure a better future. A season of mentoring gone by, excited for another already !

Continue ReadingBeing a mentor ! #GoogleCodeIn