Automatic Signing and Publishing of Android Apps from Travis

As I discussed about preparing the apps in Play Store for automatic deployment and Google App Signing in previous blogs, in this blog, I’ll talk about how to use Travis Ci to automatically sign and publish the apps using fastlane, as well as how to upload sensitive information like signing keys and publishing JSON to the Open Source repository. This method will be used to publish the following Android Apps:

Current Project Structure

The example project I have used to set up the process has the following structure:

It’s a normal Android Project with some .travis.yml and some additional bash scripts in scripts folder. The update-apk.sh file is standard app build and repo push file found in FOSSASIA projects. The process used to develop it is documented in previous blogs. First, we’ll see how to upload our keys to the repo after encrypting them.

Encrypting keys using Travis

Travis provides a very nice documentation on encrypting files containing sensitive information, but a crucial information is buried below the page. As you’d normally want to upload two things to the repo – the app signing key, and API JSON file for release manager API of Google Play for Fastlane, you can’t do it separately by using standard file encryption command for travis as it will override the previous encrypted file’s secret. In order to do so, you need to create a tarball of all the files that need to be encrypted and encrypt that tar instead. Along with this, before you need to use the file, you’ll have to decrypt in in the travis build and also uncompress it for use.

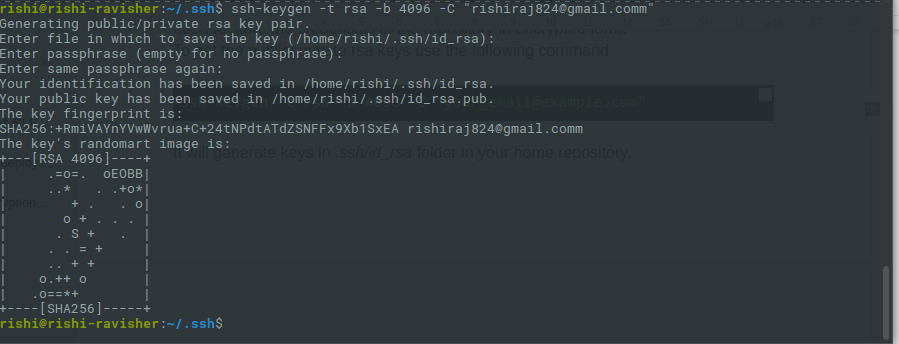
So, first install Travis CLI tool and login using travis login (You should have right access to the repo and Travis CI in order to encrypt the files for it)

Then add the signing key and fastlane json in the scripts folder. Let’s assume the names of the files are key.jks and fastlane.json

Then, go to scripts folder and run this command to create a tar of these files:

tar cvf secrets.tar fastlane.json key.jks


secrets.tar will be created in the folder. Now, run this command to encrypt the file

travis encrypt-file secrets.tar


A new file secrets.tar.enc will be created in the folder. Now delete the original files and secrets tar so they do not get added to the repo by mistake. The output log will show the the command for decryption of the file to be added to the .travis.yml file.

Decrypting keys using Travis

But if we add it there, the keys will be decrypted for each commit on each branch. We want it to happen only for master branch as we only require publishing from that branch. So, we’ll create a bash script prep-key.sh for the task with following content

#!/bin/sh
set -e

export DEPLOY_BRANCH=${DEPLOY_BRANCH:-master}

if [ "$TRAVIS_PULL_REQUEST" != "false" -o "$TRAVIS_REPO_SLUG" != "iamareebjamal/android-test-fastlane" -o "$TRAVIS_BRANCH" != "$DEPLOY_BRANCH" ]; then
    echo "We decrypt key only for pushes to the master branch and not PRs. So, skip."
    exit 0
fi

openssl aes-256-cbc -K $encrypted_4dd7_key -iv $encrypted_4dd7_iv -in ./scripts/secrets.tar.enc -out ./scripts/secrets.tar -d
tar xvf ./scripts/secrets.tar -C scripts/


Of course, you’ll have to change the commands and arguments according to your need and repo. Specially, the decryption command keys ID

The script checks if the repo and branch are correct, and the commit is not of a PR, then decrypts the file and extracts them in appropriate directory

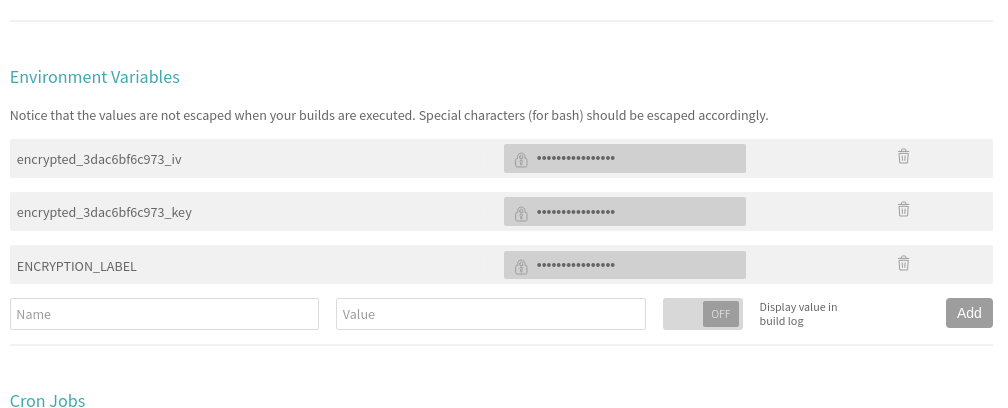
Before signing the app, you’ll need to store the keystore password, alias and key password in Travis Environment Variables. Once you have done that, you can proceed to signing the app. I’ll assume the variable names to be $STORE_PASS, $ALIAS and $KEY_PASS respectively

Signing App

Now, come to the part in upload-apk.sh script where you have the unsigned release app built. Let’s assume its name is app-release-unsigned.apk.Then run this command to sign it

cp app-release-unsigned.apk app-release-unaligned.apk
jarsigner -verbose -tsa http://timestamp.comodoca.com/rfc3161 -sigalg SHA1withRSA -digestalg SHA1 -keystore ../scripts/key.jks -storepass $STORE_PASS -keypass $KEY_PASS app-release-unaligned.apk $ALIAS


Then run this command to zipalign the app

${ANDROID_HOME}/build-tools/25.0.2/zipalign -v -p 4 app-release-unaligned.apk app-release.apk


Remember that the build tools version should be the same as the one specified in .travis.yml

This will create an apk named app-release.apk

Publishing App

This is the easiest step. First install fastlane using this command

gem install fastlane


Then run this command to publish the app to alpha channel on Play Store

fastlane supply --apk app-release.apk --track alpha --json_key ../scripts/fastlane.json --package_name com.iamareebjamal.fastlane


You can always configure the arguments according to your need. Also notice that you have to provide the package name for Fastlane to know which app to update. This can also be stored as an environment variable.

This is all for this blog, you can read more about travis CLI, fastlane features and signing process in these links below:

Continue ReadingAutomatic Signing and Publishing of Android Apps from Travis

Auto Deployment of SUSI Web Chat on gh-pages with Travis-CI

SUSI Web Chat uses Travis CI with a custom build script to deploy itself on gh-pages after every pull request is merged into the project. The build system auto updates the latest changes hosted on chat.susi.ai. In this blog, we will see how to automatically deploy the repository on gh pages.

To proceed with auto deploy on gh-pages branch,

  1. We first need to setup Travis for the project.
  2. Register on https://travis-ci.org/ and turn on the Travis for this repository.

Next, we add .travis.yml in the root directory of the project.

# Set system config
sudo: required
dist: trusty
language: node_js

# Specifying node version
node_js:
  - 6

# Running the test script for the project
script:
  - npm test

# Running the deploy script by specifying the location of the script, here ‘deploy.sh’ 

deploy:
  provider: script
  script: "./deploy.sh"


# We proceed with the cache if there are no changes in the node_modules
cache:
  directories:
    - node_modules

branches:
  only:
    - master

To find the code go to https://github.com/fossasia/chat.susi.ai/blob/master/.travis.yml

The Travis configuration files will ensure that the project is building for every change made, using npm test command, in our case, it will only consider changes made on the master branch.

If one wants to watch other branches one can add the respective branch name in travis configurations. After checking for build passing we need to automatically push the changes made for which we will use a bash script.

#!/bin/bash

SOURCE_BRANCH="master"
TARGET_BRANCH="gh-pages"

# Pull requests and commits to other branches shouldn't try to deploy.
if [ "$TRAVIS_PULL_REQUEST" != "false" -o "$TRAVIS_BRANCH" != "$SOURCE_BRANCH" ]; then
    echo "Skipping deploy; The request or commit is not on master"
    exit 0
fi

# Save some useful information
REPO=`git config remote.origin.url`
SSH_REPO=${REPO/https:\/\/github.com\//git@github.com:}
SHA=`git rev-parse --verify HEAD`

ENCRYPTED_KEY_VAR="encrypted_${ENCRYPTION_LABEL}_key"
ENCRYPTED_IV_VAR="encrypted_${ENCRYPTION_LABEL}_iv"
ENCRYPTED_KEY=${!ENCRYPTED_KEY_VAR}
ENCRYPTED_IV=${!ENCRYPTED_IV_VAR}
openssl aes-256-cbc -K $ENCRYPTED_KEY -iv $ENCRYPTED_IV -in deploy_key.enc -out ../deploy_key -d

chmod 600 ../deploy_key
eval `ssh-agent -s`
ssh-add ../deploy_key

# Cloning the repository to repo/ directory,
# Creating gh-pages branch if it doesn't exists else moving to that branch
git clone $REPO repo
cd repo
git checkout $TARGET_BRANCH || git checkout --orphan $TARGET_BRANCH
cd ..

# Setting up the username and email.
git config user.name "Travis CI"
git config user.email "$COMMIT_AUTHOR_EMAIL"

# Cleaning up the old repo's gh-pages branch except CNAME file and 404.html
find repo/* ! -name "CNAME" ! -name "404.html" -maxdepth 1  -exec rm -rf {} \; 2> /dev/null
cd repo

git add --all
git commit -m "Travis CI Clean Deploy : ${SHA}"

git checkout $SOURCE_BRANCH

# Actual building and setup of current push or PR.
npm install
npm run build
mv build ../build/

git checkout $TARGET_BRANCH
rm -rf node_modules/
mv ../build/* .
cp index.html 404.html

# Staging the new build for commit; and then committing the latest build
git add -A
git commit --amend --no-edit --allow-empty

# Deploying only if the build has changed
if [ -z `git diff --name-only HEAD HEAD~1` ]; then

  echo "No Changes in the Build; exiting"
  exit 0

else
  # There are changes in the Build; push the changes to gh-pages
  echo "There are changes in the Build; pushing the changes to gh-pages"

  # Actual push to gh-pages branch via Travis
  git push --force $SSH_REPO $TARGET_BRANCH
fi

This bash script will enable Travis CI user to push changes to gh pages, for this we need to store the credentials of the repository in encrypted form.

1. To get the public/private rsa keys we use the following command

ssh-keygen -t rsa -b 4096 -C "your_email@example.com"

2.  It will generate keys in .ssh/id_rsa folder in your home repository.

  1. Make sure you do not enter any passphrase while generating credentials otherwise Travis will get stuck at the time of decryption of the keys.
  2. Copy the public key and deploy the key to repository by visiting  

5. We also need to set the environment variable ENCRYPTED_KEY in Travis. Here’s a screenshot where to set it in the Travis repository dashboard.

6. Next, install Travis for encryption of keys.

sudo apt install ruby ruby-dev
sudo gem install travis

7. Make sure you are logged in to Travis, to login use the following command.

travis login

8. Make sure you have copied the ssh to deploy_key and then encrypt your private deploy_key and add it to root of your repository, use command –

travis encrypt-file deploy_key

9. After successful encryption, you will see a message

Please add the following to your build script (before_install stage in your .travis.yml, for instance):

openssl aes-256-cbc -K $encrypted_3dac6bf6c973_key -iv $encrypted_3dac6bf6c973_iv -in deploy_key.enc -out ../deploy_key -d
  1. Add the above-generated deploy_key in Travis and push the changes on your master branch. Do not push the deploy_key only the encryption file i.e., deploy_key.enc
  1. Finally, push the changes and create a Pull request and merge it to test the deployment. Visit Travis logs for more details and debugging.

Resources

Continue ReadingAuto Deployment of SUSI Web Chat on gh-pages with Travis-CI

Auto Deploying loklak Server on Google Cloud Using Travis

This is a setup for loklak server which want to check in only the source files, but have the development branch in Kubernetes deployment automatically updated with some compiled output every time the push using details from Travis build.

How to achieve it?

Unix commands and shell script is one of the best option to automate all deployment and build activities. I explored Kubernetes Gcloud which can be accessed through unix command.

1.Checking for Travis build details before deployment:

Firstly check whether the repository is loklak_server, pull request is available and branches are either master or development, and then decide to update the docker image or not. The code of the aforementioned things is as follows:

if [ "$TRAVIS_REPO_SLUG" != "loklak/loklak_server" ]; then
    echo "Skipping image update for repo $TRAVIS_REPO_SLUG"
    exit 0
fi

if [ "$TRAVIS_PULL_REQUEST" != "false" ]; then
    echo "Skipping image update for pull request"
    exit 0
fi

if [ "$TRAVIS_BRANCH" != "master" ] && [ "$TRAVIS_BRANCH" != "development" ]; then
    echo "Skipping image update for branch $TRAVIS_BRANCH"
    exit 0
fi

2. Setting up Tag and Decrypting the credentials:

For the Kubernetes deployment, each time the travis build is successful, it takes the commit details from travis and appended into tag details for deployment and gcloud credentials is decrypted from the json file.

openssl aes-256-cbc -K $encrypted_48d01dc243a6_key -iv $encrypted_48d01dc243a6_iv  -in kubernetes/gcloud-credentials.json.enc -out kubernetes/gcloud-credentials.json -d

3. Install, Authenticate and Configure GCloud details with Kubernetes:

In this step, initially Google Cloud SDK should be installed with Kubernetes-

curl https://sdk.cloud.google.com | bash > /dev/null
source ~/google-cloud-sdk/path.bash.inc
gcloud components install kubectl


Then, Authenticate Google Cloud using the above mentioned decrypted credentials and finally configure the Google Cloud with the details like zone, project name, cluster details, number of nodes etc.

4. Update the Kubernetes deployment:

Since, in this issue it is specific to the loklak_server/development branch, so in here it checks if the branch is development or not and then updates the deployment using following command:

if [ $TRAVIS_BRANCH == "development" ]; then
    kubectl set image deployment/server --namespace=web server=$TAG
fi


Conclusion:

In this post, how to write a script in such a way that with each successful push after travis build how to update the deployment on Kubernetes GCloud.

Resources:

Continue ReadingAuto Deploying loklak Server on Google Cloud Using Travis