Implementing Tracks Filter in Open Event Webapp using the side track name list

4f451d29-c6c2-44be-9ef7-d91a45fc1eb0.png

On Clicking the Design, Art, Community Track

ff85d907-512b-4a41-be49-888bbd17bf83.png

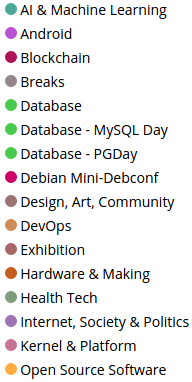
But, it was not an elegant solution. We already had a track names list present on the side of the page which remained unused. A better idea was to use this side track names list to filter the sessions. Other event management sites like http://sched.org follow the same idea. The relevant issue for it is here and the major work can be seen in this Pull Request. Below is the screenshot of the unused side track names list.

5b15a297-fd5e-4c23-bc1b-dbed193db0f4.png

The end behavior should be something like this, the user clicks on a track and only sessions belonging to the track should be visible and the rest be hidden. There should also be a button for clearing the applied filter and reverting the page back to its default view. Let’s jump to the implementation part.

First, we make the side track name list and make the individual tracks clickable.

<div class="track-names col-md-3 col-sm-3"> 
  {{#tracknames}}
    <div class="track-info">
      <span style="background-color: {{color}};" 
      class="titlecolor"></span>
      <span class="track-name" style="cursor: pointer">{{title}}
      </span>
    </div>
  {{/tracknames}}
</div>

f45f1591-937d-4e2f-9245-237cfaf3af0d.png

Now we need to write a function for handling the user click event on the track name. Before writing the function, we need to see the basic structure of the tracks page. The divs with the class date-filter contain all the sessions scheduled on a given day. Inside that div, we have another div with class tracks-filter which contains the name of the track and all the sessions of that track are inside the div with class room-filter.

Below is a relevant block of code from the tracks.hbs file

<div class="date-filter">
  // Contains all the sessions present in a single day
  <div class="track-filter row">
    // Contains all the sessions of a single track
    <div class="row">
      // Contains the name of the track
      <h5 class="text">{{caption}}</h4>
    </div>
    <div class="room-filter" id="{{session_id}}">
      // Contain the information about the session
    </div>
  </div>
</div>

We iterate over all the date-filter divs and check all the track-filter divs inside it. We extract the name of the track and compare it to the name of the track which the user selected. If both of them are same, then we show that track div and all the sessions inside it. If the names don’t match, then we hide that track div and all the content inside it. We also keep a variable named flag and set it to 0 initially. If the user selected track is present on a given day, we set the flag to 1. Based on it, we decide whether to display that particular day or not. If the flag is set, we display the date-filter div of that day and the matched track inside it. Otherwise, we hide the div and all tracks inside it.

$('.track-name').click(function() {
  // Get the name of the track which the user clicked
  trackName = $(this).text();
  // Show the button for clearing the filter applied and reverting to the default view
  $('#filterInfo').show();
  $('#curFilter').text(trackName);
  // Iterate through the divs and show sessions of user selected track
  $('.date-filter').each(function() {
    var flag = 0;
    $(this).find('.track-filter').each(function() {
      var name = $(this).find('.text').text();
      if(name != trackName) {
        $(this).hide();
        return;
      }
      flag = 1;
      $(this).show();
    });
    if (flag) {
     $(this).show();
    } else {
      $(this).hide();
    }
  });
});

On Selecting the Android Track of FOSSASIA Summit, we see something like this

935f208b-c17c-4d41-abb6-7197c003d962.png

Now the user may want to remove the filter. He/she can just click on the Clear Filter button shown in the above screenshot to remove the filter and revert back to the default view of the page.

$('#clearFilter').click(function() {                                                                                                   
  trackFilterMode = 0;                                                                                                                 
  display();                                                                                                                           
  $('#filterInfo').hide();                                                                                                             
});

Back to the default view of the page

2ff61ccf-17cf-4595-9c2f-e6825de549f7.png

References:

Continue ReadingImplementing Tracks Filter in Open Event Webapp using the side track name list

Writing Dredd Test for Event Topic-Event Endpoint in Open Event API Server

The API Server exposes a large set of endpoints which are well documented using apiary’s API Blueprint. Ton ensure that these documentations describe exactly what the API does, as in the response made to a request, testing them is crucial. This testing is done through Dredd Documentation testing with the help of FactoryBoy for faking objects.

In this blogpost I describe how to use FactoryBoy to write Dredd tests for the Event Topic- Event endpoint of Open Event API Server.

The endpoint for which tests are described here is this: For testing this endpoint, we need to simulate the API GET request by making a call to our database and then compare the response received to the expected response written in the api_blueprint.apib file. For GET to return some data we need to insert an event with some event topic in the database.

The documentation for this endpoint is the following:

To add the event topic and event objects for GET events-topics/1/events, we use a hook. This hook is written in hook_main.py file and is run before the request is made.

We add this decorator on the function which will add objects to the database. This decorator basically traverses the APIB docs following level with number of ‘#’ in the documentation to ‘>’ in the decorator. So for
 we have,

Now let’s write the method itself. In the method here, we first add the event topic object using EventTopic Factory defined in the factories/event-topic.py file, the code for which can be found here.

Since the endpoint also requires some event to be created in order to fetch events related to an event topic, we add an event object too based on the EventFactoryBasic class in factories/event.py  file. [Code]

To fetch the event related to a topic, the event must be referenced in that particular event topic. This is achieved by passing event_topic_id=1 when creating the event object, so that for the event that is created by the constructor, event topic is set as id = 1.
event = EventFactoryBasic(event_topic_id=1)
In the EventFactoryBasic class, the event_topic_id is set as ‘None’, so that we don’t have to create event topic for creating events in other endpoints testing also. This also lets us to not add event-topic as a related factory. To add event_topic_id=1 as the event’s attribute, an event topic with id = 1 must be already present, hence event_topic object is added first.
After adding the event object also, we commit both of these into the database. Now that we have an event topic object with id = 1, an event object with id = 1 , and the event is related to that event topic, we can make a call to GET event-topics/1/events and get the correct response.

Related:

Continue ReadingWriting Dredd Test for Event Topic-Event Endpoint in Open Event API Server

Adding Face Recognition based Authentication to SUSI MagicMirror Module

SUSI MagicMirror Module is a module designed for MagicMirror that helps you get SUSI Intelligence right on your Mirror. You may then ask it questions in the way the Queen in the tale “Snow White and the Seven Dwarfs” asked. One key feature that was missing in it was that the user could be recognized and queries he asked are answered in a personalized manner. This could be achieved if SUSI uses the account dedicated to that person to answer his/her queries. Thus, we need an authentication support.

The authentication on MagicMirror is not as trivial as on Web, Android and iOS client apps for SUSI. Key difference here is that user, while using the MagicMirror, does not have access to a keyboard and mouse. Therefore, we cannot simply ask him to input email and password. Furthermore, a MagicMirror installed in your home may be used by several members of your family. Thus, we need a mechanism to tell each user apart.

This was done with the help of MMM-Facial-Recognition module which brings face recognition support to MagicMirror.

MMM-Facial-Recognition module provides support for recognizing multiple faces and setting the modules on the mirror screen based on the user facing the mirror using OpenCV. Other modules can also take advantage of knowing about the person with the help of module notifications sent by MMM-Facial-Recognition Module.

To add Face based Authentication support to SUSI with MMM-Facial-Recognition, we first need to add the latter to MagicMirror. It can be added easily by first cloning the repository to modules directory of MagicMirror.

$ git clone https://github.com/paviro/MMM-Facial-Recognition

Go inside the directory and install dependencies

$ npm run install

Now, we need to train a model for the users who are going to use the MagicMirror. This can be done by the MMM-Facial-Recognition-Tools. This tool captures photos from the camera and trains a model for Face Recognition. The guide to use the tool is very well written on the Github page so I am not including it here. After training for faces of the users, you will get a training.xml file. This file contains the information about the facial features of every person so that it can tell users apart. You need to copy this file to the Module directory for MMM-Facial-Recognition module i.e. MagicMirror/module/MMM-Facial-Recognition.

After this we can add the module to MagicMirror, by modifying the config file. Add the following lines in the config file (config.js). Copy and paster username array from the training script in the asked position.

{
    module: 'MMM-Facial-Recognition',
    config: {
        // 1=LBPH | 2=Fisher | 3=Eigen
        recognitionAlgorithm: 1,
        lbphThreshold: 50,
        fisherThreshold: 250,
        eigenThreshold: 3000,
        useUSBCam: true,
        trainingFile: 'modules/MMM-Facial-Recognition/training.xml',
        interval: 2,
        logoutDelay: 15,
        // Array with usernames (copy and paste from training script)
        users: [],
        defaultClass: "default",
        everyoneClass: "everyone",
        welcomeMessage: true
    }
}

You may configure the show and hide behavior of modules based on the person. Find more information about it in the official guide on the repository. After setting up it recognizes and shows welcome message to each user like this.


Now, we need to integrate this module to SUSI for Authentication. To do this first of all we make config for SUSI MagicMirror Module to add user authentication along with their name registered on Facial Recognition Module. It can be done by adding SUSI MagicMirror module config file (config.js) like below.

{
       module: "MMM-SUSI-AI",
       position: "top_center",
       config: {
            hotword: "Susi",
            users: [{
                face_recognition_username: "Pranjal Paliwal",
                email: "paliwal.pranjal83@gmail.com",
                password: "PASSWORD_HERE"
            }, {
                face_recognition_username: "Chashmeet Singh",
                email: "chashmeetsingh@gmail.com",
                password: "PASSWORD_HERE"
            }],
        },
        classes: 'default everyone'
},

Now, we need to know that which user is facing the mirror at that time. MMM-Facial-Recognition sends a module notification when a user is detected. The format of the notification is

sender : MMM-Facial-Recognition
type: CURRENT_USER
payload: Name of the User / None 

If the user is recognized we get the name of the User as payload. If no face could be identified, we get None as payload.

We need to find out user based on the user’s name registered in the module. We already have that parameter in the user object in users array in config for SUSI MagicMirror Module (MMM-SUSI-AI). We can iterate over users array to find out the user facing the mirror on receiving the notification. In SUSI Chat API, users are identified with the help of an access token. On identifying a user, we perform login with the help of SignInService to obtain token for him. The implementation of the above task can be understood via the following snippet.

public receivedNotification(type: NotificationType, payload: any): void {
   if (type === "CURRENT_USER") {
       console.log("Current User", payload);
       if (payload === "None") {
           this.configService.Config.accessToken = null;
       } else {
           console.log(this.config.users);
           for (const user of this.config.users) {
               if (user.face_recognition_username === payload) {
                   if (isUndefined(this.signInService)) {
                       this.signInService = new SignInService(user);
                   }
                   this.signInService.updateUser(user).then((token) => {
                       console.log("updating token for " + user);
                       this.configService.Config.accessToken = token;
                   });
                   return;
               }
           }
           this.configService.Config.accessToken = null;
       }
   }
}

Explanation: In the receivedNotification method of the Main Component of SUSI MagicMirror module, we check if notification is of type CURRENT_USER. If the payload is None, we set access-token to null. If a user is identified, we check if it is contained in the users array. If present, we perform Sign In to SUSI Server for that user and store the access token obtained in the Config.

Now, every time a recognized my Facial Recognition module, the access token is updated in the config. We use the accessToken field in Config to send the message to SUSI Chat API. The implementation of it can be referred below.

public async askSusi(query: string): Promise<any> {

   const accessToken = this.configService.Config.accessToken;

   const requestString: string = (!isUndefined(accessToken) && accessToken != null) ?
       `http://api.susi.ai/susi/chat.json?q=${query}&access_token=${accessToken}` :
       `http://api.susi.ai/susi/chat.json?q=${query}`;

   const response = await WebRequest.get(requestString);
   return JSON.parse(response.content);
}

By using the above approach, the request sent to SUSI Server are identified according to the person facing the mirror. SUSI can, therefore, answer according to the user. In this way, authentication with Face Recognition is performed in the SUSI Magic Mirror Module.

Resources


Continue ReadingAdding Face Recognition based Authentication to SUSI MagicMirror Module

Adding Event Type – Event Endpoint Docs in Open Event API Server

As part of the extensive documentation written for Open Event API Server, event list endpoint with regards to event type had to be added to API Blueprint docs. The endpoint under consideration in this blogpost is:

GET https://api.eventyay.com/v1/event-types?sort=identifier&filter=[]

This endpoint returns a list of events for a specific event type. These event types are used for categorising similar types of events in the API Server. One example for an event type is : Camp, Treat & Retreat

With "slug": "camp-treat-retreat"
API Blueprint docs: 

To add the documentation in api_bluprint.apib file, we need to define the collection list and different levels using different numbers of ‘#’ . Since this endpoint is classified under the collection group Events, we first write it under # Events Collection
Now, since this is a separate and standalone endpoint, we describe the URL format for this in the following manner:

GET https://api.eventyay.com/v1/event-types?sort=identifier&filter=[]

Defining the parameters for the url includes

  • Page size: 10
  • Page number: 2
  • Sort: ‘identifier’
  • Filter_by : [none]

On the third level we define the type of request to be made along with the endpoint description, which in this case is :
### List All Events of an Event Type [GET]
Get a list of events.
This defines the GET request being made to the URL

GET https://api.eventyay.com/v1/event-types?sort=identifier&filter=[]

 The next step is adding the request headers to the docs. In the API server each request will contain the JWT Authentication token and one or more of Content-type or Accept attribute depending on the request method: GET, PATCH, DELETE or POST.
In any case the value for both of these will be:

Content-Typeapplication/vnd.api+json
Acceptapplication/vnd.api+json, (mime type for JSONAPI 0.1 specs)
Authentication token included in the following format:
AuthorizationJWT <Auth Key>
 

The response obtained from making a call to this endpoint is added next.API Blueprint describes adding the Response along with the mime type.
+ Response 200 (application/vnd.api+json)

To parse this document correctly, apiary requires the response data to be added starting at column 9, which means 8 spaces have to be left before it. Indenting with TAB is currently not supported by apiary for api blueprint docs and will give rise to compilation error if tab indentation is found. If not properly indented, semantic issues will arise on compilation, but the tests proceed with a valid document. To ensure that this document is syntactically correct, we need to check once which can be done on apiary’s site. The compilation tool there raises proper issues, exceptions and errors. If the  document is valid, it is rendered side-by-side using api blueprint’s default theme. It is a helpful tool for on the fly editing for apib documentation. The tool and my copy of documentation can be found at: 
https://app.apiary.io/eopenevent/editor

The response data as received from making the GET request is added below. This data in this case includes

"meta": {
    "count": 1 
     },
    "data": [
         {}
     ]

Meta data contains the count of number of events for the given event-type, here : 1.
The details of each event is contained in the list defined by data. 
This is excluded from here as it can be simply found on  API Servers’ Documentation.

Related:
API Blueprint | Write the Docs – APIB Docs
Apiary.io
API Blueprint tutorial | Writing REST APIs – I’d rather be writing, blog


Continue ReadingAdding Event Type – Event Endpoint Docs in Open Event API Server

One Click Deployment Button for loklak Using Heroku with Gradle Build

The one click deploy button makes it easy for the users of loklak to get their own cloud instance created and deployed in their heroku account and can be used according to their flexibility. Heroku uses an app.json manifest in the code repo to figure out what add-ons, config and other deployment steps are required to make the code run. This is used to configure and deploy the app.

Once you have provide the app name and then click on deploy button, Heroku will start deploying the loklak server to a new app on your account:

When setup is complete, you can open the deployed app in your browser or inspect it in Dashboard.

All these steps and requirements can now be encoded in an app.json file and placed in a repo alongside a button that kicks off the setup with a single click.

App.json is a manifest format for describing apps and specifying what their config requirements are. Heroku uses this file to figure out how code in a particular repo should be deployed on the platform. Here is the loklak’s app.json file which used gradle build pack:

{
	"name": "Loklak Server",
	"description": "Distributed Tweet Search Server",
	"logo": "https://raw.githubusercontent.com/loklak/loklak_server/master/html/images/loklak_anonymous.png",
	"website": "http://api.loklak.org",
	"repository": "https://github.com/loklak/loklak_server.git",
	"image": "loklak/loklak_server:latest-master",
	"env": {
		"BUILDPACK_URL": "https://github.com/heroku/heroku-buildpack-gradle.git"
	}
}


If you are interested you can try deploying the peer from here itself. Checkout how simple it can be to deploy.

Deploy button:

Deploy

Resources:

Continue ReadingOne Click Deployment Button for loklak Using Heroku with Gradle Build

Auto Deploying loklak Server on Google Cloud Using Travis

This is a setup for loklak server which want to check in only the source files, but have the development branch in Kubernetes deployment automatically updated with some compiled output every time the push using details from Travis build.

How to achieve it?

Unix commands and shell script is one of the best option to automate all deployment and build activities. I explored Kubernetes Gcloud which can be accessed through unix command.

1.Checking for Travis build details before deployment:

Firstly check whether the repository is loklak_server, pull request is available and branches are either master or development, and then decide to update the docker image or not. The code of the aforementioned things is as follows:

if [ "$TRAVIS_REPO_SLUG" != "loklak/loklak_server" ]; then
    echo "Skipping image update for repo $TRAVIS_REPO_SLUG"
    exit 0
fi

if [ "$TRAVIS_PULL_REQUEST" != "false" ]; then
    echo "Skipping image update for pull request"
    exit 0
fi

if [ "$TRAVIS_BRANCH" != "master" ] && [ "$TRAVIS_BRANCH" != "development" ]; then
    echo "Skipping image update for branch $TRAVIS_BRANCH"
    exit 0
fi

2. Setting up Tag and Decrypting the credentials:

For the Kubernetes deployment, each time the travis build is successful, it takes the commit details from travis and appended into tag details for deployment and gcloud credentials is decrypted from the json file.

openssl aes-256-cbc -K $encrypted_48d01dc243a6_key -iv $encrypted_48d01dc243a6_iv  -in kubernetes/gcloud-credentials.json.enc -out kubernetes/gcloud-credentials.json -d

3. Install, Authenticate and Configure GCloud details with Kubernetes:

In this step, initially Google Cloud SDK should be installed with Kubernetes-

curl https://sdk.cloud.google.com | bash > /dev/null
source ~/google-cloud-sdk/path.bash.inc
gcloud components install kubectl


Then, Authenticate Google Cloud using the above mentioned decrypted credentials and finally configure the Google Cloud with the details like zone, project name, cluster details, number of nodes etc.

4. Update the Kubernetes deployment:

Since, in this issue it is specific to the loklak_server/development branch, so in here it checks if the branch is development or not and then updates the deployment using following command:

if [ $TRAVIS_BRANCH == "development" ]; then
    kubectl set image deployment/server --namespace=web server=$TAG
fi


Conclusion:

In this post, how to write a script in such a way that with each successful push after travis build how to update the deployment on Kubernetes GCloud.

Resources:

Continue ReadingAuto Deploying loklak Server on Google Cloud Using Travis

Adding Voice Recognition in Description Dialog Box in Phimpme project

In this blog, I will explain how I added Voice Recognition in a dialog box to describe an image in Phimpme Android application. In Phimpme Android application we have an option to add a description for the image. Sometimes the description can be long. Adding Voice Recognition text to speech will ease the user’s experience to add a description for the image.

Adding appropriate Dialog Box

In order to take input from the user to prompt the Voice Recognition function, I have added an image button in the description dialog box. Since the description dialog box will only contain an EditText and a button will have used material design to make it look better and add caption on top of it.


<LinearLayout
   android:id="@+id/rl_description_dialog"
   android:layout_width="match_parent"
   android:layout_height="wrap_content"
   android:orientation="horizontal"
   android:padding="15dp">
   <EditText
       android:id="@+id/description_edittxt"
       android:layout_weight="1"
       android:layout_width="fill_parent"
       android:layout_height="wrap_content"
       android:padding="15dp"
       android:hint="@string/description_hint"
       android:textColorHint="@color/grey"
       android:layout_margin="20dp"
       android:gravity="top|left"
       android:inputType="text" />
   <ImageButton
       android:layout_width="@dimen/mic_image"
       android:layout_height="@dimen/mic_image"
       android:layout_alignRight="@+id/description_edittxt"
       app2:srcCompat="@drawable/ic_mic_black"
       android:layout_gravity="center"
       android:background="@color/transparent"
       android:paddingEnd="10dp"
       android:paddingTop="12dp"
       android:id="@+id/voice_input"/>
</LinearLayout>

Function to prompt dialog box

We have added a function to prompt the dialog box from anywhere in the application. getDescriptionDialog() function is used to prompt the description dialog box. getDescriptionDialog() returns EditText which can be further be used to manipulate the text in the EditText. Please follow the following steps to inflate description dialog box in the activity.

First,

In the getDescriptionDialog() function we will inflate the layout by using getLayoutInflater function. We will pass the layout id as an argument in the function.

public EditText getDescriptionDialog(final ThemedActivity activity, AlertDialog.Builder descriptionDialog){
final View DescriptiondDialogLayout = activity.getLayoutInflater().inflate(R.layout.dialog_description, null);

Second,

Get the TextView in the description dialog box.

final TextView DescriptionDialogTitle = (TextView) DescriptiondDialogLayout.findViewById(R.id.description_dialog_title);

Third,

Present the dialog using cardview to make use of the material design. Then take an instance of the EditText. This EditText can be further used to input text from the user either by text or Voice Recognition.

final CardView DescriptionDialogCard = (CardView) DescriptiondDialogLayout.findViewById(R.id.description_dialog_card);
EditText editxtDescription = (EditText) DescriptiondDialogLayout.findViewById(R.id.description_edittxt);

Fourth,

Set onClickListener when the user clicks the mic image icon. This onClicklistener will prompt the voice Recognition in the activity. We need to specify the language for the speech to text input. In the case of Phimpme its English so “en-US”. We have set the maximum results to 15.  

ImageButton VoiceRecognition = (ImageButton) DescriptiondDialogLayout.findViewById(R.id.voice_input);
VoiceRecognition.setOnClickListener(new View.OnClickListener() {
   @Override
   public void onClick(View v) {
       // This are the intents needed to start the Voice recognizer
       Intent i = new Intent(RecognizerIntent.ACTION_RECOGNIZE_SPEECH);
       i.putExtra(RecognizerIntent.EXTRA_LANGUAGE_MODEL, "en-US");
       i.putExtra(RecognizerIntent.EXTRA_MAX_RESULTS, 15); // number of maximum results..
       i.putExtra(RecognizerIntent.EXTRA_PROMPT, R.string.caption_speak);
       startActivityForResult(i, REQ_CODE_SPEECH_INPUT);

   }
});

Putting Text in the EditText

After Voice Recognition prompt ends the onActivityResult function checks to see if the data is received or not.

if (requestCode == REQ_CODE_SPEECH_INPUT && data!=null) {

We get the spoken text from intent data.getString() and store it in ArrayList. To store the received data in a string we need to get the first string from the ArrayList.

ArrayList<String> result = data
       .getStringArrayListExtra(RecognizerIntent.EXTRA_RESULTS);
voiceInput = result.get(0);

Setting the received data in the the EditText

editTextDescription.setText(voiceInput);

Conclusion

Using Voice recognition is a quick and simple way to add a long description on the image. It’s Speech to Text feature works without many mistakes and is useful in our Phimpme Android application.

Github

https://github.com/fossasia/phimpme-android

Resources

Tutorial for speech to Text: https://www.androidhive.info/2014/07/android-speech-to-text-tutorial/

To add description dialog box: https://developer.android.com/guide/topics/ui/dialogs.html

Continue ReadingAdding Voice Recognition in Description Dialog Box in Phimpme project

Google Authentication and sharing Image on Google Plus from Phimpme Android

In this blog, I will be explaining how I implemented Google Authentication and sharing an Image on GooglePlus from Phimpme Android application.

Adding Google Plus authentication in accounts activity in Phimpme Android

In accounts Activity, we added Google Plus option. This is done by adding “Googleplus” in accountName.  

public static String[] accountName = { "Facebook", "Twitter", "Drupal", "NextCloud", "Wordpress", "Pinterest", "Flickr", "Imgur", "Dropbox", "OwnCloud", "Googleplus"};

Add this to your Gradle Build. Please note that the version of Google:play-services in the grade should be same. In the case of Phimpme the version is 10.0.1, so all the services from Google should be 10.0.1.

compile 'com.google.android.gms:play-services-auth:10.0.1

In onCreate we need to make the object of the GoogleSignInOptions. This is required to call methods: requestEmail() and build.

GoogleSignInOptions gso = new GoogleSignInOptions.Builder(GoogleSignInOptions.DEFAULT_SIGN_IN)
       .requestEmail()
       .build();

Building GoogleApiClient with access to the Google Sign and the option specified by the gso.

mGoogleApiClient = new GoogleApiClient.Builder(this)
       .enableAutoManage(this , AccountActivity.this)
       .addApi(Auth.GOOGLE_SIGN_IN_API, gso)
       .build();

Signing in Google Authentication can take place through intent which calls logged in users on the phone. The user will choose an option to select the account he or she wants to authenticate the application.

private void signInGooglePlus() {
   Intent signInIntent = Auth.GoogleSignInApi.getSignInIntent(mGoogleApiClient);
   startActivityForResult(signInIntent, RC_SIGN_IN);
}

Adding Google Plus account in the Realm Database

HandleSignInResult() function is used to handle Sign in result. This result includes:

Storing the received data in the Realm Database. Showing the appropriate username in the Accounts activity and handling login failed.

Checking if login is successful or not

If the login is successful a Toast message will pop up to show the appropriate message.  

private void handleSignInResult(GoogleSignInResult result) {
   if (result.isSuccess())
       GoogleSignInAccount acct = result.getSignInAccount();//acct.getDisplayName()
       Toast.makeText(AccountActivity.this, R.string.success, Toast.LENGTH_SHORT).show();

Creating Object to store the details in Realm Database.

First, we need to begin realm transaction.Then add logged in username in the database.

To display the username we will create the function setUserName(acct.getDisplayName()). And then finally commit everything to Realm database.  

       realm.beginTransaction();
       account = realm.createObject(AccountDatabase.class,
       accountName[GOOGLEPLUS]);
       account.setUsername(acct.getDisplayName());
       realm.commitTransaction();
   }

Adding Google Plus option in Sharing Activity.

To add Google Plus option in the sharing Activity we first added Google Plus icon in the resource folder.

The Google Plus icon is SVG(scalable vector) format so that we can manipulate it to apply any colour and size.

<vector xmlns:android="http://schemas.android.com/apk/res/android"
   android:width="24dp"
   android:height="24dp"
   android:viewportHeight="32.0"
   android:viewportWidth="32.0">
   <path
       android:fillColor="#00000000"
       android:pathData="M16,16m-16,0a16,16 0,1 1,32 0a16,16 0,1 1,-32 0" />
   <path
       android:fillColor="#000000"
       android:pathData="M16.7,17.2c-0.4,-0.3 -1.3,-1.1 -1.3,-1.5c0,-0.5 0.2,-0.8 1,-1.4c0.8,-0.6 1.4,-1.5 1.4,-2.6c0,-1.2 -0.6,-2.5 -1.6,-2.9h1.6L18.8,8h-5c-2.2,0 -4.3,1.7 -4.3,3.6c0,2 1.5,3.6 3.8,3.6c0.2,0 0.3,0 0.5,0c-0.1,0.3 -0.3,0.6 -0.3,0.9c0,0.6 0.3,1 0.7,1.4c-0.3,0 -0.6,0 -0.9,0c-2.8,0 -4.9,1.8 -4.9,3.6c0,1.8 2.3,2.9 5.1,2.9c3.1,0 4.9,-1.8 4.9,-3.6C18.4,19 18,18.1 16.7,17.2zM14.1,14.7c-1.3,0 -2.5,-1.4 -2.7,-3.1c-0.2,-1.7 0.6,-3 1.9,-2.9c1.3,0 2.5,1.4 2.7,3.1C16.2,13.4 15.3,14.8 14.1,14.7zM13.6,23.2c-1.9,0 -3.3,-1.2 -3.3,-2.7c0,-1.4 1.7,-2.6 3.6,-2.6c0.4,0 0.9,0.1 1.2,0.2c1,0.7 1.8,1.1 2,1.9c0,0.2 0.1,0.3 0.1,0.5C17.2,22.1 16.2,23.2 13.6,23.2zM21.5,15v-2h-1v2h-2v1h2v2h1v-2h2v-1H21.5z" />
</vector>

Sharing Image on Google Plus from Sharing Activity

After creating the appropriate button, we need to send the image to Google Plus. We need to import the PlusShare files in the SharingActivity.

import com.google.android.gms.plus.PlusShare;

Share Image function

To share the image on Google Plus we have used PlusShare function which comes in Google Plus API. In the function shareToGoogle() we will send the message and the image on Google Plus.

To send the message: share.setText(“Provide the message you want to pass”) .

To send the Image:share.addStream(Uri of the Image to be sent).

private void shareToGoogle() {
   Uri uri = getImageUri(context);
   PlusShare.Builder share = new PlusShare.Builder(this);
   share.setText(caption);
   share.addStream(uri);
   share.setType(getResources().getString(R.string.image_type));
   startActivityForResult(share.getIntent(), REQ_SELECT_PHOTO);
}

Show appropriate message after uploading the image

After uploading the image on Google Plus there can be two possibilities:

  1. Image failed to upload
  2. Image uploaded successfully.

If the image uploaded image successfully an appropriate message is displayed in snackbar.

If the image upload fails an error message is displayed.

if (requestCode == REQ_SELECT_PHOTO) {
   if (responseCode == RESULT_OK) {
       Snackbar.make(parent, R.string.success_google, Snackbar.LENGTH_LONG).show();
       return;
   } else {
       Snackbar.make(parent, R.string.error_google, Snackbar.LENGTH_LONG).show();
       return;
   }
}

Conclusion

This is how we have implemented image share on Google Plus in Phimpme. Following this method, it will provide an easy way to upload an image on Google Plus without leaving or switching between the Phimpme application.

Github

https://github.com/fossasia/phimpme-android

Resources


Continue ReadingGoogle Authentication and sharing Image on Google Plus from Phimpme Android

Developing LoklakWordCloud app for Loklak apps site

LoklakWordCloud app is an app to visualise data returned by loklak in form of a word cloud.

The app is presently hosted on Loklak apps site.

Word clouds provide a very simple, easy, yet interesting and effective way to analyse and visualise data. This app will allow users to create word cloud out of twitter data via Loklak API.

Presently the app is at its very early stage of development and more work is left to be done. The app consists of a input field where user can enter a query word and on pressing search button a word cloud will be generated using the words related to the query word entered.

Loklak API is used to fetch all the tweets which contain the query word entered by the user.

These tweets are processed to generate the word cloud.

Related issue: https://github.com/fossasia/apps.loklak.org/pull/279

Live app: http://apps.loklak.org/LoklakWordCloud/

Developing the app

The main challenge in developing this app is implementing its prime feature, that is, generating the word cloud. How do we get a dynamic word cloud which can be easily generated by the user based on the word he has entered? Well, here comes in Jqcloud. An awesome lightweight Jquery plugin for generating word clouds. All we need to do is provide list of words along with their weights.

Let us see step by step how this app (first version) works. First we require all the tweets which contain the entered word. For this we use Loklak search service. Once we get all the tweets, then we can parse the tweet body to create a list of words along with their frequency.

var url = "http://35.184.151.104/api/search.json?callback=JSON_CALLBACK&count=100&q=" + query;
        $http.jsonp(url)
            .then(function (response) {
                $scope.createWordCloudData(response.data.statuses);
                $scope.tweet = null;
            });

Once we have all the tweets, we need to extract the tweet texts and create a list of valid words. What are valid words? Well words like ‘the’, ‘is’, ‘a’, ‘for’, ‘of’, ‘then’, does not provide us with any important information and will not help us in doing any kind of analysis. So there is no use of including them in our word cloud. Such words are called stop words and we need to get rid of them. For this we are using a list of commonly used stop words. Such lists can be very easily found over the internet. Here is the list which we are using. Once we are able to extract the text from the tweets, we need to filter stop words and insert the valid words into a list.

 tweet = data[i];
            tweetWords = tweet.text.replace(", ", " ").split(" ");

            for (var j = 0; j < tweetWords.length; j++) {
                word = tweetWords[j];
                word = word.trim();
                if (word.startsWith("'") || word.startsWith('"') || word.startsWith("(") || word.startsWith("[")) {
                    word = word.substring(1);
                }
                if (word.endsWith("'") || word.endsWith('"') || word.endsWith(")") || word.endsWith("]") ||
                    word.endsWith("?") || word.endsWith(".")) {
                    word = word.substring(0, word.length - 1);
                }
                if (stopwords.indexOf(word.toLowerCase()) !== -1) {
                    continue;
                }
                if (word.startsWith("#") || word.startsWith("@")) {
                    continue;
                }
                if (word.startsWith("http") || word.startsWith("https")) {
                    continue;
                }
                $scope.filteredWords.push(word);
            }

What are we actually doing in the above snippet? We are simply iterating over each of the statuses returned by Loklak API. For each tweet, first we are splitting the text into words and then we are iterating over those words. For a given word we do a number of checks. First we check if the word begins or ends with a special character, for example quotation marks or brackets. If so we remove those character as it will cause trouble in calculating frequencies. Next we also check if the word is beginning with ‘#’ or ‘@’. If it is true, then we discard such words as we are handling hashtags and mentions separately. Finally we check whether the word is a stop word or not. If it is a stop word then we discard it. If a word passes all the checks, we add it to our list of valid words.

Once we are done with the tweet bodies, next we need to handle hashtags and mentions.

tweet.hashtags.forEach(function (hashtag) {
                $scope.filteredWords.push("#" + hashtag);
            });

            tweet.mentions.forEach(function (mention) {
                $scope.filteredWords.push("@" + mention);
            });

The above code simply iterates over the hashtags and mentions and inserts them into the filteredWords list. We have handled hashtags and mentions separately so that we can apply filters in future.

Once we are done with generating list of valid words, we need to calculate weight for each of the word. Here weight is nothing but the number of times a particular word is present in the list. We calculate this using JavaScript object. We iterate over the list of valid words. If word is not present in the object (or dictionary as you wish to call it), we create a new key by the name of that word and set its value to one. If a word is already present as a key, then we simply increment its value by one.

for (var word in $scope.wordFreq) {
            $scope.wordCloudData.push({
                text: word,
                weight: $scope.wordFreq[word]
            });
        }

The above code snippet calculates the frequency of each word by the process mentioned above.

Now we are all set to generate our word cloud. We simply use Jqcloud’s interface to configure it with the words and their respective frequencies, provide a list of color codes for a color gradient, and set autoResize to true so that our word cloud resizes itself when the screen size changes.

$scope.generateWordCloud = function() {
        if ($scope.wordCloud === null) {
            $scope.wordCloud = $('.wordcloud').jQCloud($scope.wordCloudData, {
                colors: ["#D50000", "#FF5722", "#FF9800", "#4CAF50", "#8BC34A", "#4DB6AC", "#7986CB", "#5C6BC0", "#64B5F6"],
                fontSize: {
                    from: 0.06,
                    to: 0.01
                },
                autoResize: true
            });
        } else {
            $scope.wordCloud = $(".wordcloud").jQCloud('update', $scope.wordCloudData);
        }
    }

Whenever the user searches for a new word, we simply update the existing word cloud with the cloud of the new word.

Future roadmap

  • Make the words in the cloud clickable. On clicking a word, the cloud should get replaced by the selected word’s cloud.
  • Add filters for hashtags, mentions, date.
  • Add option for exporting the cloud to an image, so that user’s can also use this app as a tool to generate word clouds as images and save them.
  • Add a loader and error notification for invalid or empty input.

Important resources

  • View the app source code here.
  • Learn more about Loklak API here.
  • Learn more about Jqcloud here.
  • Learn more about AngularJS here.
Continue ReadingDeveloping LoklakWordCloud app for Loklak apps site

Implementing Notifications API in Open Event Frontend

In Open Event Frontend, at the index page of the application, we have a notification dropdown in which a user gets the notifications regarding the events, sessions, etc. Thus, a user gets notified for the particular event or session he wants to receive notifications about. While dealing with an issue, we had to integrate the API with the frontend. We achieved it as follows:

First, we create a model of notifications so that we have basic structure ready. It goes as follows:

export default ModelBase.extend({
  title      : attr('string'),
  message    : attr('string'),
  isRead     : attr('boolean', { defaultValue: false }),
  receivedAt : attr('moment'),

  user: belongsTo('user')
});

Thus, we have fields like title, message, isRead, receivedAt which we will get from the server response as JSON which we will need to show on the page. To show the notifications to the user, first we need to query the notifications for a specific user using ember data. Since we are querying the notifications for a specific user when he is logged in, we are also having relationship between user and notification as shown in the above notification model. In user model we do:

notifications: hasMany('notification')

Now, we query the notifications in our application route i.e routes/application.js

model() {
    if (this.get('session.isAuthenticated')) {
      return new RSVP.Promise((resolve, reject) => {
        this.store.findRecord('user', this.get('authManager.currentUser.id'), { reload: true })
          .then(user => {
            user.get('notifications').then(resolve).catch(reject);
          })
          .catch(reject);
      });
    }
  }

The reason why we used a RSVP promise here was because the authManager couldn’t load the user befor the notifications were queried and returned. Thus, we query the notifications by using currentUser from authManager. Thus, in our template, we iterate over our notifications as follows:

    {{#each notifications as  notification }}
      <div class="item">
        <div class="header">
          {{notification.title}}
        </div>
        <div class="content weight-600">
          {{notification.description}}
        </div>
        <div class="left floated content">
          {{moment-from-now notification.createdAt}}
        </div>
      </div>
    {{/each}}

The notifications are thus shown to the user when he clicks the icon in the nav-bar. As a result, we get the following notifications in the dropdown:

Resources:

Ember data official guide

Blog on Ember data by Embedly.

Continue ReadingImplementing Notifications API in Open Event Frontend