Functionality of KnitWeb Application

Hi Everyone,

In this blog post I will show what are the functionalities implemented in KnitWeb application. First of all let us look into why there is a web application to get a knitting job done. It’s simple. Going for a web application is the best way to acheive platform independence among all the knit app firmware. So the if the hardware level functionality can be abstracted out to a separate library then the web application can use that and provide a common interface to all different knitting application platforms. This is what we have been doing in this GSoC, to provide a common platform and interface for all open source knit app solutions.

So let’s look at the KnitWeb Functionality. KnitWeb consists of two major components, KnitWeb front end and KnitWeb back end logic. KnitWeb front end consists of a pattern editor for edit loaded patterns to workspace, Simulator for show knitting progress and a drawing tool for draw a pattern from scratch. Therefore Pattern editor component is used for easily edit the pattern before send for knitting.

Knitting Simulator is used for render knitting progress to the user with a enhanced user experience. It also consists of main controls for knitting job which user can start/pause/stop a job while knitting.

KnitWeb Drawing tool is used to generate a pattern from a scratch. It provides basic drawing tools including pencil, line, basic shapes and color palette. It also used for replicate a pattern from a existing pattern or a image. Then user can export it to the workspace to continue knitting job.

Pattern Editor Usage

Pattern editor gives following functionality to the users

  • Loads the pattern according to number of rows and columns(stitches) to the editor. Pattern is pixelated as the defined number of rows and columns.

Screenshot from 2015-08-25 08:42:41

  • Select pattern area using square/free hand tools. Then edit colour values of selected area.

Screenshot from 2015-08-25 08:57:28Screenshot from 2015-08-25 08:59:53

  • Show colour regions of selected area/whole pattern and easily edit their colour values.

Screenshot from 2015-08-25 09:08:03

  • Configure machine type and Available ports before creating a knit job. In this step knit web client is communicating with the knit lib server to get those information. After that user can click proceed knitting button to create a knit job.

Knitting Simulator Usage

Screenshot from 2015-08-25 12:14:40

  • Knitting simulator provides knitting progress to the user with enhanced user experience. Current knitting progress is shown to the user as above and also with a progress bar.
  • Knitting simulator window consists of other meta data input needed for configure knitting pattern(knitpat) file such as Start Line, Start Needle, Stop Needle, Number of colours used etc.

Screenshot from 2015-08-25 12:19:33

Drawing Tool

Screenshot from 2015-08-25 12:25:19

  • Drawing tool is used to generate a pattern from scratch or design patterns by replicating image or a texture.
  • After editing finished pattern can be exported to the workspace.

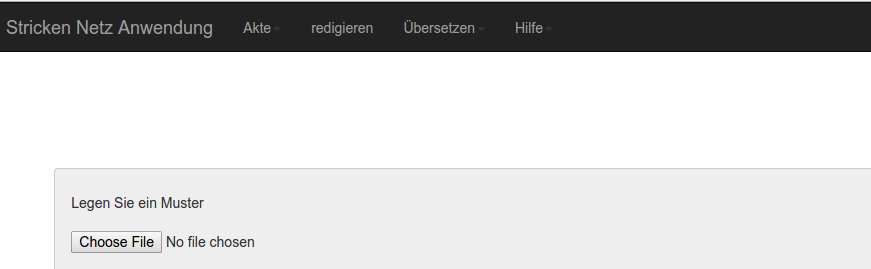
Apart from the above mentioned components edited patterns at the pattern editor can be downloaded as a image file. Also multi-language translation is added by @shiluka to the knit web interface. following is the translation for german language

.Screenshot from 2015-08-25 09:36:08

This sums up the most critical functionalities of knitweb application. I would like to continuously contribute to FashionTec as this inspired me to research and do things that I have not done before. :).

Also here is a little demo on the functionality of knit web. demo link

Thank You 🙂

Continue ReadingFunctionality of KnitWeb Application

KnitWeb Localization

  • Post author:
  • Post category:FOSSASIA

Why Localization important

Localization is the process of adapting, translating and customizing a product for a specific locale or cultural conventions. Localization distinguishes a good web front end from a truly successful one. Today English is a priority language to be learning to use computers. Having Localization we can gain benefits such as, no need to local users to learn English first, Reduce amount of training and localization brings additional value. Localization To improve localization community of volunteers needs to get together and first establish a guiding set of terms to guarantee accurate and consistent translation. Community is the strongest part for an Open Source project. Translation process can be improved by making sure that efforts in translations are consistent and structured. So the lots of local users can enjoy KnitWeb and hopefully become a part of the community.

How Localization work on KnitWeb

KnitWeb construct elements of the interface using JavaScript dynamically. Retrieve the correct localized string in JavaScript is the most important part for localize an app like KnitWeb. For the Localization I used 3 types of files i.e. languge.properties, locles.ini and l10.js.

.properties files (en.properties, ge.properties): These files contain the translations of strings used in the KnitWeb. Each line is the translation of a single string in “name=value” format; name is an identifier for this string, It is used to map the string; value is the translation of the string in particular language.

Inside ge.properties

#Inputs
input_port=Port
input_machine=Maschine:

Inside si.properties

#Inputs
input_port=කවුළුව
input_machine=යන්ත්‍රය:

locales.ini : locales.ini includes which is the default language in case app does not support current language, what type of other locales KnitWeb supports and the location of the each translated file.

l10n.js: JavaScript library. Automatic localization of strings appearing in your app’s HTML. Provides a JavaScript API your app can use to retrieve localized strings( get, getLanguage, setLanguage, getDirection)

global_translate_german
Localization – German
global_tranlate_sinhala
Localization – Sinhala
Continue ReadingKnitWeb Localization

[Tutorial] Continuous Integration Automated Build for your Pharo Application

reposted from jigyasagrover.wordpress.com/ci-automated-build-for-your-pharo-application

Hello Fellas !

This post aims to put forward the basics of Build Automation and also brief the steps required to put up a Pharo application on Continuous Integration, Inria which is a platform for Scheduled Automated Build.
For simplicity, Build automation is the act of scripting or automating a wide variety of tasks that software developers do in their day-to-day activities including things like:
  • compiling computer source code into binary code
  • packaging binary code
  • running automated tests
  • deploying to production systems
  • creating documentation and/or release notes

Various types of automation are as:

  • On-Demand automation such as a user running a script at the command line
  • Scheduled automation such as a continuous integration server running a nightly build
  • Triggered automation such as a continuous integration server running a build on every commit to a version control system.
In recent years, build management tools have provided relief when it comes to automating the build process.
The dominant benefits of continuous integration include:
  • Improvement of product quality
  • Acceleration of compile and link processing
  • Elimination of redundant tasks
  • Minimization of ‘bad builds’
  • Have history of builds and releases in order to investigate issues
  • Save time and money – because of above listed reasons.

A build system should fulfill certain requirements.

Basic requirements:

  1. Frequent or overnight builds to catch problems early.
  2. Support for Source Code Dependency Management
  3. Incremental build processing
  4. Reporting that traces source to binary matching
  5. Build acceleration
  6. Extraction and reporting on build compile and link usage

Optional requirements:

  1. Generate release notes and other documentation such as help pages
  2. Build status reporting
  3. Test pass or fail reporting
  4. Summary of the features added/modified/deleted with each new build

Considering the above mentioned advantages of automated build, the below enlisted steps will help to put up your own Pharo application hosted on github on the CI server for continuous integration/scheduled build.
 1. Log on to Continuous Integration, Inria website (https://ci.inria.fr/).

Screenshot from 2015-08-08 15:53:49
2. Click on ‘Sign Up‘ at the top-right corner, enter the required details and register for CI.

Screenshot from 2015-08-08 15:54:02
3. From the ‘Dashboard‘ option located at the top most of the screen click on ‘Join an existing project‘ blue button as shown .

Screenshot from 2015-08-08 15:59:22
4. Search ‘pharo-contribution‘ in the enlisted public projects and click on ‘Join

5. On clicking the ‘Join‘ button, a message stating: “Request to join the project ‘pharo-contribution’ sent.” appears.

6. It might take a day or two for the request approval mail to deliver at your registered Email ID.

The E-Mail content is as follows:
        Your request to join pharo-contribution has been accepted
        Hi _ _ _,
        Your request to join the project pharo-contribution has been accepted !
        Regards,
        Support team.

7. Click on ‘My Account‘ option and under ‘My Projects‘ check the status of pharo-contribution project. It should state ‘member‘.

Screenshot from 2015-08-08 16:17:55
8. Now, visit the LINK: https://ci.inria.fr/pharo-contribution/job/JobTemplate/  to create a ‘New Job

Screenshot from 2015-08-08 16:21:06
9. Read all the steps mentioned carefully. After going through all the points, click on the ‘New Job‘ mentioned in point 2 on the Project Job Template web page.

10. Enter the ‘Project Name‘ in the ‘Item Name: ‘ box and choose ‘Copy from existing item‘ option and fill ‘JobTemplate

Screenshot from 2015-08-08 16:30:01
11. After clicking OK, You will be directed to your project configuration.

12. Fill in the description of the project in the desired box.

Screenshot from 2015-08-08 16:32:31
13. Fill int the configuration details of your project like:

* Maximum number of builds
*  Link to GitHub Project
*  Source Code Manager
* Build Triggers
*  Schedule of build (@hourly, @daily, @weekly, @fortnightly, @monthly, @yearly etc.)
*  Configuration Matrix (User Defined Axis: Name && Version Values- stable, development etc.)
* Build environment options
* Post-build actions
*  Report regressed tests

14. The main task is to carefully write the commands in the ‘Execute Shell
The default commands are as:

Screenshot from 2015-08-08 16:39:06
15. After saving and applying the changes, the application is all set for automated build.

16. Each build’s ‘Console Output‘ can be used to analyse the steps and highlight the weak areas of the project.
For instance: The below output is of a project whose stable version build was successful.

Screenshot from 2015-08-08 16:49:05

TIP: Keep a regular tab on the build results and analyze each line of the Console Output with utmost care.

Hope this post was able to help you start with the automation build process of Pharo Application.

Do like if it was worth a read !
Post queries/suggestions as comments 🙂 Looking forward to them.


UPCOMING: Next, I plan to share experience of putting up my Pharo application searchQuick on CI Inria for automated build. I intend to detail about the various configuration settings applied along with the Execute Shell commands utilized for a GitHub project 🙂


Introduction Accredits: Wikipedia 
Resources:  Build Automation and Continuous Integration .


Continue Reading[Tutorial] Continuous Integration Automated Build for your Pharo Application

A low-cost laboratory for everyone: Sensor Plug-ins for ExpEYES to measure temperature, pressure, humidity, wind speed, acceleration, tilt angle and magnetic field

Working on ExpEYES in the last few months has been an amazing journey and I am gratful of the support of Mario Behling, Hong Phuc Dang and Andre Rebentisch at FOSSASIA. I had a lot of learning adventures with experimenting and exploring with new ideas to build sensor plug-ins for ExpEYES. There were some moments which were disappointing and there were some other moments which brought the joy of creating sensor plug-ins, add-on devices and GUI improvements for ExpEYES.

My GSoC Gallery of Sensors and Devices: Here are all the sensors I played with for PSLab..

The complete list of sensor plug-ins developed is available at http://gnovi.edublogs.org/2015/08/21/gsoc-2015-with-fossasia-list-of-sensor-plug-ins-developed-for-expeyes/

Sensor Plugins for ExpEYES

The aim of my project is to develop new Sensor Plug-ins for ExpEYES to measure a variety of parameters like temperature, pressure, humidity, wind speed, acceleration, tilt angle, magnetic field etc. and to provide low-cost open source laboratory equipment for students and citizien scientists all over the world.

We are enhancing the scope of ExpEYES for using it to perform several new experiments. Developing a low-cost stand alone data acquisition system that can be used for weather monitoring or environmental studies is another objective of our project.

I am happy to see that the things have taken good shape with additional gas sensors added which were not included in the initial plan and we have almost achieved all the objectives of the project, except for some difficulties in calibrating sensor outputs and documentation. This issue will be solved in a couple of days.

Experimenting with different sensors in my kitchen laboratory

I started exploring and experimenting with different sensors. After doing preliminary studies I procured analog and a few digital sensors for measuring weather parameters like temperature, relative humidity and barometric pressure. A few other sensors like low cost piezoelectric sensor, accelerometer ADXL-335, Hall effect magnetic sensor, Gyro-module etc were also added to my kitchen laboratory. We then decided to add gas sensors for detecting Carbon Monoxide, LPG and Methane.

With this development ExpEYES can now be used for pollution monitoring and also in safety systems in Physics/chemistry laboratory. The work on the low-cost Dust Sensor is under progress.

Challenges, Data Sheet, GUI programs

I had to spend a lot of time in getting the sensor components, studying their data sheets, soldering and setting them up with ExpEYES. And then little time in writing GUI Programs. I started working almost 8 to 10 hours every evening after college hours (sometimes whole night) and now things have taken good shape.

Thanks to my mentor at FOSSASIA for pushing me, sometimes with strict words. I could add many new sensor plug-ins to ExpEYES and now I will also be working on Light sensors so that the Pocket Science Lab can be used in optics. With these new sensor plug-ins one can replace many costly devices from Physics, Chemistry, Biology and also Geology Lab.

What’s next? My Plan for next steps

  • Calibration of sensor data

  • Prototyping stand-alone weather station

  • Pushing data to Loklak server

  • Work on PSLab@Fossasia website

  • Fossasia Live Cd based on Lubuntu with ExpEYES and other educational softwares

  • Set-up Documentation for possible science experiments with the sensor plug-ins and low-cost, open source apparatus

Continue ReadingA low-cost laboratory for everyone: Sensor Plug-ins for ExpEYES to measure temperature, pressure, humidity, wind speed, acceleration, tilt angle and magnetic field

searchQuick Apprise: SEVEN #GoogleSummerOfCode #FOSSASIA

banner-gsoc2015.png.pagespeed.ce.1-XG35qq3R8SQJ5DGgL9

The intended searchQuick” (sQuick) is an application to enable a user to search a set of books or texts, like an encyclopedia, or some other topical book collection offline built in the open source platform Pharo 4.0.

header


After the chief tasks of search functionality and automated build were done with, the next undertaking included working on finer details and embellishments.

  • Embedding Jenkins automated build status icon in GitHub markdown file
  • Relative widget re-sizing by using ‘World extent x‘ and ‘World extent y‘ co-ordinates instead of hard coded co-ordinates
  • Modifying the Accordion Widget by addition of ‘Search Bar‘ at the top
  • Checking for duplicates in the ‘Browse Files‘ menu, thus reducing the CPU consumption
  • Equalizing the sizes of all the windows to bring uniformity
  • Addition of ‘Scroll Pane‘ in accordion search result display list
  • Multi-line search result display by extending the Expander Title Morph and use of new line character in labels (otherwise not supported by default)
  • Truncating file content to first n characters for neater look in Expander Title

Latest Screenshot of Accordion Widget:
Screenshot from 2015-08-18 18:38:06
UPCOMING:

  • Removal of OK & CANCEL buttons (present by default in Pluggable Dialog Window) from Accordion Widget
  • Implementing of Search via the result window as well
  • Relative re-sizing of background images (Image Morphs)

Continue ReadingsearchQuick Apprise: SEVEN #GoogleSummerOfCode #FOSSASIA

Knitapps at the 7th Central American Free Software Congress ECSL 2015

On August, 9th, in San Pedro Sula, Honduras, I presented at the seventh Central American Free Software Congress a talk on Knitting Machines, Knitapps, Free Software and Free Manufacture.

DSCF5303

I had the opportunity to present on the main auditorium of Unitec, a private, technical university. The audience of the congress was compromised mostly of professionals and students from Central America. Local and National media also covered the event.

Continue ReadingKnitapps at the 7th Central American Free Software Congress ECSL 2015

Exception handler in KnitLib

  • Post author:
  • Post category:FOSSASIA

An exception is an error that happens during the execution of a program. It is important to have exception handler in KnitLib to handle and deal with errors automatically. Many standard libraries define their own exceptions to report errors that may occur in functions they define.  Depending on the kind of error in knitlib (“communication error”, “pattern not found error”, etc.. ). The exception handler module in the knitlib can handle the exception and the knitlib can be continued afterwards with the previously saved data.

Define exceptions as classes

Exception can be defined as classes which do any other class can do, but are usually kept simple, often only offering a number of attributes that allow information about the error to be extracted by handlers for the exception. When creating a library like KnitLib which can raise several distinct errors, a common practice is to create a base class for exceptions and subclass that to create specific exception classes for different error conditions.

Part of the Exception Handler Module, catch exceptions raise from the library
Continue ReadingException handler in KnitLib

searchQuick Apprise: SIX #GoogleSummerOfCode #FOSSASIA

banner-gsoc2015.png.pagespeed.ce.1-XG35qq3R8SQJ5DGgL9

The intended searchQuick” (sQuick) is an application to enable a user to search a set of books or texts, like an encyclopedia, or some other topical book collection offline built in the open source platform Pharo 4.0.

header


The main task achieved was putting up the application up on Continuous Integration, Inria for automated build. It was indeed a beneficial idea as it helped me keep a check on the builds and work on issues.
Being a newbie, this work was cumbersome initially but with the help of my mentors and the #pharo community, I was able to accomplish it. To assist fellow Pharo-ers, I have compiled all the information regarding CI Automated Build for yout Pharo Application and published the same on my blog-spot. Kindly go through it for a complete understanding 🙂

Other tasks completed as of now include:

  • Putting up the project for automated build on https://ci.inria.fr/
  • Successful ‘stable’ and ‘development’ version builds
  • Accessing resource folder via MCGitHubRepository, Removal of manual download option
  • By default full screen system window open
  • Removing redundant code by creating open argument methods
  • Abolishment of hard-coded font family and font point size
  • Categorization of methods & classes
  • GUI Embellishment with background colors, borders etc.

Upcoming: 

  • Dynamic widget re-sizing
  • Multi-line search result title
  • Putting up Help and About sections
  • Removal of old configurations

Continue ReadingsearchQuick Apprise: SIX #GoogleSummerOfCode #FOSSASIA

Importance of the test cases for the KnitLib

Having test cases is very important especially for a library like KnitLib because using test cases; we can clearly test particular fields.  In KnitLib, test cases show the information of how the KnitLib should be checked. Also test cases help for new contributors to understand about the KnitLib.

There are several test cases for the current KnitLib implementation such as tests on ayab communication, tests on ayab image, tests on command line interface, tests on KnitPat module and tests on knitting plugin.

For an example in ayab communication there are several important functions have been tested. Test on closing serial port communication, test on opening serial port with a baud rate of 115200 which ayab fits, tests on sending start message to the controller, tests on sending line of data via serial port and tests on reading line from serial communication.  Most of these tests have been done using mock tests. Mock is a python library to test in python.  Using mocks we can replace parts of our system with mock objects and have assertions about how they have been used. We can easily represent some complex objects without having to manually set up stubs as mock objects during a test.

It is very important to improve further test cases on the KnitLib because with the help of good test cases we can guarantee that the KnitLib’s features and functionalities should be working great.

Regards,

Shiluka.

Continue ReadingImportance of the test cases for the KnitLib

searchQuick Apprise: FIVE #GoogleSummerOfCode #FOSSASIA

banner-gsoc2015.png.pagespeed.ce.1-XG35qq3R8SQJ5DGgL9

The intended searchQuick” (sQuick) is an application to enable a user to search a set of books or texts, like an encyclopedia, or some other topical book collection offline built in the open source platform Pharo 4.0.

header


As the rudimentary structure of the application is sewn up, embellishment of GUI and rigorous testing are the major part of course of action.
On eMBee’s ( +Martin Bähr ) suggestion to build up an accordion widget to display the search results, various trials were conducted to design a similar one in Pharo.

The task of developing the accordion widget in Pharo was achieved using Expander Morphs. Looping through the search results array, a #newExpander: was added in each #newRow: of the modal built.

A challenging chore was to add a scroll-able content on the click of the desired search result expander. Sundry experiments with #newLabel: and #newText: in #newScrollPaneFor: {i.e. adding text model and labels in scroll pane} had no effect. Eventually, #newTextEditorFor: did the trick and the desired look was created.
Next on the cards is putting up sQuick for automated build on the CI Server, as suggested by +Sean DeNigris for its various advantages which include:
  • Improvement of product quality
  • Acceleration of compile and link processing
  • Elimination of redundant tasks
  • Minimization of ‘bad builds’
  • Have history of builds and releases in order to investigate issues
  • Save time and money – because of above listed reasons.
For simplicity, Build automation is the act of scripting or automating a wide variety of tasks that software developers do in their day-to-day activities including things like:
  • compiling computer source code into binary code
  • packaging binary code
  • running automated tests
  • deploying to production systems
  • creating documentation and/or release notes
UPCOMING:
To achieve Build Automation for sQuick, I have already registered on CI and configured sQuick.
Next endeavor is to look into the red signal in the build evaluation.
 

Stay tuned for more….Post any queries, will be happy to help 🙂
Continue ReadingsearchQuick Apprise: FIVE #GoogleSummerOfCode #FOSSASIA