Fetching Images for RSS Responses in SUSI Web Chat

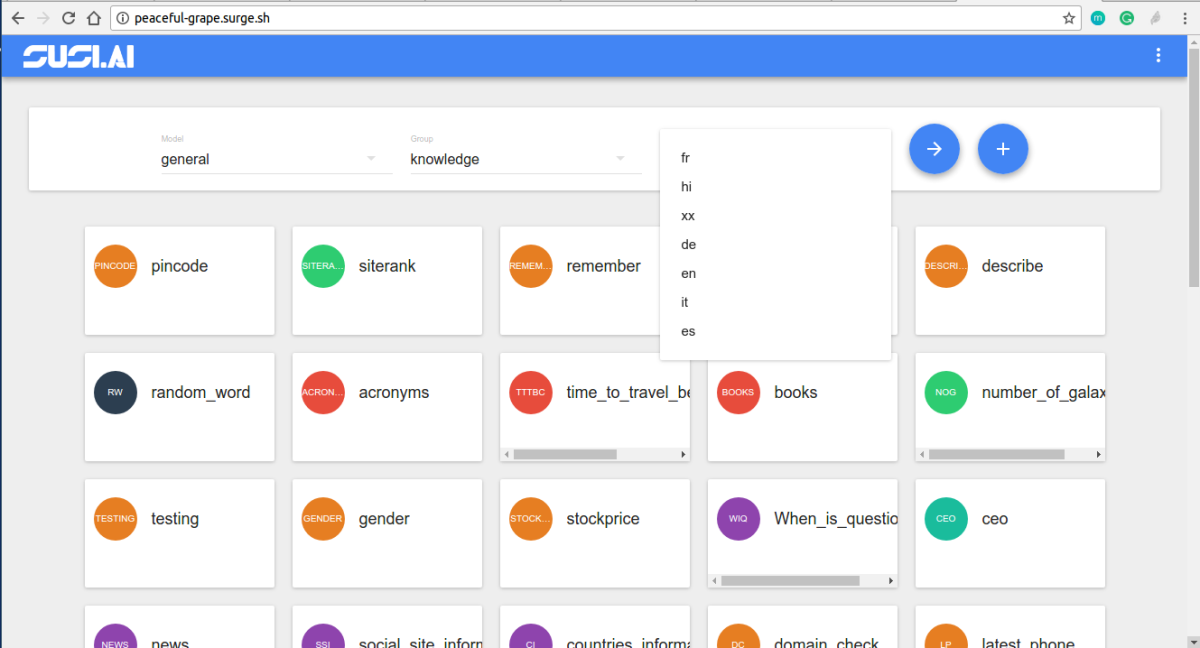
Initially, SUSI Web Chat rendered RSS action type responses like this:

The response from the server initially only contained

  • Title
  • Description
  • Link

We needed to improvise the web search & RSS results display and also add images for the results.

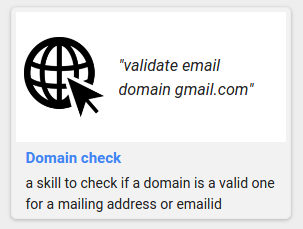
The web search & RSS results are now rendered as :

How was this implemented?

SUSI AI uses Yacy to fetchRSSs feeds. Firstly the server using the console process to return the RSS feeds from Yacy needs to be configured to return images too.

"yacy":{
  "example":"http://127.0.0.1:4000/susi/console.json?q=%22SELECT%20title,%20link%20FROM%20yacy%20WHERE%20query=%27java%27;%22",
  "url":"http://yacy.searchlab.eu/solr/select?wt=yjson&q=",
  "test":"java",
  "parser":"json",
  "path":"$.channels[0].items",
  "license":""
}

In a console process, we provide the URL needed to fetch data from, the query parameter needed to be passed to the URL and the path to look for the answer in the API response.

  • url = <url>   – the URL to the remote JSON service which will be used to retrieve information. It must contain a $query$ string.
  • test = <parameter> – the parameter that will replace the $query$ string inside the given URL. It is required to test the service.

Here the URL used is :

http://yacy.searchlab.eu/solr/select?wt=yjson&q=QUERY

To include images in RSS action responses, we need to parse the images also from the Yacy response. For this, we need to add `image` in the selection rule while calling the console process

"process":[
  {
    "type":"console",
    "expression":"SELECT title,description,link FROM yacy WHERE query='$1$';"
  }
]

Now the response from the server for RSS action type will also include `image` along with title, description, and link. An example response for the query `Google` :

{
  "title": "Terms of Service | Google Analytics \u2013 Google",
  "description": "Read Google Analytics terms of service.",
  "link": "http://www.google.com/analytics/terms/",
  "image":   "https://www.google.com/images/branding/googlelogo/1x/googlelogo_color_116x41dp.png",
}

However, the results at times, do not contain images because there are none stored in the index. This may happen if the result comes from p2p transmission within Yacy where no images are transmitted. So in cases where images are not returned by the server, we use the link preview service to preview the link and fetch the image.

The endpoint for previewing the link is :

BASE_URL+'/susi/linkPreview.json?url=URL'

On the client side, we first search the response for data objects with images in API actions. And the amongst the remaining data objects in answers[0].data, we preview the link to fetch image keeping a check on the count. This needs to be performed for processing the history cognitions too.To preview the remaining links in a loop, we cannot make ajax calls directly in a loop. To handle this, nested ajax calls are made using the function previewURLForImage() where we loop through the remaining links and on the success we decrement the count and call previewURLForImage() on the next link and on error we try previewURLForImage() on the next link without decrementing the count.

success: function (rssResponse) {
  if(rssResponse.accepted){
    respData.image = rssResponse.image;
    respData.descriptionShort = rssResponse.descriptionShort;
    receivedMessage.rssResults.push(respData);
  }
  if(receivedMessage.rssResults.length === count ||
    j === remainingDataIndices.length - 1){
    let message = ChatMessageUtils.getSUSIMessageData(receivedMessage, currentThreadID);
    ChatAppDispatcher.dispatch({
      type: ActionTypes.CREATE_SUSI_MESSAGE,
      message
    });
  }
  else{
    j+=1;
    previewURLForImage(receivedMessage,currentThreadID,
BASE_URL,data,count,remainingDataIndices,j);
  }
},

And we store the results as rssResults which are used in MessageListItems to fetch the data and render. The nested calling of previewURLForImage() ends when we have the required count of results or we have finished trying all links for previewing images. We then dispatch the message to the message store. We now improvise the UI. I used Material UI Cards to display the results and for the carousel like display, react-slick.

<Card className={cardClass} key={i} onClick={() => {
  window.open(tile.link,'_blank')
}}>
  {tile.image &&
    (
      <CardMedia>
        <img src={tile.image} alt="" className='card-img'/>
      </CardMedia>
    )
  }
  <CardTitle title={tile.title} titleStyle={titleStyle}/>
  <CardText>
    <div className='card-text'>{cardText}</div>
    <div className='card-url'>{urlDomain(tile.link)}</div>
  </CardText>
</Card>

We used the full width of the message section to display the results by not wrapping the result in message-list-item class. The entire card is hyperlinked to the link. Along with title and description, the URL info is also shown at the bottom right. To get the domain name from the link, urlDomain() function is used which makes use of the HTML anchor tag to get the domain info.

function urlDomain(data) {
  var a = document.createElement('a');
  a.href = data;
  return a.hostname;
}

To prevent stretching of images we use `object-fit: contain;` to make the images fit the image container and align it to the middle.

We finally have our RSS results with images and an improvised UI. The complete code can be found at SUSI WebChat Repo. Feel free to contribute

Resources
Continue ReadingFetching Images for RSS Responses in SUSI Web Chat

Implementing Text To Speech Settings in SUSI WebChat

SUSI Web Chat has Text to Speech (TTS) Feature where it gives voice replies for user queries. The Text to Speech functionality was added using Speech Synthesis Feature of the Web Speech API. The Text to Speech Settings were added to customise the speech output by controlling features like :

  1. Language
  2. Rate
  3. Pitch

Let us visit SUSI Web Chat and try it out.

First, ensure that the settings have SpeechOutput or SpeechOutputAlways enabled. Then click on the Mic button and ask a query. SUSI responds to your query with a voice reply.

To control the Speech Output, visit Text To Speech Settings in the /settings route.

First, let us look at the language settings. The drop down list for Language is populated when the app is initialised. speechSynthesis.onvoiceschanged function is triggered when the app loads initially. There we call speechSynthesis.getVoices() to get the voice list of all the languages currently supported by that particular browser. We store this in MessageStore using ActionTypes.INIT_TTS_VOICES action type.

window.speechSynthesis.onvoiceschanged = function () {
  if (!MessageStore.getTTSInitStatus()) {
    var speechSynthesisVoices = speechSynthesis.getVoices();
    Actions.getTTSLangText(speechSynthesisVoices);
    Actions.initialiseTTSVoices(speechSynthesisVoices);
  }
};

We also get the translated text for every language present in the voice list for the text – `This is an example of speech synthesis` using google translate API. This is called initially for all the languages and is stored as translatedText attribute in the voice list for each element. This is later used when the user wants to listen to an example of speech output for a selected language, rate and pitch.

https://translate.googleapis.com/translate_a/single?client=gtx&sl=en-US&tl=TARGET_LANGUAGE_CODE&dt=t&q=TEXT_TO_BE_TRANSLATED

When the user visits the Text To Speech Settings, then the voice list stored in the MessageStore is retrieved and the drop down menu for Language is populated. The default language is fetched from UserPreferencesStore and the default language is accordingly highlighted in the dropdown. The list is parsed and populated as a drop down using populateVoiceList() function.

let voiceMenu = voices.map((voice,index) => {
  if(voice.translatedText === null){
    voice.translatedText = this.speechSynthesisExample;
  }
  langCodes.push(voice.lang);
  return(
    <MenuItem value={voice.lang}
              key={index}
              primaryText={voice.name+' ('+voice.lang+')'} />
  );
});

The language selected using this dropdown is only used as the language for the speech output when the server doesn’t specify the language in its response and the browser language is undefined. We then create sliders using Material UI for adjusting speech rate and pitch.

<h4 style={{'marginBottom':'0px'}}><Translate text="Speech Rate"/></h4>
<Slider
  min={0.5}
  max={2}
  value={this.state.rate}
  onChange={this.handleRate} />

The range for the sliders is :

  • Rate : 0.5 – 2
  • Pitch : 0 – 2

The default value for both rate and pitch is 1. We create a controlled slider saving the values in state and using onChange function to record change in values. The Reset buttons can be used to reset the rate and pitch values respectively to their default values. Once the language, rate and pitch values have been selected we can click on `Play a short demonstration of speech synthesis`  to listen to a voice reply with the chosen settings.

{ this.state.playExample &&
  (
    <VoicePlayer
       play={this.state.play}
       text={voiceOutput.voiceText}
       rate={this.state.rate}
       pitch={this.state.pitch}
       lang={this.state.ttsLanguage}
       onStart={this.onStart}
       onEnd={this.onEnd}
    />
  )
}

We use the VoicePlayer by passing the required props to get the speech output. onStart and onEnd functions are triggered at the beginning and ending of the speech synthesis and are used to control the state from the parent component. Chosen language, rate, pitch and translated text are passed as props to VoicePlayer which creates a new SpeechSynthesisUtterance() with the passed props and plays the speech output.

On saving these settings and then using the Mic button to get voice replies we see that the voice output is controlled according to the selected settings.

Finally, we have to store the selected settings on the server and ensure that these are pulled when the app is initialized. The format in which these settings are stored in the server is :

Speech Rate

- Used to control rate of speech output.
- SETTING_NAME :  `speechRate`
- SETTING_VALUE : `0.5 - 2`
- DEFAULT_VALUE : `1`
 
Speech Pitch

- Used to control pitch of speech output.
- SETTING_NAME :  `speechPitch`
- SETTING_VALUE : `0 - 2`
- DEFAULT_VALUE : `1`
 
TTS Language

- Used to set the language for Text-To-Speech used when the response from server doesnt specify language and the browser language is also undefined.
- SETTING_NAME :  `ttsLanguage`
- SETTING_VALUE : `Language Code (string)`
- DEFAULT_VALUE : `en-US`

This is how the Text To Speech Settings were implemented in SUSI Web Chat. The complete code can be found at SUSI Web Chat Repository.

PS: To test whether your browser supports Text To Speech, open your browser console and try the following :

  • var msg = new SpeechSynthesisUtterance(‘Hello World’);
  • window.speechSynthesis.speak(msg)

If you get a speech output then the Web API Speech Synthesis is supported by your browser and Text To Speech features of SUSI Web Chat will work. The Web Speech API has support for all latest Chrome browsers as mentioned in the Web Speech API Mozilla docs.However there are few bugs with some Chromium versions please check out more on how to fix them locally here in this link.

Resources:


Continue ReadingImplementing Text To Speech Settings in SUSI WebChat

Modifying SUSI Skills using SUSI Skill CMS

SUSI Skill CMS is a complete solution right from creating a skill to modifying the skill. The skills in SUSI are well synced with the remote repository and can be completely modified using the Edit Skill feature of SUSI Skill CMS. Here’s how to Modify a Skill.

  1. Sign Up/Login to the website using your credentials in skills.susi.ai
  2. Choose the SKill which you want to edit and click on the pencil icon.
  3. The following screen allows editing the skill. One can change the Group, Language, Skill Name, Image and the content as well.
  4. After making the changes the commit message can be added to Save the changes.

To achieve the above steps we require the following API Endpoints of the SUSI Server.

  1. http://api.susi.ai/cms/getSkillMetadata.json – This gives us the meta data which populates the various Skill Content, Image, Author etc.
  2. http://api.susi.ai/cms/getAllLanguages.json – This gives us all the languages of a Skill Group.
  3. http://api.susi.ai/cms/getGroups.json – This gives us all the list of Skill Groups whether Knowledge, Entertainment, Smalltalk etc.

Now since we have all the APIs in place we make the following AJAX calls to update the Skill Process.

  1. Since we are detecting changes in all the fields (Group Value, Skill Name, Language Value, Image Value, Commit Message, Content changes and the format of the content), the AJAX call can only be sent when there is a change in the PR and there is no null or undefined value in them. For that, we make various form validations. They are as follows.
    1. We first detect whether the User is in a logged in state.
if (!cookies.get('loggedIn')) {
            notification.open({
                message: 'Not logged In',
                description: 'Please login and then try to create/edit a skill',
                icon: <Icon type="close-circle" style={{ color: '#f44336' }} />,
            });
        }
  1. We check whether the image uploaded matches the format of the Skill image to be stored which is ::image images/imageName.png
if (!new RegExp(/images\/\w+\.\w+/g).test(this.state.imageUrl)) {
            notification.open({
                message: 'Error Processing your Request',
                description: 'image must be in format of images/imageName.jpg',
                icon: <Icon type="close-circle" style={{ color: '#f44336' }} />,
            });
        }
  1. We check if the commit message is not null and notify the user if he forgot to add a message.
if (this.state.commitMessage === null) {
            notification.open({
                message: 'Please make some changes to save the Skill',
                icon: <Icon type="close-circle" style={{ color: '#f44336' }} />,
            });
        }
  1. We also check whether the old values of the skill are completely similar to the new ones, in this case, we do not send the request.
if (toldValues===newValues {
            notification.open({
                message: 'Please make some changes to save the Skill',
                icon: <Icon type="close-circle" style={{ color: '#f44336' }} />,
            });
        }

To check out the complete code, go to this link.

  1. Next, if the above validations are successful, we send a POST request to the server and show the notification to the user accordingly, whether the changes to the Skill Data have been updated or not. Here’s the AJAX call snippet.
// create a form object
let form = new FormData();       
/* Append the following fields from the Skill Component:- OldModel, OldLanguage, OldSkill, NewModel, NewGroup, NewLanguage, NewSkill, changelog, content, imageChanged, old_image_name, new_image_name, image_name_changed, access_token */  
if (image_name_changed) {
            file = this.state.file;
            // append file to image
        }

        let settings = {
            "async": true,
            "crossDomain": true,
            "url": "http://api.susi.ai/cms/modifySkill.json",
            "method": "POST",
            "processData": false,
            "contentType": false,
            "mimeType": "multipart/form-data",
            "data": form
        };
        $.ajax(settings)..done(function (response) {
         //show success
        }.
        .fail(function(response){
         // show failure
        }
  1. To verify all this we head to the commits section of the SUSI Skill Data repo and see the changes we made. The changes can be seen here https://github.com/fossasia/susi_skill_data/commits/master 

Resources

  1. AJAX POST Request – https://api.jquery.com/jquery.post/ 
  2. Material UI – http://material-ui.com 
  3. Notifications – http://www.material-ui.com/#/components/notification 
Continue ReadingModifying SUSI Skills using SUSI Skill CMS

Enhanced Skill Tiles in SUSI Skill CMS

The SUSI Skill Wiki is a management system for all the SUSI Skills and the Skill display screen ought to look attractive. The earlier version of the Skill Display was just a display with the skill name populated as cards as shown in the image.

image

So as we progressed over to add more metadata to the SUSI Skills, we had the challenge to show all details which were as follows –

An example of a skill metadata format-

"cricketTest": {
      "image": "images/images.jpg",
      "author_url": "skill.susi.ai",
      "examples": ["Testing Works"],
      "developer_privacy_policy": "na",
      "author": "cms",
      "skill_name": "cricket",
      "dynamic_content": true,
      "terms_of_use": "na",
      "descriptions": "testing",
      "skill_rating": null
    }

To embed the Skill metadata in the Tiles the following steps are to be followed –

  1. We first use the end point at the SUSI Server, http://api.susi.ai/cms/getSkillList.json with the following attributes –
    1. model – The skill follows a general model or maybe a tutorial model
    2. group -The category or group of the skill.
    3. language – The language of the skill output.

2.  An AJAX request to this end point gives us the following response.

{
accepted: true,
model: "general",
group: "Knowledge",
language: "en",
skills: 
{
capital: 
{
image: "images/capital.png",
author_url: "https://github.com/chashmeetsingh",
examples: 
[
"capital of Bangladesh"
],
developer_privacy_policy: null,
author: "chashmeet singh",
skill_name: "capital",
dynamic_content: true,
terms_of_use: null,
descriptions: "a skill to tell user about capital of any country.",
skill_rating: 
{
negative: "0",
positive: "1"
}
}

We use the descriptions, skill_name, examples, image from the skill metadata to create our Skill Tile.

  1. The styles of the cards follow a CSS flexbox structure. A sample mock up of the Skill Card looks as follows.

We first handle all the base cases and show “No name available”, “No description available” for data which does not exist or is found to be “null”. We then create the card mock-up in ReactJS which looks somewhat like this code snippet in the file BrowseSkill.js

                            <Card style={styles.row} key={el}>
                                <div style={styles.right} key={el}>
                                    {image ? <div style={styles.imageContainer}>
                                        <img alt={skill_name} src={image} style={styles.image}/>
                                    </div>:
                                    <CircleImage name={el} size="48"/>}
                                    <div style={styles.titleStyle}>"{examples}"</div>
                                </div>
                                <div style={styles.details}>
                                    <h3 style={styles.name}>{skill_name}</h3>
                                    <p style={styles.description}>{description}</p>
                                </div>
                            </Card>

  1. We then add the following styles to the Card and its contents which complete the look of the View.
imageContainer:{   
        position: 'relative',
        height: '80px',
        width: '80px',
        verticalAlign: 'top'
    },
    name:{
        textAlign: 'left',
        fontSize: '15px',
        color: '#4285f4',
        margin: '4px 0'
    },
    details:{
        paddingLeft:'10px'
    },
    image:{
        maxWidth: '100%',
        border: 0
    },
description:{
        textAlign:'left',
        fontSize: '14px'   
    },
row: {
        width: 280,
        minHeight:'200px',
        margin:"10px",
        overflow:'hidden',
        justifyContent: "center",
        fontSize: '10px',
        textAlign: 'center',
        display: 'inline-block',
        background: '#f2f2f2',
        borderRadius: '5px',
        backgroundColor: '#f4f6f6',
        border: '1px solid #eaeded',
        padding: '4px',
        alignSelf:'flex-start'
    },
titleStyle:{
    textAlign: 'left',
    fontStyle: 'italic',
    fontSize: '16px',
    textOverflow: 'ellipsis',
    overflow: 'hidden',
    width: '138px',
    marginLeft: '15px',
    verticalAlign: 'middle',
    display: 'block'
}

To see the SUSI Skills or to contribute to it, please visit http://skills.susi.ai

Resources

Continue ReadingEnhanced Skill Tiles in SUSI Skill CMS

Displaying Blog Posts on SUSI AI Web Chat’s Blog Page and Share Posts

FOSSASIA is maintaining a superior blog and it contains blog posts about projects and programs run by FOSSASIA. While we were implementing SUSI Web Chat Application we got a requirement to implement a blog page. Speciality of this blog page is it is not a separate blog page, it fetches blog posts and other related data by filtering the FOSSASIA’s main blog.

In this blog post I’ll discuss how we fetched and managed those data on front-end and how we made the appearance same as the FOSSASIA main blog.

First we get blog posts as a JSON. For that we used rss2json API. we can get the RSS feed as a JSON by sending our RSS feed URL to the rss2json API. Check the rss2json API documentation here.

It produces all posts as items array. Next we store this array of responses in our application as a state.

This response contains blog post titles featured images’ details and post content and other metadata such as tags, author name and published date.

We had few requirements to fulfill. First one is to show full content of the blogpost in a new blog page.

We can take the full content from response like this,

this.state.posts.slice(this.state.startPage, this.state.startPage + 10).map((posts, i) => {
        let content = posts.content;
})

We can use “cintent” variable to show content but it contains the featured image. We have to skip that image. For that,

let htmlContent = content.replace(/<img.*?>/, '');

Now we have to render this string value as HTML. For that we have to install “test-to-html” package using below command.

npm install html-to-text --save

Now we can convert text into html like this

htmlContent = renderHTML(htmlContent);

We used this HTML content inside the “CardText” tag.

<CardText> {htmlContent}
</CardText>

At the bottom of the post we needed to show author name, tags list and categories list.
Since tags and categories come in one array, we have to separate them.
First we defined an array which contains all the categories in Fossasia blog. Then we compared that array with the categories we got like this.

       const allCategories = ['FOSSASIA','GSoC','SUSI.AI']

Compare two arrays,

          posts.categories.map((cat) => {
                let k = 0;
                for (k = 0; k < allCategories.length; k++) {
                              if (cat === allCategories[k]) {
                                  category.push(cat);
                              }
              	}
          });

we defined this “arrDiff” simple function to get the difference of two arrays.

     var tags=arrDiff(category,posts.categories)

Make the list of categories

let fCategory=category.map((cat) =>
<span key={cat} ><a className="tagname" href={'https://blog.fossasia.org/category/' + cat.replace(/\s+/g, '-').toLowerCase()} rel="noopener noreferrer">{cat}</a></span>
   );

We can use above step to make tags list.

Then after used it in the “CardActions”

<span className='categoryContainer'>
    <i className="fa fa-folder-open-o tagIcon"></i>
    {fCategory}
</span>


According to the final requirement we needed to add social media share buttons for Facebook and Twitter.

If we need to make a twitter share button we have to follow up this method. But we can use “react-share” npm package to make these kind of share buttons.

This is how we made Facebook and Twitter share buttons. First of all we have to install “react-share” package using below command.

npm install react-share --save

Then we have to import the installed package.

import { ShareButtons, generateShareIcon } from 'react-share';

Then after we defined Button and Icon like this.

      const {FacebookShareButton,TwitterShareButton} = ShareButtons;
      const FacebookIcon = generateShareIcon('facebook');
      const TwitterIcon = generateShareIcon('twitter');

Now we can use these components.

<TwitterShareButton url={posts.guid} title={posts.title} via='asksusi' hashtags={posts.categories.slice(0, 4)} >                                                                                <TwitterIcon size={32} round={true} />
</TwitterShareButton>
<FacebookShareButton url={posts.link}>
     <FacebookIcon size={32} round={true} />
</FacebookShareButton>

We have to send URL and title of the post with the tweet and tags as hashtags. So we have to pass them into the component as above.
Above code produces this model of tweets.

That’s how “text-to-htm”l and “react-share” works on react. If you would like to contribute to SUSI project or any other FOSSASIA project please fork our repositories on github.

Resources:

Continue ReadingDisplaying Blog Posts on SUSI AI Web Chat’s Blog Page and Share Posts

Sorting Users and Implementing Animations on SUSI Web Chat Team Page

While we were developing the chat application, we wanted to show details of Developers.  So we planned to build a team page for SUSI Web Chat Application. In this post I discuss few things we built there. Like sorting feature, animations of the page, usage of Material UI.

First we made an array of objects to store user details. In that array we grouped them in sub arrays so we can refer them in different sections separately. We stored following data in “TeamList.js” in an array.

var team = [{
 'mentors': [{
   'name': 'Mario Behling',
   'github': 'http://github.com/mariobehling',
   'avatar': 'http://fossasia.org/img/mariobehling.jpg',
   'twitter': 'https://twitter.com/mariobehling',
   'linkedin': 'https://www.linkedin.com/in/mariobehling/',
   'blog': '#'
 }]
},{ 'server': [{
    }]
}

There was a requirement to sort developers by their name so we had to build a way to sort out array data which are in main array. This is how we built that.
The function we are going to use for sorting.

   function compare(a, b) {
     if (a.name < b.name) { return -1; }
     if (a.name > b.name) { return 1; }
     return 0;
   }

This is how we have used it to sort developers.

import team from './TeamList';
team[1].server.sort(compare);

In this function we took values of object two by two and compared.
Now we have to show these sorted information on view.
Extract data that we want from array and we used material UI Cards to show these data on view.
This is how we extracted data from the array.

   team[1].server.sort(compare);
   let server = team[1].server.map((serv, i) => {
     return ( <Card className='team-card' key={i}>
         <CardMedia className="container" >
           <img src={serv.avatar} alt={serv.name} className="image" />
           <div className="overlay" >
             <div className="text"> <FourButtons member={serv} /> </div>
           </div>
         </CardMedia>
         <CardTitle title={serv.name} subtitle={serv.designation} />
       </Card>)   })

Now it shows data on the view.
“” contains an image of the member. We need to show social media links of the user on mouseover. We did that using simple CSS. I added a block comment around those particular styles. Check those styles here.

.overlay {
 position: absolute;
 bottom: 100%;
 left: 0;
 right: 0;
 background-color: #000;
 overflow: hidden;
 width: 100%;
 height:0;
 transition: .3s ease;
 opacity:0;
}
.container:hover .overlay {
 bottom: 0;
 height: 100%;
 opacity:0.7;
}

Above lines show that how we made the animation of the overlay animation.

Now we want to show social media buttons on the overlay. We made another separate component for buttons and return those like this.

render() {
       let member= this.props.member;
       return (<div>
         <CardActions>
           <IconButton href={member.github} target="_blank" >
  <CardActions>
		</div>)}

Finally we showed those data on Team page. We returned these JSX from render(){} method.

         <div className="team-header">
           <div className="support__heading">Developers</div>
         </div>
         <div className='team-container'>{server}</div>

I have mentioned few resources which I used to implement these features. If you are willing to contribute SUSI AI Web Chat application. Fork our repository on github.

Resources

Documentation of Array.sort https://developer.mozilla.org/en-US/docs/Web/JavaScript/Reference/Global_Objects/Array/sort

How to use Image overlay CSS effects: https://www.w3schools.com/howto/howto_css_image_overlay.asp

Continue ReadingSorting Users and Implementing Animations on SUSI Web Chat Team Page

Handling Offline Message Responses in SUSI Web Chat

Previously, the SUSI Web Chat stopped working when there was no Internet connectivity. The application’s overall state was disturbed as one would see the loading message gif and the users were left to wonder on how to proceed. To handle this situation, we required notifying the User in the offline mode, with a message, that there is no Internet Connectivity.

This following image demonstrates the previous state where the application hung.

This image shows how this state was handled currently. One can test this out on http://chat.susi.ai by disconnecting and sending a message to SUSI and then connecting back to the Internet.

To achieve this, one needed to handle the offline and online events of the browser. The following steps can be followed to achieve this.

  1. We make use of the following eventListener functions to know whether the user is connected to the Internet.
// handles the Offlines event
window.addEventListener('offline', handleOffline.bind(this));  

// handles the Online event
window.addEventListener('online', handleOnline.bind(this));
  1. We then set a global offline message which is modified on the connections switching from online to an offline state. They are handled by the following functions.
let offlineMessage = null;

function handleOffline() {
  offlineMessage = 'Sorry, cannot answer that now. I have no net connectivity';
}
function handleOnline() {
  offlineMessage = null;
}
  1. We then handle the action createSUSIMessage() in API.actions.js and send the  AJAX request which we are making according to the offline/online state. This enables us to send the correct message response to the User even in the offline state and not letting the Application state crash.
// So if the offlineMessage variable is not null we call the AJAX 
if(!offlineMessage){
        // handle AJAX
}
else {
    // we create a message saying there is no Internet connectivity.
}
     
  1. The messages on refreshing back restore back to the original state as these are not being stored in the server. Hence the User is able to see the correct History, i.e., only those messages which were sent to the server and successfully responded to by SUSI.

Resources

Continue ReadingHandling Offline Message Responses in SUSI Web Chat

Implementation of SUSI Web Chat Auto Sizing Message Composer

While we are using SUSI Web Chat Application we may have to send lengthy messages. Existing application’s Message composer supports for lengthy messages but it manages a constant value for every user input. While we were developing the application we got a requirement to build a growing message composer.

Final output of this implementation produces a message composer that grows when user completes a new line until user completes 5 lines and after 5 lines it maintains a fixed size and enables scrolling.

So we tried several packages to get this done. And finally we did this  using react-textarea-autosize  it gives all these features and it gives user to customize the elements furthermore.

First we have to install the npm package:

npm install --save react-textarea-autosize

After the installation we have to import the package on top of the “MessageComposer.react.js”

import TextareaAutosize from 'react-textarea-autosize';

Next we need to use this package like this,

         <TextareaAutosize
           className='scroll'
           id='scroll'
           minRows={1}
           maxRows={5}
           placeholder="Type a message..."
           value={this.state.text}
           onChange={this._onChange.bind(this)}
           onKeyDown={this._onKeyDown.bind(this)}
           ref={(textarea) => { this.nameInput = textarea; }}
           style={{ background: this.props.textarea}}
         />


This package provides “minRows” and “maxRows”  attributes and we can define minimum height of the text area and maximum height it can grow. If you need to know more about auto growing text areas and to get examples refer this.

Next we wanted to hide the scrollbar which is displaying when the textarea height is exceeding.

How we hide the scrollbars  on chrome browsers.

.scroll::-webkit-scrollbar {
 	 display: none;
}

This is how we hide the scrollbar on firefox browser.

.scroll {
 	overflow: -moz-scrollbars-none;
}

Now we have to style up the textarea because it comes with default styles. We wrapped up the textarea with the div and applied our styles to that. In my case we wrapped up my textarea with  <div className=“textBack”>

This is how we styled the textarea using the wrapper div.

.textBack{
 background: #fff;
 width: 83%;
 border-radius: 40px;
 padding: 5px 20px;
 display: block;
 position: relative;
 top: 12%;
 box-sizing: content-box;
 margin: 0px 0 10px 0;
}

Our textarea is like this.

It expands when user exceeds the width of textarea.

This is how we implemented the SUSI Web Chat’s growing message composer. If you would like to contribute please fork our repository on github  

Resources:

Continue ReadingImplementation of SUSI Web Chat Auto Sizing Message Composer

Implementing a Collapsible Responsive App Bar of SUSI Web Chat

In the SUSI Web Chat application we wanted to make few static pages such as: Overview, Terms, Support, Docs, Blog, Team, Settings and About. The idea was to show them in app bar. Requirements were  to have the capability to collapse on small viewports and to use Material UI components. In this blog post I’m going to elaborate how we built the responsive app bar Using Material UI components.

First we added usual Material UI app bar component  like this.

             <header className="nav-down" id="headerSection">
             <AppBar
               className="topAppBar"
title={<a href={this.state.baseUrl} ><img src="susi-white.svg" alt="susi-logo"  className="siteTitle"/></a>}
               style={{backgroundColor:'#0084ff'}}
               onLeftIconButtonTouchTap={this.handleDrawer}
               iconElementRight={<TopMenu />}
             />
             </header>

We added SUSI logo instead of the text title using below code snippet and linked it to the home page like this.

title={<a href={this.state.baseUrl} ><img src="susi-white.svg" alt="susi-logo"  className="siteTitle"/></a>}

We have defined “this.state.baseUrl” in constructor and it gets the base url of the web application.

this.state = {
       openDrawer: false, 
baseUrl: window.location.protocol + '//' + window.location.host + '/'
       };

We need to open the right drawer when we click on the button on top left corner. So we have to define two methods to open and close drawer as below.

   handleDrawer = () => this.setState({openDrawer: !this.state.openDrawer});
   handleDrawerClose = () => this.setState({openDrawer: false});

Now we have to add components that we need to show on the right side of the app bar. We connect those elements to the app bar like this. “iconElementRight={}”

We defined “TopMenu” Items like this.

   const TopMenu = (props) => (
   <div>
     <div className="top-menu">
     <FlatButton label="Overview"  href="/overview" style={{color:'#fff'}} className="topMenu-item"/>
     <FlatButton label="Team"  href="/team" style={{color:'#fff'}} className="topMenu-item"/>
     </div>

We added FlatButtons to place links to other static pages. After all we needed a FlatButton that gives IconMenu to show login and signup options.

     <IconMenu {...props} iconButtonElement={
         <IconButton iconStyle={{color:'#fff'}} ><MoreVertIcon /></IconButton>
     }>
     <MenuItem primaryText="Chat" containerElement={<Link to="/logout" />}
                   rightIcon={<Chat/>}/>
     </IconMenu>
   </div>
   );

After adding all these correctly you will see this kind of an app bar in your application.

Now our app bar is ready. But it does not collapse on small viewports.
So we planned to hide flat buttons on small sized screens and show the menu button. For that we used media queries.

@media only screen and (max-width: 800px){
   .topMenu-item{ display: none !important;  }
   .topAppBar button{ display: block  !important; }
}

This is how we built the responsive app bar using Material UI components. You can check the preview from this url. If you are willing to contribute to SUSI Web Chat here is the GitHub repository.

Resources:

  • Material UI Components: http://www.material-ui.com/#/components/
  • Learn More about media queries: https://www.w3schools.com/css/css_rwd_mediaqueries.asp
Continue ReadingImplementing a Collapsible Responsive App Bar of SUSI Web Chat

Implementing Speech to Text for Chrome in SUSI Web Chat

SUSI Web Chat now replies to voice inputs. To achieve this, I made use of the Web Speech API. The voice input saves one from the pain of typing and it’s a much needed feature for the Web Chat and to maintain the similarity with the other SUSI Android and SUSI iOS clients.

To test the feature out in SUSI Web Chat, click on the microphone icon beside the text area on chat.susi.ai.

Say the message once the dialog appears, and you will see the message being sent to the Chat List rendered in text.

Let’s achieve the same result following the steps below.

  1. First, initialize the class Voice Recognition with defaults for the Speech Recognition, for that we create a file VoiceRecognition.js
  1. We first initialize the Speech Recognition API with the window object.
  2. We warn the User with a console message if there is no Speech Recognition API available.
  3. If it’s available call the recognition function using the following line

this.recognition = this.createRecognition(SpeechRecognition)

// Initialise the Speech recognition API
const SpeechRecognition = window.SpeechRecognition
      || window.webkitSpeechRecognition
      || window.mozSpeechRecognition
      || window.msSpeechRecognition
      || window.oSpeechRecognition
    // Warn the user if not available otherwise call the createRecognition function
    if (SpeechRecognition != null) {
      this.recognition = this.createRecognition(SpeechRecognition)
    } else {
      console.warn('The current browser does not support the SpeechRecognition API.');
    }
  }
  1. Then we write the createRecognition function
  1. We set our defaults first as “continuous  – true, interimResults – false, and language – ‘en-US’ ”
  2. We pass these options to the recognition object that we created in the above step and finally return the recognition object.
createRecognition = (SpeechRecognition) => {
    const defaults = {
      continuous: true,
      interimResults: false,
      lang: 'en-US'
    }

    const options = Object.assign({}, defaults, this.props)

    let recognition = new SpeechRecognition()

    recognition.continuous = options.continuous
    recognition.interimResults = options.interimResults
    recognition.lang = options.lang

    return recognition
  }
  1. Initialize all the helper functions to be passed as props.
  1. start – This method starts the recognition and invokes the Mic of the browser. It also checks if the browser has the access to the user’s Mic.
  2. stop – Stop method closes the Mic and returns the audio captured so far.
  3. abort – Abort method stops the SpeechRecognition service.
  4. onspeechend – This method is called if there is any inactivity and there is no voice input. Hence, stops the recognition service.
  5. componentWillReceiveProps – This method waits for the stop method and calls it when it has received the stop object.
  6. componentWIllUnmount – This method is invoked just before the component is about to unmount and therefore its function is to abort the Speech Recognition Service
  7. render –  We return null as there is nothing to return in this component and all the converted text of the captured Speech will be sent to the parent element.
start = () => {
    this.recognition.start()
  }

  stop = () => {
    this.recognition.stop()
  }

  abort = () => {
    this.recognition.abort()
  }
  onspeechend = () => {
    console.log('no sound detected');
    this.recognition.stop()
  }

  componentWillReceiveProps ({ stop }) {
    if (stop) {
      this.stop()
    }
  }

  componentWillUnmount () {
    this.abort()
  }

  render () {
    return null
  }
  1. Add event listeners to start and stop functions inside componentDidMount() to ensure every action that we want to perform from the parent element is after the component has successfully mounted itself.
  1. start – The start method is set with an action start so that we can pass the required action name to the VoiceRecognition component that we created
  2. end – The end method similarly is set with an action end
  3. After setting up the actions we finally call the bindResult function with the result that we received.
componentDidMount () {
    const events = [
      { name: 'start', action: this.props.onStart },
      { name: 'end', action: this.props.onEnd },
      { name: 'onspeechend', action: this.props.onspeechend }
    ]

    events.forEach(event => {
      this.recognition.addEventListener(event.name, event.action)
    })

    this.recognition.addEventListener('result', this.bindResult)

    this.start()
  }
  1. Bind the result and send it as the props to the parent element.
  2. Combine all interim results of the recognition and send it to the onResult function as finalTranscript
  3. The function bindResult – The function bindResult does all the binding of the interim results that we received and output a final result as finalTranscript.
  4. Lastly, we add the prop validations to ensure the correct props are being passed to our VoiceRecognition component.
// bindResult function
 bindResult = (event) => {
    let interimTranscript = ''
    let finalTranscript = ''
   // Bind all the results to finalTranscript
    for (let i = event.resultIndex; i < event.results.length; ++i) {
      if (event.results[i].isFinal) {
        finalTranscript += event.results[i][0].transcript
      } else {
        interimTranscript += event.results[i][0].transcript
      }
    }

    this.props.onResult({ interimTranscript, finalTranscript })
  }
// Add Prop Validations
VoiceRecognition.propTypes = {
  onStart: PropTypes.func,
  onEnd : PropTypes.func,
  onResult: PropTypes.func,
  Onspeechend: PropTypes.func,
  continuous: PropTypes.bool,
  lang: PropTypes.string,
  stop: PropTypes.bool
};
// Finally export the VoiceRecognition Component
export default VoiceRecognition
  1. Lastly, call the VoiceRecogntion component and pass the props from the MessageComposer Section to it in the following way.
  1. Initialize the default state in the constructor inside this.state
this.state = {
      text: '',
      start: false, // Starting the VoiceRecognition
      stop: false, // Stop the VoiceRecognition
      open: false, // Maintain the modal state
      result:'' // Maintain the result state
    };
  1. onStart function to call the VoiceRecognition component only when the Mic Button is pressed.
  2. onEnd to end the Speech Recognition service.
  3. onResult to send the message through the Actions.createMessage() function
onResult = ({interimTranscript,finalTranscript }) => {
    let result = interimTranscript;
    let voiceResponse = false;
    this.setState({result:result});
    if(finalTranscript) {
      result = finalTranscript;
      this.setState({
      start: false,
      result:result,
      stop: false,
      open:false,
      animate:false
      });
      if(this.props.speechOutputAlways || this.props.speechOutput){
        voiceResponse = true;
      }
      Actions.createMessage(result, this.props.threadID, voiceResponse);
      setTimeout(()=>this.setState({result: ''}),400);
      this.Button = <Mic />
    }
  }
  1. Fire the component based on the value of start variable and pass the requisite props as given below in the code.
// Only when the start is ‘true’ call the VoiceRecognition component

    {this.state.start && (
          <VoiceRecognition
            onStart={this.onStart}
            onEnd={this.onEnd}
            onResult={this.onResult}
            continuous={true}
            lang="en-US"
            stop={this.state.stop}
          />
        )}


  1. Update the text in the “Speak Now” Dialog to show the user the Speech to Text conversion
  1. Update the text in the Modal when it is converted from Speech to Text, i.e. when we set the state of the result variable.
{this.state.result !=='' ? this.state.result :
          'Speak Now...'}

To get access to the full code, go to the repository https://github.com/fossasia/chat.susi.ai

Resources

Continue ReadingImplementing Speech to Text for Chrome in SUSI Web Chat