Add Feature to Post Feedback for a Skill in SUSI.AI Server

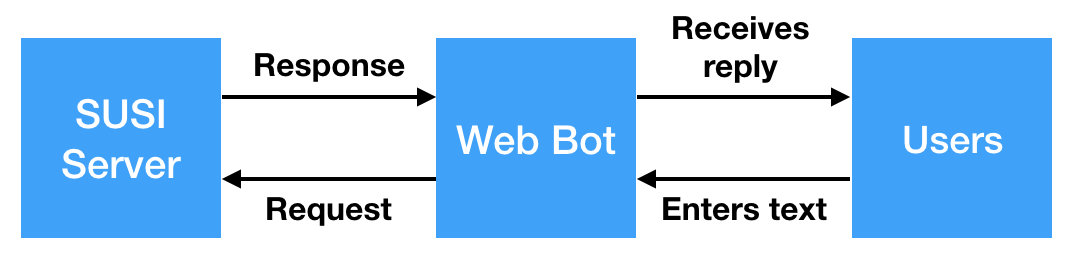
In this blog post, we are going to discuss on how the feature to post user feedback was implemented on the SUSI. AI server side. The API endpoint by which a user can post feedback for a Skill is https://api.susi.ai/cms/feedbackSkill.json.

It accepts five url parameters –

  • model – It tells the model to which the skill belongs. The default value is set to General.
  • group – It tells the group(category) to which the skill belongs. The default value is set to Knowledge.
  • language – It tells the language to which the skill belongs. The default value is set to en.
  • skill – It is the name of the skill to be given a feedback. It is a compulsory param.
  • feedback – It is the parameter that contains the string type feedback of the skill, that the user wants to update.

The minimalUserRole is set to USER for this API, as only logged-in users can use this API.

Going through the API development

  • The parameters are first extracted via the call object that is passed to the main function. The  parameters are then stored in variables. If any parameter is absent, then it is set to the default value.
  • There is a check if the skill exists. It is done by checking, if there exists a file corresponding to that skill. If no, then an exception is thrown.
  • This code snippet discusses the above two points –

@Override
public ServiceResponse serviceImpl(Query call, HttpServletResponse response, Authorization authorization, final JsonObjectWithDefault permissions) throws APIException {

        String model_name = call.get("model", "general");
        File model = new File(DAO.model_watch_dir, model_name);
        String group_name = call.get("group", "Knowledge");
        File group = new File(model, group_name);
        String language_name = call.get("language", "en");
        File language = new File(group, language_name);
        String skill_name = call.get("skill", null);
        File skill = SusiSkill.getSkillFileInLanguage(language, skill_name, false);
        String skill_feedback = call.get("feedback", null);

        JSONObject result = new JSONObject();
        if (!skill.exists()) {
            throw new APIException(422, "Skill does not exist.");
        }
.
.
.


  • Then the  feedbackSkill.json that was initialized in the DAO object, is then opened. It is a JSONTray, which is then parsed.
  • It is checked if the skill is previously rated or not. If yes, has the user rated it before or not. In the case, when the user has given a feedback for it already, we just need to make changes in the feedbackSkill.json file as the feedback_count key present in the skillRatings.json doesn’t change. In case, the user hasn’t given the feedback earlier, the changes also needs to be reflected on the skillRatings.json file. For this use,  the utility function addToSkillRatingJSON is called. The feedback_count of that skill is increased by one, as it is a unique feedback and changes need to be reflected on the file.
  • The response object is then sent with three key values mainly, apart from the session object. They are
    • accepted –  true – It tells that the skill feedback has been updated.
    • message – “Skill feedback updated”
    • feedback –  <feedback> – It is the string that the client has sent as feedback.

Here are code snippets and data objects that will help in understanding the API well –

  • addToSkillRating function –
    public void addToSkillRatingJSON(Query call) {
        String model_name = call.get("model", "general");
        String group_name = call.get("group", "Knowledge");
        String language_name = call.get("language", "en");
        String skill_name = call.get("skill", null);

        JsonTray skillRating = DAO.skillRating;
        JSONObject modelName = new JSONObject();
        JSONObject groupName = new JSONObject();
        JSONObject languageName = new JSONObject();
        JSONObject skillName = new JSONObject();
        if (skillRating.has(model_name)) {
            modelName = skillRating.getJSONObject(model_name);
            if (modelName.has(group_name)) {
                groupName = modelName.getJSONObject(group_name);
                if (groupName.has(language_name)) {
                    languageName = groupName.getJSONObject(language_name);
                    if (languageName.has(skill_name)) {

                        skillName = languageName.getJSONObject(skill_name);
                    }
                }
            }
        }

        if (skillName.has("feedback_count")) {

            int skillFeedback = skillName.getInt("feedback_count");
            skillName.put("feedback_count", skillFeedback + 1 );
        } else {

            skillName.put("feedback_count", 1);
        }
                        
        if (!skillName.has("stars")) {

            JSONObject skillStars = new JSONObject();
            skillStars.put("one_star", "0");
            skillStars.put("two_star", "0");
            skillStars.put("three_star", "0");
            skillStars.put("four_star", "0");
            skillStars.put("five_star", "0");
            skillStars.put("avg_star", "0");
            skillStars.put("total_star", "0");
            skillName.put("stars", skillStars);
        }

        languageName.put(skill_name, skillName);
        groupName.put(language_name, languageName);
        modelName.put(group_name, groupName);
        skillRating.put(model_name, modelName, true);
        return;
    }
}


  • Sample  of feedbackSkill.json file –

{
  "general": {
    "Knowledge": {
      "en": {
        "aboutsusi": [
          {
            "feedback": "The skill is awesome!",
            "email": "email1@domain.com",
            "timestamp": "2018-06-06 02:20:20.245"
          },
          {
            "feedback": "Great!",
            "email": "email2@domain.com",
            "timestamp": "2018-06-06 02:20:20.245"
          }
        ],
        "quotes": [
          {
            "feedback": "Wow!",
            "email": "email1@domain.com",
            "timestamp": "2018-06-06 02:19:53.86"
          }
        ]
      }
    }
  }
}
  • Sample  of skillRatings.json file –

{
  "general": {
    "Knowledge": {
      "en": {
        "aboutsusi": {
          "negative": "0",
          "positive": "0",
          "stars": {
            "one_star": 0,
            "four_star": 2,
            "five_star": 0,
            "total_star": 5,
            "three_star": 3,
            "avg_star": 3.4,
            "two_star": 0
          },
          "feedback_count": 2
        },
        "quotes": {
          "negative": "0",
          "positive": "0",
          "stars": {
            "one_star": 0,
            "four_star": 0,
            "five_star": 0,
            "total_star": 0,
            "three_star": 0,
            "avg_star": 0,
            "two_star": 0
          },
          "feedback_count": 1
        }
      }
    }
  }
}


I hope the development of creating the aforesaid API is clear and proved to be helpful for your understanding.

Continue ReadingAdd Feature to Post Feedback for a Skill in SUSI.AI Server

Adding feature to preview chatbot

You can access all features of SUSI.AI on chat.susi.ai. But this restricts the usage of SUSI.AI to this site only. To solve this issue, we can use a Chatbot which can be embedded on any website and then can be used by the people who visit that website, hence generalising the usage of SUSI.AI.

How to embed SUSI.AI Chatbot on any website?

To embed SUSI.AI Chatbot on any website, go to skills.susi.ai and login and then check out the Botbuilder section. There you can find a deploy button which will give you a code which looks something like this :

<script type="text/javascript" id="susi-bot-script" data-userid="" data-group="" data-language="" data-skill="" src="https://skills.susi.ai/susi-chatbot.js" > </script>


As can be seen from the code above, it is simply a script tag with an id and a custom attribute data-token (which is the unique access token of the User for that session). The source file for this script is susi-chatbot.js. This is the file that is responsible for displaying the Chatbot on the screen.

But, let’s say that you configured your Chatbot in the entire Botbuilder process. So, we need to have a Preview button which could show us a preview of the Chatbot with the chosen configurations, otherwise we would have to test it out by embedding it on our website, which would be tiresome.

How does the Preview Button work?

The code for Botbuilder page is in the Botbuilder.js file.

The code for the Preview button is as follows :

  {!this.state.chatbotOpen?(<RaisedButton
        label='Preview'
        style={{ width: '148px' }}
        onClick={this.injectJS}
    />):(<RaisedButton
        label='Close Preview'
        style={{ width: '148px' }}
        onClick={this.handleChatbotClose}
  />)}


It can be seen that on clicking the ‘Preview’ button, injectJS() function is called, and on clicking the ‘Close Preview’ button, handleChatbotClose() function is called.

     injectJS = () => {
        const myscript = document.createElement('script');
        myscript.type = 'text/javascript';
        myscript.id = 'susi-bot-script';
        myscript.setAttribute('data-token',cookies.get('loggedIn'));
        myscript.src = '/susi-chatbot.js';
        myscript.async = true;
        document.body.appendChild(myscript);
        // some code
    };

     handleChatbotClose = () =>{
      // some code
      $('#susi-launcher-container').remove();
      $('#susi-frame-container').remove();
      $('#susi-launcher-close').remove();
      $('#susi-bot-script').remove();
    }


The above 2 functions are the key functions in understanding how the Preview button is previewing the Chatbot on the screen.

Let us see the functioning of injectJS() function first. Firstly, the createElement() method creates an element node of type ‘script’. We store this element node in a variable myscript. We then add attribute values to the script tag by using myscript.attribute_name = attribute_value. We can add ‘type’, ‘id’, ‘src’ and ‘async’ attributes in this way because they are predefined attributes.

However, we need to also add a custom attribute to store the access_token of the User, because we would need to pass down this information to detect the owner of the Chatbot. To add a custom attribute, we use the following code :

myscript.setAttribute('data-token',cookies.get('loggedIn'));


This add a custom attribute ‘data-token’ and sets its value to the access token of the session, which would later be used to identify the User.

This script is then appended to the body of the document. As soon as the script is appended to the page, 3 new <div> tags are created and added to the page’s HTML. These 3 <div> tags contain the code for the UI and functionality of the Chatbot itself.

Next, let us look at the functioning of handleChatbotClose() function. This function’s basic objective is to close the Chatbot and remove the 3 components that were rendered as a result of the injectJS() function, and also remove the script itself. As can be seen from the code of the function, we are removing the 4 components which can be seen in the above image of the developer console.

So, this is how the Preview functionality has been added to the Chatbot. Visit https://skills.susi.ai and login to check out the Botbuilder section to try it out.

Resources

Continue ReadingAdding feature to preview chatbot

How api.susi.ai responds to a query and send response

A direct way to access raw data for a query is https://api.susi.ai. It is an API of susi server which sends responses to a query by a user in form of a JSON (JavaScript Object Notation) object (more on JSON here). This JSON object is the raw form of any response to a query which is a bunch of key (attribute) value pair. This data is then send from the server to various APIs like chat.susi.ai, susi bots, android and ios apps of SUSI.AI.

Whenever a user in using an API, for example chat.susi.ai, the user send a query to the API. This query is then sent by the API as a request to the susi server. The server then process the request and sends the answer to the query in form of json data as a response to the request. This request is then used by the API to display the answer after applying stylings to the json data.

Continue ReadingHow api.susi.ai responds to a query and send response

How to integrate SUSI.AI with Google Sign In API

Google Sign-In manages the OAuth 2.0 flow and token lifecycle, simplifying our integration with Google APIs. A user always has the option to revoke access to an application at any time. Users can see a list of all the apps which they have given permission to access their account details and are using the login API. In this blog post I will discuss how to integrate this API with susi server API to enhance our AAA system. More on Google API here.

Continue ReadingHow to integrate SUSI.AI with Google Sign In API

How does conversation view of bot wizard work in the SUSI.AI Botbuilder?


Earlier, we could view the skills in code view only in SUSI.AI. Code views shows user queries along with bot responses in a simple form. Different types of responses are coded in different ways and there’s a proper documentation for it here. While this works for a developer, it’s not user friendly. The main purpose of a chatbot web plugin is that user should be able to customise it. User should be able to add skills. Hence we need a conversation view to better show the skills of SUSI.

Fetching data from code view and its storage form:

Skill data from code view is fetched and then stored in the following form:

{
   userQueries: [],
   botResponses: [],
}

This is stored in an object called conversationData.
userQueries stores an array of all the user queries. Similarly, botResponses stores the answers to these queries.
For the query at index 0 of the array in userQueries, the response is at index 0 of botResponses. For the query at index 1 of the array in userQueries, the response is at index 1 of botResponses. The queries and responses are stored in this way.

For example:
If the query is: “Hi|Hello” and the response is “Hi. I am SUSI.|Hello!”
Then the object conversationData will look like this:

{
   userQueries: [[‘Hi’, ‘Hello’]],
   botResponses: [[‘Hi. I am SUSI’, ‘Hello!’]],
}

You can see that index 0 of userQueries holds the queries and botResponses holds its responses.
An example of data from code view getting stored in object conversationData.

::name <Skill_name>
::author <author_name>
::author_url <author_url>
::description <description>
::dynamic_content <Yes/No>
::developer_privacy_policy <link>
::image <image_url>
::terms_of_use <link>

Hi|Hello
Hi. I’m a chatbot.

I need help.|Can you help me?
Sure! I’ll help you. What do you want help with?

How do I track my order?|I need to track my order.
Please tell me the order id.

This will be stored in conversationData in the following way:

{
   userQueries: [
      [‘Hi’, ‘Hello’],
      [‘I need help.’, ‘Can you help me?’],
      [‘How do I track my order?’, ‘I need to track my order.’]
   ],
   botResponses: [
      [Hi. I’m a chatbot.],
      [‘Sure! I’ll help you. What do you want help with?’],
      [‘Please tell me the order id.’]
   ],
}

Rendering data in conversation view:

The data collected in conversationData object is passed to conversation view JS file as props. Now this data can be rendered by injecting HTML elements using jQuery but that is not a right approach. So, we use an array to render it. We pass the HTML elements into the array using the push() method.

This will be more clear from the following code snippets.

This is the code for adding user query:

for (let query of user_query) {
   if (query !== ‘’) {
      conversation.push(
            <div className=”user-text-box”>{query}</div>,
      );
   }
}

This is the code for adding bot response:

for (let response of bot_response) {
   if (response !== ‘’) {
      conversation.push(
            <div className=”bot-text-box”>{response}</div>,
      );
   }
}

References:


Continue ReadingHow does conversation view of bot wizard work in the SUSI.AI Botbuilder?

How to receive different types of messages from SUSI Line Bot

In this blog, I will explain how to receive different types of messages responses from LINE Bot. This includes text, sticker, video, audio, location etc types of responses. Follow this tutorial to make SUSI AI LINE Bot.

How does LINE Messaging API work?

The messaging API of LINE allows data to be passed between the server of SUSI AI and the LINE Platform. When a user sends a message to SUSI bot, a webhook is triggered and the LINE Platform sends a request to our webhook URL. SUSI Server then sends a request to the LINE Platform to respond to the user. Requests are sent over HTTPS in JSON format.

Different Message types

  1. Image Messages

To send images, we need two things, the URLs of original image and smaller preview image in the message object. The preview image will be displayed in text and full image is displayed when user clicks on the preview image.
The message object for image message has 3 properties –

Property

Type

Description

type

String

image

originalContentUrl

String

Image URL

previewImageUrl

String

Preview image URL

Sample Message object:

{
   "type": "image",
   "originalContentUrl": "https://susi.ai/original.jpg",
   "previewImageUrl": "https://susi.ai/preview.jpg"
}
  1. Video Messages

To send videos, we need two things, the URL of video file and URL of preview image of video in the message object.
The message object for video messages has 3 properties:

Property

Type

Description

type

String

image

originalContentUrl

String

Video file URL

previewImageUrl

String

Preview image URL

Sample Message object for video type responses:

{
   "type": "video",
   "originalContentUrl": "https://susi.ai/original.mp4",
   "previewImageUrl": "https://susi.ai/preview.jpg"
}
  1. Audio Messages

To send an audio message, you have to include the URL to audio file and the duration in the message object.
The message object for audio messages has 3 properties:

Property

Type

Description

type

String

image

originalContentUrl

String

Audio file URL

duration

Number

Length of the Audio file in milliseconds

Sample Message object for audio type responses:

{
   "type": "audio",
   "originalContentUrl": "https://susi.ai/original.m4a",
   "duration": 10000
}
  1. Location Messages

To send location information to users, you need to include title, address, latitude and longitude of the location.
The message object needs to include 5 properties:

Property

Type

Required

Description

type

String

Required

location

title

String

Required

Title

address

String

Required

Address

latitude

Decimal

Required

Latitude

longitude

Decimal

Required

Longitude

Sample Message object for location type responses:

{
   "type": "location",
   "title": "singapore",
   "address": "address",
   "latitude": 1.2896698812440377,
   "longitude": 103.85006683126556
}

How to use these Message objects?

You have to send the response that you got from SUSI server to LINE platform. Now this response is sent in the form of an object. This object tells the LINE platform about the type of this message. So simply sending this object to reply API of LINE sends the message to user.
It looks like this:

return client.replyMessage(event.replyToken, answer);

References:

Continue ReadingHow to receive different types of messages from SUSI Line Bot

How does SUSI AI web bot plugin work


In this blog, we’ll learn how SUSI AI web plugin works. Normally, for any bot like Kik bot, we don’t have to worry about the chat boxes or the way chatbot is rendered on screen because all of that is handled by the service on which we are building our bot. So, for these bots, we simply take the text input from user, send a GET request to SUSI server, receive the response and display it.

This is not the case with SUSI AI Web Bot plugin. In this case, there is not Bot platform.

Hence, there are a lot of other things that we need to take care of here. Let’s explore the main ones among them.

Adding bot to website:

The final product that we’re going to provide to the client is going to be just a JavaScript code. Hence the HTML code of bot widget needs to be added to the <body> of the website. This is done usingappend() method of jQuery. The html() method sets or returns the content (innerHTML) of selected elements.

Syntax:

$(selector).append(content)

So we store the HTML code of bot widget in a variable and then returns the content of that variable to the body tag using:

$("body").append(mybot);

Here “mybot” is the variable containing HTML code of bot widget.
The text boxes of user texts and bot texts are added to a HTML element in the same way.

Event handling:

JavaScript’s interaction with HTML is handled through events that occur when the user or the browser manipulates a page. Loading of the page, clicking, pressing a key, closing a window, resizing the window etc are all examples of events.

In the SUSI AI web bot, there are two major events.

  1. Clicking a button

This is required for allowing clicks on send button. Clicking of a button can be done in many ways. There are two major ways that are used in SUSI AI web bot.

Some elements already exist on the webpage. For example – the HTML code of web bot. It is added to the body tag as soon as webpage loads. For these elements we use click(). The click() binding is called “direct” binding which can be attached to the elements that already exists.

Syntax:

$(selector).click(function);

Selector – Class, ID or name of HTML element.
Function – Specifies the function to run when click event occurs.

Some elements are dynamically generated. This means that they are added at a later point of time. For example – the text messages are added when user types in. This happens after loading of page. For this, we have to create “delegated” binding by using on() method.

Syntax:

$(selector).on(event,childSelector,data,function);

Selector – Class, ID or name of HTML element
Event – (Required) Specifies one or more event(s) or namespaces to attach to the selected elements.
childSelector – (Optional) Specifies that the event handler should only be attached to the specified child elements
Data – (Optional) Specifies additional data to pass along to the function
Function – Specifies the function to run when click event occurs.

  1. Pressing the enter key

For identifying which key is pressed, we use key codes. The code for enter key is 13.
The on() method is used for handling this event. It’ll be clear from the following code snippet:

Keyup – Keyboard key is released
Keypress – Keyboard key is pressed

$('#txMessage').on('keyup keypress', function(e) {
        var keyCode = e.keyCode || e.which;
        var text = $("#txMessage").val();
        if (keyCode === 13) {
                if(text == "" ||  $.trim(text) == '') {
                        e.preventDefault();
                        return false;
                } else {
                        $("#chat-input").blur();
                        setUserResponse(text);
                        send(text);
                        e.preventDefault();
                        return false;
                }
        }
});

This is the code used to handle “enter” key event in SUSI AI web bot. Here “txMessage” is the id of text box where user entered text.

Making GET HTTP request to SUSI Server

We use ajax() method of jQuery to perform an asynchronous HTTP request to SUSI Server. Looking at the code will make things more clear:

$.ajax({
        type: "GET",
        url: baseUrl+text,
        contentType: "application/json",
        dataType: "json",
        success: function(data) {
                main(data);
        },
        error: function(e) {
                console.log(e);
        }
});

This is a GET type Ajax request. The endpoint of SUSI API is in url . We can see from dataType that the response received will be a JSON file. If the file is successfully received then main function is called else the error is logged into console.

References :

Continue ReadingHow does SUSI AI web bot plugin work

How to make SUSI AI Twitch Bot

In this blog post, we’ll learn how to make SUSI AI Twitch botSUSI.AI is an intelligent Open Source personal assistant. SUSI AI Bots are built to enable users to chat with SUSI on different clients. Twitch is a live streaming video platform. We can integrate SUSI AI to the live chat on any of its channels.

Pre-requisites:

  1. A Main Twitch account (This is the account on whose channel users would be able to talk to SUSI)
  2. A separate Twitch account for SUSI.
  3. GitHub Account

Create a GitHub from here – Sign up on GitHub

  1. Heroku Account

To create Heroku account, go to Heroku and click on Sign Up.

  1. Node.js

Install Node.js from https://nodejs.org/en/ if it isn’t installed already on your computer.

To check if node is already installed or not, open terminal and type the command:

node -v

If you see something like this – (version can be different)

v9.4.0

Then Node.js is installed on your computer and you can follow along.

Procedure:

You can either fork susi_twitchbot repository and then simply deploy it on Heroku to create SUSI AI Twitch bot or you can create a new repository on your account then deploy it. The following section will describe how to create a new repository for SUSI AI Twitch bot. If you want to deploy susi_twitchbot directly then skip this section and directly move on to the deployment section.

Creating the SUSI AI Twitch codebase:

1. Create a folder on your computer with any name. Open terminal and change your current directory to the new folder that you just created.

2. Type npm init command and enter details like name, version etc. (preferably just keep pressing enter key and let the values stay default)

3. Create a file with the same name that you wrote in entry point (index.js by default). NOTE – It should be in the same folder that you created earlier.

4. In the same folder, type the following commands in command line –

npm i -s tmi.js

We need tmi.js module to easily interact with Twitch messaging interface. For more details, visit https://www.tmijs.org/.

npm i -s request

We need request module to make a GET request to the SUSI API and retrieve JSON data for a particular query.

npm i -s express

We need express module to create successful connection with Heroku through the port provided by it.

5. Open package.json file. It should look like this:

(Adding “start” script is necessary for deploying the app on Heroku)

{
  "name": "susi_twitchbot",
  "version": "1.0.0",
  "description": "SUSI.AI Twitchbot",
  "main": "index.js",
  "scripts": {
    "start": "node index.js"
  },
  "author": "",
  "license": "ISC",
  "dependencies": {
    "express": "^4.16.3",
    "request": "^2.86.0",
    "tmi.js": "^1.2.1"
  }
}

6. Copy the following code into the file that you created i.e. index.js

var tmi = require('tmi.js');
var request = require('request');
const express = require('express');
const app = express();
const userChannel = process.env.CHANNEL;

var ans;
var options = {
        options: {
                debug: true
        },
        connection: {
                reconnect: true
        },
        identity: {
                username: process.env.USERNAME,
                password: process.env.OAUTH_TOKEN
        },
        channels: [userChannel]
};

var client = new tmi.client(options);
// Connect the client to the server
client.connect();
client.on('chat', function(channel, userstate, message, self){
        if(message.includes("@"+process.env.USERNAME)){ // checking if SUSI is tagged
                var u = message.split("@" + process.env.USERNAME + " ");
                // Setting options to make a successful call to SUSI API
                var options1 = {
                        method: 'GET',
                        url: 'http://api.susi.ai/susi/chat.json',
                        qs:
                        {
                                timezoneOffset: '-300',
                                q: u[1]
                        }
                };
                request(options1, function(error, response, body) {
                        if (error) throw new Error(error);
                        if((JSON.parse(body)).answers[0])
                                ans = userstate['display-name'] + " " + (JSON.parse(body)).answers[0].actions[0].expression;
                        else
                                ans = userstate['display-name'] + " Sorry, I could not understand what you just said."
                
                        client.action(userChannel, ans);
                });
        }
});

client.on('connected', function(address, port){
        client.action(userChannel, `Hi, I'm SUSI. Mention me using @${process.env.USERNAME} to chat with me.`);
});
const port = process.env.PORT || 3000;
app.listen(port, () => {
   console.log(`Listening on ${port}`);
});

7. Before we can deploy this bot to Heroku, we have to make a GitHub repository for it. For making a github repository for the chatbot, follow these steps:

In the command line, change current directory to the folder we created above for the bot and type in the following commands.

git init
git add .
git commit -"initial"

Now, you have to create a Github repository, follow these steps to do that –

  1. Go to https://github.com/ and login.
  2. Create a new repository. Choose any name.
  3. Get the URL for remote repository and copy it.

Again go to the command line, change current directory to the folder we created above for the bot and type in the following commands.

git remote add origin <URL for remote repository that you just copied>
git remote -v
git push -u origin master

Setting up SUSI bot account on Twitch:

In order to set up SUSI AI bot on Twitch, go to http://twitchapps.com/tmiclick on “Connect with Twitch” and login to the account that will be used as SUSI AI bot. This will generate an OAuth tokenSave it for later use.

Deploying the Bot on Heroku:

  1. Got to Heroku and login.
  2. Go to dashboard and create a new app.
  3. After creating an app, go to Deploy and choose “GitHub” for Deployment method.

  1. Search for the repository that you created on GitHub or select susi_twitchbot after forking it. Connect to it in “App connected to GitHub”.
  2. Enable Automatic deployment.

  1. Now go to Settings and add the following config vars “CHANNEL”, “OAUTH_TOKEN”, “USERNAME” and “HEROKU_URL”.
  • The key of “CHANNEL” is the channel name on which you’d like to talk to SUSI.
  • The key of “OAUTH_TOKEN” is the OAuth key that you generated earlier. (Remember to include “oauth:” in the key)
  • The key of “USERNAME” is the username of the Twitch account you created for SUSI AI.
  • The key of “HEROKU_URL” is “http://<your_app_name>.herokuapp.com” (write ‘http’ and not ‘https’).

  1. Go to Deploy, Press “Deploy Branch” under “Manual Deployment”.

Now your SUSI AI Twitch bot is successfully deployed on Heroku. Go to your Twitch channel and mention your SUSI account using ‘@’ and start talking to SUSI!

Here, ‘dns4044′ is the owner of channel, ‘testdns’ is some user on the channel and ‘susiaibot’ is SUSI AI Twitch bot.

References:

Continue ReadingHow to make SUSI AI Twitch Bot

Demystifying a travis.yml file

In this blog post, we are going to demystify a travis.yml file. For reference, we will be using the travis configuration used in the  SUSI skill CMS project. But before delving into it, I would like to just give a brief introduction about Continuous Integration (CI) and Travis CI.

What is CI and Travis ?

Continuous Integration represents the practice of integrating a piece of work as early as possible instead of later so that one can receive immediate and frequent feedback on things that are wrong.

“ Continuous Integration is the practice of merging all developer working copies to a shared mainline several times a day.

-Wikipedia

Travis CI is a hosted continuous integration platform that is free for all open source projects hosted on Github. With just a file called .travis.yml containing some information about our project, we can trigger automated builds with every change to our code base in the master branch, other branches or even a pull request.

sudo: required
dist: trusty
language: node_js

node_js:
  - 6

script:
  - npm test

after_success:
 - bash ./pr_deploy.sh
 - bash ./deploy.sh

cache:
  directories:
    - node_modules

branches:
  only:
    - master

Travis configuration file of susi_skill_cms

Part-wise explanation of the file

  • When specifying sudo: required, Travis CI runs each build in an isolated Google Compute Engine virtual machine that offer a vanilla build environment for every build. This has the advantage that no state persists between builds, offering a clean slate and making sure that the tests run in an environment built from scratch. Builds have access to a variety of services for data storage and messaging, and can install anything that’s required for them to run.
  • The keyword dist represents the virtualization environment that is being used. trusty here refers to the distribution of the Linux environment used.
  • The keyword language represents the programming language that is be used for the project. The language used for the project is nodeJs.
  • Then follows the version details of node_js that is to be used. The node_js version used is 6.
  • This is the step where Travis runs the test script. Unless otherwise specified, it runs the default for the set language. In the case of node, it does node_js. The script stands for the build script that would be executed during the build process. The default build script for nodeJs is npm test. The result of execution of npm test can be found from the package.json file. It executes the npm run lint && react-scripts test –env=jsdom command, which is responsible for checking the linting issues and runs various unit and snapshot tests. We can add multiple lines of command to be executed.
  • The after_success block runs after the entire script is done. It’s the last step in the normal build process has been executed successfully. It has 2 commands to be executed –
    • bash ./pr_deploy.sh : Responsible for making a surge deployment of each PR
    • bash ./deploy.sh : Responsible for making a deployment to master branch
  • Travis CI can cache content that does not often change, to speed up the build process. The cache setting caches the node_modules directory, without the need to install the dependencies repeatedly.
  • We can specify certain branches to run, either by specifying a white list (using only keyword) or a black list (using except keyword). Here, the configuration mentions to run the build only for PRs to master branch.

Resources

Continue ReadingDemystifying a travis.yml file

Persisting Cookies over SUSI.AI Subdomains

In this blog post, we are going to see, how the cookies are persisted for all the subdomains of SUSI.AI. By this implementation, the session for the user is maintained over all the SUSI.AI websites.

The cookies are persisted over these SUSI.AI websites –

All the web clients are developed using ReactJs framework and for the manipulation of cookies in React, a npm package – universal-cookie is used. Firstly, we will see how the cookies are set/created during login, followed by removal of cookies during logout.

Creating cookies

  • Firstly, we need to import the universal-cookie package into the component and create an instance of it.
import Cookies from 'universal-cookie';
const cookies = new Cookies();

Now, we can set a new cookie using this instance of cookies.

  • The following snippet sets the cookies after the login is done.

// AJAX call for login

let email = this.state.email.trim();
$.ajax({
  url: loginEndpoint,
  dataType: 'jsonp',
  jsonp: 'callback',
  crossDomain: true,
  success: function(response) {
  if (response.accepted) {
    cookies.set('serverUrl', BASE_URL, {
      path: '/',
      domain: '.susi.ai',
    });
    let accessToken = response.access_token;
    let state = this.state;
    let time = response.valid_seconds;
    this.handleOnSubmit(email, accessToken, time);
  }.bind(this),
  error: function(errorThrown) {
    .
    .
    .
  }.bind(this)    
});

handleOnSubmit = (email, loggedIn, showAdmin, time) => {
  let state = this.state;
  if (state.success) {
    cookies.set('loggedIn', loggedIn, {
      path: '/',
      maxAge: time,
      domain: '.susi.ai',
    });
    cookies.set('emailId', this.state.email, {
      path: '/',
      maxAge: time,
      domain: '.susi.ai',
    });
    this.props.history.push('/', { showLogin: false });
    window.location.reload();
  } else {
    this.setState({
      error: true,
      accessToken: '',
      success: false,
    });
  }
};


  • The cookies.set is a function provided by the package, that takes in three (3) parameters –
    • Cookie name
    • Cookie vallue
    • Options – an object containing the cookies properties
  • In the above example, say setting the loggedIn cookie, that contains the access token. We set the cookie name as loggedIn, the cookie value equal to the access token value received from the server response.
  • Apart from that, we have set 3 properties of the cookies, by passing an optional options parameter to the set function.
    • path – It indicates a URL path that must exist in the requested URL in order to send the Cookie header.
    • domainIt specifies allowed hosts to receive the cookie. If unspecified, it defaults to the host of the current document location, excluding subdomains.
    • maxAgeIt specifies a time duration after which the cookie gets expired.

Deleting cookies

  • It is mainly used, when a user wants to logout. It is used in the Logout component of the client’s codebase.
  • An approach to delete/remove a cookie is to set the expiry date of the cookie as Thu, 01 Jan 1970 00:00:01 GMT, which results in the removal of the cookie after a page refresh.
  • Following is the code snippet of how the cookies are removed to log-out a user of the website.

.
.
.
let deleteCookie = function(name, options = {}) {
  let cookieString = `${name}=;expires=Thu, 01 Jan 1970 00:00:01 GMT;`;
  if (options.domain) {
    cookieString = `${cookieString}domain=${options.domain};`;
  }
  if (options.path) {
    cookieString = `${cookieString}path=${options.path};`;
  }
  document.cookie = cookieString;
};
.
.
.
.
deleteCookie('loggedIn', { domain: '.susi.ai', path: '/' });
deleteCookie('serverUrl', { domain: '.susi.ai', path: '/' });
deleteCookie('emailId', { domain: '.susi.ai', path: '/' });
deleteCookie('showAdmin', { domain: '.susi.ai', path: '/' });
deleteCookie('username', { domain: '.susi.ai', path: '/' });


  • The deleteCookie function takes in 2 params –
    • Cookie name
    • options – an object containing the cookies properties
  • The options parameter needs to be passed while deleting the cookie, as it defines the scope for which the cookie has to be deleted.
  • The function creates a string and appends to it the expiry date, path, domain to the cookie name, if provided.
  • Finally, it sets the cookie by assigning the string to the document object.

Resources

Continue ReadingPersisting Cookies over SUSI.AI Subdomains