Retrofit to make API calls in SUSI.AI Android Client

In the SUSI.AI app, I found the extensive use of “Retrofit” to make API calls to the server. While working on a part of the app, I faced some difficulty regarding the implementation of “Retrofit”.  Though I learned and overcame the problems, I realized that others would face a similar problem. So, today I am writing this blog explaining how to implement “Retrofit” using the help of “SUSI.AI” android client.

Working of API Calls:

Android networking or any networking works in the following way:

  • Request— An HTTP request is made to a certain URL, with all the supplied parameters.
  • Response — The request created returns a response, usually in the JSON format.
  • Parse & Store —The JSON returned is parsed and is being used accordingly.

In Android, we use —

  • Okhttp — For creating an HTTP request with all the proper headers
  • Retrofit — For making the request
  • Moshi / GSON — For parsing the JSON data
  • Kotlin Coroutines — For making non-blocking (main thread) network requests.
  • Picasso / Glide— For downloading an image from the internet and setting it into an ImageView.

Obviously, these are just some of the popular libraries but there are others too.

How to use Retrofit?

First of all we need to import certain libraries in the app level gradle file.

Don’t forget to add the following in the manifest file.

Now, create an interface. The API link mentioned in the interface would be used to fetch data from the server.

Now create a class to parse the JSON data.  Here, we have used a Gson Converter and so the JSON response is automatically converted to the respective.

Here Session and Settings are also a data class. These data classes are framed according to the response that we receive.

Now, create a Retrofit Builder with Base URL and GsonConverterFactory. This builder will be useful to make the API calls.

Create a service for Retrofit with your service interface. Then, create a queue which will be used to de-serialize the JSON. 

Resources: 

Documentation: Retrofit

Blog: Retrofit

Tutorial: Retrofit Video Tutorial

SUSI.AI Android App: PlayStore GitHub

Tags:

SUSI.AI Android App, Kotlin, SUSI.AI, FOSSASIA, GSoC, Android, Retrofit, API calls

Continue ReadingRetrofit to make API calls in SUSI.AI Android Client

Enable Server Configuration with Okhttp and Retrofit in Open Event Attendee Application

The open event attendee is an android app which allows users to discover events happening around the world using the Open Event Platform. It consumes the APIs of the open event server to get a list of available events and can get detailed information about them.

We are using default API for eventyay app. Server configuration is something when we replace backend API with a new one and perform the same applications with the different server. As it is a fully open-source project on F-droid, so we have enabled the server configuration field for the F-droid build variant. 

  • Retrofit and okhttp for network calls
  • Create a feasible UI and set the link to preferences
  • Create interceptor for changing API URL
  • Add interceptor in okhttp client builder
  • Conclusion
  • Resources 

Let’s analyze every step in detail.

Retrofit and Okhttp for Network Call

Using Retrofit for your Android app’s networking can make your life so much easier. However, Retrofit’s design requires a single Retrofit instance for each API with a different base URL. Consequently, if your app is talking to two or more APIs (under different URLs), you’ll need to deal with at least two Retrofit instances.

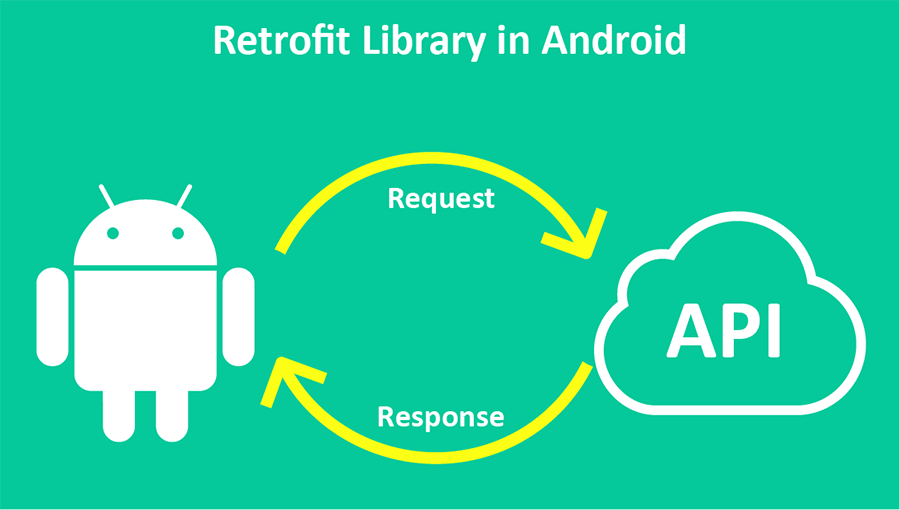
Retrofit is a type-safe REST client for Android, Java, and Kotlin developed by Square. The library provides a powerful framework for authenticating and interacting with APIs and sending network requests with OkHttp.

OkHttp communicating with the server- 

Design UI and set the link to preferences with MVVM

Create a simple dialog with a checkbox with default URL and a EditText:

<?xml version="1.0" encoding="utf-8"?>
<LinearLayout xmlns:android="http://schemas.android.com/apk/res/android"
    android:orientation="vertical" android:layout_width="match_parent"
    android:layout_height="match_parent">

    <CheckBox
        android:id="@+id/urlCheckBox"
        android:layout_margin="@dimen/layout_margin_large"
        android:layout_width="match_parent"
        android:layout_height="wrap_content" />

    <com.google.android.material.textfield.TextInputLayout           style="@style/Widget.MaterialComponents.TextInputLayout.OutlinedBox.Dense"
        android:id="@+id/urlTextInputLayout"
        android:layout_margin="@dimen/layout_margin_large"
        android:hint="@string/other_url"
        android:layout_width="match_parent"
        android:layout_height="wrap_content">

        <com.google.android.material.textfield.TextInputEditText
            android:id="@+id/urlEditText"
            android:layout_width="match_parent"
            android:layout_height="wrap_content" />
    </com.google.android.material.textfield.TextInputLayout>
</LinearLayout>

Handle visibility if the dialog and display for only F-droid build:

preferenceScreen.findPreference<PreferenceCategory>(getString(R.string.key_server_configuration))?.isVisible = BuildConfig.FLAVOR == FDROID_BUILD_FLAVOR

Set current API to preference screen:

preferenceScreen.findPreference<Preference>(getString(R.string.key_api_url))?.title =
            settingsViewModel.getApiUrl()

Get API from View model: 

fun getApiUrl(): String {
        return preference.getString(API_URL) ?: BuildConfig.DEFAULT_BASE_URL
    }

Setup alert dialog:

if (preference?.key == getString(R.string.key_api_url)) {
            showChangeApiDialog()
        }
private fun showChangeApiDialog() {
        val layout = layoutInflater.inflate(R.layout.dialog_api_configuration, null)
        layout.urlCheckBox.text = BuildConfig.DEFAULT_BASE_URL

        val dialog = AlertDialog.Builder(requireContext())
            .setView(layout)
            .setPositiveButton(getString(R.string.change)) { _, _ ->
                val url = if (layout.urlCheckBox.isChecked) BuildConfig.DEFAULT_BASE_URL
                                else layout.urlEditText.text.toString()
                if (url === settingsViewModel.getApiUrl()) return@setPositiveButton
                settingsViewModel.changeApiUrl(url)
                view?.snackbar("API URL changed to $url")
                findNavController().popBackStack(R.id.eventsFragment, false)
            }
            .setNegativeButton(getString(R.string.cancel)) { dialog, _ -> dialog.cancel() }
            .setCancelable(false)
            .show()
        dialog.getButton(AlertDialog.BUTTON_POSITIVE).isEnabled = false

        layout.urlCheckBox.setOnCheckedChangeListener { _, isChecked ->
            layout.urlTextInputLayout.isVisible = !isChecked
            dialog.getButton(AlertDialog.BUTTON_POSITIVE).isEnabled = isChecked
        }

Set URL to preferences in the view model and end current session:

fun changeApiUrl(url: String) {
        preference.putString(API_URL, url)
        logout()
    }

Create Interceptor to Handle New API URL

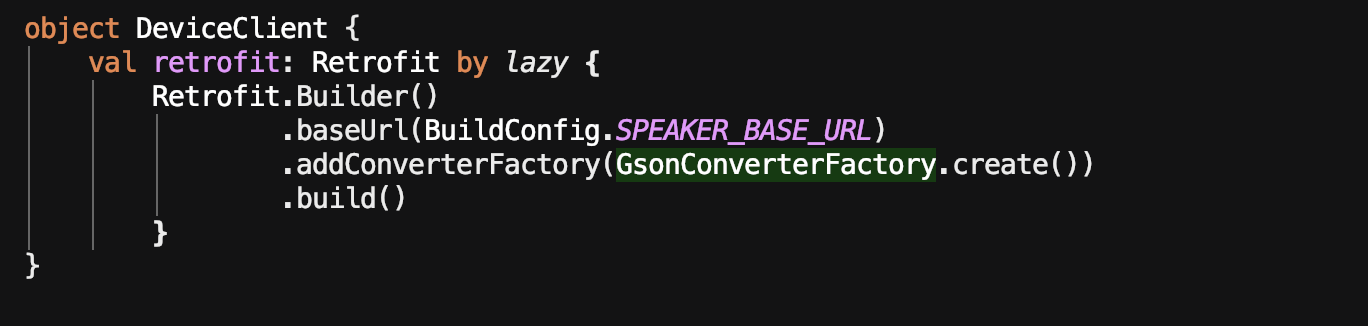
Here default API URL is set to the retrofit already: 

Retrofit.Builder()
            .client(get())
            .baseUrl(baseUrl)
            .build()

As we discussed earlier OkHttp handles every network call for the application. So here we track the URL host from the okhttp interceptor. If the URL host is equaled to the default API URL host, then we can say that it is an API call and then we can replace same with the host getting from preferences if it is not null and set the interceptor to okhttp client builder.

Create host selection interceptor class to return interceptor with the API URL:

class HostSelectionInterceptor(private val preference: Preference) : Interceptor {

    override fun intercept(chain: Interceptor.Chain): Response {
        var original = chain.request()
        val httpUrl = preference.getString(API_URL)?.toHttpUrlOrNull()
        if (original.url.host == BuildConfig.DEFAULT_BASE_URL.toHttpUrlOrNull()?.host && httpUrl != null) {
            val newUrl =
                original.url.newBuilder()
                    .scheme(httpUrl.scheme)
                    .host(httpUrl.host)
                    .port(httpUrl.port)
                    .build()
            original = original.newBuilder()
                .url(newUrl)
                .build()
        }
        return chain.proceed(original)
    }
}

Set the interceptor to okhttp client builder:

val builder = OkHttpClient().newBuilder()
            .addInterceptor(HostSelectionInterceptor(get()))

GIF

In a Nutshell

Server configuration provides better user experience for open-source platform and developer, as they can mention their own server and test it.

Resources

OkHttp client with retrofit: https://futurestud.io/tutorials/retrofit-2-share-okhttp-client-and-converters-between-retrofit-instances

Tags

Eventyay, open-event, OkHttp, Retrofit, FOSSASIA, GSoC, Android, Kotlin

Continue ReadingEnable Server Configuration with Okhttp and Retrofit in Open Event Attendee Application

Swipe to Check In/Out in Open Event Organizer App

Open Event Organizer App didn’t provide any option for the Event Organizer to view the list of Attendees present under an Order and check them in/out the event. Therefore, we designed a system such that the Organizer can just swipe the attendee present under an order to check them in or out. In this blog post, I will discuss how we implemented this functionality in Open Event Organizer App without using any third party libraries.

Specifications

We will create a separate class SwipeController.java which extends ItemTouchHelper.SimpleCallback and provide the swiping functionalities to our plain old recyclerview. We will call the super constructor with ItemTouchHelper.LEFT and ItemTouchHelper.RIGHT as arguments to provide left as well as right movements in each recyclerview list item. The bitmaps and paint object initialized here will be used later in onDraw.

public SwipeController(OrderDetailViewModel orderDetailViewModel, OrderAttendeesAdapter orderAttendeesAdapter, Context context) {
super(0, ItemTouchHelper.LEFT | ItemTouchHelper.RIGHT);
this.orderDetailViewModel = orderDetailViewModel;
this.orderAttendeesAdapter = orderAttendeesAdapter;

closeIcon = BitmapFactory.decodeResource(context.getResources(), R.drawable.close);
doneIcon = BitmapFactory.decodeResource(context.getResources(), R.drawable.done);

paintGreen.setColor(context.getResources().getColor(R.color.light_green_500));
paintRed.setColor(context.getResources().getColor(R.color.red_500));
}

Next, we will override getMovementFlags method. This method decides the allowed movement directions for each recyclerview item. The deciding logic is that, if an attendee is checked in then the allowed movement is left to check out and if an attendee is checked out then the allowed movement is right to check in. If neither of the above case, then both movements are allowed.

@Override
public int getMovementFlags(RecyclerView recyclerView, RecyclerView.ViewHolder viewHolder) {
int dragFlags = 0;

If (orderDetailViewModel.getCheckedInStatus(

viewHolder.getAdapterPosition()) == null)
makeMovementFlags(dragFlags, ItemTouchHelper.LEFT | ItemTouchHelper.RIGHT);

if (orderDetailViewModel.getCheckedInStatus(

viewHolder.getAdapterPosition())) {
return makeMovementFlags(dragFlags, ItemTouchHelper.LEFT);
} else {
return makeMovementFlags(dragFlags, ItemTouchHelper.RIGHT);
}
}

The onChildDraw method involves the code doing actual drawing. The variables used in code are discussed below.

  1. ActionState – Checks the state of the recycler view item. We proceed with the below logic if the item is being swiped.
  2. dX – The distance by which the item is swiped. Positive for left and negative for right.
  3. Background – Background of the viewholder. Rectangular in shape and dimensions changed with change in dX.
  4. IconDest – Calculates the position where the icons (close icon or done icon) is placed in canvas
  5. Canvas – Java Canvas on which the drawing is done. We set the background and draw the bitmaps on their location in canvas.
@Override
public void onChildDraw(Canvas canvas, RecyclerView recyclerView, RecyclerView.ViewHolder viewHolder,
float dX, float dY, int actionState, boolean isCurrentlyActive) {
if (actionState == ItemTouchHelper.ACTION_STATE_SWIPE) {
View itemView = viewHolder.itemView;
float height = (float) itemView.getBottom() – (float) itemView.getTop();
float width = height / 3;
RectF background;
Paint paint;
Bitmap icon;
RectF iconDest;

if (dX > 0) {
background = new RectF((float) itemView.getLeft(), (float) itemView.getTop(), dX,
(float) itemView.getBottom());
paint = paintGreen;
icon = doneIcon;
iconDest = new RectF((float) itemView.getLeft() + width,
(float) itemView.getTop() + width, (float) itemView.getLeft() + 2 * width,
(float) itemView.getBottom() – width);
} else {
background = new RectF((float) itemView.getRight() + dX, (float) itemView.getTop(),
(float) itemView.getRight(), (float) itemView.getBottom());
paint = paintRed;
icon = closeIcon;
iconDest = new RectF((float) itemView.getRight() – 2 * width,
(float) itemView.getTop() + width, (float) itemView.getRight() – width,
(float) itemView.getBottom() – width);
}

canvas.drawRect(background, paint);
canvas.drawBitmap(icon, null, iconDest, paint);
}
super.onChildDraw(canvas, recyclerView, viewHolder, dX, dY, actionState, isCurrentlyActive);
}

Now after the item is swiped out or in, we need to restore its original state again. For this we override the onSwiped method and call notifyItemChanged(). Also, the changes in UI (showing green side strip for checked in and red side strip for checked out) are done by. We call the toggleCheckin() method in ViewModel to toggle the checking status of the attendee in server and local database.

@Override
public void onSwiped(RecyclerView.ViewHolder viewHolder, int direction) {
int position = viewHolder.getAdapterPosition();

orderDetailViewModel.toggleCheckIn(position);
orderAttendeesAdapter.notifyItemChanged(position);
}

Last but not the least, we will override the onMove method to return false. Since we are not supporting drag and drop features therefore this method will never be called.

@Override
public boolean onMove(RecyclerView recyclerView, RecyclerView.ViewHolder viewHolder, RecyclerView.ViewHolder target) {
return false;
}

Resources

  1. Codebase for Open Event Organizer App https://github.com/fossasia/open-event-orga-app
  2. Official documentation for ItemTouchHelper.SimpleCallback https://developer.android.com/reference/android/support/v7/widget/helper/ItemTouchHelper.SimpleCallback
Continue ReadingSwipe to Check In/Out in Open Event Organizer App

Share Events in the Open Event Organizer Android App

In the Open Event Organizer Android App, after creating an event the organizer was unable to share it. We handled this challenge and came up with options to share Event with other social media apps. Along with that user can send Email to users containing event description with just a click. All this through a UI that our user will love interacting with. Let’s see how we implemented this.

Specifications

We designed a UI given below which offer four functionalities to the user in a single screen.

  1. The Event Name and Date are shown in the CardView.
  2. User can copy Event External URL by clicking on Copy URL option.
  3. User can send Email containing information about the Event like ( Name, Description, Starting and Ending Date-Time for the Event) via Email by clicking on Email option.
  4. User can share the same information described in point three via other social media/chatting apps etc by clicking on many more option.

The is the Event Model class ia a POJO containing the associated attributes.

We will use Retrofit to fetch Event object from server through a GET request in EventApi class.

@GET(“events/{id}?include=tickets”)
Observable<Event> getEvent(@Path(“id”) long id);

Then we will use the getEvent method of EventRepositoryImpl class to make the request for us using EventApi class and then pass on the Response Event object to the ViewModel by wrapping it in RxJava Observable. We are accepting a boolean field named reload which decdes whether we need to reuse the existing Event object from Local Database  or fetch a new object from server.

@Override
public Observable<Event> getEvent(long eventId, boolean reload) {
Observable<Event> diskObservable = Observable.defer(() ->
repository
.getItems(Event.class, Event_Table.id.eq(eventId))
.filter(Event::isComplete)
.take(1)
);

Observable<Event> networkObservable = Observable.defer(() ->
eventApi
.getEvent(eventId)
.doOnNext(this::saveEvent));

return repository.observableOf(Event.class)
.reload(reload)
.withDiskObservable(diskObservable)
.withNetworkObservable(networkObservable)
.build();
}

In ShareEventVewModel, we are calling the getEvent from EventRepositoryImpl class, construct a LiveData object from it so that UI could observe changes on it. Methods getShareableInformation, getShareableUrl, getShareableSubject provide the shareable information to the UI which is further shared with other apps.

public class ShareEventViewModel extends ViewModel {

protected LiveData<Event> getEvent(long eventId, boolean reload) {
if (eventLiveData.getValue() != null && !reload)
return eventLiveData;

compositeDisposable.add(eventRepository.getEvent(eventId, reload)
.doOnSubscribe(disposable -> progress.setValue(true))
.doFinally(() -> progress.setValue(false))
.subscribe(event -> {
this.event = event;
eventLiveData.setValue(event);
},
throwable -> error.setValue(ErrorUtils.getMessage(throwable))));

return eventLiveData;
}

public String getShareableInformation() {
return Utils.getShareableInformation(event);
}

}

In ShareEventFragment class does the work of binding the UI to the model using data binding. It observes the LiveData objects supplied by presenter and reflect the changes in UI to the LiveData object.

public class ShareEventFragment extends BaseFragment implements ShareEventView {

public void shareEvent() {
Intent shareIntent = new Intent();
shareIntent.setAction(Intent.ACTION_SEND);
shareIntent.putExtra(Intent.EXTRA_TEXT, shareEventViewModel.getShareableInformation());
shareIntent.setType(“text/plain”);
startActivity(Intent.createChooser(shareIntent, getResources().getText(R.string.send_to)));
}

public void shareByEmail() {
Intent shareIntent = new Intent();
shareIntent.setAction(Intent.ACTION_SENDTO);
shareIntent.setType(“message/rfc822”);
shareIntent.setData(Uri.parse(“mailto:”));
shareIntent.putExtra(Intent.EXTRA_SUBJECT, shareEventViewModel.getEmailSubject());
shareIntent.putExtra(Intent.EXTRA_TEXT, shareEventViewModel.getShareableInformation());
try {
startActivity(Intent.createChooser(shareIntent, getResources().getText(R.string.send_to)));
} catch (android.content.ActivityNotFoundException ex) {
ViewUtils.showSnackbar(binding.getRoot(), “There are no email clients installed”);
}
}

public void copyUrlToClipboard() {
ClipboardManager clipboard = (ClipboardManager) getActivity().getSystemService(Context.CLIPBOARD_SERVICE);
String eventUrl = shareEventViewModel.getShareableUrl();
if (eventUrl == null) {
ViewUtils.showSnackbar(binding.getRoot(), “Event does not have a Public URL”);
} else {
ClipData clip = ClipData.newPlainText(“Event URL”, shareEventViewModel.getShareableUrl());
clipboard.setPrimaryClip(clip);
ViewUtils.showSnackbar(binding.getRoot(), “Event URL Copied to Clipboard”);
}
}
}

The layout file contains the Event object bind to the UI using Two way Data Binding. Here is an extract from the layout file. For viewing entire file, please refer here.

References

  1. Official documentation of Retrofit 2.x http://square.github.io/retrofit/
  2. Official documentation for RxJava 2.x https://github.com/ReactiveX/RxJava
  3. Official documentation for ViewModel https://developer.android.com/topic/libraries/architecture/viewmodel
  4. Codebase for Open Event Organizer App https://github.com/fossasia/open-event-orga-app
Continue ReadingShare Events in the Open Event Organizer Android App

Change Password Feature for Open Event Android Organizer App

In Open Event Organizer Android App, the users were able to successfully login and sign up but in case they wanted to change their login password they could not. So, we added a feature to allow users to change their existing password. This blog explains the technical details to implement this feature following MVVM architecture and using highly efficient libraries like Retrofit, RxJava, Raziz Labs DbFlow, Data Binding.

Specifications

We will implement a page where users can enter their old password and new password along with a confirm password field. Their will be a login button to send the password change request to server. Server then return a response and we will provide feedback regarding the request. We are following MVP architecture so there will be a Model class, Fragment class, Presenter class and Network Layer to make network requests.

Let’s start with creating ChangePassword model class. There are three fields to store old password, new password and new confirmed password. Several Lombok annotations like @Data, @AllArgsConstructor, @NoArgsConstructor are used to avoid boilerplate code for getters, setters and constructors. @JsonNaming annotation is used to translate the Java Object names to KebabCase when they are serialized.

@Data
@AllArgsConstructor
@NoArgsConstructor
@JsonNaming(PropertyNamingStrategy.KebabCaseStrategy.class)
public class ChangePassword {

public String oldPassword;
public String newPassword;

@JsonIgnore
public String confirmNewPassword;
}

The layout file is binded to model using Data Binding. There will be three TextInputEditText fields for user input. An option to toggle password visibility and a login button.

The Fragment class binds layout file to the Fragment and handle UI stuff. Presenter is called to make Login request when login button is pressed.

public class ChangePasswordFragment extends BaseFragment<ChangePasswordPresenter> implements ChangePasswordView {

@Override
public View onCreateView(LayoutInflater inflater, ViewGroup container,
Bundle savedInstanceState) {
binding = DataBindingUtil.inflate(inflater, R.layout.change_password_fragment, container, false);
validator = new Validator(binding);

AppCompatActivity activity = ((AppCompatActivity) getActivity());
activity.setSupportActionBar(binding.toolbar);

ActionBar actionBar = activity.getSupportActionBar();
if (actionBar != null) {
actionBar.setHomeButtonEnabled(true);
actionBar.setDisplayHomeAsUpEnabled(true);
}

return binding.getRoot();
}

@Override
public void onStart() {
super.onStart();
getPresenter().attach(this);
binding.setOrganizerPassword(getPresenter().getChangePasswordObject());
getPresenter().start();

binding.btnChangePassword.setOnClickListener(view -> {
if (!validator.validate())
return;

String url = binding.url.baseUrl.getText().toString().trim();
getPresenter().setBaseUrl(url, binding.url.overrideUrl.isChecked());
getPresenter().changePasswordRequest(binding.oldPassword.getText().toString(),
binding.newPassword.getText().toString(),
binding.confirmNewPassword.getText().toString());

});
}

When the Login button is pressed, changePasswordRequest() method is called which makes an asynchronous call to ChangePasswordModel in order to perform the task of sending and receiving data from network in a different thread than the UI thread. Along with making requests, this method also verifies the password typed in confirm password field and send the the error as well as success message to the fragment.

public class ChangePasswordPresenter extends AbstractBasePresenter<ChangePasswordView> {

public void changePasswordRequest(String oldPassword, String newPassword, String confirmPassword) {
if (!newPassword.equals(confirmPassword)) {
getView().showError(“Passwords Do Not Match”);
return;
}

organizerPasswordObject.setOldPassword(oldPassword);
organizerPasswordObject.setNewPassword(newPassword);
organizerPasswordObject.setConfirmNewPassword(confirmPassword);

changePasswordModel.changePassword(organizerPasswordObject)
.compose(disposeCompletable(getDisposable()))
.compose(progressiveErroneousCompletable(getView()))
.subscribe(() -> getView().onSuccess(“Password Changed Successfully”), Logger::logError);
}
}

We are using Retrofit to make POST Request to server using the REST API. @Body annotation denotes the object request body which here contains a Map<String, ChangePassword> object. The Response from server is captured in Observable<ChangePasswordResponse> which is an RxJava Observable.

@POST(“auth/change-password”)
Observable<ChangePasswordResponse> changePassword(@Body Map<String, ChangePassword> changePassword);

This is the declaration for the method in Network Layer where the actual network request is made. It takes as input the changePassword object from Presenter which is already binded with data. Then it uses RxJava to asynchronously call the Api class and pass in the Map<String, ChangePassword> object. The result is then processed and Completable object is returned to the presenter. The Presenter processes the Completable object and shows user feedback in the form of a message in SnackBar.

References

  1. Official documentation for RxJava by ReactiveX https://github.com/ReactiveX/RxJava
  2. Official documentation for Retrofit by Square Inc https://github.com/square/retrofit
  3. Codebase for Open Event Organizer App on Github https://github.com/fossasia/open-event-orga-app
  4. Open Event Server deployment at heroku https://open-event-api-dev.herokuapp.com/
Continue ReadingChange Password Feature for Open Event Android Organizer App

Create Session in Open Event Android Organizer Application

Open Event Android Organizer Application offered variety of features to Organizers from all over the world to help them host their Events globally but it didn’t had the functionality to create Sessions in the app itself and associate it to Tracks. This feature addition was crucial since it enables Organizer to create Sessions which every common person enquires about before attending and event. In this Blog Post we will see how we added this functionality in the app.

Open Event Android Organizer Application is a client for Open Event Server which provides the REST API.

Problem

There can be various Sessions associated with Tracks for an Event. Open Event API had the endpoint to implement Creating Session but the Orga app didn’t, so we worked on creating a Session in the app.

The UI for creating a Session is shown above. User can fill in the necessary details and click on the green Floating Action Button to create a Session.

How to implement functionality?

We will follow MVP Architecture and use Retrofit 2.x, RxJava, Dagger, Jackson, Data Binding and other industry standard libraries to implement this functionality.

Firstly, let’s create Session model class specifying the attributes and relationships to set up in database using RazizLabs DbFlow library. The POJO will be serialized into JSON by Jackson library to be passed on as a part of RequestBody to server.

Now we will create SessionApi class that will contain the request details to be passed to Retrofit. @POST denotes a POST request and @Body denotes the requestBody of the request which is a Session object.

public interface SessionApi {
@POST(“sessions”)
Observable<Session> postSession(@Body Session session);
}

This is the CreateSessionFragment class that contains the code binding model to the view. The Fragment class implements the CreateSessionView class overriding the method declarations present there. The @Inject annotation of Dagger is used to load singleton presenter instance lazily to improve app’s performance.

Event-Id and Track-Id’s are retrieved from Bundle from Fragment Transaction. These are then passed on to presenter when Create Session button is pressed. There are other methods to show binding progressbar, snackbar and other UI components to show progress of the background request to server and database.

public class CreateSessionFragment extends BaseFragment<CreateSessionPresenter> implements CreateSessionView {

@Override
public View onCreateView(LayoutInflater inflater, @Nullable ViewGroup

container, @Nullable Bundle savedInstanceState) {
binding = DataBindingUtil.inflate(inflater,

R.layout.session_create_layout, container, false);
validator = new Validator(binding.form);

binding.sessionCreate.setOnClickListener(view -> {
if (validator.validate()) {
getPresenter().createSession(trackId, eventId);
}
});

return binding.getRoot();
}

@Override
public void onStart() {
super.onStart();
getPresenter().attach(this);
binding.setSession(getPresenter().getSession());
}
}

In the Presenter createSession method is called when create button is pressed in UI. The method attaches track-id and event-id to Session object. This is necessary for Relationship constraints on Session Model. Then after binding all the data to Session object, we pass it on to SessionRepository. The success response is provided to user by passing success response in getView().onSuccess() method.

public class CreateSessionPresenter extends

AbstractBasePresenter<CreateSessionView> {

public Session getSession() {
return session;
}

public void createSession(long trackId, long eventId) {

Track track = new Track();
Event event = new Event();

track.setId(trackId);
event.setId(eventId);
session.setTrack(track);
session.setEvent(event);

sessionRepository
.createSession(session)
.compose(dispose(getDisposable()))
.compose(progressiveErroneous(getView()))
.subscribe(createdSession ->

getView().onSuccess(“Session Created”), Logger::logError);
}
}

The SessionRepository uses RxJava to make asynchronous Retrofit Call to Server. We throw a Network Error to user if the device does not have Internet Connectivity.

The session object accepted as a parameter in createSession method is passed on to sessionApi. It will return Observable<Session> Response which we will process in doOnNext() method. Then the Session object along with required foreign key relationships with Track and Event is saved in database for offline use.

@Override
public Observable<Session> createSession(Session session) {
if (!repository.isConnected()) {
return Observable.error(new Throwable(Constants.NO_NETWORK));
}return sessionApi
.postSession(session)
.doOnNext(created -> {
created.setTrack(session.getTrack());
created.setEvent(session.getEvent());
repository
.save(Session.class, created)
.subscribe();
})
.subscribeOn(Schedulers.io())
.observeOn(AndroidSchedulers.mainThread());
}

The above code snippets are from Open Event Orga Application. For exploring the entire codebase please refer here. For details about the REST API used by the app please visit here.

References

  1. Official RxJava Project on Github by ReactiveX https://github.com/ReactiveX/RxJava.
  2. Official Retrofit Project on Github by Square Inc https://github.com/square/retrofit.
  3. Official Open Event Organizer App on Github by FOSSASIA https://github.com/fossasia/open-event-orga-app.
  4. Documentation for REST API of Open Event Server on Heroku by FOSSASIA https://open-event-api-dev.herokuapp.com/.
Continue ReadingCreate Session in Open Event Android Organizer Application

Use objects to pass multiple query parameters when making a request using Retrofit

There are multiple instances where there is a need to make an API call to the SUSI.AI server to send or fetch data. The Android client uses Retrofit to make this process easier and more convenient.
While making a GET or POST request, there are often multiple query parameters that need to sent along with the base url. Here is an example how this is done:

@GET("/cms/getSkillFeedback.json")
Call<GetSkillFeedbackResponse> fetchFeedback(
                          @Query("model") String model,
                          @Query("group") String group,
                          @Query("language") String language,
                          @Query("skill") String skill);


It can be seen that the list of params can be very long indeed. A long list of params would lead to more risks of incorrect key value pairs and typos.

This blog would talk about replacing such multiple params with objects. The entire process would be explained with the help of an example of the API call being made to the getSkillFeedback.json API.

Step – 1 : Replace multiple params with a query map.

@GET("/cms/getSkillFeedback.json")
Call<GetSkillFeedbackResponse> fetchFeedback(@QueryMap Map<String, String> query);


Step – 2 : Make a data class to hold query param values.

data class FetchFeedbackQuery(
       val model: String,
       val group: String,
       val language: String,
       val skill: String
)


Step – 3 : Instead of passing all different strings for different query params, pass an object of the data class. Hence, add the following code to the ISkillDetailsModel.kt interface.

...

fun fetchFeedback(query: FetchFeedbackQuery, listener: OnFetchFeedbackFinishedListener)
...


Step – 4 : Add a function in the singleton file (ClientBuilder.java) to get SUSI client. This method should return a call.

...

public static Call<GetSkillFeedbackResponse> fetchFeedbackCall(FetchFeedbackQuery queryObject){
   Map<String, String> queryMap = new HashMap<String, String>();
   queryMap.put("model", queryObject.getModel());
   queryMap.put("group", queryObject.getGroup());
   queryMap.put("language", queryObject.getLanguage());
   queryMap.put("skill", queryObject.getSkill());
   //Similarly add other params that might be needed
   return susiService.fetchFeedback(queryMap);
}
...


Step – 5 : Send a request to the getSkillFeedback.json API by passing an object of FetchFeedbackQuery data class to the fetchFeedbackCall method of the ClientBuilder.java file which in turn would return a call to the aforementioned API.

...

override fun fetchFeedback(query: FetchFeedbackQuery, listener:  
                                   ISkillDetailsModel.OnFetchFeedbackFinishedListener) {

   fetchFeedbackResponseCall = ClientBuilder.fetchFeedbackCall(query)
   ...
}


No other major changes are needed except that instead of passing individual strings for each query param as params to different methods and creating maps at different places like in a view, create an object of FetchFeedbackQuery class and use it to pass data throughout the project. This ensures type safety. Also, data classes reduce the code length significantly and hence are more convenient to use in practice.

Resources

Continue ReadingUse objects to pass multiple query parameters when making a request using Retrofit

Fetch Five Star Skill Rating from getSkillList API in SUSI.AI Android

SUSI.AI had a thumbs up/down rating system till now, which has now been replaced by a five star skill rating system. Now, the user is allowed to rate the skill based on a five star rating system. The UI components include a rating bar and below the rating bar is a section that displays the skill rating statistics – total number of ratings, average rating and a graph showing the percentage of users who rated the skill with five stars, four stars and so on.

SUSI.AI Skills are rules that are defined in SUSI Skill Data repo which are basically the processed responses that SUSI returns to the user queries. When a user queries something from the SUSI Android app, a query to SUSI Server is made which in turn fetches data from SUSI Skill Data and returns a JSON response to the app. Similarly, to get skill ratings, a call to the ‘/cms/getSkillList.json’ API is made. In this API, the server checks the SUSI Skill Data repo for the skills and returns a JSON response consisting of all the required information like skill name, author name, description, ratings, etc. to the app. Then, this JSON response is parsed to extract individual fields to display the appropriate information in the skill details screen of the app.

API Information

The endpoint to fetch skills is ‘/cms/getSkillList.json’
The endpoints takes three parameters as input –

  • model – It tells the model to which the skill belongs. The default value is set to general.
  • group – It tells the group(category) to which the skill belongs. The default value is set to All.
  • language – It tells the language to which the skill belongs. The default value is set to en.

Since all skills have to be fetched, this API is called for every group individually. For instance, call “https://api.susi.ai/cms/getSkillList.json?group=Knowledge” to get all skills in group “Knowledge”. Similarly, call for other groups.

Here is a sample response of a skill named ‘Capital’ from the group Knowledge :

"capital": {
      "model": "general",
      "group": "Knowledge",
      "language": "en",
      "developer_privacy_policy": null,
      "descriptions": "A skill to tell user about capital of any country.",
      "image": "images/capital.png",
      "author": "chashmeet singh",
      "author_url": "https://github.com/chashmeetsingh",
      "skill_name": "Capital",
      "terms_of_use": null,
      "dynamic_content": true,
      "examples": ["What is the capital of India?"],
      "skill_rating": {
        "negative": "0",
        "positive": "4",
        "feedback_count" : 0,
        "stars": {
          "one_star": 0,
          "four_star": 1,
          "five_star": 0,
          "total_star": 1,
          "three_star": 0,
          "avg_star": 4,
          "two_star": 0
        }
      },
      "creationTime": "2018-03-17T17:11:59Z",
      "lastAccessTime": "2018-06-06T00:46:22Z",
      "lastModifiedTime": "2018-03-17T17:11:59Z"
    },


It consists of all details about the skill called ‘Capital’:

  1. Model (model)
  2. Group (group)
  3. Language (language)
  4. Developer Privacy Policy (developer_privacy_policy)
  5. Description (descriptions)
  6. Image (image)
  7. Author (author)
  8. Author URL (author_url)
  9. Skill name (skill_name)
  10. Terms of Use (terms_of_use)
  11. Content Type (dynamic_content)
  12. Examples (examples)
  13. Skill Rating (skill_rating)
  14. Creation Time (creationTime)
  15. Last Access Time (lastAccessTime)
  16. Last Modified Time (lastModifiedTime)

From among all this information, the information of interest for this blog is Skill Rating. This blog mainly deals with showing how to parse the JSON response to get the skill rating star values, so as to display the actual data in the skill rating graph.

A request to the getSkillList API is made for each group using the GET method.

@GET("/cms/getSkillList.json")
Call<ListSkillsResponse> fetchListSkills(@Query("group") String groups);

It returns a JSON response consisting of all the aforementioned information. Now, to parse the JSON response, do the following :

  1. Add a response for the response received as a result of API call. ListSkillsResponse contains two objects – group and skills.
    This blog is about getting the skill rating, so let us proceed with parsing the required response. The skills object contains the skill data that we need. Hence, next a SkillData class is created.

    class ListSkillsResponse {
       val group: String = "Knowledge"
       val skillMap: Map<String, SkillData> = HashMap()
    }
  2. Now, add the SkillData class. This class defines the response that we saw for ‘Capital’ skill above. It contains skill name, author, skill rating and so on.

    class SkillData : Serializable {
       var image: String = ""
       @SerializedName("author_url")
       @Expose
       var authorUrl: String = ""
       var examples: List<String> = ArrayList()
       @SerializedName("developer_privacy_policy")
       @Expose
       var developerPrivacyPolicy: String = ""
       var author: String = ""
       @SerializedName("skill_name")
       @Expose
       var skillName: String = ""
       @SerializedName("dynamic_content")
       @Expose
       var dynamicContent: Boolean? = null
       @SerializedName("terms_of_use")
       @Expose
       var termsOfUse: String = ""
       var descriptions: String = ""
       @SerializedName("skill_rating")
       @Expose
       var skillRating: SkillRating? = null
    }
    
  3. Now, add the SkillRating class. As what is required is the skill rating, narrowing down to the skill_rating object. The skill_rating object contains the actual rating for each skill i.e. the stars values. So, this files defines the response for the skill_rating object.

    class SkillRating : Serializable {
       var stars: Stars? = null
    }
    
  4. Further, add a Stars class. Ultimately, the values that are needed are the number of users who rated a skill at five stars, four stars and so on and also the total number of users and the average rating. Thus, this file contains the values inside the ‘stars’ object.

    class Stars : Serializable {
       @SerializedName("one_star")
       @Expose
       var oneStar: String? = null
       @SerializedName("two_star")
       @Expose
       var twoStar: String? = null
       @SerializedName("three_star")
       @Expose
       var threeStar: String? = null
       @SerializedName("four_star")
       @Expose
       var fourStar: String? = null
       @SerializedName("five_star")
       @Expose
       var fiveStar: String? = null
       @SerializedName("total_star")
       @Expose
       var totalStar: String? = null
       @SerializedName("avg_star")
       @Expose
       var averageStar: String? = null
    }
    

Now, the parsing is all done. It is time to use these values to plot the skill rating graph and complete the section displaying the five star skill rating.

To plot these values on the skill rating graph refer to the blog on plotting horizontal bar graph using MPAndroid Chart library. In step 5 of the linked blog, replace the second parameter to the BarEntry constructor by the actual values obtained by parsing.

Here is how we do it.

  • To get the total number of ratings
val  totalNumberofRatings: Int = skillData.skillRating?.stars?.totalStars


  • To get the average rating
val averageRating: Float = skillData.skillRating?.stars?.averageStars


  • To get number of users who rated the skill at five stars
val fiveStarUsers: Int = skillData.skillRating?.stars?.fiveStar

Similarly, get the number of users for fourStar, threeStar, twoStar and oneStar.

Note : If the totalNumberOfRatings equals to zero, then the skill is unrated. In this case, display a message informing the user that the skill is unrated instead of plotting the graph.

Now, as the graph shows the percentage of users who rated the skill at a particular number of stars, calculate the percentage of users corresponding to each rating, parse the result to Float and place it as the second parameter to the BarEntry constructor  as follows :

 entries.add(BarEntry(4f, (fiveStarUsers!!.toFloat() / totalUsers) * 100f)))

Similarly, replace the values for all five entries. Finally, add the total ratings and average rating section and display the detailed skill rating statistics for each skill, as in the following figure.

Resources


Continue ReadingFetch Five Star Skill Rating from getSkillList API in SUSI.AI Android

Create Call for Speakers with Open Event Organizer Android App

In The Open Event Organizer Android app, we were providing variety of features to the user but the functionality to create call for speakers for an Event was missing. This feature was required to attract speakers from all over the world to participate in the event and make it a success. Theis blog explains how we added this feature to the project us following MVVM Architecture and using libraries like Retrofit, RxJava, Db Flow etc.

Objective

The goal will be to provide an option to the organizer to create Call for Speakers for an Event (if it doesn’t exist already). We will provide the organizer a Floating Action Button in Speakers Call detail layout which will open a fragment which contain all the relevant fields provided by Open Event Server. The organizer can fill up all the fields as per requirement and create the call for speakers.

Specifications

Let’s move on to the implementation details.

First, we will create the model which will contain all the fields offered by server. We are using Lombok library to reduce boilerplate code using annotations. For example, @Data annotation is used to generate getters and setters. @NoArgsConstructor to generate no arguments constructor as the name suggests. Along with that we are using @JonNaming annotation provided by Jackson library to serialize the model using KebabCaseStrategy. Also, the Table annotation provided by Raziz DbFlow library to make a table in database for this model.

@Data
@Type(“speakers-call”)
@NoArgsConstructor
@JsonNaming(PropertyNamingStrategy.KebabCaseStrategy.class)
@Table(database = OrgaDatabase.class, allFields = true)
public class SpeakersCall {@Id(LongIdHandler.class)
@PrimaryKey
public Long id;@Relationship(“event”)
@ForeignKey(onDelete = ForeignKeyAction.CASCADE)
public Event event;

public String announcement;
public String hash;
public String privacy;
public String startsAt;
public String endsAt;
}

To handle this problem we will be using Retrofit 2.3.0 to make Network Requests, which is a REST client for Android and Java by Square Inc. It makes it relatively easy to retrieve and upload JSON (or other structured data) via a REST based Web Service. Also we will be using other awesome libraries like RxJava 2.1.10 (by ReactiveX) to handle tasks asynchronously, Jackson, Jasminb-Json-Api in an MVVM architecture.

We will make a POST request to the server . So we specify the declaration in SpeakersCallApi.java

@POST(“speakers-calls”)
Observable<SpeakersCall> postSpeakersCall(@Body SpeakersCall speakersCall);

We will use the method createSpeakersCall(SpeakersCall speakersCall) in SpeakersCallRepositoryImpl.java to interact with the SpeakersCallApi and make the network request for us. The response will be passed on to the SpeakersCallViewModel method which calls it.

@Override
public Observable<SpeakersCall> createSpeakersCall(SpeakersCall speakersCall) {
if (!repository.isConnected()) {
return Observable.error(new Throwable(Constants.NO_NETWORK));
}return speakersCallApi
.postSpeakersCall(speakersCall)
.doOnNext(created -> {
created.setEvent(speakersCall.getEvent());
repository
.save(SpeakersCall.class, created)
.subscribe();
})
.subscribeOn(Schedulers.io())
.observeOn(AndroidSchedulers.mainThread());
}

Next, we will see the code for SpeakersCallViewModel which is using MVVM ViewModel to handle the processing logic for SpeakesCallFragment. Here we are passing SpeakersCallRepository instance in constructor. Methods like getProgress, getError and getSuccess pass on a LiveData Object from ViewModel to Fragment and the latter observes the changes on the object and show these in UI. CreateSpeakersCall method is used to call speakersCallRepository to send a POST request to server asynchronously using Retrofit and RxJava. Further, initialize method is used to set initial values of time and date to SpeakersCall object.

public class CreateSpeakersCallViewModel extends ViewModel {
public void createSpeakersCall(long eventId) {
if (!verify())
return;Event event = new Event();event.setId(eventId);
speakersCallLive.getValue().setEvent(event);

compositeDisposable.add(speakersCallRepository.createSpeakersCall(speakersCallLive.getValue())
.doOnSubscribe(disposable -> progress.setValue(true))
.doFinally(() -> progress.setValue(false))
.subscribe(var -> success.setValue(“Speakers Call Created Successfully”),
throwable -> error.setValue(ErrorUtils.getMessage(throwable))));
}
}

We will create a Fragment class to bind the UI elements to the Model class so that they can be processed by ViewModel. The creation form contains less fields therefore BaseBottomSheetFragment is used. In the onStart method, we are binding several LiveData objects like SpeakersCall, Progress, Error, Success to the UI and then observe changes in them. Using LiveData we don’t have to write extra code to handle screen rotation and to update UI when the binded object is modified.

public class CreateSpeakersCallFragment extends BaseBottomSheetFragment implements CreateSpeakersCallView {
@Override
public void onStart() {
super.onStart();
createSpeakersCallViewModel.getSpeakersCall().observe(this, this::showSpeakersCall);
createSpeakersCallViewModel.getProgress().observe(this, this::showProgress);
createSpeakersCallViewModel.getError().observe(this, this::showError);
createSpeakersCallViewModel.getSuccess().observe(this, this::onSuccess);
createSpeakersCallViewModel.initialize();
}
}

We will design the speaker create form using Two Way Data Binding to bind SpeakersCall object to the UI and use TextInputEditText to take user Input. Along with that we have used Time and Date pickers to make it easier to select Date and Time. For viewing the complete code, please refer here.

Thus, we are able to build a responsive, reactive UI using Android Architectural Components.

References

  1. Official documentation of Retrofit 2.x http://square.github.io/retrofit/
  2. Official documentation for RxJava 2.x https://github.com/ReactiveX/RxJava
  3. Official documentation for ViewModel https://developer.android.com/topic/libraries/architecture/viewmodel
  4. Codebase for Open Event Orga App https://github.com/fossasia/open-event-orga-app
Continue ReadingCreate Call for Speakers with Open Event Organizer Android App

Handle response for API calls to the smart speaker

The SUSI.AI android app has the feature to connect to the smart speaker through the WiFi access point of the smart speaker. This connection takes place without internet and is completely offline and takes place locally between the device and the app.

When the APIs are hit, the parameters are sent to the server and are extracted by the speaker and then stored to perform further actions, but like any other API there is some response sent by the server once the parameters are fetched and only when this response is correctly parsed we show the confirmation that the data was required to be sent to the speaker is successfully done.

The SUSI.AI android app was unable to parse this response and so , every time there was a request made to the speaker the error message was displayed on the screen, just like this :

This is a cropped screenshot of the error message shown.

To handle the response from the local server there was a need to add the response parsing classes in the app, also since the app is written in kotlin the specialised classes for this purpose are already present in kotlin which are specifically for the purpose of handling responses. The data classes are added for the three APIs for the local server that are made, the response class added for the WiFi credentials response is :

data class SpeakerWifiResponse(
      val wifi: String,
      val wifi_ssid: String,
      val wifi_password: String
)

Here the first string by the name of ‘wifi’ is used to display a success message and other two variables are for the ssid and password of the wifi network respectively.

The API that is used to set the configuration of the speaker has the response class as follows  :

data class SpeakerConfigResponse(
      val configuration: String,
      val hotword: String,
      val stt: String,
      val tts: String,
      val wake: String
)

The third API which is used to send the auth credentials to the speaker has the following response class :

data class SpeakerAuthResponse(
      val auth: String,
      val authentication: String,
      val email: String,
      val password: String? = null
)

Now these response classes have the variable name similar to the key values in the JSON response generated by the local server. Due to the similar names to the keys an extra step and extra lines of code are eliminated which had to be added otherwise denoting the “Serializable” values to match the JSON response values.

After these data classes were added the Call<> functions of the retrofit service DeviceApi.java were made of the type of the types of the above data classes , which then were able to successfully parse the response from the local server of the speaker.

So, after this the app to speaker connection was successful and a success message was shown as :

References


Continue ReadingHandle response for API calls to the smart speaker