Preparing a release for Phimpme Android

Most of the essential features are now in a stable state in our Phimpme Android app. So we decided to release a beta version of the app. In FOSSASIA we follow branch policy where in development all current development will take place and in master branch the stable code resides.

Releasing an app is not just building an apk and submitting to the distribution platform, certain guidelines should follow.

How I prepare a released apk for Phimpme

List down the feature

We discussed on our public channel what features are now in stable state and can be released. Features such as account manager and Share Activity is excluded because it is not complete and in under development mode. We don’t want to show and under development feature. So excluded them. And made a list of available features in different category of Camera, Gallery and Share.

Follow the branch policy.

The releasable and stable codebase should be on master branch. It is good to follow the branch policy because it helps if we encounter any problem with the released apk. We can directly go to our master branch and check there. Development branch have very volatile because of active development going on.

Every Contributor’s contribution is important

When we browse our old branches such as master in case of ours. We see generally it is behind 100s of commits to the development. In case of that when we create a PR for that then it generally contains all the old commits to make the branch up to the latest.

In this case while opening and merging do not squash the commits.

Testing from Developer’s end

Testing is very essential part in development. Before releasing it is a good practice that Developer should test the app from their end. We tested app features in different devices with varying Android OS version and screen size.

  • If there is any compatibility issue, report it right away and there are several tools in Android to fix.
  • Support variety of devices and screen sizes

Changing package name, application ID

Package name, application ID are vitals of an app. Which uniquely identifies them as app in world. Like I changed the package name of Phimpme app to org.fossasia.phimpme. Check all the permission app required.

Create Release build type

Build types are great to way categorize the apps. Debug and Release are two. There are various things in codebase which we want only in Debug modes. So when we create Release mode it neglect that part of the code.

Add build types in you application build.gradle

buildTypes {
   release {
       minifyEnabled false
   }

Rebuild app again and verify from the left tab bar

Generate Signed apk and Create keystore (.jks) file

Navigate to Build → Generate Signed APK

Fill all details and proceed further to generate the signed apk in your home directory.

Adding Signing configurations in build.gradle

Copy the keystore (.jks) file to the root of the project and add signing configurations

signingConfigs {
       config {
           keyAlias 'phimpme'
           keyPassword 'phimpme'
           storeFile file('../org.fossasia.phimpme.jks')
           storePassword 'XXXXXXX'
       }
   }

InstallRelease Gradle task

Navigate to the right sidebar of Android Studio click on Gradle


Click on installRelease to install the released apk. It take all the credentials from the signing configurations.

Resources

Continue ReadingPreparing a release for Phimpme Android

Sentiment Data in Emoji-Heatmapper loklak App

Analysing emojis can uncover meaning and sentiment in ways regular text analytics cannot. So this was the main idea to introduce sentiment data into the Emoji-Heatmapper app. LokLak Search API has features such as classification and categorization of tweets. The emotions, for instance, can be joy, anticipation, sad etc.

So, in the Emoji-heatmapper app, I am displaying the occurrence of emojis on the map according to the location traced and also the sentiment related to the emoji i.e., search query as follows:

How to get the sentiment data:

One should simply enter the emoji into the search box for the results. The following code shows part of the LokLak Search API results (JSONObject):

      "hashtags_count": 0,
      "classifier_emotion": "anger",
      "classifier_emotion_probability": 
      1.2842921170985733E-9,
      "classifier_language": "english",
      "classifier_language_probability": 
      1.4594549568869297E-8,
      "without_l_len": 49,
      "without_lu_len": 49,
      "without_luh_len": 49,

I am using the above field name ”classifier_emotion” to display the results.

Till here getting the data relevant to query part is done. Next, the classifier_emotion of each tweet containing the query is collected into an array and sorted to get a unique list.

var emotion = [];
var emotions_array = [];

for (var i = 0; i  <  tweets.statuses.length; i++) {
    if (tweets.statuses[i].classifier_emotion) {
        emotion = tweets.statuses[i].classifier_emotion;
        emotions_array.push(emotion);
    }

    emotions_array.sort();
    emotion_array = jQuery.unique( emotions_array );

Loading the Sentiment data onto the Screen

When the query has a single emotion, or if multiple emotions or no emotions. These use cases/situations are displayed as follows:

Fig: Single Emotion

Fig: Multiple Emotions

Fig: No Emotions data

The code which creates the data dynamically on the output screen is as follows:

//Loading the sentiment
$(document).ready(function() {
    var listItems= "";
    if (emotions_array.length == 0) {
        listItems = "No Sentiment data is available for " + query
    }
    if (emotion_array.length == 1) {
        listItems += "<h3> Sentiment of " + query + " is ";
    } else if (emotion_array.length > 1) {
        listItems += "<h3> Sentiments of " + query + " are ";
    }

    var emotion_data = emotion_array.join(", ") + "."
    listItems += emotion_data + "</h3>"

    $("#sentiment").html(listItems);
});

Conclusion

The Emoji-Heatmapper app displays the sentiment data of the query being searched for which populates data dynamically using LokLak Search API.

Resources

Continue ReadingSentiment Data in Emoji-Heatmapper loklak App

How to make a SUSI chat bot skill for Cortana

Cortana is assistant from Microsoft just like Siri from Apple. We can make a skill for Cortana i.e Creating your own bot with in cortana so that you can use your bot through cortana by activating it using invocation name. To create SUSI cortana skill we will use SUSI API and Microsoft bot framework. First of all we will have to make a bot on microsoft bot framework and to do so follow this tutorial. Change code in this tutorial with code given below.

var restify = require('restify');
var builder = require('botbuilder');
var request = require('request');
var http = require('http');

// Setup Restify Server
var server = restify.createServer();
server.listen(process.env.port || process.env.PORT || 8080, function() {
   console.log('listening to ', server.name, server.url);
});
// Create chat bot
var connector = new builder.ChatConnector({
   appId: process.env.appId,
   appPassword: process.env.appPassword
});

setInterval(function() {
       http.get(process.env.HerokuURL);
   }, 1200000);

var bot = new builder.UniversalBot(connector);
server.post('/api/messages', connector.listen());

//getting response from SUSI API upon receiving messages from User
bot.dialog('/', function(session) {
   var msg = session.message.text;
   var options = {
       method: 'GET',
       url: 'http://api.asksusi.com/susi/chat.json',
       qs: {
           timezoneOffset: '-330',
           q: session.message.text
       }
   };
//sending request to SUSI API for response
   request(options, function(error, response, body) {
       if (error) throw new Error(error);
       var ans = (JSON.parse(body)).answers[0].actions[0].expression;
       //responding back to user
       session.say(ans,ans);

   })
});

After making bot we have to configure this bot for Cortana and to do so select cortana from list of channel on your bot from https://dev.botframework.com and add following detail shown in figure below.

Invocation name is name which you will call to use your bot. There are many ways to in invoke your skill like Run <invocation name> , Launch <invocation name>. Here is the complete list of invocation commands. How SUSI skill in cortana actually works is when user invoke SUSI skill cortana acts as middleware to send and receive responses from skill to user. After configuring your bot for Cortana test it with cortana with same hotmail account which you have used for bot framework by calling invocation name. Here is the demo video for testing SUSI Skill https://youtu.be/40yX16hxcls.

You have complete creating a skill for cortana now if you want to publish it to world select manage cortana dashboard from your bots in https://dev.botframework.com and publish it to first by filling form.

If you want to learn more about bot framework refer to https://docs.microsoft.com/en-us/Bot-Framework/index

References:
SUSI Cortana Repository: https://github.com/fossasia/susi_cortana_skill
Tutorial for bot: https://blog.fossasia.org/susi-ai-bots-with-microsofts-bot-framework/

Continue ReadingHow to make a SUSI chat bot skill for Cortana

How to make SUSI kik bot

To make SUSI kik bot first you have to configure a bot. To configure bot go to https://dev.kik.com/ and make your bot by scanning code from your kik mobile app.You have to answer following questions from botsworth and make your bot.


After logging in to your dashboard get your api key by going to configuration menu on top.

After your bot is setup follow given steps to create your first susi kik bot.

Steps:

  1. Install Node.js from the link below on your computer if you haven’t installed it already.
    https://nodejs.org/en/
  2. Create a folder with any name and open shell and change your current directory to the new folder you created.
  3. Type npm init in command line and enter details like name, version and entry point.
  4. Create a file with the same name that you wrote in entry point in above given step. i.e index.js and it should be in same folder you created.
  5. Type following commands in command line  npm install –save @kikinteractive/kik. After @kikinteractive/kik is installed type npm install –save http after http is installed type npm install –save request when all the modules are installed check your package.json these modules will be included within dependencies portion.

  6. Your package.json file should look like this.

     
    {
     "name": "susi_kikbot",
       "version": "1.0.0",
     "description": "susi kik bot",
     "main": "index.js",
     "scripts": {
       "test": "node tests/sample.js"
     },
     "license": "MIT",
     "dependencies": {
       "@kikinteractive/kik": "^2.0.11",
       "request": "^2.75.0"
     }
    }
    
    
  7. Copy following code into file you created i.e index.js and add your bot name to it in place of username.

    var http = require('http');
    var Bot = require('@kikinteractive/kik');
    var request = require('request')
    var answer;
     
    var bot = new Bot({
     
        username: '<your-bot-name>',
        apiKey: process.env.API_KEY,
        baseUrl: process.env.HEROKU_URL
     
    });
     
    bot.updateBotConfiguration();
     
    bot.onTextMessage((message) => {
     
        request('http://api.asksusi.com/susi/chat.json?q=' + encodeURI(query), function(error, response, body) {
     
            if (!error && response.statusCode == 200) {
     
                answer = JSON.parse(body).answers[0].actions[0].expression;
     
            } else {
     
                answer = "Oops, Looks like Susi is taking a
                break, She will be back soon";
     
            }
     
        });
     
        message.reply(answer)
    });
     
    http.createServer(bot.incoming()).listen(process.env.PORT || 5000)
    
    
  8. Before deploying our bot to heroku so that it can be active we have to make a github repository for chatbot to make github repository follow these steps.In shell change current directory to folder we created above and  write
    git init
    git add .
    git commit -m”initial”
    git remote add origin <URL for remote repository>
    git remote -v
    git push -u origin master

    You will get URL for remote repository by making repository on your github and copying this link of your repository.

  9. To deploy your bot to heroku you need an account on Heroku and after making an account make an app.


  10. Deploy app using github deployment method.
  11. Select Automatic deployment method.
  12. Go to settings of your app and config variables and paste your API key for bot to this and name it as API_KEY and get your heroku app url and make a variable for it named HEROKU_URL.
  13. Your susi bot is ready now test it by massaging it.

If you want to learn more about kik API then refer to https://dev.kik.com/#/docs/messaging


Resources:

Github Repository: https://github.com/fossasia/susi_kikbot
KIK bot API: https://dev.kik.com/#/docs/messaging

Continue ReadingHow to make SUSI kik bot

Using a YAML file to read configuration options in Yaydoc

Yaydoc provides access to a lot of configurable variables which can be set as per requirements to configure various sections of the build process. You can see the entire list of variables in the project’s homepage. Till now the only way to do this was to set appropriate environment variables. Since a web user interface for yaydoc is in development, providing a clean UI was very important. This meant that we could not just create a bunch of input fields for all variables as that could be overwhelming for any new user. So we decided to ask only minimal information in the web form and read other variables if the user chooses to specify from a YAML file in the target repository.

To read a YAML file, we used PyYaml. It is a well established Python package to safely read info from a YAML file and convert it to a Python’s dictionary. Here is the code snippet for that.

def get_yaml_config():
    try:
        with open('.yaydoc.yml', 'r') as file:
            conf = yaml.safe_load(file)
    except FileNotFoundError:
        return {}
    return conf

The above code snippet returns a dictionary specifying all keys read from the YAML file. Since none of the options are required, we first create a dictionary with all defaults and recursively merges it with the yaml dict. The merging is done using the following code snippet:

for key, value in head.items():
    if isinstance(base, dict):
        if isinstance(value, dict):
            base[key] = update_dict(base.get(key, {}), value)
        else:
           base[key] = head[key]
    else:
        base = {key: head[key]}
return base

Now you can create a .yaydoc.yml file in the root of your repository and yaydoc would read options from there. Here is a sample yml file.

metadata:
  author: FOSSASIA
  projectname: Yaydoc
  version: development

build:
  doctheme: fossasia_theme
  docpath: docs/
  logo: images/logo.svg
  markdown_flavour: markdown_github

publish:
  ghpages:
    docurl: yaydoc.fossasia.org

It should be noted that the layout of the file may change in the future as the project is in active development.

Resources

Continue ReadingUsing a YAML file to read configuration options in Yaydoc

SUSI AI Bots with Microsoft’s Bot Framework

The Bot Framework is used to build intelligent chatbots and it supports .NET, Node.js, and REST. To learn about building bots using bot framework go to  https://docs.microsoft.com/en-us/bot-framework/bot-builder-overview-getstarted . Now to build SUSI AI bot for different platforms like facebook, telegram, kik, skype follow below given steps.

  1. Install Node.js from the link below on your computer if you haven’t installed it already.
    https://nodejs.org/en/
  2. Create a folder with any name and open a shell and change your current directory to the new folder you created.
  3. Type npm init in shell and enter details like name, version and entry point.
  4. Create a file with the same name that you wrote in entry point in above given step. i.e index.js and it should be in same folder you created.
  5. Type following commands in command line  npm install –save restify.After restify is installed type npm install –save botbuilder   after botbuilder is installed type npm install –save request when all the modules are installed check your package.json modules will be included within dependencies portion.

  6. Your package.json file should look like this.

    {
    "name": "skype-bot",
    "version": "1.0.0",
    "description": "SUSI AI Skype Bot",
    "main": "app.js",
    "scripts": {
      "test": "echo \"Error: no test specified\" && exit 1",
      "start": "node app.js"
    },
    "author": "",
    "license": "ISC",
    "dependencies": {
      "botbuilder": "^3.8.1",
      "request": "^2.81.0",
      "restify": "^4.3.0"
    }
    }
    
  7. Copy following code into file you created i.e index.js

    var restify = require('restify');
    var builder = require('botbuilder');
    var request = require('request');
    
    // Setup Restify Server
    var server = restify.createServer();
    server.listen(process.env.port || process.env.PORT || 8080, function() {
       console.log('%s listening to %s', server.name, server.url);
    });
    
    // Create chat bot
    var connector = new builder.ChatConnector({
     appId: process.env.appId,
     appPassword: process.env.appPassword
    });
    
    var bot = new builder.UniversalBot(connector);
    server.post('/api/messages', connector.listen());
    //When bot is added by user
    bot.on('contactRelationUpdate', function(message) {
       if (message.action === 'add') {
           var name = message.user ? message.user.name : null;
           var reply = new builder.Message()
               .address(message.address)
               .text("Hello %s... Thanks for adding me. You can talk to SUSI now.", name || 'there');
           bot.send(reply);
       }
    });
    //getting response from SUSI API upon receiving messages from User
    bot.dialog('/', function(session) {
       var options = {
           method: 'GET',
           url: 'http://api.asksusi.com/susi/chat.json',
           qs: {
               timezoneOffset: '-330',
               q: session.message.text
           }
       };
    //sending request to SUSI API for response 
       request(options, function(error, response, body) {
           if (error) throw new Error(error);
           var ans = (JSON.parse(body)).answers[0].actions[0].expression;
           //responding back to user
           session.send(ans);
    
       })
    });
    
  8. You have to replace appID and appPassword with your own ID and Password which you can get by below given steps.
  9. Sign in/Sign up to this https://dev.botframework.com/. After signing in go to My Bots option at the top of the page and Create/Register your bot. Enter details of your bot and click on “Create Microsoft App ID and password”. 
  10. Leave messaging endpoint for now after getting app ID and password we will write messaging endpoint.
  11. Copy your APP ID and Password and save them for later use. Paste your App ID in box given for ID on bot registration page.

  12. Now we have to create messaging endpoint to listen for requests. Make a github repository and push the files in the folder we created above.

    In command line change current directory to folder we created above and  write
    git init
    git add .
    git commit -m”initial”
    git remote add origin <URL for remote repository>
    git remote -v
    git push -u origin master  You will URL for remote repository by making repository on your github and copying this link of your repository.

  13. Now we have to deploy this github repository to heroku to get url for messaging endpoint. If you don’t have account on heroku sign up here https://www.heroku.com/ else just sign in and create a new app.
  14. Deploy your repository onto heroku from deploy option and choosing github as a deployment method.
  15. Select automatic deployment so that you make any changes in github repository they should be deployed to heroku.

  16. Open you app from option on top right and copy the link of your heroku app and append it with /api/messages and enter this url as messaging endpoint.

    https://{Your_App_Name}.herokuapp.com/api/messages
  17. Register the bot and add APP ID and password you saved to your heroku app in settings->config variables.
  18. Now go to  https://dev.botframework.com/. and then in My Bots go to your bot and click on Skype bot then add it to contact and start chatting.
  19. You can connect same bot to different channels like kik, slack, telegram, facebook and many others.

    Add different channels in your bot page and follow these links for deploying onto different platforms.

If you want to learn more about bot framework you can refer to https://docs.microsoft.com/en-us/Bot-Framework/index

Resources:
Code: https://github.com/fossasia/susi_skypebot
Bot Framework: https://docs.microsoft.com/en-us/bot-framework/bot-builder-overview-getstarted

Continue ReadingSUSI AI Bots with Microsoft’s Bot Framework

How to Collaborate Design on Hardware Schematics in PSLab Project

Generally ECAD tools are not built to support collaborative features such as git in software programming. PSLab hardware is developed using an open source ECAD tool called KiCAD. It is a practice in the electronic industry to use hierarchical blocks to support collaboration. One person can work on a specific block having rest of the design untouched. This will support a workaround to have a team working on a one hardware design just like a software design. In PSLab hardware repository, many developers can work simultaneously using this technique without having any conflicts in project files.

Printed Circuit Board (PCB) designing is an art. The way the components are placed and how they are interconnected through different type of wires and pads, it is an art for hardware designing engineers. If they do not use auto-route, PCB design for the same schematic will be quite different from one another.

There are two major approaches in designing PCBs.

  • Top Down method
  • Bottom Up method

Any of these methods can be implemented in PSLab hardware repository to support collaboration by multiple developers at the same time.

Top Down Method

In this method the design is starting from the most abstract definitions. We can think of this as a black box with several wires coming out of it. The user is aware of how to use the wires and to which devices they need to be connected. But the inside of the black box is not visible. Then a designer can open up this box and break the design down to several small black boxes which can perform a subset of functionalities the bigger black box did. He can go on breaking it down to even smaller boxes and reach the very bottom where basic components are found such as transistors, resistors, diodes etc.

Bottom Up Method

In the bottom up method, the opposite approach of the top down method is used. Small parts are combined together to design a much bigger part and they are combined together to build up an even bigger part which will eventually create the final design. Our human body is a great example for a use of bottom up method. Cells create organ; organs create systems and systems create the body.

Designing Top Down Designs using KiCAD

In PCB designing, the designers are free to choose whatever the approach they prefer more suitable for their project. In this blog, the Top Down method is used to demonstrate how to create a design from the abstract concepts. This will illustrate how to create a design with one layer deep in design using hierarchical blocks. However, these design procedures can be carried out as many times as the designer want to create depending on the complexity of the project.

Step 01 – Create a new project in KiCAD

Step 02 – Open up Eeschema to begin the design

Step 03 – Create a Hierarchical Sheet

Step 04 – Place the hierarchical sheet on the design sheet and give it a name

Step 05 – Enter sheet

Step 06 – Place components and create a schematic design inside the sheet and place hierarchical labels

Step 07 – Define the labels as input or output and give them an identifier. Once done, place them on appropriate places and connect with wires

Step 08 – Go back to main sheet to complete the hierarchical block

Step 09 – Place hierarchical pins on the block

Click on the “Place hierarchical pin” icon from the toolbar and click on the block. The pins can be placed on anywhere on the block. As a convention, input pins are placed on the left side and the output pins are placed on the right side of the block.

Step 10 – Complete the circuit

Resources:

Continue ReadingHow to Collaborate Design on Hardware Schematics in PSLab Project

Using react-url-query in SUSI Chat

For SUSI Web Chat, I needed a query parameter which can be passed to the components directly to activate the SUSI dreams in my textarea using just the URL which is not easy when one is using react-router. React URL Query is a package for managing state through query parameters in the URL in React. It integrates well with React Router and Redux and provides additional tools specifically targeted at serializing and deserializing state in URL query parameters. So for example, if one wants to pass some parameters to populate in your component directly through the URL, you can use react-url-query. Eg. http://chat.susi.ai/?dream=fossasia will populate fossasia in our textarea section without actually typing the term textarea.

So this in the URL,
Screenshot from 2017-06-29 09.46.33

Will produce this in the textarea,

To achieve this. the following steps are required:

  1. First we proceed with installing the packages (Dependencies  – history)
npm install history --save
npm install react-url-query --save
  1.   We then instantiate a history in our component where we want to listen to the parameters like the following code. Our class ChatApp is where we want to pass the params.

ChatApp.react.js

import history from '../history'; 
//Import the history object from the History package.
    
 // force an update if the URL changes inside the componentDidMount function
  componentDidMount() {
      history.listen(() => this.forceUpdate());
   }
  1.  Next, we define the props of the parameters in our Message Section. For that we need the following props-
  • urlPropsQueryConfig – this is where we define our URLConfig
  • Static proptypes – the query param to which we want to pass the value, so for me it’s dream.
  • The defaultProps when no such value is being passed to our param should be left a blank.
  • And then we finally assign the props.
  • This is then passed to the Message Composer Section from where we receive the value passed.

MessageSection.react.js

// Adding the UrlConfig
const urlPropsQueryConfig = {
  dream: { type: UrlQueryParamTypes.string }
};

 // Defining the query param inside our ClassName
  static propTypes = {
    dream: PropTypes.string
  }
// Setting the default param

  static defaultProps = {     
dream: ''
  }

 //Assigning the props inside the render() function
    const {
      dream
    } = this.props;
 //Passing the dream to the MessageComposer Section

                  <MessageComposer
                    threadID={this.state.thread.id}
                    theme={this.state.darkTheme}
                    dream={dream} />                
//Exporting our Class

export default addUrlProps({ urlPropsQueryConfig })(ClassName);
  1. Next we update the Message Composer section by the props we had passed. For this we first check if the props are null, we don’t populate it in our textarea if it is, otherwise we populate the textarea with the value ‘dream + props.dream’ so the value passed in the URL will be prepend by a word dream to enable the ‘dream value’ in our textarea.

The full file is available at MessageComposer.js

 //Add Check to the constructor
 constructor(props) {
    super(props);
    this.state = {text: ''};
    if(props.dream!==''){   //Setting the text as received ‘dream dreamPassed’
      this.state= {text: 'dream '+ props.dream}
    }
  }
// Populate the textarea
        <textarea
          name="message"
          value={this.state.text}
          onChange={this._onChange.bind(this)}
          onKeyDown={this._onKeyDown.bind(this)}
          ref={(textarea)=> { this.nameInput = textarea; }}
          placeholder="Type a message..."
        />
// Add props to the component
MessageComposer.propTypes = {
  /* other props */,
  dream: PropTypes.string //Setting Proptypes to receive the prop from the MessageSection
};

Now we have the full code working for querying any dream. Head over to chat.susi.ai?dream=fossasia Change fossasia to see the text change.

Resources

Continue ReadingUsing react-url-query in SUSI Chat

Using SUSI as your dictionary

SUSI can be taught to give responses from APIs as well. I made use of an API called Datamuse which is a premier search engine for English words, indexing 10 million unique words and phrases in more than 1000 dictionaries and glossaries.

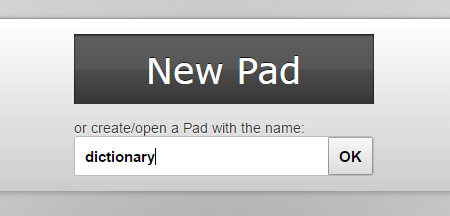
1. First, we head towards creating our dream pad for creating rules for the skill. To do this we need to create a dream at dream.susi.ai and give it a name, say dictionary.

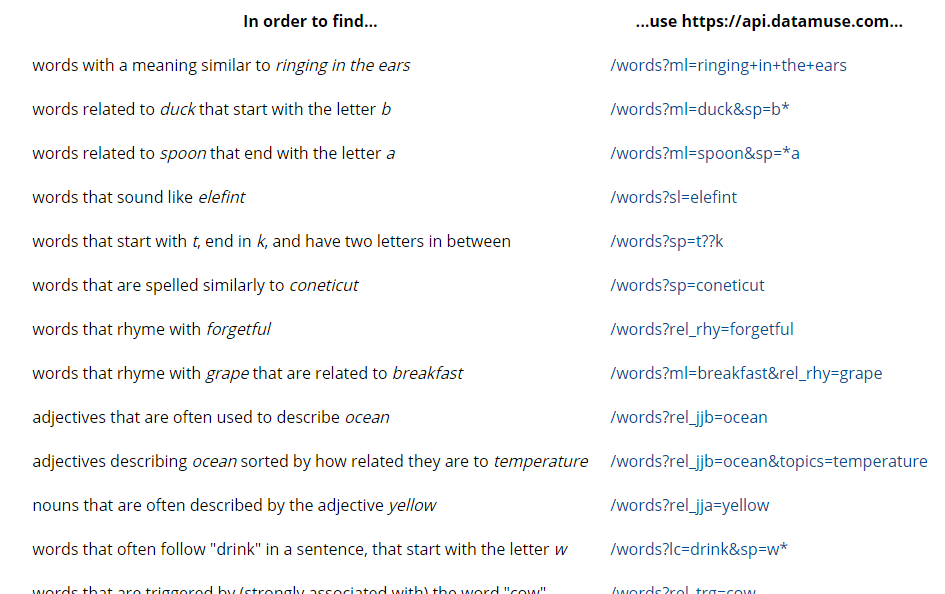
2. After that one needs to go to the API and check the response generated.

3. Going through the docs of the API, one can create various queries to produce informative responses as follows –

  • Word with a similar meaning.

define *| Meaning of *| one word for *

!console: $word$
{
"url":"https://api.datamuse.com/words?ml=$1$",
"path":"$.[0]"
}
eol
  • Word related to something that start with a given letter.

word related to * that start with the letter *

!console: $word$
{
"url":"https://api.datamuse.com/words?ml=$1$&sp=$2$*",
"path":"$.[0]"
}
eol

  • Word that sound like a given word..

word that sound like *|sounding like *

!console: $word$
{
"url":"https://api.datamuse.com/words?sl=$1$",
"path":"$.[0]"
}
eol

  • Words that are spelled similarly to a given word.

words that are spelled similarly to *| similar spelling to *| spelling of *

!console: $word$
{
"url":"https://api.datamuse.com/words?sp=$1$",
"path":"$.[0]"
}
eol

  • Word that rhyme with a given word.

rhyme *| word rhyming with *

!console: $word$
{
"url":"https://api.datamuse.com/words?rel_rhy=$1$",
"path":"$.[0]"
}
eol

  • Adjectives that are often used to describe a given word.

adjective to describe *|show adjective for *|adjective for *

!console: $word$
{
"url":"https://api.datamuse.com/words?rel_jjb=$1$",
"path":"$.[0]"
}
eol

  • Suggestions for a given word.

suggestions for *| show words like *| similar words to * | words like *

!console: $word$
{
"url":"https://api.datamuse.com/sug?s=$1$",
"path":"$.[0]"
}
eol

This is a sample query response for define *

To create more dictionary skills go to http://dream.susi.ai/p/dictionary and add skills from the API. To contribute by adding more skills, send a pull request to the susi_skill_data.  To test the skills, you can go to chat.susi.ai

Continue ReadingUsing SUSI as your dictionary

20 Amazing Things SUSI can do for You

SUSI.AI has a collection of varied skills in numerous fields such as knowledge, entertainment, problem solving, small-talk, assistants etc. Here’s a list of top skills which SUSI possesses.

Knowledge Based

  1. Ask SUSI to describe anything.

Sample Queries describe *

  1. Ask SUSI the distance between any two cities.

Sample queries – distance between * and *|What is distance between * and * ?| What is distance between * and *         

  1. Ask SUSI about your site’s rank.

Sample Query – site rank of *                

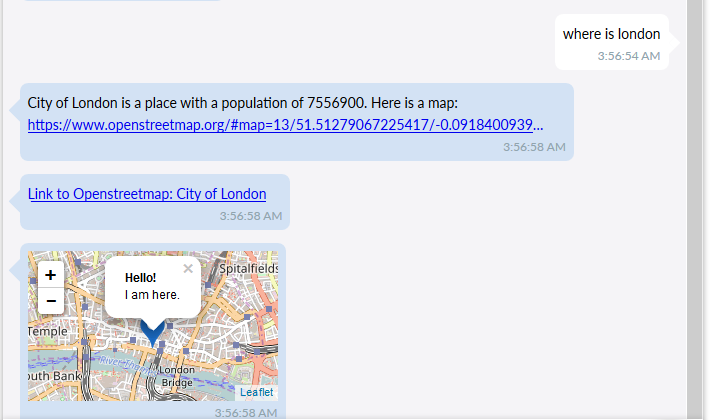
  1. Ask SUSI to know the location of any place.

Sample Queries – where is *


  1. Ask SUSI the time in any city.

 Sample Query – current time in *


  1. Ask SUSI the weather information of any city.

Sample Queries – temperature in * , hashtags * *, mentions * *, weather in *, Tell me about humidity in *|What is humidity in *|Humidity in *|* Humidity, Tell me tomorrow’s weather in *|Weather forecast of *


  1. Ask SUSI to wiki about anything.

Sample Query – wiki *


  1. Ask SUSI about any word, words etc.

Sample Queries – define *| Meaning of *| one word for *, word related to * that start with the letter *, word that sound like *|sounding like *, words that are spelled similarly to *| similar spelling to *| spelling of *, rhyme *| word rhyming with *, adjective to describe *|show adjective for *|adjective for *, suggestions for *| show words like *| similar words to * | words like *

  1. Ask SUSI about a day in the calendar.

Sample Queries – Date * ?, Day * ?, Day on year * month * date *?


  1. Ask to convert a currency to USD for you. 

Sample Queries –  convert * to USD


Problem Solving Based

  1. Ask SUSI to solve a problem for you in Mathematics.

  Sample Queries – compute *| Compute *| Calculate *| calculate *


Entertainment Based

  1. Ask SUSI to draw a card for you.

Sample Query – draw a card


  1. Ask SUSI to toss a coin for you.

Sample Query – flip a coin


  1. Ask SUSI to tell you a Big Bang Theory Joke.

Sample Query – * big bang theory| tell me about big bang theory|geek jokes|geek joke|big bang theory *

  1. Ask SUSI to generate a meme for you.

 Sample Query – get me a meme


  1. Ask SUSI to give you a recipe. 

Sample Queries – * cook *, cook *|how to cook *|recipe for


  1. Ask SUSI to tell you a random joke.

Sample Queries – tell me a joke|recite me a joke|entertain me

  1. Ask SUSI to give you a random gif.

Sample Query – random gif


Assistants

  1. Ask SUSI to translate something for you

Sample Queries – What is * in french|french for * , What is * in german|german for *, What is * in spanish|spanish for *,  What is * in hindi|hindi for *

  1. Ask SUSI to search anything for you.

Sample Queries – search *|query *|duckduckgo *


To contribute to the above skills you can follow the tutorial here. To test or chat with SUSI you can go to chat.susi.ai

Continue Reading20 Amazing Things SUSI can do for You