Implementing Check-in time chart in Orga App
Earlier in the Open event orga app there were no charts present to track the check-in time of the attendees. Hence it was quite cumbersome for the organiser to track the people and at what time they have checked-in. Using this feature of check-in time chart, the process has become quite easier.
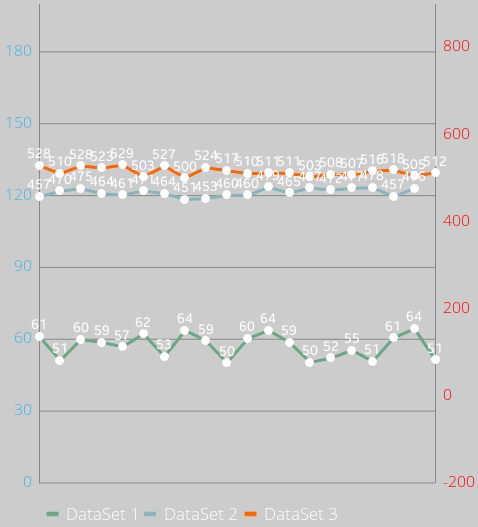
Whenever an attendee checks-in, the data point is added to the chart and a chart is plotted. The Y-axis shows the number of attendees and the X-axis shows the time at which they have checked-in.
To implement this feature I have taken use of the MPAndroidCharts library which makes the job a lot easier. Following steps were followed to implement the charts:
- Adding the following Library dependency in the build.gradle file
| implementation “com.github.PhilJay:MPAndroidChart:v3.0.3” |
- Now the following code is added to the ticket_analytics.xml file. This is done so that the UI of the charts can be created. The following XML file consists of the LineChart XML tag which shows the check-in time chart on screen. Also the labelling of the axis needs to be done, so the X-axis is explicitly named as “TIME”.
| <LinearLayout android:layout_width=“match_parent” android:layout_height=“wrap_content” android:orientation=“vertical”> <TextView android:layout_width=“wrap_content” android:layout_height=“wrap_content” android:layout_marginLeft=“@dimen/spacing_normal” android:layout_marginStart=“@dimen/spacing_normal” android:layout_marginTop=“@dimen/spacing_normal” android:text=“@string/check_in_summary” android:textAllCaps=“true” android:textSize=“@dimen/text_size_small” /> <com.github.mikephil.charting.charts.LineChart android:id=“@+id/chartCheckIn” android:layout_width=“match_parent” android:layout_height=“200dp” android:layout_marginEnd=“@dimen/spacing_normal” android:layout_marginLeft=“@dimen/spacing_normal” android:layout_marginRight=“@dimen/spacing_normal” android:layout_marginStart=“@dimen/spacing_normal” /> <TextView android:layout_width=“wrap_content” android:layout_height=“wrap_content” android:layout_gravity=“center” android:layout_marginBottom=“8dp” android:layout_marginTop=“8dp” android:text=“@string/check_in_time” android:textSize=“10sp” /> <LinearLayout android:layout_width=“match_parent” android:layout_height=“wrap_content” android:orientation=“vertical”> <FrameLayout android:layout_width=“match_parent” android:layout_height=“1dp” android:background=“@color/color_shadow” /> <FrameLayout android:layout_width=“match_parent” android:layout_height=“@dimen/spacing_small” android:background=“@color/color_bottom_surface” /> </LinearLayout> </LinearLayout> |
- Now the a method loadCheckIn( ) chart needs to added to the EventsDashboardPresenter. This is called from the EventsDashboardFragment. The loadDataCheckIn( ) is created in the ChartAnalyzer class. We pass getId( ) as the parameter.
| private void loadCheckInTimesChart() { chartAnalyser.showChart(getView().getCheckinTimeChartView()); chartAnalyser.loadDataCheckIn(getId()) .compose(disposeCompletable(getDisposable())) .subscribe(() -> { getView().showChartCheckIn(true); chartAnalyser.showChart(getView().getCheckinTimeChartView()); }, throwable -> getView().showChartCheckIn(false)); } |
- Now we add the method loadDataCheckIn( ) in the ChartAnalyzer class. This method returns a Completable and takes eventId as the single parameter.
| public Completable loadDataCheckIn(long eventId) { clearData(); isCheckinChart = true; return getAttendeeSource(eventId).doOnNext(attendee -> { String checkInTime = attendee.getCheckinTimes(); int length = checkInTime.split(“,”).length; String latestCheckInTime = checkInTime.split(“,”)[length – 1]; error = checkInTime == null ? true : false; addDataPointForCheckIn(checkInTimeMap, latestCheckInTime); }) .toList() .doAfterSuccess(attendees -> this.attendees = attendees) .toCompletable() .doOnComplete(() -> { if (error) throw new IllegalAccessException(“No checkin’s found”); checkInDataSet = setDataForCheckIn(checkInTimeMap, “check-in time”); prepare(); }); } |
It calls the getAttendeeSource( ) which further gives a call to the method getAttendees( ) from the AttendeeRepository. All the inormation related to the attendees is returned from which the check-in times is extracted. The check-in times are returned in comma separated form and hence we need to extract the first element of the sequence.
| private Observable<Attendee> getAttendeeSource(long eventId) { if (attendees == null || attendees.isEmpty()) return attendeeRepository.getAttendees(eventId, false); else return Observable.fromIterable(attendees); } |
- After the success of loading the attendees, the method addDataPointForCheckIn is called. We call it by inserting the parameters Map<Integer, Long> and the dateString which we had passed from the loadDataCheckIn( ). Following is the code for it. A map is created out of the data. The key in the map is the time and value is the number of people who have checked-in at that time.
| private void addDataPointForCheckIn(Map<Integer, Long> map, String dateString) { int hour = DateUtils.getDate(dateString).getHour(); Long numberOfCheckins = map.get(hour); if (numberOfCheckins == null) numberOfCheckins = 0L; map.put(hour, ++numberOfCheckins); } |
- After the map is created it is passed on to the setDataForCheckIn( ) and the label is provided as “check-in times”. Following is the code for setDataForCheckIn( ). All the values of the map are parsed and a new entry object is made in which the value of the key and value pairs are passed. This object is then added to the ArrayList.
| private LineDataSet setDataForCheckIn(Map<Integer, Long> map, String label) throws ParseException { List<Entry> entries = new ArrayList<>(); for (Map.Entry<Integer, Long> entry : map.entrySet()) { entries.add(new Entry(entry.getKey(), entry.getValue())); } Collections.sort(entries, new EntryXComparator()); // Add a starting point 2 hrs ago entries.add(0, new Entry(entries.get(0).getX() – 2, 0)); return new LineDataSet(entries, label); } |
- The object LineDataSet is returned with all the entries stored in the ArrayList. Now the prepare( ) is called. It is in this method that we add the code for the UI of the chart.
| private void prepare() { if (isCheckinChart) { initializeLineSet(checkInDataSet, R.color.light_blue_500, R.color.light_blue_100); lineData.addDataSet(checkInDataSet); } else { initializeLineSet(freeSet, R.color.light_blue_500, R.color.light_blue_100); initializeLineSet(paidSet, R.color.purple_500, R.color.purple_100); initializeLineSet(donationSet, R.color.red_500, R.color.red_100); lineData.addDataSet(freeSet); lineData.addDataSet(paidSet); lineData.addDataSet(donationSet); lineData.setDrawValues(false); } lineData.setDrawValues(false); } |
initializeLineSet( ) is the method where we add the color which will be used for plotting the data set.In our case the color is blue.
- We also need to plot the time stamps in the X-axis. Unfortunately MPAndroidCharts doesn’t have a functionality for that. So to handle it an inner class MyMyAxisValueFormatter is created which extends IAxisValueFormatter. Following is the code for it.
| public class MyAxisValueFormatter implements IAxisValueFormatter { @Override public String getFormattedValue(float value, AxisBase axis) { if (value < 0) return values[24 + (int) value]; return values[(int) value]; } } |
The values array list consists of the time stamps that will be present on the X-Axis.
| String[] values = new String[] {“00:00”, “1:00”, “2:00”, “3:00”, “4:00”, “5:00”, “6:00”, “7:00”, “8:00”, “9:00”, “10:00”, “11:00”, “12:00”, “13:00”, “14:00”, “15:00”, “16:00”, “17:00”, “18:00”, “19:00”, “20:00”, “21:00”, “22:00”, “23:00”}; |
- Finally the showChart( ) is called in which we specify details regarding the grid color, legend, visibility of X and Y axis etc. We also specify the animation that needs to be done whenever the chart is on screen.
| public void showChart(LineChart lineChart) { lineChart.setData(lineData); lineChart.getXAxis().setEnabled(true); lineChart.getAxisRight().setEnabled(false); lineChart.getDescription().setEnabled(false); lineChart.getLegend().setEnabled(false); YAxis yAxis = lineChart.getAxisLeft(); yAxis.setGridLineWidth(1); yAxis.setGridColor(Color.parseColor(“#992ecc71”)); if (!isCheckinChart) if (maxTicketSale > TICKET_SALE_THRESHOLD) yAxis.setGranularity(maxTicketSale / TICKET_SALE_THRESHOLD); else { XAxis xAxis = lineChart.getXAxis(); xAxis.setValueFormatter(new MyAxisValueFormatter()); yAxis.setGranularity(1); lineChart.getXAxis().setPosition(XAxis.XAxisPosition.BOTTOM); lineChart.getXAxis().setGranularity(1f); } Description description = new Description(); description.setText(“”); lineChart.setDescription(description); lineChart.animateY(1000); } |