Fixing Notification Services Across EventYay

In this Blog-Post, I will show you, the fixing of multiple notification messages getting sent on multiple clicks or display of multiple messages for a single response.

What Caused the Problem?

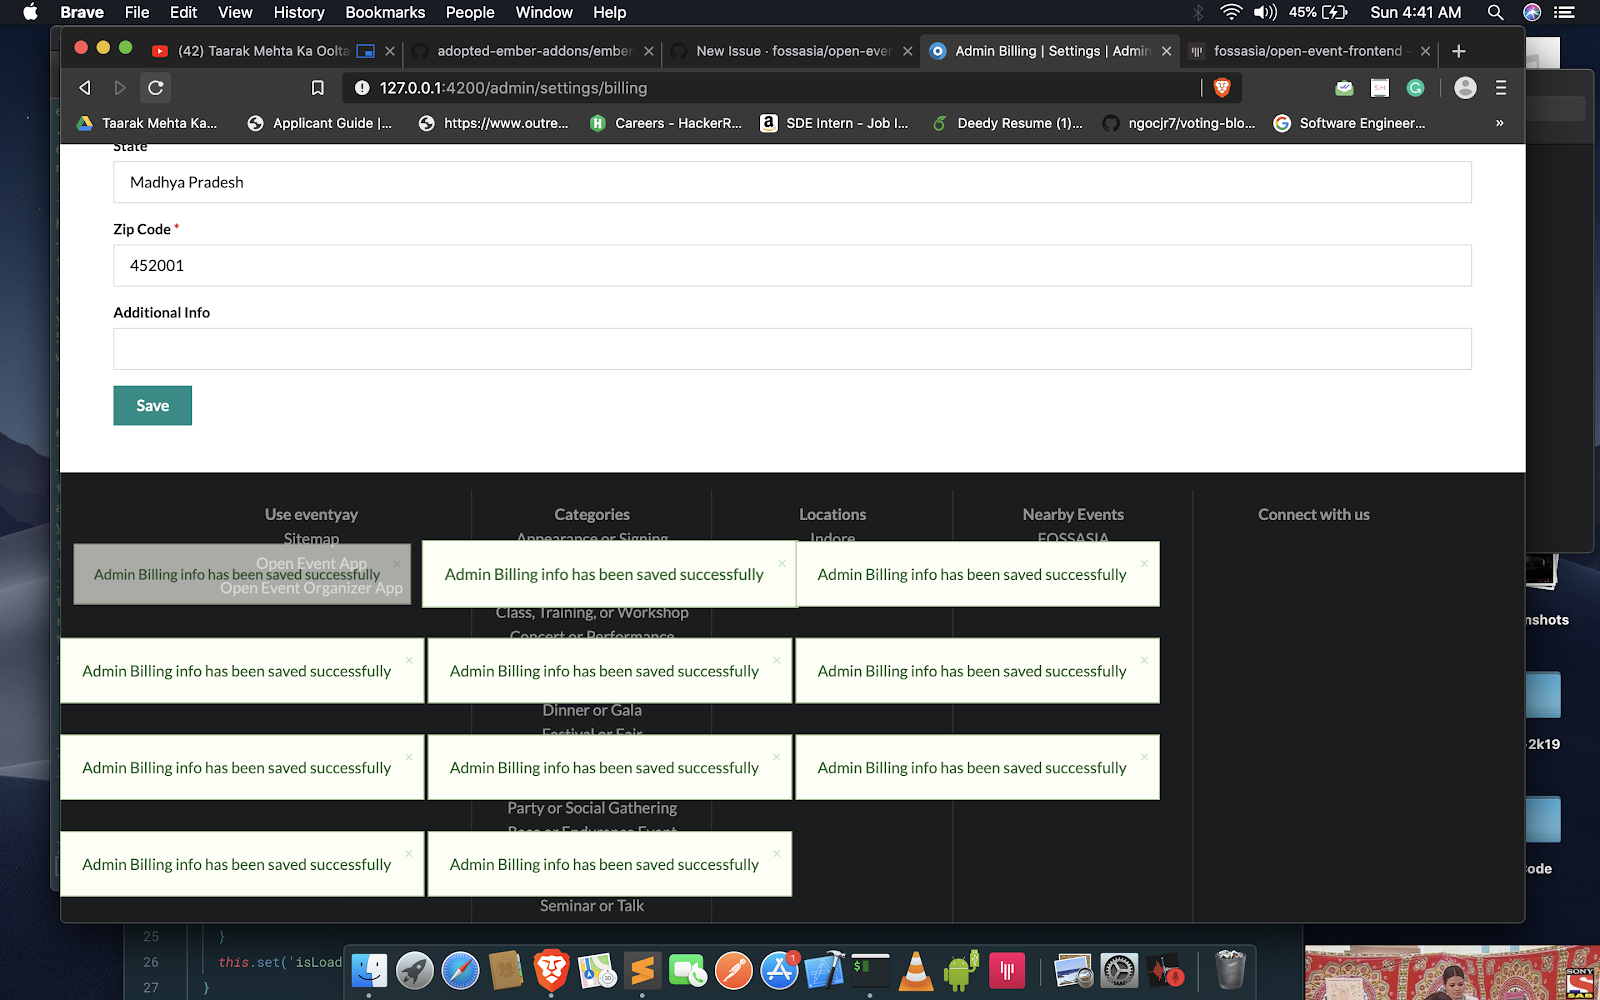
In our Open Event Frontend, We are using Ember Notify Services to inject notification across the web app to show the notifications. Due to improper error handling on the client side sometimes we get multiple notification messages for a single click or for a single action. As shown in this picture.

How Did we Tackle It ?

Since the following issue was long pertaining, I solved the issue by adding a unique ID to each notification injected through the webapp. Since a unique ID was associated with each notification message, A single notification was getting displayed on each and every action irrespective of number of clicks or number of actions called. If an actions caused two notification to be simultaneously triggered, One of them on the basis of ID is suppressed so that a unique and understandable notification get shown.

Code Snippet:

Before the changes:

.then(() => {
          if (state === 'draft') {
            this.notify.success(this.l10n.t('Your event has been published successfully.'));
          } else {
            this.notify.success(this.l10n.t('Your event has been unpublished.'));
          }

After the changes:

this.notify.success(this.isNewInvite ? this.l10n.t('Role Invite sent successfully') : this.l10n.t('Role Invite updated successfully'), {
            id: 'man_role'
          });
        })
        .catch(() => {
          this.notify.error(this.l10n.t('Oops something went wrong. Please try again'), {
            id: 'man_role_error'
          });
        })

Pull Request : Open-Event-Frontend-3438

Issue : Open-Event-Frontend-3437

Tags :

OpenEvent, EventYay, Fossasia, Intern-2k19

Continue ReadingFixing Notification Services Across EventYay

Customizing Ember CLI Notify for Badgeyay

Badgeyay project is divided into two parts i.e front-end with Ember JS and back-end with REST-API programmed in Python.

Badgeyay comes with many features for customising the process of generation of Badges. It gives freedom to user to choose Input Badge data which is to be printed on the individual badges, choosing the badge size, applying custom background to the badges and then optional features of font customization helps to generate cool badges.You have to just click on create badges and the generated badge with download link appear at bottom of form. But a problem arises with the generated badges link that after logout/login or generation of new badges just after creating badges one time, the link of the previously created badges is still there which is a bit confusing, as user might think the previous link to be the new link and press on that in order to download and find the old badges downloaded.

To resolve this issue, I have used the power of Ember notify library and customized it to show the generated badges link and disappear after a specified time in my Pull Request and after that user can always see his previously generated badges in My Badges route.

Let’s get started and understand it.

  • Customizing Notify library and making the changes in the send Badge data function to show the generated badge link just after the completion of badge generation process.

import Controller from '@ember/controller';
import { inject as service } from '@ember/service';   

export default Controller.extend({
....
routing : service('-routing'),
notify : service('notify'), // importing Notify service
.....
sendBadge(badgeData) {
      const _this = this;
      let badgeRecord = _this.get('store').createRecord('badge', badgeData);
      badgeRecord.save()
        .then(record => {
          _this.set('badgeGenerated', true);
          _this.set('genBadge', record);
          var notify = _this.get('notify');
          var link   = record.download_link; // Assigning download link to a variable 
          var message = notify.success(  // Configuring the message of notify service
            { html:   // Adding the html in notify message
            '
Badge generated successfully.
'
+ '<p>Visit this<b>' + '<a href=' + link + '> Link </a></b> to download badge.</p>', closeAfter: 10000 }); // Specifying the time of closing the message }) .catch(err => { _this.get('notify').error('Unable to generate badge'); }); },


I have implemented the customized notify function to show the badge generation link for a specific time.

  • Now run the server to see the implemented changes by following command.

$ ember serve


  • Ember Notify service showing the generated Badges link:

Now, I am done with the implementation of customised notify function to show the badge generation link for a specific time of 10 seconds.

Resources:

  1. Ember Docs –  Link
  2. Ember Notify Docs – Link
Continue ReadingCustomizing Ember CLI Notify for Badgeyay

Integrating Ember Notify with Badgeyay

Badgeyay project is divided into two parts i.e front-end with Ember JS and back-end with REST-API programmed in Python.

Badgeyay frontend has many features like Login and Sign up features and Login with OAuth and the most important, the badge generation feature is also up and running but the important thing from the User’s perspective is to get notified of all the actions performed in the application so that user can proceed easily further after performing a specific action in the Application..

In this Blog, I will be discussing how I integrated ember-notify in Badgeyay frontend to notify user about the actions performed in my Pull Request.

Ember-notify displays a little notification message down the bottom of our application.

Let’s get started and understand it step by step.

Step 1:

This module is an ember-cli addon, so installation is easy:

npm install ember-notify --save-dev


Step 2:

Inject the notify service in the controller of the template. Here, I will showing how I added it in showing Log In and Logout messages and you can check the whole code in my Pull request for other controllers also.

// controllers/login.js 

import Ember from 'ember';

import Controller from '@ember/controller';

const { inject } = Ember;

export default Controller.extend({
  session : inject.service(),
  notify  : inject.service('notify'),

..........

           this_.transitionToRoute('/');
          this_.get('notify').success('Log In Successful');
        }).catch(function(err) {
          console.log(err.message);
          this_.get('notify').error('Log In Failed ! Please try again');
        });

............

              this_.transitionToRoute('/');
              this_.get('notify').success('Log In Successful');
            })
            .catch(err => {
              console.log(err);
            });
        }).catch(function(err) {
          console.log(err.message);
          this_.get('notify').error('Log In Failed ! Please try again');
        });
 ..........
// controllers/logout.js

import Ember from 'ember';

import Controller from '@ember/controller';

const { inject } = Ember;

export default Controller.extend({
  session : inject.service(),
  notify  : inject.service('notify'),
  beforeModel() {
    return this.get('session').fetch().catch(function() {});
  },
  actions: {
    logOut() {
      this.get('session').close();
      this.transitionToRoute('/');
      this.get('notify').warning('Log Out Successful');
    }
  }
});


I have implemented ember-notify for Logging In and Out feature & in the similar way I have implemented it for other controllers and complete code can be seen in my Pull Request.

Step 3::

Now run the server to see the implemented changes by following command.

$ ember serve


Navigate to localhost and perform login and logout actions to see the changes.

  •  Successful Log In

  • Successful Log out

  • Successful CSV Upload

Now, we are done with the integration of ember-notify in Badgeyay frontend to notify user about the actions performed in the Application.

Resources:

  • Ember Docs –  Link
  • Ember Notify Docs – Link
Continue ReadingIntegrating Ember Notify with Badgeyay