

How SUSI WebChat Implements RSS Action Type
SUSI.AI now has a new action type called RSS. As the name suggests, SUSI is now capable of searching the internet to answer user queries. This web search can be performed either on the client side or the server side. When the web search is to be performed on the client side, it is denoted by websearch action type. When the web search is performed by the server itself, it is denoted by rss action type. The server searches the internet and using RSS feeds, returns an array of objects containing :
- Title
- Description
- Link
- Count
Each object is displayed as a result tile and all the results are rendered as swipeable tiles.
Lets visit SUSI WebChat and try it out.
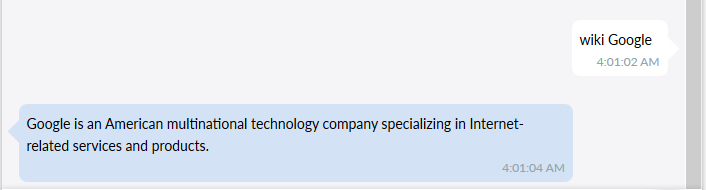
Query : Google
Response: API response

SUSI WebChat uses the same code abstraction to render websearch and rss results as both are results of websearch, only difference being where the search is being performed i.e client side or server side.
How does the client know that it is a rss action type response?
"actions": [
  {
    "type": "answer",
    "expression": "I found this on the web:"
  },
  {
    "type": "rss",
    "title": "title",
    "description": "description",
    "link": "link",
    "count": 3
  }
],
The actions attribute in the JSON API response has information about the action type and the keys to be parsed for title, link and description.
- The type attribute tells the action type is rss.
- The title attribute tells that title for each result is under the key – title for each object in answers[0].data.
- Similarly keys to be parsed for description and link are description and link respectively.
- The count attribute tells the client how many results to display.
We then loop through the objects in answers,data[0] and from each object we extract title, description and link.
let rssKeys = Object.assign({}, data.answers[0].actions[index]);

delete rssKeys.type;

let count = -1;

if(rssKeys.hasOwnProperty('count')){
  count = rssKeys.count;
  delete rssKeys.count;
}

let rssTiles = getRSSTiles(rssKeys,data.answers[0].data,count);
We use the count attribute and the length of answers[0].data to fix the number of results to be displayed.
// Fetch RSS data

export function getRSSTiles(rssKeys,rssData,count){

  let parseKeys = Object.keys(rssKeys);
  let rssTiles = [];
  let tilesLimit = rssData.length;

  if(count > -1){
    tilesLimit = Math.min(count,rssData.length);
  }

  for(var i=0; i<tilesLimit; i++){
    let respData = rssData[i];
    let tileData = {};

    parseKeys.forEach((rssKey,j)=>{
      tileData[rssKey] = respData[rssKeys[rssKey]];
    });

    rssTiles.push(tileData);
  }

return rssTiles;

}
We now have our list of objects with the information parsed from the response.We then pass this list to our renderTiles function where each object in the rssTiles array returned from getRSSTiles function is converted into a Paper tile with the title and description and the entire tile is hyperlinked to the given link using Material UI Paper Component and few CSS attributes.
// Draw Tiles for Websearch RSS data

export function drawTiles(tilesData){

let resultTiles = tilesData.map((tile,i) => {

  return(
    <div key={i}>
      <MuiThemeProvider>
        <Paper zDepth={0} className='tile'>
          <a rel='noopener noreferrer'
          href={tile.link} target='_blank'
          className='tile-anchor'>
            {tile.icon &&
            (<div className='tile-img-container'>
               <img src={tile.icon}
               className='tile-img' alt=''/>
             </div>
            )}
            <div className='tile-text'>
              <p className='tile-title'>
                <strong>
                  {processText(tile.title,'websearch-rss')}
                </strong>
              </p>
              {processText(tile.description,'websearch-rss')}
            </div>
          </a>
        </Paper>
      </MuiThemeProvider>
    </div>
  );

});

return resultTiles;
}
The tile title and description is processed for HTML special entities and emojis too using the processText function.
case 'websearch-rss':{

let htmlText = entities.decode(text);
processedText = <Emojify>{htmlText}</Emojify>;
break;

}
We now display our result tiles as a carousel like swipeable display using react-slick. We initialise our slider with few default options specifying the swipe speed and the slider UI.
import Slider from 'react-slick';

// Render Websearch RSS tiles

export function renderTiles(tiles){

  if(tiles.length === 0){
    let noResultFound = 'NO Results Found';
    return(<center>{noResultFound}</center>);
  }

  let resultTiles = drawTiles(tiles);

  var settings = {
    speed: 500,
    slidesToShow: 3,
    slidesToScroll: 1,
    swipeToSlide:true,
    swipe:true,
    arrows:false
  };

  return(
    <Slider {...settings}>
      {resultTiles}
    </Slider>
  );
}
We finally add CSS attributes to style our result tile and add overflow for text maintaining standard width for all tiles.We also add some CSS for our carousel display to show multiple tiles instead of one by default. This is done by adding some margin for child components in the slider.
.slick-slide{
  margin: 0 10px;
}

.slick-list{
  max-height: 100px;
}
We finally have our swipeable display of rss data tiles each tile hyperlinked to the source of the data. When the user clicks on a tile, he is redirected to the link in a new window i.e the entire tile is hyperlinked. And when there are no results to display, we show a `NO Results Found` message.
The complete code can be found at SUSI WebChat Repo. Feel free to contribute
Resources


You must be logged in to post a comment.