

Designing PayTM Checkout Components
This summer, Open Event project has 3 different payment gateways integrated in its system enabling the user base a wider base of options to buy their tickets and pay the organizers and hence making the platform more user friendly. In the initial period Omise gateway was implemented and properly documented in the first phase while Alipay was subsequently implemented in the middle of the coding period. In the late phase, the focus has been shifted to Indian payment gateways and PayTM came out as prime choice considering it’s popularity and ease of integration with the existing technology stack.
This requires two different modals to be added to frontend project to felicitate the open-event-server hits being made on PayTM’s API services.
The first modal’s skeleton design is to check paytm wallets as the payment option and acquire the mobile number to be used.
// app/templates/components/modals/paytm-payment-options.hbsdiv class="header">div>div class="content">div class="muted small text">div>form class="ui form" autocomplete="off" {{action 'openOTPController' on='submit' preventDefault=true}}>div class="field">img src="/images/payment-logos/paytm.png" alt="paytm">div>if isWalletSelected}}div class="field">div class="label">div>div>if}}form>div>div class="actions">button type="button" class="ui black button" {{action 'close'}}>button>button {{action openOTPController}} class="ui green button" disabled={{not isWalletSelected}}>button>div> |
This simple modal design implementation resulted in the skeleton design of the first modal which can be seen as following:

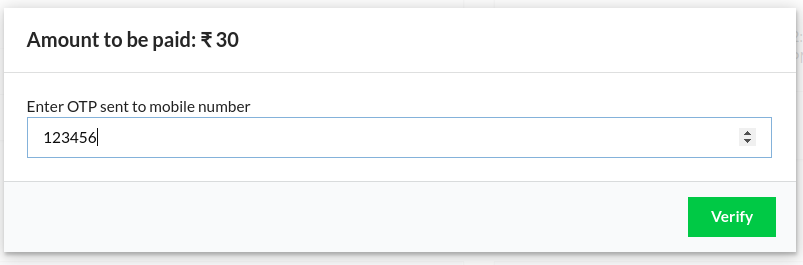
The second modal required a simple API hit integration which will be validating the acquired OTP. This was designed rather simply with the following snippet:
// app/templates/components/modals/paytm-otp.hbsdiv class="header">div>div class="content">form class="ui form" autocomplete="off">div class="field">div>form>div>div class="actions">button type="button" class="ui black button" {{action 'close'}}>button>button class="ui green button">button>div> |
These modals were controlled by adding corresponding pop-up logic in the pending.js controller focusing on the clicks on Proceed and verify buttons respectively.
// app/controllers/orders/pending.js |
This concludes the design walk through of custom PayTM checkout modals. These will be integrated with the APIs to complete the backend workflow and hence adding PayTM as another payment option!
Resources
Related Work and Code Repository