Refactor of Dropdown Menu in Susper

The first version of the Susper top menu was providing links to resources and tutorials. In the next version of the menu, we were looking for a menu with more colorful icons, a cleaner UI design and a menu that should appear on the homepage as well. In this blog, I will discuss about refactoring the dropdown menu. This is how earlier dropdown of Susper looks like:

We decided to create a separate component for the menu DropdownComponent.

At first, I created a drop down menu with matching dimensions similar to what Google follows. Then, I gave padding: 28px to create similar UI to market leader. This will make a dropdown menu with clean UI design. I replaced the old icons with colorful icons. In the dropdown we have:

  • Added more projects of FOSSASIA like eventyay, loklak, susi and main website of FOSSASIA. Here how it looks now :

The main problem I faced was aligning the content inside the dropdown and they should not get disturbed when the screen size changes.
I kept the each icon dimensions as 48 x 48 inside drop down menu. I also arranged them in a row. It was easy to use div element to create rows rather than using ul and li tags which were implemented earlier.

To create a horizontal grey line effect, I used the hr element. I made sure, padding remained the same above and below the horizontal line.

At the end of drop down menu, @mariobehling suggested instead of writing ‘more’, it should redirect to projects page of FOSSASIA.

This is how I worked on refactoring drop down menu and added it on the homepage as well.

Resources

Continue ReadingRefactor of Dropdown Menu in Susper

Using MockBackend to test Susper Angular Front-end Code

In this blog, I’ll be sharing how we are testing services which we are using in Susper development.We’re using Angular 4 in our project as tech stack and we use Jasmine for testing purpose.

Tests are written to avoid issues which occur again and again. For example: Since we have implemented knowledge graph, we faced a lot of issues like:

  • When a user enters a query, search results appear but knowledge graph does not appear.
  • When a fresh query is entered or page is refreshed, knowledge graph does not appear.
  • The API which we have used is not responding.

We overcome this issue by writing test. The data is being taken with the help of an API. So, it will require testing using HTTP. Instead of testing like this, there is a better way by using MockBackend.

Testing with MockBackend is a more sensible approach. This allows us to mock our responses and avoid hitting the actual backend which results in boosting our testing.

To use the MockBackend feature, it requires creating a mock. For knowledge-service it looks like this:

export const MockKnowledgeApi {
  results: {
    uri: ‘http://dbpedia.org/resource/Berlin’,
    label: ‘Berlin’,
  }
  MaxHits: 5
};

To use the MockBackend feature, import MockBackend, MockConnection, BaseRequestOptions and MockKnowledgeApi.

import { MockBackend, MockConnection } from ‘@angular/http/testing’;
import { MockKnowledgeApi } from ‘./shared/mock-backend/knowledge.mock’;
import { BaseRequestOptions } from ‘@angular/http’;

Create a mock setup. In this case, we will create mock setup w.r.t HTTP because data from API is being returned as HTTP. If data, is being returned in JSON format, create a mock setup w.r.t jsonp.

const mockHttp_provider = {
  provide: Http,
  deps: [MockBackend, BaseRequestOptions],
  useFactory: (backend: MockBackend,options: BaseRequestOptions) => {
    return new Http(backend, options);
}
};

Now, describe the test suite. Inside, describe the function, don’t import MockConnection. It will throw error since it is only used to create a fake backend. It should look like this:

providers: [
  KnowledgeapiService,
  MockBackend,
  BaseRequestOptions,
  mockHttp_provider,
]
Define service as KnowledgeService and backend as MockBackend. Inject both the services in beforeEach() function.
Now to actually test the service, create a query.

const searchquery = ‘Berlin’;

The written specs should look like this. I won’t go much in detail here, but I’ll cover up the key points of code.

it(‘should call knowledge service API and return the result’, () => {
backend.connections.subscribe((connection: MockConnection) => {
const options = new ResponseOptions({
body: JSON.stringify(MockKnowledgeApi)
});connection.mockRespond(new Response(options));
expect(connection.request.method).toEqual(RequestMethod.Get);
});
Here, mockRespond will mock our response and it will test whether the service is working or not. Already, we have defined a query.

It should have a link to API and should be equal to searchquery which we have defined already as ‘Berlin’.

expect(connection.request.url).toBe(
`http://lookup.dbpedia.org/api/search/KeywordSearch` +
`?&QueryString=${searchquery}`
);

At last, it will check if it’s working or not. If it’s working, then test case will pass. Please note, it will not hit the actual backend.

service.getsearchresults(searchquery).subscribe((res) => {
expect(res).toEqual(MockKnowledgeApi);
);
In this way, we have written tests for knowledge graph to avoid future issues. We will be adding tests like these for other services as well which are being used in Susper project.

Resources

Continue ReadingUsing MockBackend to test Susper Angular Front-end Code

Filtering out a query in Solr for Susper

In this blog, I would like to share you how- we have implemented tabs feature in Susper.

When a search is attempted, results are fetched in results.component. Since there are many kinds of results being fetched from the server, how should we filter them in separate tabs? For example under the tab ‘All’: All kind of results are being fetched but .png or .mp3 which should be loaded under tabs ‘Images’ and ‘Videos’. The yacy server is written in Java on Solr technology. Going through Solr documents, we found the solution to filter queries using ‘fq’ parameter.

What is fq parameter?

‘fq’ stands for filter query. It returns the document which we want or in simple words returns filtered document. Documents will only be included in the result if they are at the intersection of the document sets resulting from each fq.

How we did we use fq parameter in Susper?

To explain it better, I’m sharing a code snippet here which has been written to filter out queries :

if (query[‘fq’]) {
  if (query[‘fq’].includes(‘png’)) {
    this.resultDisplay = ‘images’;
    urldata.fq = ‘url_file_ext_s:(png+OR+jpeg+OR+jpg+OR+gif)’;
} else if (query[‘fq’].includes(‘avi’)) {
    this.resultDisplay = ‘videos’;
} else {
  this.resultDisplay = ‘all’;
}
}

What is ongoing here is that we have subscribed to a query and used if and else conditions. query[‘fq’] simply filters out the query which has been subscribed. include(‘png’) and include(.avi) is clear that we are filtering out the documents with these tabs. This action happens when the user clicks on a tab.

If the user clicks on images tab: files with .png are displayed. If the user clicks on videos tab: files with .avi are displayed.

url_file_ext_s:() is simply another solr syntax to provide the document format.

The flowchart above explains more clearly, how fq parameter is filtering out documents without affecting the total number of documents which yacy fetches by indexing web pages based on the query.

Resources:

Continue ReadingFiltering out a query in Solr for Susper

Setting up Codecov in Susper repository hosted on Github

In this blog post, I’ll be discussing how we setup codecov in Susper.

  • What is Codecov and in what projects it is being used in FOSSASIA?

Codecov is a famous code coverage tool. It can be easily integrated with the services like Travis CI. Codecov also provides more features with the services like Docker.

Projects in FOSSASIA like Open Event Orga Server, Loklak search, Open Event Web App uses Codecov. Recently, in the Susper project also the code coverage tool has been configured.

  • How we setup Codecov in our project repository hosted on Github?

The simplest way to setup Codecov in a project repository is by installing codecov.io using the terminal command:

npm install --save-dev codecov.io

Susper works on tech-stack Angular 2 (we have recently upgraded it to Angular v4.1.3) recently. Angular comes with Karma and Jasmine for testing purpose. There are many repositories of FOSSASIA in which Codecov has been configured like this. But with, Angular this case is a little bit tricky. So, using alone:

bash <(curl -s https://codecov.io/bash)

won’t generate code coverage because of the presence of Karma and Jasmine. It will require two packages: istanbul as coverage reporter and jasmine as html reporter. I have discussed them below.

Install these two packages:

  • Karma-coverage-istanbul-reporter
  • npm install karma-coverage-istanbul-reporter --save-dev
  • Karma-jasmine html reporter
  • npm install karma-jasmine-html-reporter --save-dev

    After installing the codecov.io, the package.json will be updated as follows:

  • "devDependencies": {
      "codecov": "^2.2.0",
      "karma-coverage-istanbul-reporter": "^1.3.0",
      "karma-jasmine-html-reporter": "^0.2.2",
    }

    Add a script for testing:

  • "scripts": {
       "test": "ng test --single-run --code-coverage --reporters=coverage-istanbul"
    }

    Now generally, the codecov works better with Travis CI. With the one line bash <(curl -s https://codecov.io/bash) the code coverage can now be easily reported.

Here is a particular example of travis.yml from the project repository of Susper:

script:
 - ng test --single-run --code-coverage --reporters=coverage-istanbul
 - ng lint
 
after_success:
 - bash <(curl -s https://codecov.io/bash)
 - bash ./deploy.sh

Update karma.config.js as well:

Module.exports = function (config) {
  config.set({
    plugins: [
      require('karma-jasmine-html-reporter'),
      require('karma-coverage-istanbul-reporter')
    ],
    preprocessors: {
      'src/app/**/*.js': ['coverage']
    },
    client {
      clearContext: false
    },
    coverageIstanbulReporter: {
      reports: ['html', 'lcovonly'],
      fixWebpackSourcePaths: true
    },
    reporters: config.angularCli && config.angularCli.codeCoverage
      ? ['progress', 'coverage-istanbul'],
      : ['progress', 'kjhtml'],
  })
}

This karma.config.js is an example from the Susper project. Find out more here: https://github.com/fossasia/susper.com/pull/420
This is how we setup codecov in Susper repository. And like this way, it can be set up in other repositories as well which supports Angular 2 or 4 as tech stack.

Continue ReadingSetting up Codecov in Susper repository hosted on Github

Implementing Voice Search In Susper (in Chrome only)

Last week @mariobehling opened up an issue to implement voice search in Susper. Google Chrome provides an API to integrate Speech recognition feature with any website. More about API can be read here: https://shapeshed.com/html5-speech-recognition-api/

The explanation might be in Javascript but it has been written following syntax of Angular 4 and Typescript. So, I created a speech-service including files:

  • speech-service.ts
  • speech-service.spec.ts

Code for speech-service.ts: This is the code which will control the working of voice search.

import { Injectable, NgZone } from ‘@angular/core’;
import { Observable } from ‘rxjs/Rx’;
interface
IWindow extends Window {
  webkitSpeechRecognition: any;
}
@Injectable()
export
class SpeechService {

constructor(private zone: NgZone) { }

record(lang: string): Observable<string> {
  return Observable.create(observe => {
    const { webkitSpeechRecognition }: IWindow = <IWindow>window;

    const recognition = new webkitSpeechRecognition();

    recognition.continuous = true;
    recognition.interimResults = true;
    recognition.onresult = take => this.zone.run(() => observe.next(take.results.item(take.results.length 1).item(0).transcript)
);

    recognition.onerror = err =>observe.error(err);
    recognition.onend = () => observe.complete();
    recognition.lang = lang;
    recognition.start();
});
}
}

You can find more details about API following the link which I have provided above in starting. Here recognition.onend() => observe.complete() works as an important role here. Many developers forget to use it when working on voice search feature. It works like: whenever a user stops speaking, it will automatically understand that voice action has now been completed and the search can be attempted. And for this:

speechRecognition() {
  this.speech.record(‘en_US’).subscribe(voice => this.onquery(voice));
}

We have used speechRecognition() function. onquery() function is called when a query is entered in a search bar.

Default language has been set up as ‘en_US’ i.e English. We also created an interface to link it with the API which Google Chrome provides for adding voice search feature on any website.

I have also used a separate module by name NgZone. Now, what is NgZone? It is used as an injectable service for executing working inside or outside of the Angular zone. I won’t go into detail about this module much here. More about it can be found on angular-docs website.

We have also, implemented a microphone icon on search bar similar to Google. This is how Susper’s homepage looks like now:

This feature only works in Google Chrome browser and for Firefox it doesn’t. So, for Firefox browser there was no need to show ‘microphone’ icon since voice search does not work Firefox. What we did simply use CSS code like this:

@mozdocument urlprefix() {
  .microphone {
    display: none;
  }
}

@-moz-document url-prefix() is used to target elements for Firefox browser only. Hence using, this feature we made it possible to hide microphone icon from Firefox and make it appear in Chrome.

For first time users: To use voice search feature click on the microphone feature which will trigger speechRecognition() function and will ask you permission to allow your laptop/desktop microphone to detect your voice. Once allowing it, we’re done! Now the user can easily, use voice search feature on Susper to search for a random thing.

Continue ReadingImplementing Voice Search In Susper (in Chrome only)

Creating a drop up in Susper

We are accustomed to creating drop-downs in our navigation bars, but sometimes we are faced with the need of creating drop ups.

In Susper, we had to create a drop up for settings for the footer.

This is how it looks:

Let us see the step by step procedure to create the drop up:

  1. Write the required Html content (in Susper it is in the footer-navbar.component.html)
<span class="dropup">

 <a class="dropdown-toggle" data-toggle="dropdown">Settings</a>

 <ul class="dropdown-menu" id="fsett">

   <li><a routerLink="/preferences">Search settings</a></li>

   <li><a routerLink="/advancedsearch">Advanced Search</a></li>

   <li><a routerLink="/crawlstartexpert" routerLinkActive="active">Crawl Job</a></li>

 </ul>

</span>


Make sure to link all the listed items in the drop down correctly. Notice that all of this has been put in the parent tag span, with class drop up


  1. We need to write the CSS part now:
.dropup{

cursor: pointer;

}

#fsett {

background: #fff;

border: 1px solid #999;

bottom: 30px;

padding: 10px 0;

position: absolute;

box-shadow: 0 2px 4px rgba(0, 0, 0, 0.2);

text-align: left;

z-index: 104;

margin-left: -85%;

margin-bottom: -9%;

}

#fsett a {

display: block;

line-height: 44px;

padding: 0 20px;

text-decoration: none;

white-space: nowrap;

}

#fsett a:hover {

text-decoration: underline;

background-color: white;

}

Here are some useful attributes, that can style your drop up:

  • Cursor: It sets your cursor to whatever you like when you move over the drop up. The pointer changes it to the hand symbol, default changes it to the standard arrow and so on…
  • Z-index: can be used to set the height of your elements, it is equal to its parent element by default, setting the z-index of something to more than that will make it have a higher stack order so it will be in the front.
  • Text-decoration: This attribute is used to add/remove decoration like underline for links.
  • Margin and position: Use margin-left and margin-right to set the position of the drop-up, combine it with position: absolute, to give absolute dimensions.
  • Box-shadow: This gives the drop up a shadow effect, which looks really nice. The first 3 parameters are for dimensions (X-offset, Y-offset, Blur). The rgba specifies colour, with parameters as (red-component, green-component, blue-component, opacity).
Continue ReadingCreating a drop up in Susper

Adding Susper as standard search engine in Firefox and Chrome

Have you ever seen on the sites like Google and DuckDuckGo, when a user visits their website they provide an option to add their search engine as default search provider. Similarly, we raised up an issue regarding the implementation of this feature.

Currently, we have implemented this feature but facing some issues. Here is a screenshot:

Code for implementing this feature:

  $(document).ready(function() {
    var isFirefox = typeof InstallTrigger!=='undefined';

     if (isFirefox === false) {
       $("#set-susper-default").remove();
       $(".input-group-btn").addClass("align-search-btn");
       $("#navbar-search").addClass("align-navsearch-btn");
     }

     if (window.external && window.external.IsSearchProviderInstalled) {
       var isInstalled = window.external.IsSearchProviderInstalled("http://susper.com");

     if (!isInstalled) {
       $("#set-susper-default").show();
     }
    }

    $("#install-susper").on("click", function() {
      window.external.AddSearchProvider("http://susper.com/susper.xml");
    });

    $("#cancel-installation").on("click", function() {
      $("#set-susper-default").remove();
    });
  });


You can see, right side a box to add search provider. But this feature was not working for Chrome since it has some different feature to add search providers because of AddSearchProvider() and window.external.IsSearchProviderInstalled() works only with some versions of Firefox and earlier they worked with Chrome as well but now they don’t. So to remove this feature from Chrome browser, we simply commented out the lines which are highlighted in the code as bold.

We are still having an issue like, if a user adds the search provider in Firefox by installing it and then he/she visits the site next time, that option still appears to be there. It should not appear again if Susper has been already added as default search provider. We’re working on it though.

  • What else we did for other browsers compatibility?
    We picked up the idea of adding an OpenSearch feature. It auto-discovers the search providers. What we did simply:
  1. Create an XML file as  yoursitename.xml and configure it like this:
    <?xml version="1.0" encoding="UTF-8"?>
    <OpenSearchDescription xmlns="http://a9.com/-/spec/opensearch/1.1/">
    <ShortName>[Name of your website]</ShortName>
    <Description>[Description of your website]</Description>
    <Url type="text/html" template="http://www.yourwebsite.com/search?q=site:[Site host] {searchTerms}"/>
    </OpenSearchDescription>
  2. Add an auto-discovery link in your main index.html file:
<link rel="search" href="//susper.com/susper.xml" type="application/opensearchdescription+xml" title="susper.com"/>

We’re done! To see it in action, refresh the browser. The browser will auto-detect and tell you that a custom search engine was discovered and you can customise it according to your choice.

Check our susper.xml here:
https://github.com/fossasia/susper.com/blob/master/susper.xml

Continue ReadingAdding Susper as standard search engine in Firefox and Chrome

How we implemented an InfoBox similar to Google in Susper

Research Work: This was initially proposed by @mariobehling , https://github.com/fossasia/susper.com/issues/181, where he proposed an idea of building an infobox similar to Google or Duckduckgo.

Later Michael Christen 0rb1t3r referenced DBpedia API, which can get a structured data from Wikipedia information.

One example of using the DBpedia API is: http://lookup.dbpedia.org/api/search/KeywordSearch?QueryClass=place&QueryString=berlin

More information about the structured Knowledge Graphs is available at https://en.wikipedia.org/wiki/Knowledge_Graph

Implementation:

We created an infobox component to display the data related to infobox https://github.com/fossasia/susper.com/tree/master/src/app/infobox

It takes care about rendering the information, styling of the rendered data retrieved from the DBpedia API

Infobox.component.html :

<div *ngIf="results?.length > 0" class="card">

<div>

<h2><b>{{this.results[0].label}}</b></h2>

<p>{{this.results[0].description}}</p>

</div>

<div class="card-container">

<h3><b>Related Searches</b></h3>


<div *ngFor="let result of results">

   <a [routerLink]="resultsearch" [queryParams]="{query: result.label}">{{result.label}}</a>

</div>

</div>

</div>

The infobox.component.ts makes a call to Knowledge service with the required query, and the knowledge service makes a get request to the DBpedia API and retrieves the results.

infobox.component.ts

this.query$.subscribe( query => {

if (query) {

   this.knowledgeservice.getsearchresults(query).subscribe(res => {

     if (res.results) {

       this.results = res.results;

     }

   });

 }


knowledeapi.service.ts

getsearchresults(searchquery) {


let params = new URLSearchParams();

params.set('QueryString', searchquery);


let headers = new Headers({ 'Accept': 'application/json' });

let options = new RequestOptions({ headers: headers, search: params });

return this.http

   .get(this.searchURL, options).map(res =>


     res.json()


   ).catch(this.handleError);


}

For passing params in an HTTP object, we should create URLSearchParams() object, set the parameters in it, and send them as RequestOptions in http.get method. If you observe the line let headers = new Headers({ ‘Accept’: ‘application/json’ }); . we informed the API to send us data in JSON format.

Thereby finally the infobox component retrieves the results and displays them on susper.

Whole code for this implementation could be found in this pull:

https://github.com/fossasia/susper.com/pull/288

Continue ReadingHow we implemented an InfoBox similar to Google in Susper

Calling an API in Angular: Using Ngrx/Redux Architecture and Yacy API for Susper

Initially, in Susper we retrieved data from Yacy using a service in Angular 2, but later we introduced redux architecture, which resolved many issues and also made the code structured. In the past when Web APIs were not standardised people used to make their own architecture to implement each functionality. Web APIs have simplified the process of sending a query to an external server and standardised the process of sharing one’s own work with others.

The rise of Internet and mobile content in the recent past has resulted in many developers decoupling the front end and back end of their projects by exposing APIs that they create so that Android and iOS devices can interact with them using Web APIs. If you are new to building web APIs, A good place would be to look is here https://zapier.com/learn/apis/chapter-1-introduction-to-apis/ .

To understand how the Susper front end implements API calls from Yacy, it’s essential to understand the ngrx redux architecture inspired by react redux which helps manage the state. In case you are new to redux, please go through this to learn more about it and look at this sample app before proceeding with the rest of this blog post

In Susper we have implemented a front end for peer-to-peer decentralised Search Engine Yacy using Yacy Search API.

The services here are very similar to the angular services that seasoned angular js developers are familiar with. This service implementation in the project is responsible for making the calls to the API whenever a query is made.

https://github.com/fossasia/susper.com/blob/master/src/app/search.service.ts

where we implemented a searchService –


getsearchresults(searchquery) {

let params = new URLSearchParams();

for (let key in searchquery) {

if (searchquery.hasOwnProperty(key)) {

params.set(key, searchquery[key]);

}

}

params.set('wt', 'yjson');

params.set('callback', 'JSONP_CALLBACK');

params.set('facet', 'true');

params.set('facet.mincount', '1');

params.append('facet.field', 'host_s');

params.append('facet.field', 'url_protocol_s');

params.append('facet.field', 'author_sxt');

params.append('facet.field', 'collection_sxt');

return this.jsonp

.get('http://yacy.searchlab.eu/solr/select', {search: params}).map(res =>

res.json()[0]

).catch(this.handleError);

}

Now that you have seen the above service it contains JSONP_CALLBACK as a parameter, which tells the server “Hey Yacy, I can understand JSON, so you could communicate or send me data in JSON”. Some servers need one to send a header Accept: application/json

*JSONP is JSON with padding, that is, you put a string at the beginning and a pair of parenthesis around it*

so what about Redux where have we used it then? Basically, every redux based project will have an action and a reducer for each state in the store. Especially for search implementation we have our reducers and actions at https://github.com/fossasia/susper.com/blob/master/src/app/reducers

And

https://github.com/fossasia/susper.com/blob/master/src/app/actions

Now going through the architecture when a user types something in the search bar a call to the action query is made this.store.dispatch(new query.QueryServerAction(event.target.value));

Which is of type QUERYSERVER


export class QueryServerAction implements Action {

type = ActionTypes.QUERYSERVER;

constructor(public payload: any) {}

}

export type Actions

= QueryAction|QueryServerAction ;


Now on the above action below effect gets called

@Injectable()

export class ApiSearchEffects {

@Effect()

search$: Observable<any>

= this.actions$

.ofType(query.ActionTypes.QUERYSERVER)

.debounceTime(300)

.map((action: query.QueryServerAction) => action.payload)

.switchMap(querypay => {

if (querypay === '') {

return empty();

}

const nextSearch$ = this.actions$.ofType(query.ActionTypes.QUERYSERVER).skip(1);

this.searchService.getsearchresults(querypay)

.takeUntil(nextSearch$)

.subscribe((response) => {

this.store.dispatch(new search.SearchAction(response));

return empty();

});

return empty();

});

If you check with the above lines it makes a call to the service we have built before. that is: searchService.getsearchresults()

On response, it dispatches the response as a payload to SearchAction

On receiving the payload with the searchAction, the searchReducer takes off the responsibility and stores the payload in a state in the store.

export function reducer(state: State = initialState, action: search.Actions): State {

switch (action.type) {

case search.ActionTypes.CHANGE: {

const search = action.payload;

return Object.assign({}, state, {

searchresults: search,

items: search.channels[0].items,

totalResults: Number(search.channels[0].totalResults) || 0,

navigation: search.channels[0].navigation,

});

}

default: {

return state;

}

}

}

Thereby results could be displayed in the results page by subscribing to the store as in this.items$ = store.select(fromRoot.getItems);

Why should we do this all why not a direct service call? There are two reasons to use ngrx store along with ngrx effects.

  1. Using a store the search results will be available to all components.
  2. When we have implemented an instant search, a query call to the server goes for each character input, thereby if the response from the server is not in order, it leads to different results. For instance, if one searches for ‘India’ they might get results shown for ‘Ind’. Which was faced by us while developing the server https://github.com/fossasia/susper.com/issues/256 where “When a user searches, there is a search performed while typing. The search results that are often shown do not always reflect the final search term, they show a result that appeared while the user was typing it in.” we solved this issue using takeUntil(nextSearch$) in the search-effect.ts
Continue ReadingCalling an API in Angular: Using Ngrx/Redux Architecture and Yacy API for Susper

How to make your Website as a default Search Engine

A huge number of users are forcefully made to use predefined search engines on their browsers. On the Firefox browser, you usually see a search box at the top right. In Chrome, you can simply put in anything into the URL bar and it will go to the standard search engine. The browser companies predefined these search boxes, e.g. Google on Chrome, Firefox depending on which language version you have Yahoo or another and on Internet Explorer/Edge it is Bing. This shuts out new and independent searches like our Susper search engine. However, we want to help users and provide them with a choice.


At Susper, we integrated a small toast modal which allows users to make Susper their default search engine. They can simply go to susper.com and they will see a small option to change their search engine.

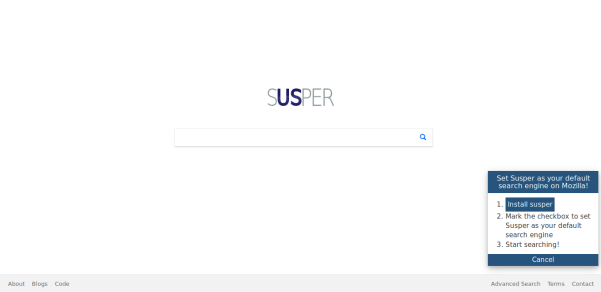
 Search box on Firefox

Implementation

We have Implemented this feature in a simple three-step procedure.

1.Generate Plugin for your search engine

create a plugin for your search engine at:-

http://mycroftproject.com/submitos.html

checked in with “show full instructions” checkbox at the top of the form to understand what those fields are.

Finally, a plugin got generated in XML format that we have to distribute to our user base.

2.Distributing the plugin to our user base

We at susper.com have implemented a toast onto the right bottom of the website’s homepage.

Where, when the user clicks on install Susper, the button triggers and displays an alert box.

Check the box “make this the current search engine”, and make the Susper search engine as your default search engine.


Implementation Code:-


We first check whether the search engine is installed already using window.external.IsSearchProviderInstalled , if not we show the toast for the user. When the user clicks Install button, this will call the window.external.AddSearchProvider API and installs susper using that.


<div id="set-susper-default">

<h3>Set Susper as your default search engine on Mozilla!</h3>

<ol>

<li><button id="install-susper">Install susper</button></li>

<li>Mark the checkbox to set Susper as your default search engine</li>

<li>Start searching!</li>

</ol>

<button id="cancel-installation">Cancel</button>

</div>

<script>

$(document).ready(function () {

if (window.external && window.external.IsSearchProviderInstalled) {

var isInstalled = window.external.IsSearchProviderInstalled("http://susper.com");

if (!isInstalled) {

$("#set-susper-default").show();

}

}

$("#install-susper").on("click", function () {

window.external.AddSearchProvider("http://susper.com/susper.xml");

});

$("#cancel-installation").on("click", function () {

$("#set-susper-default").remove();

});

});

</script>

In this way, we are able to give users an option to choose Susper as a default search engine.

More details regarding the implementation of this feature in susper could be checked at this pull https://github.com/fossasia/susper.com/pull/62 .

Continue ReadingHow to make your Website as a default Search Engine