How SUSI Analyzes A Given Response

Ever wondered where SUSI’s answers come from? Now Susi has ability to do an answer analysis. To get that analysis, just ask susi “analysis”. This will set susi into an analysis mode, will tell where the latest answer came from and will give you the link for improving the skill.

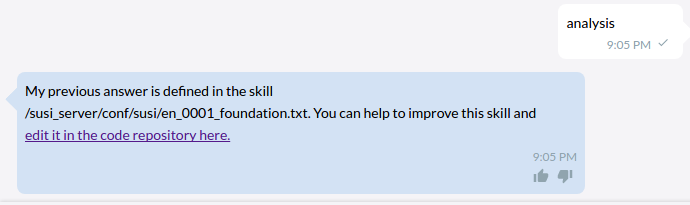
Let’s check out how Susi analysis work. The skill for analysis is defined  en_0001_foundation.txt  as following

analysis|analyse|analyze|* analysis|* analyse|* analyze|analysis *|analyse *|analyze *
My previous answer is defined in the skill $skill$. You can help to improve this skill and <a href="$skill_link$" target="_blank"> edit it in the code repository here.</a>

$skill$ and $skill_link$ are the variable compiled using

public static final Pattern variable_pattern = Pattern.compile("\\$.*?\\$");

These variables are memorized in Susi cognition. A cognition is the combination of a query of a user with the response of susi.

SusiThought dispute = new SusiThought();
List<String> skills = clonedThought.getSkills();
 if (skills.size() > 0) {
    dispute.addObservation("skill", skills.get(0));
    dispute.addObservation("skill_link",getSkillLink(skills.get(0)));
   }

Susi Thought is a piece of data that can be remembered. The structure of the thought is modeled as a table in which information contained in it is organized in rows and columns.

 public SusiThought addObservation(String featureName, String observation) ;

One can memorize using addObservation() method.  It takes two parameter featureName the object key and observation the object value. It is a table of information pieces as a set of rows which all have the same column names. It inserts the new data always in front of existing similar data rather than overwriting them.

 public String getSkillLink(String skillPath) {
       String link=skillPath;
        if(skillPath.startsWith("/susi_server")) {
            link ="https://github.com/fossasia/susi_server/blob/development" + skillPath.substring("/susi_server".length());
        } else if (skillPath.startsWith("/susi_skill_data")) {
            link = "https://github.com/fossasia/susi_skill_data/blob/master" + skillPath.substring("/susi_skill_data".length());
        }
        return link;
    }

The getSkillLink is a utitlity method to return the link of the skill source github repository based on skillPath.

private String skill;
SusiThought recall;
final SusiArgument flow = new SusiArgument().think(recall);
this.skill = origin.getAbsolutePath();
 if (this.skill != null && this.skill.length() > 0) flow.addSkill(this.skill);

The source of the skill gets added in SusiIntent.java using getAbsolutePath() method which resolves the skill path in the filesystem. Intent  considers the key from the user query, matches the intent tokens to get the optimum result and produces json like

 "data": [
      {
        "object": "If you spend too much time thinking about a thing, you'll never get it done.",
        "0": "tell me a quote",
        "token_original": "quote",
        "token_canonical": "quote",
        "token_categorized": "quote",
        "timezoneOffset": "-330",
        "answer": "When you discover your mission, you will feel its demand. It will fill you with enthusiasm and a burning desire to get to work on it. ",
        "skill_link": "https://github.com/fossasia/susi_skill_data/blob/master/models/general/entertainment/en/quotes.txt",
        "query": "tell me a quote",
        "skill": "/susi_skill_data/models/general/entertainment/en/quotes.txt"
      },

The getskills() method returns list of skill from json which are later added for memorization.

    public List<String> getSkills() {
        List<String> skills = new ArrayList<>();
        getSkillsJSON().forEach(skill -> skills.add((String) skill));
        return skills;
    }

This is how Susi is able to fetch  where the answer came from. Next time when you have a chat with susi do check skill analysis and add your ideas to improve the skill. Take a look at Susi_skill_data for more skills and  read this tutorial  for creating skills for susi.

Resources

Continue ReadingHow SUSI Analyzes A Given Response

Using Variables in a SUSI skill

One of the best feature provided in making a skill is the ease of using variables. From storing the favourite book of the user to the most recent movie he searched for to the mood he is in, variables play an indispensable part. If any problem is faced with the code part, the skill referred in this blog is coded in this file in susi_skill_data repository

This link refers to the official docs of SUSI, which walk you through some basic examples of how to use variables in a SUSI skill. Great skills can be achieved using them like the skill below:

It’s easy to make such skills by using variables. Let’s check it out how this skill can be achieved.

To store value in a variable we use this syntax during the skill development

^value^>_variableName

First, let’s save the favourite dish of the user and then we will try to surprise him/her with a witty answer.

I love * dish
^$1$^>_userFavouriteDish

So, if the user types “I love biryani dish”, $1$ will be equal to biryani. Let’s save it to _userFavouriteDish variable.

Now if user asks “What should i eat” to SUSI, I bet SUSI will answer a well calculated answer!

What should i eat?
I am sure you will love $_userFavouriteDish$!

Another example that can answer back the user efficiently:

How to cook biryani?

#Gives recipies and links to cook a dish
* cook *
!console:To cook  $title$ , check out $href$ and make sure you have $ingredients$! ^$2$^>_recentSearch
{
"url":"http://www.recipepuppy.com/api/?q=$2$",
"path":"$.results"
}
eol

In the above code, we saved the dish searched for at the end of the output.

If somehow user ends up asking “what is the most recent dish i searched for”. It’s skill will be:

what is the most recent dish I searched for?
It was $_recentSearch$

Even if before asking this question, user asks “how to cook sushi”. The _recentSearch variable will be overridden with value “sushi” instead of “biryani”. Hence, SUSI won’t mistake answering “most recent dish” as “sushi”!

Now I think we are bit comfortable with use of variables in a skill. Let’s get back to our target skill i.e. remembering skill. We store the thing asked to remember in a variable having the same name as of that thing and the statement related to it as the value of that variable. Examples:

Remember that my keys are on the table. So the variable will be named “keys” and it’s value will be “on the table”.

Remember that my birthday is on 20th of December. So the variable will be named “birthday” and it’s value will be “on 20th of December”.

Remember that my meetings are at 8 pm with mentors and at 9:30 pm with Shruti. So the variable will be named “meetings” and it’s value will be “at 8 pm with mentors and at 9:30 pm with Shruti”.

Hence the skill:

Remember that my * is * | Remember that my * is *
Okay, remembered!^$2$^>_$1$

When the user will ask for any of its thing, we will just show the value of the variable having the same name as of the thing asked. Examples:

#$_keys$ will be our answer
Where are my keys?
On the table                   

#$_meetings$ will be our answer
When are my meetings?
at 8 pm with mentors and at 9:30 pm with Shruti

Hence the skill which answers the question is:

when are my * | where is my * | where are my *
$_$1$$

So the skill as a whole will be:

Remember that my * is * | Remember that my * is *
Okay, remembered!^$2$^>_$1$

when are my * | where is my * | where are my *
$_$1$$

Resources

Continue ReadingUsing Variables in a SUSI skill

Implementing the Message Response Status Indicators In SUSI WebChat

SUSI Web Chat now has indicators reflecting the message response status. When a user sends a message, he must be notified that the message has been received and has been delivered to server. SUSI Web Chat implements this by tagging messages with ticks or waiting clock icons and loading gifs to indicate delivery and response status of messages ensuring good UX.

This is implemented as:

  • When the user sends a message, the message is tagged with a `clock` icon indicating that the message has been received and delivered to server and is awaiting response from the server
  • When the user is waiting for a response from the server, we display a loading gif
  • Once the response from the server is received, the loading gif is replaced by the server response bubble and the clock icon tagged to the user message is replaced by a tick icon.

Lets visit SUSI WebChat and try it out.

Query : Hey

When the message is sent by the user, we see that the displayed message is tagged with a clock icon and the left side response bubble has a loading gif indicating that the message has been delivered to server and are awaiting response.

When the response from server is delivered, the loading gif disappears and the user message tagged with a tick icon.


How was this implemented?

The first step is to have a boolean flag indicating the message delivery and response status.

let _showLoading = false;

getLoadStatus(){
  return _showLoading;
},

The `showLoading` boolean flag is set to true when the user just sends a message and is waiting for server response.  When the user sends a message, the CREATE_MESSAGE action is triggered. Message Store listens to this action and along with creating the user message, also sets the showLoading flag as true.

case ActionTypes.CREATE_MESSAGE: {

  let message = action.message;
  _messages[message.id] = message;
  _showLoading = true;
  MessageStore.emitChange();
  
  break;
}

The showLoading flag is used in MessageSection to display the loading gif. We are using a saved gif to display the loading symbol. The loading gif is displayed at the end after displaying all the messages in the message store. Since this loading component must be displayed for every user message, we don’t save this component in MessageStore as a loading message as that would lead to repeated looping thorugh the messages in message store to add and delete loading component.

import loadingGIF from '../../images/loading.gif';

function getLoadingGIF() {

  let messageContainerClasses = 'message-container SUSI';

  const LoadingComponent = (
    <li className='message-list-item'>
      <section className={messageContainerClasses}>
        <img src={loadingGIF}
          style={{ height: '10px', width: 'auto' }}
          alt='please wait..' />
      </section>
    </li>
  );
  return LoadingComponent;
}

We then use this flag in MessageListItem class to tag the user messages with the clock icons. We used Material UI SVG Icons to display the clock and tick messages. We display these beside the time in the messages.

import ClockIcon from 'material-ui/svg-icons/action/schedule';

statusIndicator = (
  <li className='message-time' style={footerStyle}>
    <ClockIcon style={indicatorStyle}
      color={UserPreferencesStore.getTheme()==='light' ? '#90a4ae' : '#7eaaaf'}/>
  </li>
);

When the response from server is received, the CREATE_SUSI_MESSAGE action is triggered to render the server response. This action is again collected in MessageStore where the `showLoading` boolean flag is reset to false. This event also triggers the state of MessageSection where we are listening to showLoading value from MessageStore, hence triggering changes in MessageSection and accordingly in MessageListItem where showLoading is passed as props, removing the loading gif component and displaying the server response and replacing the clock icon with tick icon on the user message.

case ActionTypes.CREATE_SUSI_MESSAGE: {
  
  let message = action.message;
  MessageStore.resetVoiceForThread(message.threadID);
  _messages[message.id] = message;
  _showLoading = false;
  MessageStore.emitChange();
  
  break;
}

This is how the status indicators were implemented for messages. The complete code can be found at SUSI WebChat Repo.

Resources

Continue ReadingImplementing the Message Response Status Indicators In SUSI WebChat

Calculation of the Frame Size of the Chat Bubble in SUSI iOS

We receive intelligent responses from the SUSI Server based on our query. Each response contains a different set of actions and the content of the action can be of variable sizes, map, string, table, pie chart, etc. To make the chat bubble size dynamic in the SUSI iOS client, we need to check the action type. For each action, we calculate a different frame size which makes the size of the chat bubble dynamic and hence solving the issue of dynamic size of these bubbles.

In order to calculate the frame size, as mentioned above, we need to check the action type of that message. Let’s start by first making the API call sending the query and getting the action types as a response.

func queryResponse(_ params: [String : AnyObject], _ completion: @escaping(_ messages: List<Message>?, _ success: Bool, _ error: String?) -> Void) {

   let url = getApiUrl(UserDefaults.standard.object(forKey: ControllerConstants.UserDefaultsKeys.ipAddress) as! String, Methods.Chat)

       _ = makeRequest(url, .get, [:], parameters: params, completion: { (results, message) in
           if let _ = message {
               completion(nil, false, ResponseMessages.ServerError)
           } else if let results = results {

               guard let response = results as? [String : AnyObject] else {
                   completion(nil, false, ResponseMessages.InvalidParams)
                   return
               }

               let messages = Message.getAllActions(data: response)
               completion(messages, true, nil)
           }
           return
})
}

Here, we are sending the query in the params dictionary. The `makeRequest` method makes the actual API call and returns a results object and an error object if any which default to `nil`. First, we check if the error variable is `nil` or not and if it is, we parse the complete response by using a helper method created in the Message object called `getAllActions`. This basically takes the response and gives us a list of messages of all action types returned for that query.

In order to display this in the UI, we need to call this method in the View Controller to actually use the result. Here is how we call this method.

var params: [String : AnyObject] = [
 Client.WebsearchKeys.Query: inputTextView.text! as AnyObject,
 Client.ChatKeys.TimeZoneOffset: ControllerConstants.timeZone as AnyObject,
       Client.ChatKeys.Language: Locale.current.languageCode as AnyObject
]

if let location = locationManager.location {
 params[Client.ChatKeys.Latitude] = location.coordinate.latitude as AnyObject
       params[Client.ChatKeys.Longitude] = location.coordinate.longitude as AnyObject
}

if let userData = UserDefaults.standard.dictionary(forKey: ControllerConstants.UserDefaultsKeys.user) as [String : AnyObject]? {
 let user = User(dictionary: userData)
        params[Client.ChatKeys.AccessToken] = user.accessToken as AnyObject
       }

Client.sharedInstance.queryResponse(params) { (messages, success, _) in
 DispatchQueue.main.async {
 if success {
 self.collectionView?.performBatchUpdates({
                            for message in messages! {
                                try! self.realm.write {
                                    self.realm.add(message)
                                    self.messages.append(message)
                                    let indexPath = IndexPath(item: self.messages.count - 1, section: 0)
                                    self.collectionView?.insertItems(at: [indexPath])
                                }
                            }
                        }, completion: { (_) in
                            self.scrollToLast()
                     })
 }
 }
}

Here, we are creating a params object sending the query and some additional parameters such as time zone, location coordinates and access token identifying the user. After the response is received, which contains a list of messages, we use a method called `performBatchUpdates` on the collection view where we loop through all the messages, writing each one of them to the database and then adding at the end of the collection view. Here we got all the messages inside the `messages` list object where each message can be checked for its action type and a frame can be calculated for the same.

Since the frame for each cell is returned in the `sizeForItemAt` delegate method of the collectionViewDelegate, we first grab the message using its indexPath and check the action type for each such message added to the collection view.

if message.actionType == ActionType.map.rawValue {
   // map action
} else if message.actionType == ActionType.rss.rawValue {
   // rss action type
} else if message.actionType == ActionType.websearch.rawValue {
   // web search action
}

Since map action will be a static map, we use a hard coded value for the map’s height and the width equals to the width of the cell frame.

CGSize(width: view.frame.width, height: Constants.mapActionHeight)

Next, web search and rss action having the same UI, will have the same frame size but the number of cells inside each of the frame for these action depends on number of responses were received from the server.

CGSize(width: view.frame.width, height: Constants.rssActionHeight)

And the check can be condensed as well, instead of checking each action separately, we use a `||` (pipes) or an `OR`.

else if message.actionType == ActionType.rss.rawValue ||
            message.actionType == ActionType.websearch.rawValue {
           // web search and rss action
 }

The anchor and answer action types, are supposed to display a string in the chat bubble. So the chat bubble size can be calculated using the following method:

let size = CGSize(width: Constants.maxCellWidth, height: Constants.maxCellHeight)
let options = NSStringDrawingOptions.usesFontLeading.union(.usesLineFragmentOrigin)
let estimatedFrame = NSString(string: messageBody).boundingRect(with: size, options: options, attributes: [NSFontAttributeName: UIFont.systemFont(ofSize: Constants.messageFontSize)], context: nil)

Here, we first create a maximum frame size that can exist. Then, using the drawingOptions create an options variable. The actual calculation of the frame happens in the last method where we use the complete message string and this returns us the actual frame for the above action types. Use the above method to get the frame in the `CGRect` type.

Below, is the complete method used for this calculation:

func collectionView(_ collectionView: UICollectionView, layout collectionViewLayout: UICollectionViewLayout, sizeForItemAt indexPath: IndexPath) -> CGSize {
        let message = messages[indexPath.row]
 
        let estimatedFrame = self.estimatedFrame(messageBody: message.message)
        if message.actionType == ActionType.map.rawValue {
            return CGSize(width: view.frame.width, height: Constants.mapActionHeight)
        } else if message.actionType == ActionType.rss.rawValue ||
            message.actionType == ActionType.websearch.rawValue {
            return CGSize(width: view.frame.width, height: Constants.rssActionType)
        }
        return CGSize(width: view.frame.width, height: estimatedFrame.height + Constants.answerActionMargin)
    }

rn CGSize(width: view.frame.width, height: estimatedFrame.height + Constants.answerActionMargin)
}

Below are the results of the app in action.

References:

Continue ReadingCalculation of the Frame Size of the Chat Bubble in SUSI iOS

How SUSI WebChat Implements RSS Action Type

SUSI.AI now has a new action type called RSS. As the name suggests, SUSI is now capable of searching the internet to answer user queries. This web search can be performed either on the client side or the server side. When the web search is to be performed on the client side, it is denoted by websearch action type. When the web search is performed by the server itself, it is denoted by rss action type. The server searches the internet and using RSS feeds, returns an array of objects containing :

  • Title
  • Description
  • Link
  • Count

Each object is displayed as a result tile and all the results are rendered as swipeable tiles.

Lets visit SUSI WebChat and try it out.

Query : Google
Response: API response

SUSI WebChat uses the same code abstraction to render websearch and rss results as both are results of websearch, only difference being where the search is being performed i.e client side or server side.

How does the client know that it is a rss action type response?

"actions": [
  {
    "type": "answer",
    "expression": "I found this on the web:"
  },
  {
    "type": "rss",
    "title": "title",
    "description": "description",
    "link": "link",
    "count": 3
  }
],

The actions attribute in the JSON API response has information about the action type and the keys to be parsed for title, link and description.

  • The type attribute tells the action type is rss.
  • The title attribute tells that title for each result is under the key – title for each object in answers[0].data.
  • Similarly keys to be parsed for description and link are description and link respectively.
  • The count attribute tells the client how many results to display.

We then loop through the objects in answers,data[0] and from each object we extract title, description and link.

let rssKeys = Object.assign({}, data.answers[0].actions[index]);

delete rssKeys.type;

let count = -1;

if(rssKeys.hasOwnProperty('count')){
  count = rssKeys.count;
  delete rssKeys.count;
}

let rssTiles = getRSSTiles(rssKeys,data.answers[0].data,count);

We use the count attribute and the length of answers[0].data to fix the number of results to be displayed.

// Fetch RSS data

export function getRSSTiles(rssKeys,rssData,count){

  let parseKeys = Object.keys(rssKeys);
  let rssTiles = [];
  let tilesLimit = rssData.length;

  if(count > -1){
    tilesLimit = Math.min(count,rssData.length);
  }

  for(var i=0; i<tilesLimit; i++){
    let respData = rssData[i];
    let tileData = {};

    parseKeys.forEach((rssKey,j)=>{
      tileData[rssKey] = respData[rssKeys[rssKey]];
    });

    rssTiles.push(tileData);
  }

return rssTiles;

}

We now have our list of objects with the information parsed from the response.We then pass this list to our renderTiles function where each object in the rssTiles array returned from getRSSTiles function is converted into a Paper tile with the title and description and the entire tile is hyperlinked to the given link using Material UI Paper Component and few CSS attributes.

// Draw Tiles for Websearch RSS data

export function drawTiles(tilesData){

let resultTiles = tilesData.map((tile,i) => {

  return(
    <div key={i}>
      <MuiThemeProvider>
        <Paper zDepth={0} className='tile'>
          <a rel='noopener noreferrer'
          href={tile.link} target='_blank'
          className='tile-anchor'>
            {tile.icon &&
            (<div className='tile-img-container'>
               <img src={tile.icon}
               className='tile-img' alt=''/>
             </div>
            )}
            <div className='tile-text'>
              <p className='tile-title'>
                <strong>
                  {processText(tile.title,'websearch-rss')}
                </strong>
              </p>
              {processText(tile.description,'websearch-rss')}
            </div>
          </a>
        </Paper>
      </MuiThemeProvider>
    </div>
  );

});

return resultTiles;
}

The tile title and description is processed for HTML special entities and emojis too using the processText function.

case 'websearch-rss':{

let htmlText = entities.decode(text);
processedText = <Emojify>{htmlText}</Emojify>;
break;

}

We now display our result tiles as a carousel like swipeable display using react-slick. We initialise our slider with few default options specifying the swipe speed and the slider UI.

import Slider from 'react-slick';

// Render Websearch RSS tiles

export function renderTiles(tiles){

  if(tiles.length === 0){
    let noResultFound = 'NO Results Found';
    return(<center>{noResultFound}</center>);
  }

  let resultTiles = drawTiles(tiles);
  
  var settings = {
    speed: 500,
    slidesToShow: 3,
    slidesToScroll: 1,
    swipeToSlide:true,
    swipe:true,
    arrows:false
  };

  return(
    <Slider {...settings}>
      {resultTiles}
    </Slider>
  );
}

We finally add CSS attributes to style our result tile and add overflow for text maintaining standard width for all tiles.We also add some CSS for our carousel display to show multiple tiles instead of one by default. This is done by adding some margin for child components in the slider.

.slick-slide{
  margin: 0 10px;
}

.slick-list{
  max-height: 100px;
}

We finally have our swipeable display of rss data tiles each tile hyperlinked to the source of the data. When the user clicks on a tile, he is redirected to the link in a new window i.e the entire tile is hyperlinked. And when there are no results to display, we show a `NO Results Found` message.

The complete code can be found at SUSI WebChat Repo. Feel free to contribute

Resources


Continue ReadingHow SUSI WebChat Implements RSS Action Type

Using Day Night Theme in SUSI Android

SUSI is an artificial intelligence for interactive chat bots. It provides response to the user in most intuitive way. Therefore we thought why not implement the option to give theme preference to the user to make it more interactive. It will also help in increasing the user’s interest towards the application.

We tried out different themes and then finally decided to settle for the newly announced Day Night Theme for the SUSI Android App (https://github.com/fossasia/susi_android). This theme is provided by AppCompat 23.2.0 . With the help of this theme we can switch between Theme.AppCompat.Light (light) and Theme.AppCompat (dark) based on the user preference and time of day. For default the theme is set to the light theme and it can be easily changed from the settings. Thus it allows the user to change the theme according to his or her mood which looks very intuitive.

How to use this theme?

To use the Day Night theme is quite simple. We just need to extend our default theme to that of Theme.AppCompat.DayNight. The declaration is done as shown below in the screenshot.

<style name="MyTheme" parent="Theme.AppCompat.DayNight">

  <!-- Blah blah -->

</style>

Now to enable different features of the theme in our application we need to call AppCompatDelegate.setDefaultNightMode(). It takes one of the following values as the parameter.

  • MODE_NIGHT_NO. This is for the day (light) theme.
  • MODE_NIGHT_YES.This is for the night (dark) theme.
  • MODE_NIGHT_AUTO. It automatically changes between the above two themes based on the time of day.
  • MODE_NIGHT_FOLLOW_SYSTEM (default). This theme is dependent on the system settings of the user mobile phone.

We can set one of these parameters at the time of calling the function to fix the theme of the application in the following way.

static {

AppCompatDelegate.setDefaultNightMode(

          AppCompatDelegate.MODE_NIGHT_...);

}

The theme inside an activity is set at the time time of calling onCreate() method. Therefore we cannot change the theme from any other place inside our activity apart from onCreate(). If we want to set it inside our activity but outside the onCreate() method then we have to call the recreate() function to recreate the whole activity which will implement the selected theme.Let us look at the example.

public class MyActivity extends AppCompatActivity {

 public void onCreate(Bundle savedInstanceState) {

      super.onCreate(savedInstanceState);

      if (savedInstanceState == null) {

          // Set the local night mode to some value

          getDelegate().setLocalNightMode(

                  AppCompatDelegate.MODE_NIGHT_...);

          // Now recreate for it to take effect

          recreate();

      }

  }

}

To take care of the text colors in our app we can set textColor attribute as

?android:attr/textColorPrimary

Now let us look at the implementation in Susi Android

In Susi Android we are providing user the option to select either the dark or the light theme in the settings.

 
The code for the implementation is as below

@Override

protected void onCreate(Bundle savedInstanceState) {

  super.onCreate(savedInstanceState);


  prefs = getSharedPreferences(Constant.THEME, MODE_PRIVATE);

  if(prefs.getString(Constant.THEME,"Dark").equals("Dark")) {

      AppCompatDelegate.setDefaultNightMode(AppCompatDelegate.MODE_NIGHT_YES);

  }

  else {

      AppCompatDelegate.setDefaultNightMode(AppCompatDelegate.MODE_NIGHT_NO);

  }


  setContentView(R.layout.activity_main);

}

The result output for the light theme is

To learn more about themes in Android you can refer to this link.

Resources

Continue ReadingUsing Day Night Theme in SUSI Android

Versioning of SUSI Skills

This is a concept for the management of the skill repository aka The “SUSI Skill CMS.

With SUSI we are building a personal assistant where the users are able to write and edit skills in the easiest way that we can think of. To do that we have to develop a very simple skill language and a very simple skill editor

The skill editor should be done as a ‘wiki’-like content management system (cms). To create the wiki, we follow an API-centric approach. The SUSI server acts as an API server with a web front-end which acts as a client of the API and provides the user interface.

The skill editor will be ‘expert-centric’, an expert is a set of skills. That means if we edit one text file, that text file represents one expert, it may contain several skills which all belong together.

An ‘expert’ is stored within the following ontology:

model  >  group  >  language  >  expert  >  skill

To Implement the CMS wiki system we need versioning with a working AAA System. To implement versioning we used JGit. JGit is an EDL licensed, lightweight, pure Java library implementing the Git version control system.

So I included a Gradle dependency to add JGit to the SUSI Server project.

compile 'org.eclipse.jgit:org.eclipse.jgit:4.6.1.201703071140-r'

Now the task was to execute git commands when the authorised user makes changes in any of the expert. The possible changes in an expert can be

1. Creating an Expert
2. Modifying an existing Expert
3. Deleting an Expert

1. git add <filename>

2. git commit -m “commit message”

Real Example in SUSI Server

This is the code that every servlet shares. It defines the base user role set a URL endpoint to trigger the endpoint

public class ModifyExpertService extends AbstractAPIHandler implements APIHandler {
    @Override
    public String getAPIPath() {
        return "/cms/modifyExpert.json";
    }

This is the part where we do all the processing of the URL parameters and store their versions. This method takes the “Query call” and then extracts the “get” parameters from it.
For the functioning of this service, we need 5 things, “model”, “group”, “language”, “expert” and the “commit message”.

@Override
public ServiceResponse serviceImpl(Query call, HttpServletResponse response, Authorization rights, final JsonObjectWithDefault permissions) {

    String model_name = call.get("model", "general");
    File model = new File(DAO.model_watch_dir, model_name);
    String group_name = call.get("group", "knowledge");
    File group = new File(model, group_name);
    String language_name = call.get("language", "en");
    File language = new File(group, language_name);
    String expert_name = call.get("expert", null);
    File expert = new File(language, expert_name + ".txt");

Then we need to open your SUSI Skill DATA repository and commit the new file in it. Here we call the functions of JGit, which do the work of git add and git commit.

FileRepositoryBuilder builder = new FileRepositoryBuilder();
Repository repository = null;
try {

    repository = builder.setGitDir((DAO.susi_skill_repo))
            .readEnvironment() // scan environment GIT_* variables
            .findGitDir() // scan up the file system tree
            .build();

    try (Git git = new Git(repository)) {

The code above opens our local git repository and creates an object “git”. Then we perform further operations on “git” object. Now we add our changes to “git”. This is similar to when we run “git add . ”

    git.add()
                .addFilepattern(expert_name)
                .call();

Finally, we commit the changes. This is similar to “git commit -m “message”.

    git.commit()
                .setMessage(commit_message)
                .call();

At last, we return the success object and set the “accepted” value as “true”.

    json.put("accepted", true);
        return new ServiceResponse(json);
    } catch (GitAPIException e) {
        e.printStackTrace();
    }

Resources

JGit documentation : https://eclipse.org/jgit/documentation/

SUSI Server : https://github.com/fossasia/susi_server


Continue ReadingVersioning of SUSI Skills

Servlets and Containers in SUSI Server

The core of SUSI Clients is the SUSI server that holds the “intelligence” and “personality” of SUSI AI. SUSI Server is in JAVA and it uses the concepts of Servlets heavily. While implementing server for SUSI, we have used JAVA as the backend language and hence are using servlets and Servlet containers heavily.

The problem that servlets are solving is regarding how to generate dynamic content on every request if the request comes with different parameters.  This is not possible by simply using HTML.

Servlets are widely used for dynamic content and have inbuilt support for HTTP (Hypertext Transfer Protocol).

In this blog post, along with basics of servlets and servlet containers, I am explaininghow to make classes for custom servlets. I am using an example of AbstractAPIHandler class that we have used in SUSI server for clear picture.

Web Server

Before we can understand a  servlet container, we need to understand what is a web server.

A web server uses HTTP protocol to transfer data. When a user types in a URL in a browser or any client, he first sees loading and then see the content of the page. So actually there is a server that is sending the content of the page to the user. The transfer of data is in HTTP protocol.

Servlet Container

From the example above, a user can request static pages from the server. Hence the pages will be very basic and we cannot do much with user inputs and dynamic data such as making a real time chat bot. So the idea of having Servlet container is using Java to dynamically generate the content of a web page from the server side.  

The flow of Control

The servlet container manages servlets through servlet life cycles. The container calls a servlet as soon as it receives an HTTP request. Then the servlet does the processing of the data which it has received from the request. the container sends the HTTP response back to the client and then the clients render it to show the final output.

The flowchart below explains how a request is processed from a browser to a servlet container and then to a servlet. It shows the usage of a generic Servlet.

Similarly in SUSI-Server we have a “AbstractAPIHandler” which is a generic servlet that every other servlet inherits.

Structure of a Servlet

public class ServletName extends HttpServlet {

public void init() throws ServletException {
// Servlet Initialization
}

protected void service(HttpServletRequest req,
HttpServletResponse resp)
throws ServletException, IOException {
// Code for the Service Method
}
/**
* Process a GET request
*/
protected void doGet(HttpServletRequest request,
HttpServletResponse response)
throws IOException, ServletException {
// Code for the doGet() method
}
/**
* Process a POST request
*/
protected void doPost(HttpServletRequest request,
HttpServletResponse response)
throws IOException, ServletException {
// Code for the doPost() method

}
/**
* Process a PUT request
*/
protected void doPut(HttpServletRequest req,
HttpServletResponse resp)
throws ServletException, IOException {
//Code for the doPut() method

}
}

Abstract API Handler

public abstract class AbstractAPIHandler extends HttpServlet implements APIHandler {
}

The function below sets the Minimum Base Role of the SUSI user. We can set which servlet is accessible by which user.

@Override
public abstract BaseUserRole getMinimalBaseUserRole();

The function below gets the Default Permissions of a user Role in SUSI Server. The permissions for each SUSI user can be different.

@Override
public abstract JSONObject getDefaultPermissions(BaseUserRole baseUserRole);

The function below finally sets whatever output we want to show as a response when we query the SUSI Server.

   public abstract ServiceResponse serviceImpl(Query post,  HttpServletResponse response, Authorization rights, final JsonObjectWithDefault permissions) throws APIException;

Each Servlet in SUSI Server extends this class (AbstractAPIHandler.java). This also increases code reusability.

A Servlet is not a just a simple java class. You cannot run a servlet using javac or by running main() function. In order to run a servlet, you have to deploy this Servlet on a web server.

References

SUSI Server : https://github.com/fossasia/susi_server/

Docs: http://docs.oracle.com/javaee/6/tutorial/doc/bnafd.html

Continue ReadingServlets and Containers in SUSI Server

Creating and Maintaining User Sessions Using Universal-Cookies in SUSI Web Chat

If you login to SUSI Web Chat, and come back again after some days, you find that you didn’t have to login and all your previous sent messages are in there in the message pane. To achieve this, SUSI Web Chat uses cookies stored in your browser which is featured in this blog.  

In ReactJS, it’s highly misleading and extensive to use the conventional Javascript methodology of saving tokens and deleting them. However, universal-cookie, a node package allows you to store and get cookies with the least possible confusion. In the following examples, I have made use of the get, set and remove functions of the universal-cookie package which have documentations easily available at this link. The basic problem one finds while setting cookies and maintaining sessions is the time through which it should be valid and to secure the routes. We shall look at the steps below to figure out how was it implemented in SUSI Web Chat.

1. The first step is to install the packages by using the following command in your project’s root-

npm install universal-cookie --save

2. Import the Cookies Class, where-ever you want to create a Cookie object in your repository.

import Cookies from 'universal-cookie';

Create a Cookie object at the same time in the file you want to use it,

const cookies = new Cookies();

3. We make use of the set function of the package first, where we try to set the cookie while the User is trying to login to the account.

Note – The cookie value can be set to any value one wants, however, here I am setting it to the access token which is generated by the server so that I can access it throughout the application.

$.ajax({ options: options,
        success: function (response) {
//Get the response token generated from the server
                let accessToken = response.access_token;                       // store the current state
                 let state = this.state;
// set the time for which the session needs to be valid
            let time = response.valid_seconds;
//set the access token in the state
             state.accessToken = accessToken;
// set the time in the state
             state.time = time;           
// Pass the accessToken and the time through the binded function
             this.handleOnSubmit(accessToken, time);
            }.bind(this),
        error: function ( jqXHR, textStatus, errorThrown) {
                   // Handle errors
                   }
        });

Function –  handleOnSubmit()

// Receive the accessToken and the time for which it needs to be valid
handleOnSubmit = (loggedIn, time) => {
        let state = this.state;
        if (state.success) {
              // set the cookie of with the value of the access token at path ‘/’ and set the time using the parameter ‘maxAge’
            cookies.set('loggedIn', loggedIn, { path: '/', maxAge: time });
// Redirect the user to logged in state and reload
            this.props.history.push('/', { showLogin: false });
            window.location.reload();
        }
        else {
        // Handle errors
    }
}

4.  To access the value set to the cookie, we make use of the get function. To check the logged in state of the User we check if get method is returning a null value or an undefined value, this helps in maintaining the User behaviour at every point in the application.

if(cookies.get('loggedIn')===null||
    cookies.get('loggedIn')===undefined) {
    // Handle User behaviours do not send chat queries with access token if the cookie is null
    url = BASE_URL+'/susi/chat.json?q='+
          createdMessage.text+
          '&language='+locale;
  }
  else{
   //  Send the messages with User’s access token
    url = BASE_URL+'/susi/chat.json?q='
          +createdMessage.text+'&language='
          +locale+'&access_token='
          +cookies.get('loggedIn');
  }

5. To delete the cookies, we make use of the remove function, which deletes that cookie. This function is called while logging the user out of the application.

cookies.remove('loggedIn');
this.props.history.push('/');
window.location.reload();

Here’s the full code in the repository. Feel free to contribute:https://github.com/fossasia/chat.susi.ai

Resources

Continue ReadingCreating and Maintaining User Sessions Using Universal-Cookies in SUSI Web Chat

Using SUSI AI Accounting Object to Write User Settings

SUSI Server uses DAO in which accounting object is stored as JSONTray. SUSI clients are using this accounting object for user settings data. In this blogpost we will focus on how to use accounting JSONTray to write the user settings, so that a client can use such endpoint to store the user related settings in Susi server. The Susi server provides the required API endpoints to its web and mobile clients. Before starting with the implementation of servlet let’s take a look at Accounting.java file, to check how Susi server stores the accounting data.

public class Accounting {

        private JsonTray parent;
        private JSONObject json;
        private UserRequests requests;
        private ClientIdentity identity;
    ...
}


The JsonTray is class to hold the volume as <String,JsonObject> pairs as a Json file. The UserRequests  class holds all the user activities. The ClientIdentity class extend the base class Client and provides an Identification String for authentication of users. Now that we have understood about accounting in SUSI server let’s proceed for making an API endpoint to Store Webclient User settings. To make an endpoint we will use the HttpServlet class which provides methods, such as doGet and doPost, for handling HTTP-specific services. We will inherit our ChangeUserSettings class from AbstractAPIHandler yand implement APIhandler interface. In Susi Server the AbsrtactAPI handler extends a HTTPServlet which implements doGet and doPost ,all servlet in SUSI Server extends this class to increase code reusability.  

Since a User has to store its setting, set the minimum base role to access this endpoint to User. Apart from ‘User’ there are Admin and Anonymous roles too.

   @Override
    public BaseUserRole getMinimalBaseUserRole() {
        return BaseUserRole.USER;
    }

Next set the path for using this endpoint, by overriding getAPIPath method().

 @Override
    public String getAPIPath() {
        return "/aaa/changeUserSettings.json";
    }

We won’t be dealing with getdefault permissions so null can be return.

  @Override
    public JSONObject getDefaultPermissions(BaseUserRole baseUserRole) {
        return null;
    }

Next we implement serviceImpl method which takes four parameters the query, response, authorization and default permissions.

@Override
    public ServiceResponse serviceImpl(Query query, HttpServletResponse response, Authorization authorization, JsonObjectWithDefault permissions) throws APIException {
       String key = query.get("key", null);
       String value =query.get("value", null);
       if (key == null || value == null ) {
           throw new APIException(400, "Bad Service call, key or value parameters not provided");
       } else {
           if (authorization.getIdentity() == null) {
               throw new APIException(400, "Specified User Setting not found, ensure you are logged in");
           } else {
               Accounting accounting = DAO.getAccounting(authorization.getIdentity());
               JSONObject jsonObject = new JSONObject();
               jsonObject.put(key, value);
               if (accounting.getJSON().has("settings")) {
                   accounting.getJSON().getJSONObject("settings").put(key, value);
               } else {
                   accounting.getJSON().put("settings", jsonObject);
               }
               JSONObject result = new JSONObject();
               result.put("message", "You successfully changed settings to your account!");
               return new ServiceResponse(result);
           }
       }

    }

We will be storing the setting in Json object using key, value pairs. Take the values from user using query.get(“param”,”default value”) and set the default value to null. So that in case the parameters are not present the servlet can return “Bad service call”. To get the accounting object user identity string given by authorization.getIdentity() method is used. Now check if the same user settings is already present, if yes, overwrite it and if not append a new Json object with received key and value. And return the success message through ServiceResponse method.

Proceed to test the working of endpoint at http://127.0.0.1:4000/aaa/changeUserSettings.json?key=theme&value=dark and see if it’s stored using   http://127.0.0.1:4000/aaa/listUserSettings.json.

You have successfully created an endpoint to store user settings and  enhanced Susi Server, take a look and contribute to Susi Server.

Resources

Continue ReadingUsing SUSI AI Accounting Object to Write User Settings