Implementation of Child Routes in SUSI Skill CMS

In a previous blog post I discussed about how we implemented routing in SUSI Web Chat Application. In this post I’m planning to discuss about how we developed child routes in SUSI Skill CMS .

When we start developing our application, it was working correctly but  all skills loaded in the same URL. ( skill.susi.ai/SkillPage ). When user clicks the edit button every skill loaded in the same URL ( skill.susi.ai/EditSkill ). We got a requirement to load each of our skills in separate routes. This is how we implemented the child routes of the application.

We wanted to show each individual skill under this type of URL,

skill.susi.ai/ [SKILL GROUP] / [SKILL NAME] / [LANGUAGE]

When user clicks on the edit button, we needed to show that particular skill under this URL.

skill.susi.ai/ [SKILL GROUP] / [SKILL NAME] / edit / [LANGUAGE]

First we set our routings in index.js file.

<Switch>
    <Route exact path="/:category/:skill/edit/:lang" component={Home} />
    <Route exact path="/:category/:skill/:lang" component={SkillListing}/>
    <Route exact path="/" component={BrowseSkill} />
    <Route exact path="*" component={NotFound} />
</Switch>

We have to add the “exact” attribute, if we don’t add that it will not redirect users to “404” page when user trying to access wrong routes.

Next step is sending data from one component to another component.
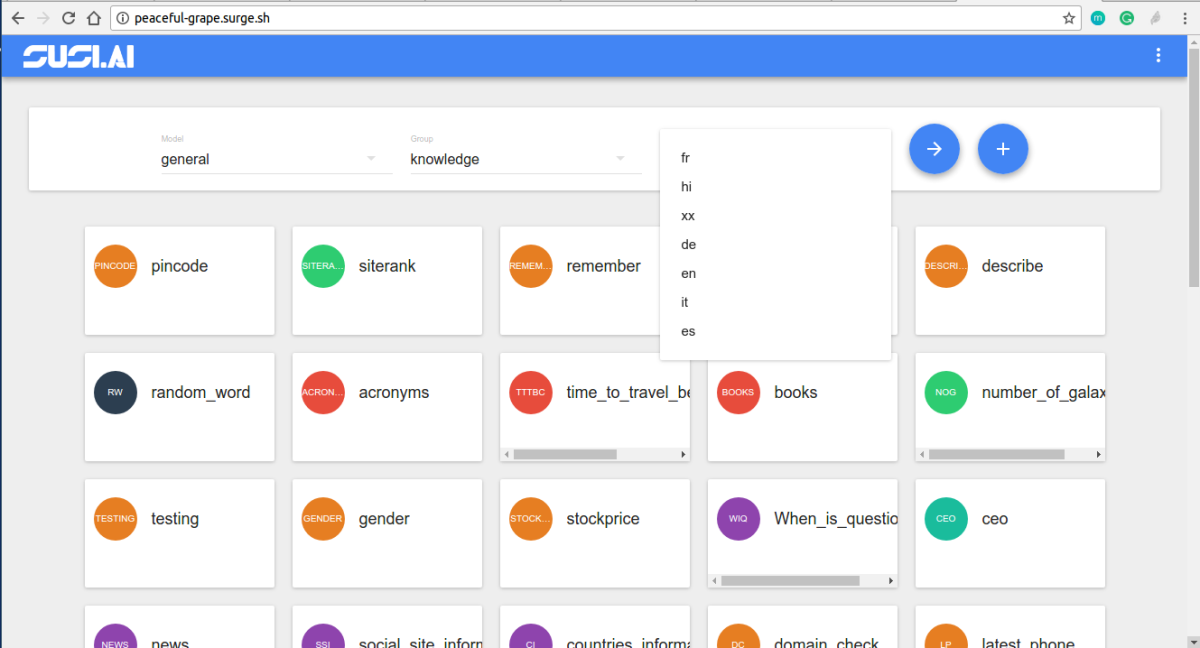
In SUSI Skill CMS, user can choose any skill from the home page. Then after it goes to the skill page and shows details about the selected skill. We have to modify the button as,

<Link to={{ pathname: '/'+self.state.groupValue+'/'+el+'/'+self.state.languageValue }} >
<Card>
</Card>
</Link>

Now the user clicks on the card. It changes the URL and loads the corresponding component according to the routes that we defined in “index.js” file previously.
Second thing that we need to do is to catch URL routs and render relevant data according to the URL routes.
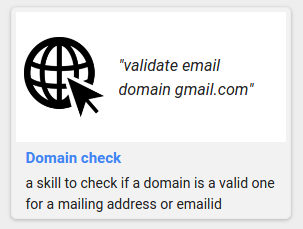
Let’s say I clicked on “distance” skill. Then user will go to this URL “http://skills.susi.ai/Knowledge/distance/en ”
Now It loads the “SkillListing” component according to the route we defined in “ index.js ” here ””.
To derive data from URL we simply used these codes in “SkillListing.js”.

let baseUrl = 'http://api.susi.ai/cms/getSkillMetadata.json';           
let modelValue = "general";
           this.name = this.props.location.pathname.split('/')[2];
           this.groupValue = this.props.location.pathname.split('/')[1];
           this.languageValue = this.props.location.pathname.split('/')[3];
           url = baseUrl + '?model=' + modelValue + '&group=' + this.groupValue + '&language=' + this.languageValue + '&skill=' + this.name;

We collected data from the URL and made another URL, we used this URL to get details of the skill from the server. We used this urls as below.

           $.ajax({
               url: url,
               jsonpCallback: 'pc',
               dataType: 'jsonp',
               jsonp: 'callback',
               crossDomain: true,
               success: function (data) {
                   self.updateData(data.skill_metadata)
               }
           });

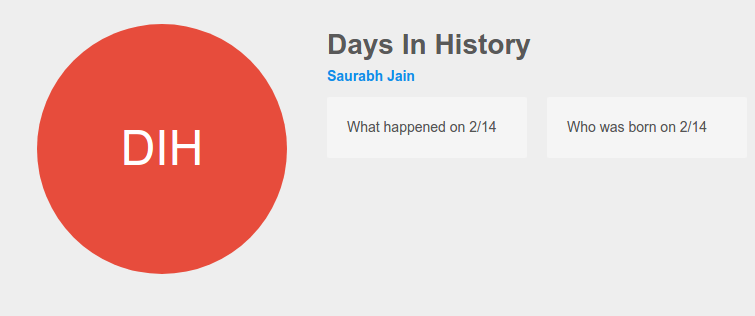
If the Ajax request is success, those data are passed to “updateData()” and it updates the component and shows to users like this.

We applied same mechanism to the edit button and edit page. This is how we modified skill.susi.ai ‘s Routings. If you like to contribute SUSI Skill CMS please fork our repository on github. here

Resources:

  • Previous Blogpost about routing: https://blog.fossasia.org/implementation-of-react-routers-in-susi-web-chat/
  • React Router v4 tutorial https://medium.com/@pshrmn/a-simple-react-router-v4-tutorial-7f23ff27adf
Continue ReadingImplementation of Child Routes in SUSI Skill CMS

Enhanced Skill Tiles in SUSI Skill CMS

The SUSI Skill Wiki is a management system for all the SUSI Skills and the Skill display screen ought to look attractive. The earlier version of the Skill Display was just a display with the skill name populated as cards as shown in the image.

image

So as we progressed over to add more metadata to the SUSI Skills, we had the challenge to show all details which were as follows –

An example of a skill metadata format-

"cricketTest": {
      "image": "images/images.jpg",
      "author_url": "skill.susi.ai",
      "examples": ["Testing Works"],
      "developer_privacy_policy": "na",
      "author": "cms",
      "skill_name": "cricket",
      "dynamic_content": true,
      "terms_of_use": "na",
      "descriptions": "testing",
      "skill_rating": null
    }

To embed the Skill metadata in the Tiles the following steps are to be followed –

  1. We first use the end point at the SUSI Server, http://api.susi.ai/cms/getSkillList.json with the following attributes –
    1. model – The skill follows a general model or maybe a tutorial model
    2. group -The category or group of the skill.
    3. language – The language of the skill output.

2.  An AJAX request to this end point gives us the following response.

{
accepted: true,
model: "general",
group: "Knowledge",
language: "en",
skills: 
{
capital: 
{
image: "images/capital.png",
author_url: "https://github.com/chashmeetsingh",
examples: 
[
"capital of Bangladesh"
],
developer_privacy_policy: null,
author: "chashmeet singh",
skill_name: "capital",
dynamic_content: true,
terms_of_use: null,
descriptions: "a skill to tell user about capital of any country.",
skill_rating: 
{
negative: "0",
positive: "1"
}
}

We use the descriptions, skill_name, examples, image from the skill metadata to create our Skill Tile.

  1. The styles of the cards follow a CSS flexbox structure. A sample mock up of the Skill Card looks as follows.

We first handle all the base cases and show “No name available”, “No description available” for data which does not exist or is found to be “null”. We then create the card mock-up in ReactJS which looks somewhat like this code snippet in the file BrowseSkill.js

                            <Card style={styles.row} key={el}>
                                <div style={styles.right} key={el}>
                                    {image ? <div style={styles.imageContainer}>
                                        <img alt={skill_name} src={image} style={styles.image}/>
                                    </div>:
                                    <CircleImage name={el} size="48"/>}
                                    <div style={styles.titleStyle}>"{examples}"</div>
                                </div>
                                <div style={styles.details}>
                                    <h3 style={styles.name}>{skill_name}</h3>
                                    <p style={styles.description}>{description}</p>
                                </div>
                            </Card>

  1. We then add the following styles to the Card and its contents which complete the look of the View.
imageContainer:{   
        position: 'relative',
        height: '80px',
        width: '80px',
        verticalAlign: 'top'
    },
    name:{
        textAlign: 'left',
        fontSize: '15px',
        color: '#4285f4',
        margin: '4px 0'
    },
    details:{
        paddingLeft:'10px'
    },
    image:{
        maxWidth: '100%',
        border: 0
    },
description:{
        textAlign:'left',
        fontSize: '14px'   
    },
row: {
        width: 280,
        minHeight:'200px',
        margin:"10px",
        overflow:'hidden',
        justifyContent: "center",
        fontSize: '10px',
        textAlign: 'center',
        display: 'inline-block',
        background: '#f2f2f2',
        borderRadius: '5px',
        backgroundColor: '#f4f6f6',
        border: '1px solid #eaeded',
        padding: '4px',
        alignSelf:'flex-start'
    },
titleStyle:{
    textAlign: 'left',
    fontStyle: 'italic',
    fontSize: '16px',
    textOverflow: 'ellipsis',
    overflow: 'hidden',
    width: '138px',
    marginLeft: '15px',
    verticalAlign: 'middle',
    display: 'block'
}

To see the SUSI Skills or to contribute to it, please visit http://skills.susi.ai

Resources

Continue ReadingEnhanced Skill Tiles in SUSI Skill CMS

Adding Fallback Images in SUSI.AI Skill CMS

SUSI.AI Skill CMS shows image of a every skill. Here we are going to talk about a special case, where we handle the case when image is not found. We will be discussing the author’s skill component(all the skills by an author) and how we added fallback image in order to handle all the cases. For displaying image in table displaying all skills of author, we provide the path of image in SUSI Skill Data repository. The path is provided as follows :

let image = 'https://raw.githubusercontent.com/fossasia/susi_skill_data/master/models/general/'+ parse[6]+'/'+parse[7]+'/images/'+parse[8].split('.')[0];

Explanation:
parse is the array which contains the models, language ISO code, and the name of the skill. This is obtained after parsing JSON from this endpoint :

"http://api.susi.ai/cms/getSkillsByAuthor.json?author=" + author;
  • parse[6]: This represents a model of the skill. There are currently six models Assistants, Entertainment, Knowledge, Problem Solving, Shopping and Small Talks.
  • parse[7]: This represents ISO language code of the skill.
  • parse[8]: This represents the name of the skill.

Now the image variable just needs the file extension. We have .jpg and .png extensions in images in our skill data repository. So we made two images :

let image1 = image + '.png';
let image2 = image + '.jpg';

The img tag only takes one attribute in src and we can only add a string in alt tag. Now we needed to check which image exists and add proper src. This can be solved by following methods:

We can use Jquery to solve this:

$.get(image_url)
        .done(function() { 
                // image exists
        }).fail(function() { 
                // Image doesn't exist
    })

This will result in more code and and also this does not handles the case where no image is found and we need to show the Circle Image component which takes first two letters of skill and make a circular component. After researching the internet we found a perfect solution to our problem. There is an npm package named react-image, which is an alternative to default img tag. Features of react-image package helpful to us are:

  • We can provide multiple fallback images in an array as source which will be used in order of index of array. This feature solves our problem of extensions, we add provide image with all extensions.
  • We can show a fallback element in case no images are loaded. This solves our second problem where we needed to show Circle Image component.

Code looks like this:

<Img
  style={imageStyle}
  src={[
       image1,
       image2
      ]}
  unloader={<CircleImage name={name} size="40"/>}
 />

Resources:

Continue ReadingAdding Fallback Images in SUSI.AI Skill CMS

Getting skills by an author in SUSI.AI Skill CMS

The skill description page of any skill in SUSI.AI skill cms displays all the details regarding the skill. It displays image, description, examples and name of author. The skill made by author can impress the users and they might want to know more skills made by that particular author.

We decided to display all the skills by an author. We needed an endpoint from server to get skills by author. This cannot be done on client side as that would result in multiple ajax calls to server for each skill of user. The endpoint used is :

"http://api.susi.ai/cms/getSkillsByAuthor.json?author=" + author

Here the author is the name of the author who published the particular skill. We make an ajax call to the server with the endpoint mentioned above and this is done when the user clicks the author. The ajax call response is as follows(example) :

{
 0:       "/home/susi/susi_skill_data/models/general/Entertainment/en/creator_info.txt",
 1: "/home/susi/susi_skill_data/models/general/Entertainment/en/flip_coin.txt",
 2: "/home/susi/susi_skill_data/models/general/Assistants/en/websearch.txt",
session: {
identity: {
type: "host",
name: "139.5.254.154",
anonymous: true
  }
 }
}

The response contains the list of skills made by author. We parse this response to get the required information. We decided to display a table containing name, category and language of the skill. We used map function on object keys to parse information from every key present in JSON response. Every value corresponding to a key represents a response of following type:

"/home/susi/susi_skill_data/models/general/Category/language/name.txt"

Explanation:

  • Category: There are currently six categories Assistants, Entertainment, Knowledge, Problem Solving, Shopping and Small Talks. Each skill falls under a different category.
  • language: This represents the ISO language code of the language in which skill is written.
  • name: This is the name of the skill.

We want these attributes from the string so we have used the split function:

let parse = data[skill].split('/');

data is JSON response and skill is the key corresponding to which we are parsing information. We store the array returned by split function in variable parse. Now we return the following table in map function:

return (
            <TableRow>
               <TableRowColumn>
                   <div>
                      <Img
                         style={imageStyle}
                         src={[
                              image1,
                              image2
                         ]}
                         unloader={<CircleImage name={name} size="40"/>}
                       />
                       {name}
                    </div>
                </TableRowColumn>
                <TableRowColumn>{parse[6]}</TableRowColumn>
                <TableRowColumn>{isoConv(parse[7])}</TableRowColumn>
             </TableRow>
          )

Here :

    • name: The name of skill converted into Title case by the following code :
let name = parse[8].split('.')[0];
name = name.charAt(0).toUpperCase() + name.slice(1);
  • parse[6]: This represents the category of the skill.
  • isoConv(parse[7]): parse[7] is the ISO code of the language of skill and isoConv is an npm package used to get full form of the language from ISO code.
  • CircleImage: This is a fallback option in case image at the URL is not found. This takes first two words from the name and makes a circular component.

After successful execution of the code, we have the following looking table:

Resources:

Continue ReadingGetting skills by an author in SUSI.AI Skill CMS

Skill Editor in SUSI Skill CMS

SUSI Skill CMS is a web application built on ReactJS framework for creating and editing SUSI skills easily. It follows an API centric approach where the SUSI Server acts as an API server. In this blogpost we will see how to add a component which can be used to create a new skill SUSI Skill CMS.

For creating any skill in SUSI we need four parameters i.e model, group, language, skill name. So we need to ask these 4 parameters from the user. For input purposes we have a common card component which has dropdowns for selecting models, groups and languages, and a text field for skill name input.

<SelectField
    floatingLabelText="Model"
    value={this.state.modelValue}
    onChange={this.handleModelChange}
>
    {models}
</SelectField>
<SelectField
    floatingLabelText="Group"
    value={this.state.groupValue}
    onChange={this.handleGroupChange}
>
    {groups}
</SelectField>
<SelectField
    floatingLabelText="Language"
    value={this.state.languageValue}
    onChange={this.handleLanguageChange}
>
    {languages}
</SelectField>
<TextField
    floatingLabelText="Enter Skill name"
    floatingLabelFixed={true}
    hintText="My SUSI Skill"
    onChange={this.handleExpertChange}
/>
<RaisedButton label="Save" backgroundColor="#4285f4" labelColor="#fff" style={{marginLeft:10}} onTouchTap={this.saveClick} />

This is the card component where we get the user input. We have API endpoints on SUSI Server for getting the list of models, groups and languages. Using those APIs we inflate the dropdowns.
Then the user needs to edit the skill. For editing of skills we have used Ace Editor. Ace is an code
editor written in pure javascript. It matches the features native editors like Sublime and TextMate.

To use Ace we need to install the component.

npm install react-ace --save                        

This command will install the dependency and update the package.json file in our project with this dependency.

To use this editor we need to import AceEditor and place it in the render function of our react class.

<AceEditor
    mode=" markup"
    theme={this.state.editorTheme}
    width="100%"
    fontSize={this.state.fontSizeCode}
    height= "400px"
    value={this.state.code}
    name="skill_code_editor"
    onChange={this.onChange}
    editorProps={{$blockScrolling: true}}
/>

Now we have a page that looks something like this

Now we need to handle the click event when a user clicks on the save button.

First we check if the user is logged in or not. For this we check if we have the required cookies and the access token of the user.

 if(!cookies.get('loggedIn')) {
            notification.open({
                message: 'Not logged In',
                description: 'Please login and then try to create/edit a skill',
                icon: <Icon type="close-circle" style={{ color: '#f44336' }} />,
            });
            return 0;
        }

If the user is not logged in then we show him a error notification and asks him to login.

Then we check if he has filled all the required fields like name of the skill etc. and after that we call an API Endpoint on SUSI Server that will finally store the skill in the skill_data_repo.

let url= “http://api.susi.ai/cms/modifySkill.json”
$.ajax({
    url:url,
    dataType: 'jsonp',
    jsonp: 'callback',
    crossDomain: true,
    success: function (data) {
        console.log(data);
        if(data.accepted===true){
            notification.open({
                message: 'Accepted',
                description: 'Your Skill has been uploaded to the server',
                icon: <Icon type="check-circle" style={{ color: '#00C853' }} />,
            });
           }
    }
});

In the success function of ajax call we check if accepted parameter is true from the server or not. If accepted is true then we show user a notification with a message that “Your Skill has been uploaded to the server”.

To see this component running please visit http://skills.susi.ai/skillEditor.

Resources

Material-UI: http://www.material-ui.com/

Ace Editor: https://github.com/securingsincity/react-ace

Ajax: http://api.jquery.com/jquery.ajax/

Universal Cookies: https://www.npmjs.com/package/universal-cookie

Continue ReadingSkill Editor in SUSI Skill CMS

Uploading Images to SUSI Server

SUSI Skill CMS is a web app to create and modify SUSI Skills. It needs API Endpoints to function and SUSI Server makes it possible. In this blogpost, we will see how to add a servlet to SUSI Server to upload images and files.

The CreateSkillService.java file is the servlet which handles the process of creating new Skills. It requires different user roles to be implemented and hence it extends the AbstractAPIHandler.

Image upload is only possible via a POST request so we will first override the doPost method in this servlet.

  @Override
  protected void doPost(HttpServletRequest req, HttpServletResponse resp) throws ServletException, IOException {
  resp.setHeader("Access-Control-Allow-Origin", "*"); // enable CORS

resp.setHeader enables the CORS for the servlet. This is required as POST requests must have CORS enables from the server. This is an important security feature that is provided by the browser.

        Part file = req.getPart("image");
        if (file == null) {
            json.put("accepted", false);
            json.put("message", "Image not given");
        }

Image upload to servers is usually a Multipart Request. So we get the part which is named as “image” in the form data.

When we receive the image file, then we check if the image with the same name exists on the server or not.

Path p = Paths.get(language + File.separator + “images/” + image_name);

        if (image_name == null || Files.exists(p)) {
                json.put("accepted", false);
                json.put("message", "The Image name not given or Image with same name is already present ");
            }

If the same file is present on the server then we return an error to the user requesting to give a unique filename to upload.

Image image = ImageIO.read(filecontent);
BufferedImage bi = this.createResizedCopy(image, 512, 512, true);
if(!Files.exists(Paths.get(language.getPath() + File.separator + "images"))){
   new File(language.getPath() + File.separator + "images").mkdirs();
           }
ImageIO.write(bi, "jpg", new File(language.getPath() + File.separator + "images/" + image_name));

Then we read the content for the image in an Image object. Then we check if images directory exists or not. If there is no image directory in the skill path specified then create a folder named “images”.

We usually prefer square images at the Skill CMS. So we create a resized copy of the image of 512×512 dimensions and save that copy to the directory we created above.

BufferedImage createResizedCopy(Image originalImage, int scaledWidth, int scaledHeight, boolean preserveAlpha) {
        int imageType = preserveAlpha ? BufferedImage.TYPE_INT_RGB : BufferedImage.TYPE_INT_ARGB;
        BufferedImage scaledBI = new BufferedImage(scaledWidth, scaledHeight, imageType);
        Graphics2D g = scaledBI.createGraphics();
        if (preserveAlpha) {
            g.setComposite(AlphaComposite.Src);
        }
        g.drawImage(originalImage, 0, 0, scaledWidth, scaledHeight, null);
        g.dispose();
        return scaledBI;
    }

The function above is used to create a  resized copy of the image of specified dimensions. If the image was a PNG then it also preserves the transparency of the image while creating a copy.

Since the SUSI server follows an API centric approach, all servlets respond in JSON.

       resp.setContentType("application/json");
       resp.setCharacterEncoding("UTF-8");
       resp.getWriter().write(json.toString());’

At last, we set the character encoding and the character set of the output. This helps the clients to parse the data easily.

To see this endpoint in live send a POST request at http://api.susi.ai/cms/createSkill.json.

Resources

Apache Docs: https://commons.apache.org/proper/commons-fileupload/using.html

Multipart POST Request Tutorial: http://www.codejava.net/java-se/networking/upload-files-by-sending-multipart-request-programmatically

Java File Upload tutorial: https://ursaj.com/upload-files-in-java-with-servlet-api

Jetty Project: https://github.com/jetty-project/

Continue ReadingUploading Images to SUSI Server

Adding Description to the Susi AI Skills

Susi skill CMS is an editor to write and edit skill easily. It follows an API-centric approach where the Susi server acts as API server and a web front-end act as the client for the API and provides the user interface. A skill is a set of intents. One text file represents one skill, it may contain several intents which all belong together. All the skills are stored in Susi Skill Data repository and the schema is as following.

Using this, one can access any skill based on four tuples parameters model, group, language, skill. To know what a skill is about we needed to add a !description operator which identifies the text as a description for the skill. Let’s check out how to achieve it.Susi Skill class provides parser methods for the set of intents, given as text files.

 public static JSONObject readEzDSkill(BufferedReader br) throws JSONException {}
if (line.startsWith("!") && (thenpos = line.indexOf(':')) > 0) {
        String head = line.substring(1, thenpos).trim().toLowerCase();
       String tail = line.substring(thenpos + 1).trim();
if (head.equals("description")) {
   description =tail;
    }
}
 if (description.length() > 0) intent.put("description", description); 

The method readEzDSkill parses the skill txt file, it checks if a line starts with ‘!description’ (‘bang operator with description’) it then stores the content in string variable description.
If a description is found in a skill, it is recorded and put into Json Array of intents.

private final Map<String, Set<String>> skillDescriptions; 
 if (intent.getDescription() !=null) {
  Set<String> descriptions = this.skillDescriptions.get(intent.getSkill());
  if (descriptions == null) {
     descriptions = new LinkedHashSet<>();
     this.skillDescriptions.put(intent.getSkill(), descriptions);
   }
   descriptions.add(intent.getDescription());
}

SusiMind class  process this json and stores the description in a map of skill path and description. This map is used by DescriptionSkillService to list descriptions for all the skills given its model, group and language. For adding the description servlet we need to inherit the service class from AbstractAPIHandler and implement APIhandler interface.In Susi Server, an abstract class AbstractAPIHandler extending HttpServelets and implementing API handler interface is provided.

 @Override
    public BaseUserRole getMinimalBaseUserRole() { return BaseUserRole.ANONYMOUS; }

    @Override
    public JSONObject getDefaultPermissions(BaseUserRole baseUserRole) {
        return null;
    }

    @Override
    public String getAPIPath() {
        return "/cms/getDescriptionSkill.json";
    }

The getAPIPath() methods sets the API endpoint path, it gets appended to base path which is 127.0.0.1:4000/cms/getDescriptionSkill.json for local host. The getMinimalBaseRole method tells the minimum Userrole required to access this servlet it can also be ADMIN, USER. In our case it is Anonymous. A User need not log in to access this endpoint.
Next, we implement serviceimpl method which gives us the desired response in JSON format.

@Override
    public ServiceResponse serviceImpl(Query call, HttpServletResponse response, Authorization rights, final JsonObjectWithDefault permissions) {
        String model = call.get("model", "");
        String group = call.get("group", "");
        String language = call.get("language", "");
        JSONObject descriptions = new JSONObject(true);
            for (Map.Entry<String, Set<String>> entry : DAO.susi.getSkillDescriptions().entrySet()) {
                String path = entry.getKey();
  if ((model.length() == 0 || path.indexOf("/" + model + "/") > 0) &&(group.length() == 0 || path.indexOf("/" + group + "/") > 0) &&(language.length() == 0 || path.indexOf("/" + language + "/") > 0)) {
      descriptions.put(path, entry.getValue());
   }
            }
            JSONObject json = new JSONObject(true)
                    .put("model", model)
                    .put("group", group)
                    .put("language", language)
                    .put("descriptions", descriptions);
        return new ServiceResponse(json);
    }

We can get the required parameters through a call.get() method where the first parameter is the key for which we want to get the value and second parameter is the default value. If the path contains the desired language, group and model, we return it as a response otherwise an error message is displayed. To check the response go to http://api.susi.ai/cms/getDescriptionSkill.json?model=general&group=knowledge&language=en or http://127.0.0.1:4000/cms/getDescriptionSkill.json.

This is how getDescriptionSkill service works. To add a description to the skill visit susi_skill_data, the storage place for susi skills. For more information and complete code take a look at Susi server and join gitter chat channel for discussions.

Resources

Continue ReadingAdding Description to the Susi AI Skills