

Adding Service Workers In Generated Event Websites In Open Event Webapp
Open Event Webapp Generator takes in the event data in form of a JSON zip or an API endpoint as input and outputs an event website. Since the generated event websites are static, we can use caching of static assets to improve the page-load time significantly. All this has been made possible by the introduction of service workers in the browsers.
Service workers are event-driven scripts (written in JavaScript) that have access to domain-wide events, including network fetches.With the help of service workers, we can cache all static resources, which could drastically reduce network requests and improve performance considerably, too. The service workers are like a proxy which sits between the browser and the network and intercept it. We will listen for fetch events on these workers and whenever a request for a resource is made, we intercept and process it first. Since our generated event sites are static, it makes no sense to fetch the assets again and again. When a user first loads a page, the script gets activated and try to cache all the static assets it can. On further reload of the page, whenever the browser request for an already stored asset, instead of fetching it from the network, it can directly give them back to the browser from the local store. Also, in the meantime, it is also caching all the new static assets so they won’t be loaded or fetched again from the network later. Thus the performance of the app gets increased more and more with every reload. It becomes fully functional offline after a few page loads. The issue for this feature is here and the whole work can be seen here.
To know more details about the basic functioning and the lifecycle of the service workers, check out this excellent Google Developers article. This blog mainly focuses on how we added service workers in the event websites.
We create a new fallback HTML page offline.html to return in response to an offline user who requests a page which has not been cached yet. Similarly, for images, we have a fallback image named avatar.png which is returned when the requested image is not present in the local store and the network is down. Since these assets are integral to the functioning of the service worker, we cache them in the installation step itself. The whole service worker file can be seen here
var urlsToCache = [
 './css/bootstrap.min.css',
 './offline.html',
 './images/avatar.png'
];
self.addEventListener('install', function(event) {
 event.waitUntil(
   caches.open(CACHE_NAME).then(function(cache) {
     return cache.addAll(urlsToCache);
   })
 );
});
All the other assets are cached lazily. Only when they are requested, we fetch them from the network and store it in the local store. This way, we avoid caching a large number of assets at the install step. Caching of several files in the install step is not recommended since if any of the listed files fails to download and cache, then the service worker won’t be installed!
self.addEventListener('fetch', function(event) {
event.respondWith(caches.match(event.request).then(function(response) {
     // Cache hit - return response
     if (response) { return response; }
     // Fetch resource from internet and put into cache
     var fetchRequest = event.request.clone();
     return fetch(fetchRequest).then(function(response) {
         var responseToCache = response.clone();
         caches.open(CACHE_NAME).then(function(cache) {
           cache.put(event.request, responseToCache);
         });
         return response;
       }).catch(function(err) {
         // Return fallback page when user is offline and resource is not cached
         if (event.request.headers.get('Accept').indexOf('text/html') !== -1) {
           return caches.match('./offline.html');
         }
       });
   })
 );
});
One thing which we need to keep in mind is that the website content should not become stale. Because it might happen that the website is updated but the actual content shown is older since response to every request is being fetched from the outdated cache. We need to delete the old cache and install a new service worker when the content of the site is updated. To deal with this issue, we calculate the hash of event website folder after the site has been generated. This value of the hash is used as the cache name inside which we keep the cached resources. When the content of the event website changes, the value of the hash changes. Due to this, a new service worker (containing the new value of the hash) is installed. After the currently open pages of the website are closed, the old service worker is killed and the activate event of the new service worker is fired. During this activate event, we clear the old cache containing the outdated content!
// Hash of the event website Folder
var CACHE_NAME = 'Mtj5WiGtMtzesubewqMtdGS9wYI=';
self.addEventListener('activate', function(event) {
 event.waitUntil(caches.keys().then(function(cacheNames) {
   return Promise.all(cacheNames.map(function(cacheName) {
     if (cacheName !== CACHE_NAME) {
       console.log('Deleting cache ' + cacheName);
       return caches.delete(cacheName);
     }
   })
   );
 }));
});
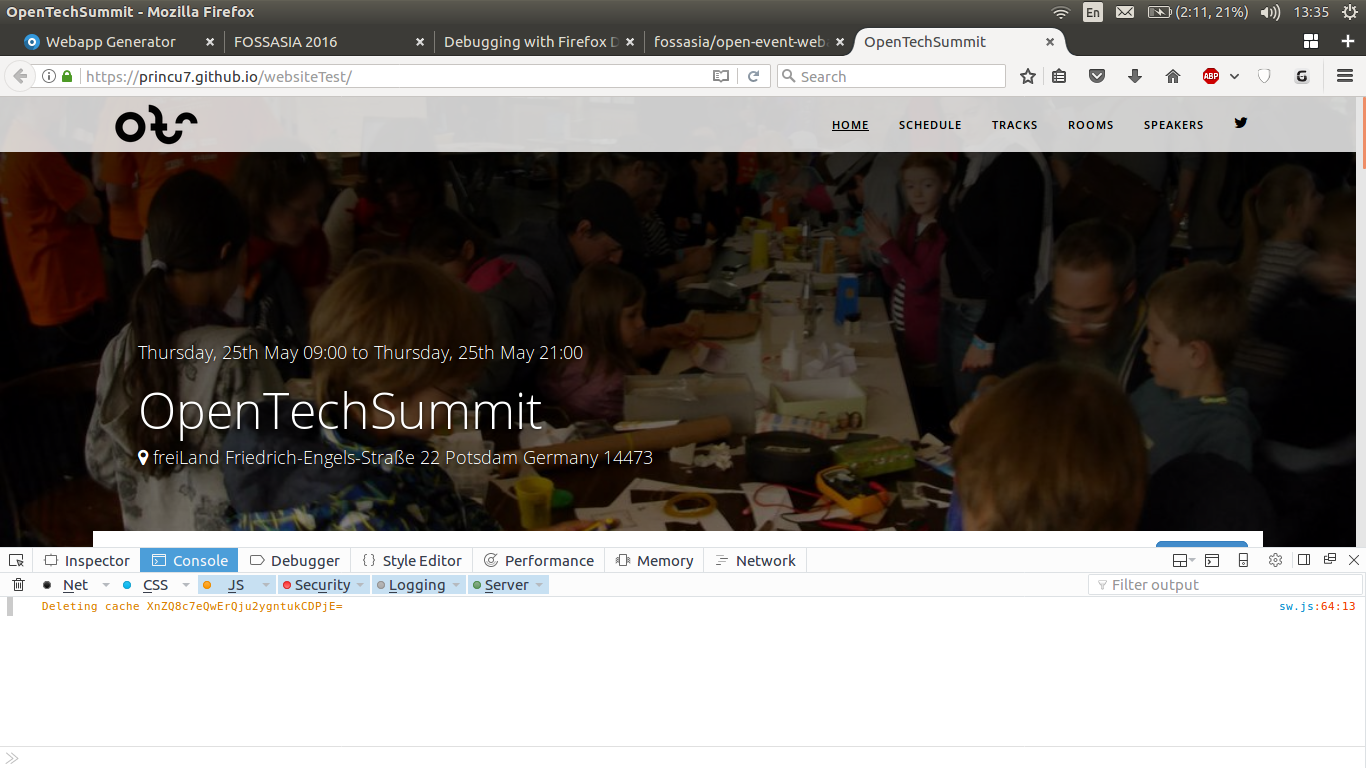
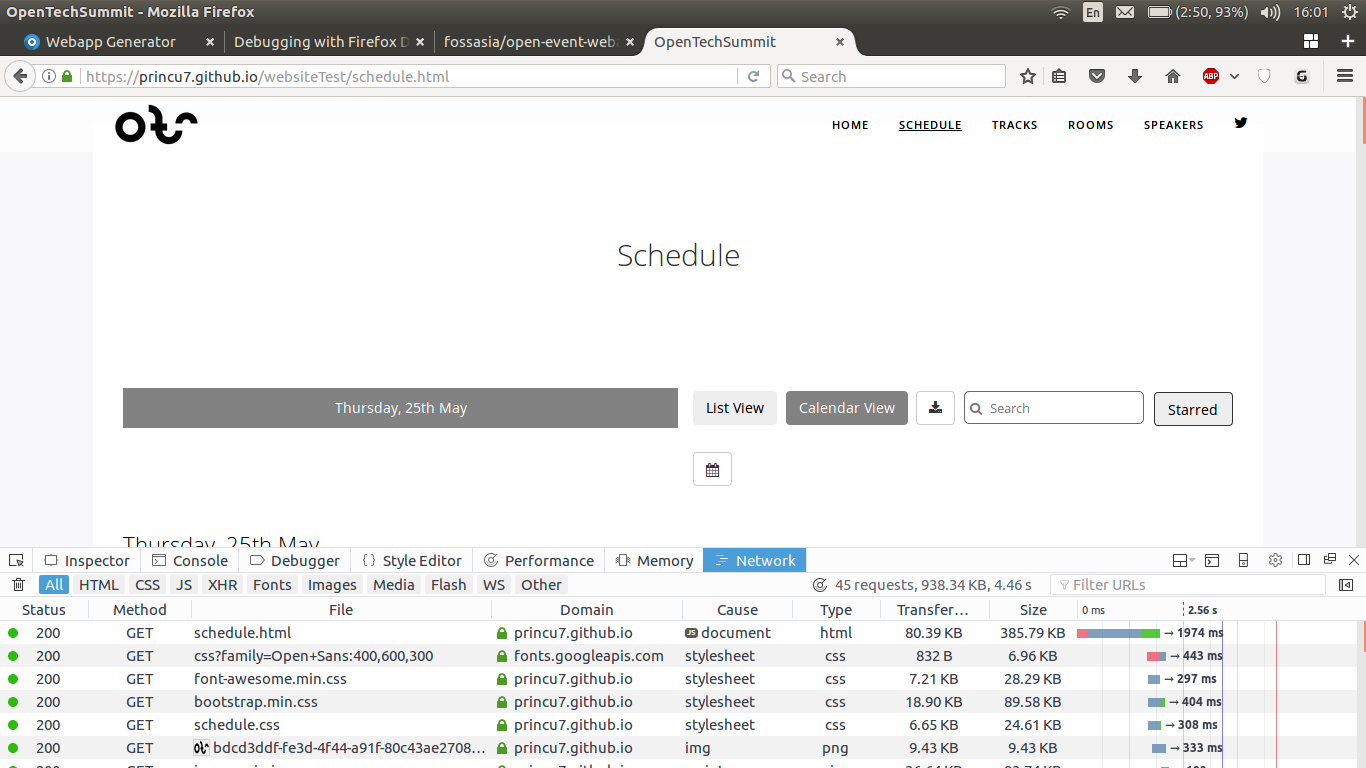
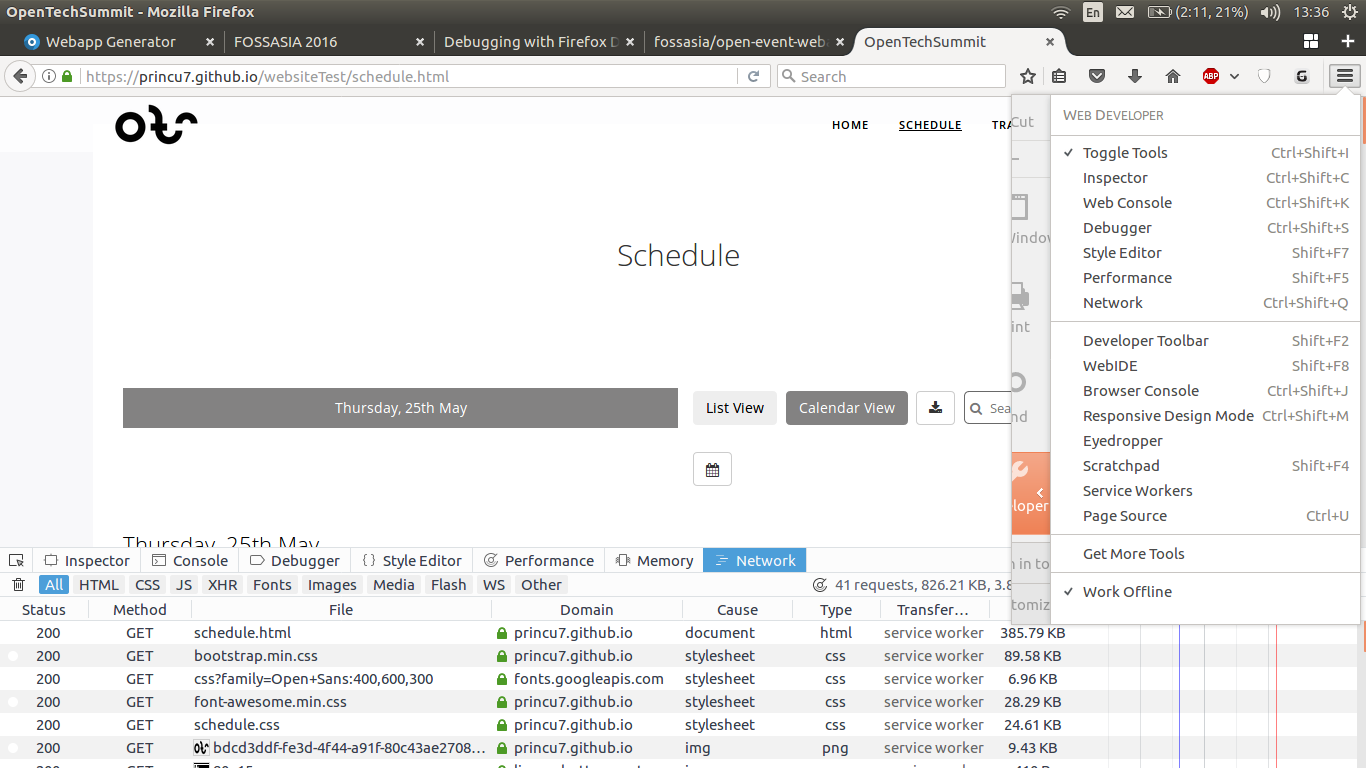
Here are many screenshots showing service workers in action
- When the site is updated, the outdated cache contents are cleared
- On visiting a page which has not yet been cached, its contents are placed into cache for utilization on future visits
- On visiting the cached page again, the assets will be served from the cache directly.

- The page will comfortably load even on offline connections
- On requesting for a page which has not yet been cached, we show a custom fallback page which shows a message


You must be logged in to post a comment.