

Implementing the Feedback Functionality in SUSI Web Chat
SUSI AI now has a feedback feature where it collects user’s feedback for every response to learn and improve itself. The first step towards guided learning is building a dataset through a feedback mechanism which can be used to learn from and improvise the skill selection mechanism responsible for answering the user queries.
The flow behind the feedback mechanism is :
- For every SUSI response show thumbs up and thumbs down buttons.
- For the older messages, the feedback thumbs are disabled and only display the feedback already given. The user cannot change the feedback already given.
- For the latest SUSI response the user can change his feedback by clicking on thumbs up if he likes the response, else on thumbs down, until he gives a new query.
- When the new query is given by the user, the feedback recorded for the previous response is sent to the server.
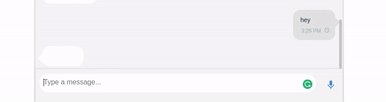
Let’s visit SUSI Web Chat and try this out.

We can find the feedback thumbs for the response messages. The user cannot change the feedback he has already given for previous messages. For the latest message the user can toggle feedback until he sends the next query.
How is this implemented?
We first design the UI for feedback thumbs using Material UI SVG Icons. We need a separate component for the feedback UI because we need to store the state of feedback as positive or negative because we are allowing the user to change his feedback for the latest response until a new query is sent. And whenever the user clicks on a thumb, we update the state of the component as positive or negative accordingly.
import ThumbUp from 'material-ui/svg-icons/action/thumb-up';
import ThumbDown from 'material-ui/svg-icons/action/thumb-down';

feedbackButtons = (
  <span className='feedback' style={feedbackStyle}>
    <ThumbUp
      onClick={this.rateSkill.bind(this,'positive')}
      style={feedbackIndicator}
      color={positiveFeedbackColor}/>
    <ThumbDown
      onClick={this.rateSkill.bind(this,'negative')}
      style={feedbackIndicator}
      color={negativeFeedbackColor}/>
  </span>
);
The next step is to store the response in Message Store using saveFeedback Action. This will help us later to send the feedback to the server by querying it from the Message Store. The Action calls the Dispatcher with FEEDBACK_RECEIVED ActionType which is collected in the MessageStore and the feedback is updated in the Message Store.
let feedback = this.state.skill;

if(!(Object.keys(feedback).length === 0 &&
feedback.constructor === Object)){
  feedback.rating = rating;
  this.props.message.feedback.rating = rating;
  Actions.saveFeedback(feedback);
}

case ActionTypes.FEEDBACK_RECEIVED: {
  _feedback = action.feedback;
  MessageStore.emitChange();
  break;
}
The final step is to send the feedback to the server. The server endpoint to store feedback for a skill requires other parameters apart from feedback to identify the skill. The server response contains an attribute `skills` which gives the path of the skill used to answer that query. From that path we need to parse :
- Model : Highest level of abstraction for categorising skills
- Group : Different groups under a model
- Language : Language of the skill
- Skill : Name of the skill
For example, for the query `what is the capital of germany` , the skills object is
"skills": ["/susi_skill_data/models/general/smalltalk/en/English-Standalone-aiml2susi.txt"]
So, for this skill,
-
- Model : general
- Group : smalltalk
- Language : en
- Skill : English-Standalone-aiml2susi
The server endpoint to store feedback for a particular skill is :
BASE_URL+'/cms/rateSkill.json?model=MODEL&group=GROUP&language=LANGUAGE&skill=SKILL&rating=RATING'
Where Model, Group, Language and Skill are parsed from the skill attribute of server response as discussed above and the Rating is either positive or negative and is collected from the user when he clicks on feedback thumbs.
When a new query is sent, the sendFeedback Action is triggered with the required attributes to make the server call to store feedback on server. The client then makes an Ajax call to the rateSkill endpoint to send the feedback to the server.
let url = BASE_URL+'/cms/rateSkill.json?'+
          'model='+feedback.model+
          '&group='+feedback.group+
          '&language='+feedback.language+
          '&skill='+feedback.skill+
          '&rating='+feedback.rating;

$.ajax({
  url: url,
  dataType: 'jsonp',
  crossDomain: true,
  timeout: 3000,
  async: false,
  success: function (response) {
    console.log(response);
  },
  error: function(errorThrown){
    console.log(errorThrown);
  }
});
This is how the feedback feedback mechanism works in SUSI Web Chat. The entire code can be found at SUSI Web Chat Repository.
Resources
- Mozilla Developers Documentation – Ajax guide
- Material UI Documentation – Material UI SVG Icons


You must be logged in to post a comment.