Add PayPal Payment integration in Open Event Attendee Application

The open event attendee is an android app which allows users to discover events happening around the world using the Open Event Platform. It consumes the APIs of the open event server to get a list of available events and can get detailed information about them.

PayPal is a very common method to pay for anything throughout the world. It is a highly popular platform and it’s only right that there should be an option to pay through PayPal on Eventyay attendee for tickets. This blog will explain how and why I added PayPal payment feature in the application with a sandbox account.

  • Why PayPal?
  • Get API key for a sandbox account
  • Integration with Android Studio
  • Conclusion
  • Resources

Let’s analyze every step in detail.

Advantages of using PayPal Payment integration

  1. Provide UI to gather payment information from the user
  2. Get your credentials, which identify your PayPal account as the payment receiver. Specifically, obtain a client ID and secret.
  3. Returns a proof of payment to your app.
  4. Provides the user their goods or services.

Setup Sandbox account and get the API key

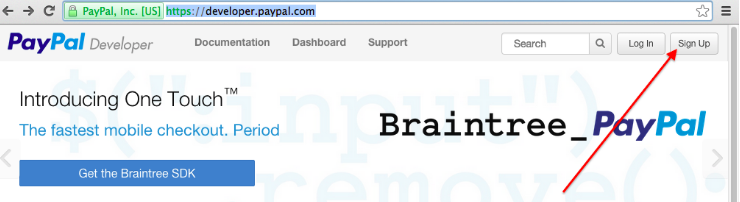
Go to https://developer.paypal.com/ and sign up for a developer account:

After Sign up, go to the dashboard and create an app: 

Now in app credentials go to sandbox accounts. Here you can find your API key.

Now, Create a new sandbox account with entering some amount of money for testing purposes:

PayPal SDK integration in the application

Add PayPal SDK in build.gradle dependencies:

//PayPal
compile 'com.paypal.sdk:paypal-android-sdk:2.16.0'

Store the API key in the android manifest file:

<meta-data
            android:name="com.paypal.android.API_KEY"
            android:value="${PAYPAL_CLIENT_ID}"/>

Get the API key in the fragment where PayPal payment is required:

private lateinit var PAYPAL_API_KEY: String
PAYPAL_API_KEY = activity?.packageManager?.getApplicati<meta-data
            android:name="com.paypal.android.API_KEY"
            android:value="${PAYPAL_CLIENT_ID}"/>onInfo(activity?.packageName, PackageManager.GET_META_DATA)
            ?.metaData?.getString(PAYPAL_KEY).toString()

Start PayPal services on create view:

val payPalConfiguration = PayPalConfiguration()
            .environment(PayPalConfiguration.ENVIRONMENT_SANDBOX) 
            .clientId(PAYPAL_API_KEY)val intent = Intent(context, PaymentActivity::class.java)intent.putExtra(PayPalService.EXTRA_PAYPAL_CONFIGURATION, payPalConfiguration)activity?.startService(intent)

Now start the Payment conditionally with same intent: 

val payment = PayPalPayment(BigDecimal(amount.toString()), "USD", "Pay for tickets", PayPalPayment.PAYMENT_INTENT_SALE)
intent.putExtra(PaymentActivity.EXTRA_PAYMENT, payment)
startActivityForResult(intent, PAYPAL_REQUEST_CODE)

Handle the result after payment is done:

override fun onActivityResult(requestCode: Int, resultCode: Int, data: Intent?) {
        if (requestCode == PAYPAL_REQUEST_CODE) {
            if (resultCode == Activity.RESULT_OK) {
                val paymentConfirmation = data?.getParcelableExtra<PaymentConfirmation>(PaymentActivity.EXTRA_RESULT_CONFIRMATION)
                if (paymentConfirmation != null) {
                    val paymentInfo = paymentConfirmation.toJSONObject()
                    val tokenId = paymentInfo.getJSONObject("response").getString("id")
                    Timber.d(paymentInfo.toString(4))
                    // Send the token to server
                    val charge = Charge(attendeeViewModel.getId().toInt(), tokenId, null)
                    attendeeViewModel.completeOrder(charge)
                }
            } else if (resultCode == Activity.RESULT_CANCELED)
                Toast.makeText(context, "Payment canceled!", Toast.LENGTH_SHORT).show()
            else if (resultCode == PaymentActivity.RESULT_EXTRAS_INVALID)
                Toast.makeText(context, "Invalid Payment Configuration", Toast.LENGTH_SHORT).show()
        }
    }

GIF

In a nutshell

With almost 250 million users worldwide, PayPal is an extremely popular platform for monetary transactions and it’s quite essential that every application an option to use it. Given the nature of Eventyay attendee and its pan-world appeal, I have added PayPal as a payment system for tickets to any event.

Resources

  1. PayPal Android SDK guide: PayPal Android SDK
  2. PayPal SDK repo: PayPal-Android-SDK

Tags

PayPal, Android, Payments, FOSSASIA, GSoC, AndroidPayments, Kotlin

Continue ReadingAdd PayPal Payment integration in Open Event Attendee Application

Adding Online Payment Support in Open Event Frontend via PayPal

Open Event Frontend involves ticketing system which supports both paid and free tickets. To buy a paid ticket Open Event provides several options such as debit card, credit card, cheque, bank transfer and onsite payments. So to add support for debit and credit card payments Open Event uses Paypal checkout as one of the options. Using paypal checkout screen users can enter their card details and pay for their ticket or they can use their paypal wallet money to pay for their tickets.

Given below are some steps which are to be followed for successfully charging a user for ticket using his/her card.

  • We create an application on paypal developer dashboard to receive client id and secret key.
  • We set these keys in admin dashboard of open event and then while checkout we use these keys to render checkout screen.
  • After clicking checkout button a request is sent to create-paypal-payment endpoint of open event server to create a paypal token which is used in checkout procedure.
  • After user’s verification paypal generates a payment id is which is used by open event frontend to charge the user for stipulated amount.
  • We send this token to open event server which processes the token and charge the user.
  • We get error or success message from open event server as per the process outcome.

To render the paypal checkout elements we use paypal checkout library provided by npm. Paypal button is rendered using Button.render method of paypal checkout library. Code snippet is given below.

// app/components/paypal-button.js

paypal.Button.render({
   env: 'sandbox',

   commit: true,

   style: {
     label : 'pay',
     size  : 'medium', // tiny, small, medium
     color : 'gold', // orange, blue, silver
     shape : 'pill'    // pill, rect
   },

   payment() {
   // this is used to obtain paypal token to initialize payment process 
   },

   onAuthorize(data) {
     // this callback will be for authorizing the payments
    }

 }, this.elementId);


After button is rendered next step is to obtain a payment token from create-paypal-payment endpoint of open event server. For this we use the payment() callback of paypal-checkout. Code snippet for payment callback method is given below:

// app/components/paypal-button.js

let createPayload = {
      'data': {
        'attributes': {
          'return-url' : `${window.location.origin}/orders/${order.identifier}/placed`,
          'cancel-url' : `${window.location.origin}/orders/${order.identifier}/placed`
        },
        'type': 'paypal-payment'
      }
    };
paypal.Button.render({
     //Button attributes

      payment() {
        return loader.post(`orders/${order.identifier}/create-paypal-payment`, createPayload)
          .then(res => {
            return res.payment_id;
          });
      },

      onAuthorize(data) {
        // this callback will be for authorizing the payments
      }

    }, this.elementId);


After getting the token payment screen is initialized and user is asked to enter his/her credentials. This process is handled by paypal servers. After user verifies his/her payment paypal generates a paymentId and a payerId and sends it back to open event. After the payment authorization onAuthorize() method of paypal is called and payment is further processed in this callback method. Payment ID and payer Id received from paypal is sent to charge endpoint of open event server to charge the user. After receiving success or failure message from paypal proper message is displayed to users and their order is confirmed or cancelled respectively. Code snippet for onAuthorize is given below:

// app/components/paypal-button.js

onAuthorize(data) {
        // this callback will be for authorizing the payments
        let chargePayload = {
          'data': {
            'attributes': {
              'stripe'            : null,
              'paypal_payer_id'   : data.payerID,
              'paypal_payment_id' : data.paymentID
            },
            'type': 'charge'
          }
        };
        let config = {
          skipDataTransform: true
        };
        chargePayload = JSON.stringify(chargePayload);
        return loader.post(`orders/${order.identifier}/charge`, chargePayload, config)
          .then(charge => {
            if (charge.data.attributes.status) {
              notify.success(charge.data.attributes.message);
              router.transitionTo('orders.view', order.identifier);
            } else {
              notify.error(charge.data.attributes.message);
            }
          });
      }


Full code can be seen here.

In this way we achieve the functionality of adding paypal payment support in open event frontend. Please follow the links below for further clarification and detailed overview.

Resources:

Continue ReadingAdding Online Payment Support in Open Event Frontend via PayPal

Paypal Integration in Open Event Server

The Open Event Server enables organizers to manage events from concerts to conferences and meetups. It offers features for events with several tracks and venues. This blog post explains how Paypal has been integrated in the Open Event Server in order to accept payments for tickets.

The integration of Paypal in the server involved the following steps:

  1. An endpoint to accept the Paypal token from the client applications.
  2. Using the token to get the approved payment details.
  3. Capturing the payment using the fetched payment details.

Endpoint for Paypal token

The server exposes an endpoint to get the Paypal token in order to accept payments.

api.route(ChargeList, ‘charge_list’, ‘/orders/<identifier>/charge’, ‘/orders/<order_identifier>/charge’)

The above endpoint accepts the Paypal token and uses that to get the payment details from Paypal and then capture the payments.

Getting Approved Payment Details

We use the Paypal Name-Value pair API in the project. First we get the credentials of the event organizer who will be accepting the payments using a call to the get_credentials helper method. It returns the data as the following dictionary:

credentials = {
  'USER': settings['paypal_live_username'],
  'PWD': settings['paypal_live_password'],
  'SIGNATURE': settings['paypal_live_signature'],
  'SERVER': 'https://api-3t.paypal.com/nvp',
  'CHECKOUT_URL': 'https://www.paypal.com/cgi-bin/webscr',
  'EMAIL': '' if not event or not event.paypal_email or event.paypal_email == "" else event.paypal_email
}

Next, we use the credentials to get the approved payment details from paypal using the following code snippet.

@staticmethod
def get_approved_payment_details(order, credentials=None):
   if not credentials:
     credentials = PayPalPaymentsManager.get_credentials(order.event)

   if not credentials:
     raise Exception('PayPal credentials have not been set correctly')

   data = {
            'USER': credentials['USER'],
            'PWD': credentials['PWD'],
            'SIGNATURE': credentials['SIGNATURE'],
            'SUBJECT': credentials['EMAIL'],
            'METHOD': 'GetExpressCheckoutDetails',
            'VERSION': PayPalPaymentsManager.api_version,
            'TOKEN': order.paypal_token
   }

   if current_app.config['TESTING']:
      return data

   response = requests.post(credentials['SERVER'], data=data)
   return json.loads(response.text)

Capturing the payments

After successfully fetching the payment details, the final step is to capture the payment. We set the amount to be charged to the amount of the order and the payer_id to be the payer id received from step 2. Then we simply make a POST request to the Paypal nvp server and capture the payments. The below method is responsible for executing this task:

@staticmethod
def capture_payment(order, payer_id, currency=None, credentials=None):
  if not credentials:
    credentials = PayPalPaymentsManager.get_credentials(order.event)

  if not credentials:
    raise Exception('PayPal credentials have not be set correctly')

  if not currency:
    currency = order.event.payment_currency

  if not currency or currency == "":
    currency = "USD"

   data = {
            'USER': credentials['USER'],
            'PWD': credentials['PWD'],
            'SIGNATURE': credentials['SIGNATURE'],
            'SUBJECT': credentials['EMAIL'],
            'METHOD': 'DoExpressCheckoutPayment',
            'VERSION': PayPalPaymentsManager.api_version,
            'TOKEN': order.paypal_token,
            'PAYERID': payer_id,
            'PAYMENTREQUEST_0_PAYMENTACTION': 'SALE',
            'PAYMENTREQUEST_0_AMT': order.amount,
            'PAYMENTREQUEST_0_CURRENCYCODE': currency,
   }

   response = requests.post(credentials['SERVER'], data=data)
   return json.loads(response.text)

References

Continue ReadingPaypal Integration in Open Event Server

Charges Layer in Open Event Server

The Open Event Server enables organizers to manage events from concerts to conferences and meetups. It offers features for events with several tracks and venues. This blog post explains how the charge layer has been implemented in the Open Event Server in order to charge the user for tickets of an event.

Schema

We currently support payments via Stripe and Paypal. As a result the schema for Charges layer consists of fields for providing the token for stripe or paypal. It also contains a read only id field.

class ChargeSchema(Schema):
    """
    ChargeSchema
    """

    class Meta:
        """
        Meta class for ChargeSchema
        """
        type_ = 'charge'
        inflect = dasherize
        self_view = 'v1.charge_list'
        self_view_kwargs = {'id': '<id>'}

    id = fields.Str(dump_only=True)
    stripe = fields.Str(allow_none=True)
    paypal = fields.Str(allow_none=True)

Resource

The ChargeList resource only supports POST requests since there is no need for other type of requests. We simply declare the schema, supported methods and the data layer. We also check for required permissions by declaring the decorators.

class ChargeList(ResourceList):
    """
    ChargeList ResourceList for ChargesLayer class
    """
    methods = ['POST', ]
    schema = ChargeSchema

    data_layer = {
        'class': ChargesLayer,
        'session': db.session
    }

    decorators = (jwt_required,)

Layer

The data layer contains a single method create_object which does all the heavy lifting of charging the user according to the payment medium and the related order. It first loads the related order from the database using the identifier.

We first check if the order contains one or more paid tickets or not. If not, then ConflictException is raised since it doesn’t make sense to charge a user without any paid ticket in the order. Next, it checks the payment mode of the order. If the payment mode is Stripe then it checks if the stripe_token is provided with the request or not. If not, an UnprocessableEntity exception is raised otherwise relevant methods are called in order to charge the user accordingly. A similar procedure is followed for payments via Paypal. Below is the full code for reference.

class ChargesLayer(BaseDataLayer):

    def create_object(self, data, view_kwargs):
        """
        create_object method for the Charges layer
        charge the user using paypal or stripe
        :param data:
        :param view_kwargs:
        :return:
        """
        order = Order.query.filter_by(id=view_kwargs['id']).first()
        if not order:
            raise ObjectNotFound({'parameter': 'id'},
                                 "Order with id: {} not found".format(view_kwargs['id']))
        elif order.status == 'cancelled' or order.status == 'expired':
            raise ConflictException({'parameter': 'id'},
                                    "You cannot charge payments on a cancelled or expired order")
        elif (not order.amount) or order.amount == 0:
            raise ConflictException({'parameter': 'id'},
                                    "You cannot charge payments on a free order")

        # charge through stripe
        if order.payment_mode == 'stripe':
            if not data.get('stripe'):
                raise UnprocessableEntity({'source': ''}, "stripe token is missing")
            success, response = TicketingManager.charge_stripe_order_payment(order, data['stripe'])
            if not success:
                raise UnprocessableEntity({'source': 'stripe_token_id'}, response)

        # charge through paypal
        elif order.payment_mode == 'paypal':
            if not data.get('paypal'):
                raise UnprocessableEntity({'source': ''}, "paypal token is missing")
            success, response = TicketingManager.charge_paypal_order_payment(order, data['paypal'])
            if not success:
                raise UnprocessableEntity({'source': 'paypal'}, response)
        return order

The charge_stripe_order_payment and charge_paypal_order_payment are helper methods defined to abstract away the complications of the procedure from the layer.

References

Continue ReadingCharges Layer in Open Event Server

Post Payment Charging in Open Event API Server

Order flow in Open Event API Server follows very simple process. On successfully creating a order through API server the user receives the payment-url. API server out of the box provides support for two payment gateways, stripe and paypal.
The process followed is very simple, on creating the order you will receive the payment-url. The frontend will complete the payment through that url and on completion it will hit the specific endpoint which will confirm the payment and update the order status.

Getting the payment-url

Payment Url will be sent on successfully creating the order. There are three type of payment-modes which can be provided to Order API on creating order. The three payment modes are “free”, “stripe” and “paypal”. To get the payment-url just send the payment mode as stripe or paypal.

POST Payment

After payment processing through frontend, the charges endpoint will be called so that payment verification can be done on the server end.

POST /v1/orders/<identifier>/charge

This endpoint receives the stripe token if the payment mode is stripe else no token is required to process payment for paypal.
The response will have the order details on successful verification.

Implementation

The implementation of charging is based on the custom data layer in Orga Server. The custom layer overrides the Base data layer and provide the custom implementation to “create_object” method thus, not using Alchemy layer.

def create_object(self, data, view_kwargs):
   order = Order.query.filter_by(id=view_kwargs['id']).first()
   if order.payment_mode == 'stripe':
       if data.get('stripe') is None:
           raise UnprocessableEntity({'source': ''}, "stripe token is missing")
       success, response = TicketingManager.charge_stripe_order_payment(order, data['stripe'])
       if not success:
           raise UnprocessableEntity({'source': 'stripe_token_id'}, response)

   elif order.payment_mode == 'paypal':
       success, response = TicketingManager.charge_paypal_order_payment(order)
       if not success:
           raise UnprocessableEntity({'source': ''}, response)
   return order

With the resource class as

class ChargeList(ResourceList):
   methods = ['POST', ]
   schema = ChargeSchema

   data_layer = {
       'class': ChargesLayer,
       'session': db.session
   }

Resources

  1. Paypal Payments API
    https://developer.paypal.com/docs/api/payments/
  2. Flask-json-api custom layer docs
    http://flask-rest-jsonapi.readthedocs.io/en/latest/data_layer.html#custom-data-layer
  3. Stripe Payments API
    https://stripe.com/docs/charges
Continue ReadingPost Payment Charging in Open Event API Server