Implementing news feature in loklak

The idea is to bring out an useful feature out of the enriched high quality of data provided by api.loklak.org. Through this blog post, I’ll be discussing about the implementation of a news feature similar to Google to provide latest news relevant to the query in loklak.

Creating news Component

First step in implementing news feature would be to create a news component which would be rendered on clicking of news tab.

ng g component feed/news

Creating an action & reducer for news status

This step involves creating an action & reducer function for tracking the status of news component on click of news tab. When the user will click on news tab, corresponding action would be dispatched to display the news component in feed.

import { Action } from ‘@ngrx/store’;
export const ActionTypes = {
    NEWS_STATUS: ‘[NEWS] NEWS STATUS’
};
export class NewsStatusAction implements Action {
    type = ActionTypes.NEWS_STATUS;
    constructor (public payload: boolean) { }
}
export type Actions
    = NewsStatusAction;


Corresponding reducer function for news status to store current news status would be:

export function reducer(state: State = initialState, 
   action: newsStatusAction.NewsStatusAction): State {
switch (action.type) {
    case newsStatusAction.ActionTypes.NEWS_STATUS: {
    const newsStatusPayload: boolean = action.payload;
    return Object.assign({}, state, {
                newsStatus: newsStatusPayload
            });
        }
        default: {
            return state;
        }
    }
}


I would not be getting into each line of code here, only the important portions would be discussed here.

Creating news-org to store the names of news organizations

A new file news-org would be created inside app/shared/ folder containing list of news organizations in an array newsOrgs from which we would extract and filter results.

export const newsOrgs = [
    ‘CNN’,
    ‘nytimes’
];


Note: This is a dynamic implementation of news service and hence, the list of news organizations can be easily modified/updated here.

We would also need to export the newsOrgs in the index file inside shared/ folder as:

export { newsOrgs } from ‘./news-org’;

Creating ngrx action, reducer & effect for news success

Now comes the main part. We would need an action to dispatch on successful response of news search and corresponding reducer to keep appending the async news results.

News action would be created following the simple ngrx composition as:

import { Action } from ‘@ngrx/store’;
import { ApiResponse } from ‘../models/api-response’;
export const ActionTypes = {
    NEWS_SEARCH_SUCCESS: ‘[NEWS] SEARCH SUCCESS’
};
export class NewsSearchSuccessAction implements Action {
    type = ActionTypes.NEWS_SEARCH_SUCCESS;
    constructor (public payload: ApiResponse) { }
}
export type Actions
    = NewsSearchSuccessAction;


One of the important parts of news implementation is the reducer function corresponding to the news success action. We would actually append the async results provided by news effect into the store.

import * as newsSuccessAction from ‘../actions/newsSuccess’;
import { ApiResponseResult } from ‘../models’;

export interface State {
newsResponse: ApiResponseResult[];
}
export const initialState: State = {
newsResponse: [],
};
export function reducer(state: State = initialState,
   action: newsSuccessAction.NewsSearchSuccessAction): State {
    switch (action.type) {
        case newsSuccessAction.ActionTypes.NEWS_SEARCH_SUCCESS: {
            // Appending the news result
            return Object.assign({}, state, {
                newsResponse: […action.payload.statuses]
            });
        }
        default: {
            return state;
        }
    }
}
export const getNewsResponse = (state: State) => state.newsResponse;


Now, we would create an effect which would actually use the search service to fetch results for the list of organizations one by one will keep dispatching a corresponding action to append the response into the store to be displayed in news feed. Instead of showing whole code for the effect, only the main logic is being displayed.

import { newsOrgs } from ‘../shared/news-org’;
...
@Injectable()
export class DisplayNewsEffects {
    @Effect({ dispatch: false })
        searchNews$: Observable<void> = this.actions$
        .pipe(
        ofType(
        newsAction.ActionTypes.NEWS_STATUS
        ),
        map((action) => {
            if (action[‘payload’]) {
                const orgs = newsOrgs;
                orgs.forEach((org) => {
                const searchServiceConfig:
                    SearchServiceConfig = 
                    new SearchServiceConfig();
                this.apiSearchService
                .fetchQuery(‘from:’
                  + org, searchServiceConfig)
                    .subscribe(response =>
                this.store$.dispatch(
                     new newsStatusAction
                     .NewsSearchSuccessAction(response)));
                });
            }
        })
    );

Filtering the news response inside news component

The basic idea is to filter the results from news response which contain the query and display them using news template on click of news tab on results page of loklak.

import { Query } from ‘../../models/query’;
import { Observable } from ‘rxjs’;
...
public query: string;
public query$: Observable<Query>;
...
ngOnInit() {
   const texts = [];
   this.store.select(fromRoot.getQuery).subscribe(res => 
       this.query = res.displayString);
   this.query$ = this.store.select(fromRoot.getQuery);
   this.store.select(fromRoot.getNewsResponse).subscribe(
       v => {
       for ( let i = 0; i < v.length; i++ ) {
           this.newsResponse.push(v[i]);
           if (v[i][‘text’].includes(this.query
               .replace(/\s/g, ”).toLowerCase())) {
               if (!texts.includes(v[i][‘text’]
                   .replace(/\s/g, ”).toLowerCase())) {
                   texts.push(v[i][‘text’]
                       .replace(/\s/g, ”).toLowerCase());
                   this.newsResponse.push(v[i]);
               }
           }
       }
   });
}


In above configuration, firstly we needed the current query which we extracted from ngrx store and then checking whether the text of news results contain the query string or not. If the query is present inside the text, we would add it into an array which would be used to display news feed using feed-card.

Displaying the news response

Displaying the news response is very easy, we just need to pass the news response items with index inside feed-card component which would display the news feed similar to the normal feed under the news section.

<div class=“wrapper feed-results”>
   <div *ngFor=“let item of newsResponse; let i = index “>
     <feed-card [feedItem]=“item” [feedIndex]=“i”></feed-card>
   </div>
</div>

Creating News tab to display news feed

To provide a tab to user to access news feed, we would need to create a News tab along with the other searching tools inside feed-advanced-search component as:

<button [class.selected]=“selectedTab === ‘news'” class=“tab” value=“news”
   (click)=“getFilterResults($event.currentTarget.value)”>
   News
</button>


Note: Complete code for news implementation can be found here and the news filter can be found here.

Testing news feature

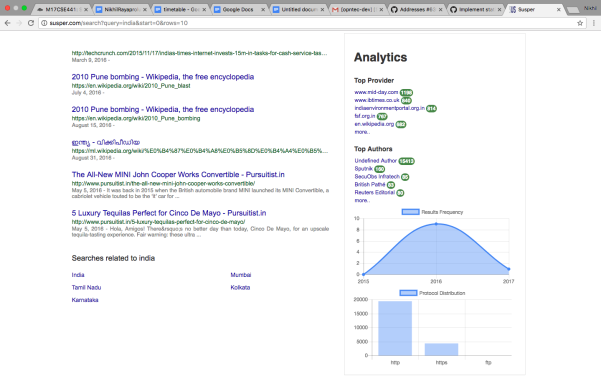
Search a query on loklak, and then click on news tab to get the latest relevant news matching the query.

Resources

Continue ReadingImplementing news feature in loklak

Dispatching a search action to get result for a query in Loklak Search

For a new comer in Loklak, it’s not really easy to understand the complete codebase to just get results for a query without explicitly using navigation route i.e. ‘/search’. In order to help newcomers to easily understand a simple way to get results for a query in the codebase, I am writing this blog post.

Setting up a query

A sample searchQuery will be created of type Query. And following discussion will provide a way to get the results for a sample query – ‘from:Fossasia’ (Last 30 days tweets from FOSSASIA).

searchQuery: Query = {
    displayString: ‘from:FOSSASIA,
    queryString: ‘from:FOSSASIA’,
    routerString: ‘from:FOSSASIA’,
    filter: { video: false, image: false },
    location: null,
    timeBound: { since: null, until: null },
    from: true
}


Process discussed here can be used to get results in any class file within Loklak Search.

Using necessary imports

First step would be to add all necessary imports.

import { OnInit } from ‘@angular/core’;
import { Store } from ‘@ngrx/store’;
import { Observable } from ‘rxjs/Observable’;
import * as fromRoot from ‘../../reducers’;
import { Query } from ‘../../models/query’;
import * as searchAction from ‘../../actions/api’;
import { ApiResponseResult } from ‘../../models/api-response’;


Note: No need to import OnInit, if the class already implements it (OnInit is one of the Angular’s Lifecycle Hooks which controls the changes when the component containing it gets loaded initially).

The Query is used to define the type of searchQuery variable created above. And ApiResponseResult is the type of result which will be obtained on searching the searchQuery.

Declaring response variables and store object

Next step would be to declare the variables with the type of response and create store object of type Store with the current State of the application.

public isSearching$: Observable<boolean>;
public apiResponseResults$: Observable<ApiResponseResult[]>;
constructor(
    private store: Store<fromRoot.State>
) { }


isSearching$ holds an Observable which can be subscribed to get a boolean value which states the current status of searching of query. apiResponseResults$ holds the actual response of query.

Dispatching a SearchAction

The most crucial part comes here to dispatch a SearchAction with the created searchQuery as payload. A new method would be created with void as return type to dispatch the SearchAction.

private queryFromURL(): void {
    this.store.dispatch(
        new searchAction.SearchAction(this.searchQuery)
    );
}

Selecting and storing results from store

A new method would be created to store the current searching status along with the response of input query in isSearching$ and apiResponseResults$ respectively. Now the selector for the reducer function corresponding to the search and api response entities would be called.

private getDataFromStore(): void {
    this.isSearching$ = 
        this.store.select(fromRoot.getSearchLoading);
    this.apiResponseResults$ =   
        this.store.select(
            fromRoot.getApiResponseEntities
    );
}

Dispatching and Selecting on view Init

create ngOnInit() method, If you have not already done and call the respective dispatching and select method inside it respectively.

ngOnInit() {
    this.queryFromURL();
    this.getDataFromStore();
}

How should one test the results?

Call these lines inside any method and look for the results on browser console window.

console.log(this.isSearching$);
console.log(this.apiResponseResults$);

Resources

Continue ReadingDispatching a search action to get result for a query in Loklak Search

Fixing Infinite Scroll Feature for Susper using Angular

In Susper, we faced a unique problem. Every time the image tab was opened, and the user scrolled through the images, all the other tabs in the search engine, such as All, Videos etc, would stop working. They would continue to display image results as shown:

Since this problem occurred only when the infinite scroll action was called in the image tab, I diagnosed that the problem probably was in the url parameters being set.

The url parameters were set in the onScroll() function as shown:

onScroll () {
let urldata = Object.assign({}, this.searchdata);
this.getPresentPage(1);
this.resultDisplay = ‘images’;
urldata.start = (this.startindex) + urldata.rows;
urldata.fq = ‘url_file_ext_s:(png+OR+jpeg+OR+jpg+OR+gif)’;
urldata.resultDisplay = this.resultDisplay;
urldata.append = true;
urldata.nopagechange = true;
this.store.dispatch(new queryactions.QueryServerAction(urldata));
};

The parameters append and nopagechange were to ensure that the images are displayed in the same page, one after the other.
To solve this bug I first displayed the query call each time a tab is clicked on the web console.
Here I noticed that for the tab videos, nopagechange and append attributes still persisted, and had not been reset. The start offset had not been set to 0 either.
So adding these few lines before making a query call from any tab, would solve the problem.

urldata.start = 0;
urldata.nopagechange = false;
urldata.append = false;

Now the object is displayed as follows:

Now videos are displayed in the videos tab, text in the text tab and so on.
Please refer to results.component.ts for the entire code.

References:

  1. On how to dispatch queries to the store: https://gist.github.com/btroncone/a6e4347326749f938510
  2. Tutorial on the ngrx suite:http://bodiddlie.github.io/ng-2-toh-with-ngrx-suite/
Continue ReadingFixing Infinite Scroll Feature for Susper using Angular

Implementing Predefined Color Themes in loklak Media Wall

Loklak media wall provides predefined color theme buttons which can be used to directly switch to day or night mode. It is important that the colors of the components are updated instantly with a click of a button. To implement pre-defined color options, we should, first, choose a set of color combinations which should be updated on the concerned divisions of the templates. These set of colors should be stored as an object (same interface) and the current state should be updated with this object when another theme is requested.

In this blog, I will explain how to implement predefined theme options and how to add a new theme in media wall.

Working

Media Wall can provide plenty of themes to help the user to choose a theme of their choice. Loklak media wall currently provides two themes, i.e.,  dark and light themes to provide a contrasting variety of themes at first. Ngrx structure makes it easy to add a predefined themes to the media wall. Let’s see how to add a theme to media wall and see it in action.

Adding ngrx structure

The first task is to create actions which will be dispatched from the Angular components to update the media wall. Depending on the action dispatched, state properties will change and when passed to the template, will update the media wall with the requested theme. There is no need of payload since the color options for all the themes are stored already as a reducer variable which will be updated directly to the media wall state.

export class WallLightThemeChangeAction implements Action {
type = ActionTypes.WALL_LIGHT_THEME_CHANGE;constructor(public payload: ) { }
}export class WallDarkThemeChangeAction implements Action {
type = ActionTypes.WALL_DARK_THEME_CHANGE;constructor(public payload: ) { }
}

Next, we have to update reducer functions for the corresponding actions so that the state properties change according to the actions and wall is updated. For color options, we have an interface defined for color options. For a particular type of theme, we have to adjust interface and just have to update state with the personalised theme state. As the default theme is set to light theme, we have to update state to the initial state when user requests for  light theme

case mediaWallCustomAction.ActionTypes.WALL_DARK_THEME_CHANGE: {
state = {
wallHeader: {
backgroundColor: ‘#243447’,
fontColor: ‘#FFFFFF’
},
wallBackground: {
backgroundColor: ‘#2C4158’
},
wallCard: {
fontColor: ‘#FFFFFF’,
backgroundColor: ‘#1B2836’,
accentColor: ‘#1c94e0’
}
}
return state;
}case mediaWallCustomAction.ActionTypes.WALL_LIGHT_THEME_CHANGE: {
state = initialState;return state;
}

Component and Template

Component

Now, we need to define an array of the string value of colors corresponding to a particular theme. These corresponding theme colors will be displayed in a form of color picker to the user through looping in the template. Whenever user requests for a particular theme, at first, the variable currentTheme is updated with the theme color. Next, the action is dispatched according to the selected theme from the method installTheme().

export class MediaWallMenuComponent implements OnInit, OnDestroy {
.
.
public currentTheme: string;
public themes = [ ‘#FFFFFF’, ‘#333’ ];public installTheme() {
if (this.currentTheme === this.themes[0]) {
this.store.dispatch( new mediaWallCustomAction.WallLightThemeChangeAction());
this.store.dispatch(new mediaWallDirectUrlAction.WallGenerateDirectUrlAction());
}
else if (this.currentTheme === this.themes[1]) {
this.store.dispatch( new mediaWallCustomAction.WallDarkThemeChangeAction());
this.store.dispatch(new mediaWallDirectUrlAction.WallGenerateDirectUrlAction());
}
}
.
.
}

Template

Now, we have to provide a menu for color themes in media wall template to make it easier for user to select the theme. Any interaction with the menu buttons will update the current chosen color and calls a method installTheme() and the corresponding action is dispatched and theme will be updated. Also, the check should show the updated theme for the media wall. For this, a check icon is put up based on condition *ngIf=”currentTheme === theme”.

<mdmenu class=“docs-theme-picker-menu” overlapTrigger=“false” #themeMenu=“mdMenu” yposition=“above”>
<mdgridlist cols=“2”>
<mdgridtile *ngFor=“let theme of themes”>
<div mdmenuitem (click)=“currentTheme = theme; installTheme();”>
<div class=“docs-theme-picker-swatch”>
<mdicon class=“docs-theme-chosen-icon” *ngIf=“currentTheme === theme”>check_circle</md-icon>
<div class=”docs-theme-picker-primary” [style.background]=”theme”></div>
</div>
</div>
</md-grid-tile>
</mdgridlist>
</mdmenu>

Now, The swatch menu looks like this and user can select any predefined theme from the menu and now, the wall is updated with the selected color option.

Reference

Continue ReadingImplementing Predefined Color Themes in loklak Media Wall

Implementation of Statistic Infobox for Susper

In Susper, we have implemented a statistic infobox to show analytics regarding Top authors, Top Providers and distribution regarding protocols and Results frequency by year.

Yacy also offers additional information for infoboxes such as files types, provider and authors. Using that information which we receive along with results we have implemented the infobox.

Implementation of Infobox:

1. For the distribution graphs, we have used angular library for chart.js https://www.npmjs.com/package/ng2-charts

2. We receive required statistics of each facet name from Yacy using the yacy search endpoint

http://yacy.searchlab.eu/solr/select?query=india&fl=last_modified&start=0&rows=15&facet=true&facet.mincount=1&facet.field=host_s&facet.field=url_protocol_s&facet.field=author_sxt&facet.field=collection_sxt&wt=yjson

Screenshot from 2017-08-15 14-10-30.png

Screenshot from 2017-08-15 14-10-16.png

We have created a statbox component to display the data related to statistic infobox at https://github.com/fossasia/susper.com/tree/master/src/app/statsbox

It takes care about rendering the statistic infobox and styling it.

Statsbox.component.ts

this.navigation$.subscribe(navigation => {
   for (let nav of navigation) {
     if (nav.displayname === 'Protocol') {
       let data = [];
       let datalabels = [];
       for (let element of nav.elements){
           datalabels.push(element.name);
           data.push(parseInt(element.count, 10));
         }
       this.barChartData[0].data = data;
       this.barChartLabels = datalabels;

     }
   }
 });
});

navigation observable gives us the latest statistics information received from the yacy and we subscribe to it and update the component variables accordingly for displaying the data.

Later these values are used by statsbox.component.html to display the statsbox.

The whole implementation of this feature can be found at pull: https://github.com/fossasia/susper.com/pull/704/

References:

1.Using Postman for analysing an API Endpoint: https://www.getpostman.com/docs

2.Using ngrx store: https://github.com/ngrx/store

Continue ReadingImplementation of Statistic Infobox for Susper

Implementation of Speech UI in Susper

Recently, we have implemented a speech recognition feature in Susper where user could search by voice but it does not have an attractive UI. Google has a good user experience while recording the voice. We have implemented a similar Speech UI in Susper,

How we have implemented this?

  1. First we made a component speechtotext. It takes care of all the styling and functional changes of the speech UI and rendering the speech and any instructions required for the user. https://github.com/fossasia/susper.com/tree/master/src/app/speechtotext
  2. Initially when user clicks on the microphone in the search bar, it triggers the speechRecognition()

searchbar.component.html

<div class="input-group-btn">
 <button class="btn btn-default" id="speech-button" type="submit">
   <img src="../../assets/images/microphone.png" class="microphone" (click)="speechRecognition()"/>
 </button>

searchbar.component.ts

speechRecognition() {
 this.store.dispatch(new speechactions.SearchAction(true));
}

3) This dispatches an action speechaction.SearchAction(true), the app.component.ts is subscribed to this action and whenever this action is triggered the app component will open the speechtotext component.

Speechtotext.component.ts

Speech to text component on getting initialised calls the speech service’s record function which activates standard browser’s speech API

constructor(private speech: SpeechService) {
 
 this.speechRecognition();
}
speechRecognition() {
 this.speech.record('en_US').subscribe(voice => this.onquery(voice));
}

On recording the user’s voice and converting it to text, the text is sent to the onquery method as input and the recognised text is sent to other components through ngrx store.

onquery(event: any) {
 this.resettimer();
 this.store.dispatch(new queryactions.QueryServerAction({ 'query': event, start: 0, rows: 10, search: true }));
 this.message = event;
}

We have some UI text transitions where the user is shown with messages like ‘Listening…’ ,‘Speak Now’ and ‘Please check your microphone’ which are handle by creating a timer observable in angular.

ngOnInit() {
 this.timer = Observable.timer(1500, 2000);
 this.subscription = this.timer.subscribe(t => {
   this.ticks = t;

   if (t === 1) {
     this.message = "Listening...";
   }
   if (t === 4) {
     this.message = "Please check your microphone and audio levels.";
     this.miccolor = '#C2C2C2';
   }
   if (t === 6) {
     this.subscription.unsubscribe();
     this.store.dispatch(new speechactions.SearchAction(false));
   }
 });
}

The related PR regarding speech to text is at https://github.com/fossasia/susper.com/issues/624 .

With this now we have achieved a good UI for handling requests on Speech.

Resources:

Continue ReadingImplementation of Speech UI in Susper

Adding Color Options in loklak Media Wall

Color options in loklak media wall gives user the ability to set colors for different elements of the media wall. Taking advantage of Angular two-way data binding property and ngrx/store, we can link up the CSS properties of the elements with concerned state properties which stores the user-selected color. This makes color customization fast and reactive for media walls.

In this blog here, I am explaining the unidirectional workflow using ngrx for updating various colors and working of color customization.

Flow Chart

The flowchart below explains how the color as a string is taken as an input from the user and how actions, reducers and component observables link up to change the current CSS property of the font color.

Working

Designing Models: It is important at first to design model which must contain every CSS color property that can be customized. A single interface for a particular HTML element of media wall can be added so that color customization for a particular element can take at once with faster rendering. Here we have three interfaces:

  • WallHeader
  • WallBackground
  • WallCard

These three interfaces are the models for the three core components of the media wall that can be customized.

export interface WallHeader {
backgroundColor: string;
fontColor: string;
}
export interface WallBackground {
backgroundColor: string;
}
export interface WallCard {
fontColor: string;
backgroundColor: string;
accentColor: string;
}


Creating Actions: Next step is to design actions for customization. Here we need to pass the respective interface model as a payload with updated color properties. These actions when dispatched causes reducer to change the respective state property, and hence, the linked CSS color property.

export class WallHeaderPropertiesChangeAction implements Action {
type = ActionTypes.WALL_HEADER_PROPERTIES_CHANGE;constructor(public payload: WallHeader) { }
}
export class WallBackgroundPropertiesChangeAction implements Action {
type = ActionTypes.WALL_BACKGROUND_PROPERTIES_CHANGE;constructor(public payload: WallBackground) { }
}
export class WallCardPropertiesChangeAction implements Action {
type = ActionTypes.WALL_CARD_PROPERTIES_CHANGE;constructor(public payload: WallCard) { }
}


Creating reducers: Now, we can proceed to create reducer functions so as to change the current state property. Moreover, we need to define an initial state which is the default state for uncustomized media wall. Actions can now be linked to update state property using this reducer when dispatched. These state properties serve two purposes:

  • Updating Query params for Direct URL.
  • Updating Media wall Colors

case mediaWallCustomAction.ActionTypes.WALL_HEADER_PROPERTIES_CHANGE: {
const wallHeader = action.payload;return Object.assign({}, state, {
wallHeader
});
}case mediaWallCustomAction.ActionTypes.WALL_BACKGROUND_PROPERTIES_CHANGE: {
const wallBackground = action.payload;return Object.assign({}, state, {
wallBackground
});
}case mediaWallCustomAction.ActionTypes.WALL_CARD_PROPERTIES_CHANGE: {
const wallCard = action.payload;return Object.assign({}, state, {
wallCard
});
}


Extracting Data to the component from the store: In ngrx, the central container for states is the store. Store is itself an observable and returns observable related to state properties. We have already defined various states for media wall color options and now we can use selectors to return state observables from the store. These observables can now easily be linked to the CSS of the elements which changes according to customization.

private getDataFromStore(): void {
this.wallCustomHeader$ = this.store.select(fromRoot.getMediaWallCustomHeader);
this.wallCustomCard$ = this.store.select(fromRoot.getMediaWallCustomCard);
this.wallCustomBackground$ = this.store.select(fromRoot.getMediaWallCustomBackground);
}


Linking state observables to the CSS properties: At first, it is important to remove all the CSS color properties from the elements that need to be customized. Now, we will instead use style directive provided by Angular in the template which can be used to update CSS properties directly from the component variables. Since the customized color received from the central store are observables, we need to use the async pipe to extract string color data from it.

Here, we are updating background color of the wall.

<span class=“wrapper”
[style.background-color]=“(wallCustomBackground$ | async).backgroundColor”>
</span>


For other child components, we need to use @Input Decorator to send color data as an input to it and use the style directive as used above.

Here, we are interacting with the child component i.e. media wall card component using @Input Decorator.

Template:

<media-wall-card
[feedItem]=“item”
[wallCustomCard$]=“wallCustomCard$”></media-wall-card>


Component:

export class MediaWallCardComponent implements OnInit {
..
@Input() feedItem: ApiResponseResult;
@Input() wallCustomCard$: Observable<WallCard>;
..
}


This creates a perfect binding of CSS properties in the template with the state properties of color actions. Now, we can dispatch different actions to update the state and hence, the colors of media wall.

Reference

Continue ReadingAdding Color Options in loklak Media Wall

Implementing Intelligence Feature in Susper

Susper gives answers to your questions using SUSI AI. We want to give users best experience while they are searching for solutions to their questions. To achieve this, we have incorporated with features like infobox and intelligence using SUSI.

Google has this feature where users can ask questions like ‘Who is president of USA?’ and get answers directly without encouraging the users to deep-dive into the search results to know the answer.

Similarly Susper gives answer to the user:

It also gives answer to question which is related to real time data like temperature.


How we have implemented this feature?

We used the API Endpoint of SUSI at http://api.asksusi.com/

Using SUSI API is as simple as sending query as a URL parameter in GET request http://api.susi.ai/susi/chat.json?q=YOUR_QUERY

You can also get various action types in the response. Eg: An anwser type response for http://api.susi.ai/susi/chat.json?q=hey%20susi is:

actions: [
  {
    type: "answer",
    expression: "Hi, I'm Susi"
  }
],


Documentation regarding SUSI is available at here.

Implementation in Susper:

We have created an Intelligence component to display answer related to a question. You can check it here: https://github.com/fossasia/susper.com/tree/master/src/app/intelligence

It takes care about rendering the information and styling of the rendered data received from SUSI API.

The intelligence.component.ts makes a call to Intelligence Service with the required query and the intelligence service makes a GETrequest to the SUSI API and retrieves the results.

Intelligence.component.ts

this.intelligence.getintelligentresponse(data.query).subscribe(res => {
  if (res && res.answers && res.answers[0].actions) {
     this.actions = res.answers[0].actions;
       for (let action of this.actions) {
         if (action.type === 'answer' && action.mood !== 'sabta') {
           this.answer = action.expression;
         } else {
             this.answer = '';
         }
      }
   } else {
       this.answer = '';
   }
});


Intelligence.service.ts

export class IntelligenceService {
 server = 'http://api.susi.ai';
 searchURL = 'http://' + this.server + '/susi/chat.json';
 constructor(private http: Http, private jsonp: Jsonp, private store: Store<fromRoot.State>) {
 }
 getintelligentresponse(searchquery) {
   let params = new URLSearchParams();
   params.set('q', searchquery);
   params.set('callback', 'JSONP_CALLBACK');
   return this.jsonp
     .get('http://api.asksusi.com/susi/chat.json', {search: params}).map(res =>
       res.json()

     );
 }

Whenever the getintelligenceresponse of intelligenceService is called, it creates a URLSearchParams() object and set required parameters in it and send them in jsonp.get request. We also set callback to ‘JSONP_CALLBACK’ to inform the API to send us data in JSONP.

Thereby, the intelligence component retrieves the answer and displays it with search resultson Susper.

Source code for this implementation could be found in this pull:

https://github.com/fossasia/susper.com/pull/569

Resources:

Continue ReadingImplementing Intelligence Feature in Susper

Customizing Results Count in Susper Angular Front-end

Problem: Earlier users were not having any option to customise results count in Susper.

Susper is a Frontend for Peer to Peer Search Engine Yacy built using Angular. So, we implemented ‘results count’ feature and used to have a strict restriction of only 10 results per page. Now, users can customise search results in Susper when instant results are turned off. By default, Susper shows only 10 results per page. If the user requires more results per page he can modify the count of results in Susper. To customise the result count visit http://susper.com/preferences and you will find a range bar to customise the results. Change the value of the range bar to the desired value and save it. (Right now we support only results till maximum size of 100)

How did we implement this feature?

searchsettings.component.html:

<div>
 <h4><strong>Results per page</strong></h4>
 <div class="range-slider">
   <input class="range-slider__range" type="range" [disabled]="instantresults" [(ngModel)]="resultCount" value="100" min="0" max="100">
   <span class="range-slider__value">{{resultCount}}</span>
 </div>

</div>

The user is displayed with a range slider, that could slide between 0 and 100. The value of the range slider is stored in a resultscount variable in search settings component using ngModel.

searchsettings.component.ts: Later when user clicks on save button, it triggers onSave() function.The resultscount is stored into localStorage of the browser and an action is triggered to inform all other components about the change in the value of resultscount.


onSave() {
 if (this.instantresults) {
   localStorage.setItem('instantsearch', JSON.stringify({value: true}));
   localStorage.setItem('resultscount', JSON.stringify({ value: 10 }));
   this.store.dispatch(new queryactions.QueryServerAction({'query': '', start: 0, rows: 10, search: false}));

 } else {
   localStorage.removeItem('instantsearch');
   localStorage.setItem('resultscount', JSON.stringify({ value: this.resultCount }));
   this.store.dispatch(new queryactions.QueryServerAction({'query': '', start: 0, rows: this.resultCount, search: false}));
 }
 this.router.navigate(['/']);
}

app.component.ts

Later new resultscount value is used in other components to request the server for search results with new resultscount.

if (localStorage.getItem('resultscount')) {
 this.store.dispatch(new queryactions.QueryServerAction({'query': '', start: 0, rows: this.resultscount, search: false}));
}

The complete working of Susper’s result count could be seen in this gif


Source code can be found here: https://github.com/fossasia/susper.com/pull/546 .

References

Continue ReadingCustomizing Results Count in Susper Angular Front-end

Auto-Refreshing Mode in loklak Media Wall

Auto-refreshing wall means that the request to the loklak server for the feeds must be sent after every few seconds and adding up new feeds in the media wall as soon as the response is received for a single session. For a nice implementation, it is also necessary to check if the new feeds are being received from the server and consequently, close the connection as soon as no feeds are received as to maintain session singularity.

In this blog post, I am explaining how I implemented the auto-refreshing mode for media wall using tools like ngrx/store and ngrx/effects.

Flow Chart

The flowchart below explains the workflow of how the actions, effects and service are linked to create a cycle of events for auto-refreshing mode. It also shows up how the response is handled as a dependency for the next request. Since effects play a major role for this behaviour, we can say it as the “Game of Effects”.

Working

  • Effect wallSearchAction$: Assuming the Query for media wall has changed and ACTION: WALL_SEARCH has been dispatched, we will start from this point of time. Looking into the flowchart, we can see as soon the action WALL_SEARCH is dispatched, a effect needs to be created to detect the action dispatched.This effect customizes the query and sets up various configurations for search service and calls the service. Depending on whether the response is received or not, it either dispatches WallSearchCompleteSuccessAction or WallSearchCompleteFailAction respectively. Moreover, this effect is responsible for changing the route/location of the application.

@Effect()
wallSearchAction$: Observable<Action>
= this.actions$
.ofType(wallAction.ActionTypes.WALL_SEARCH)
.debounceTime(400)
.map((action: wallAction.WallSearchAction) => action.payload)
.switchMap(query => {
const nextSearch$ = this.actions$.ofType(wallAction.ActionTypes.WALL_SEARCH).skip(1);
const searchServiceConfig: SearchServiceConfig = new SearchServiceConfig();if (query.filter.image) {
searchServiceConfig.addFilters([‘image’]);
} else {
searchServiceConfig.removeFilters([‘image’]);
}
if (query.filter.video) {
searchServiceConfig.addFilters([‘video’]);
} else {
searchServiceConfig.removeFilters([‘video’]);
}return this.apiSearchService.fetchQuery(query.queryString, searchServiceConfig)
.takeUntil(nextSearch$)
.map(response => {
const URIquery = encodeURIComponent(query.queryString);
this.location.go(`/wall?query=${URIquery}`);
return new apiAction.WallSearchCompleteSuccessAction(response);
})
.catch(() => of(new apiAction.WallSearchCompleteFailAction()));
  • Property lastResponseLength: Looking into the flow chart, we can see that after WallSearchCompleteSuccessAction is dispatched, we need to check for the number of feeds in the response. If the number of feeds in the response is more than 0, we can continue to make a new request to the server. On the other hand, if no feeds are received, we need to close the connection and stop requesting for more feeds. This check is implemented using lastResponseLength state property of the reducer which maintains the length of the entities for the last response received.

case apiAction.ActionTypes.WALL_SEARCH_COMPLETE_SUCCESS: {
const apiResponse = action.payload;return Object.assign({}, state, {
entities: apiResponse.statuses,
lastResponseLength: apiResponse.statuses.length
});
}


  • Effect nextWallSearchAction$: Now, we have all the information regarding if we should dispatch WALL_NEXT_PAGE_ACTION depending on the last response received. We need to implement an effect that detects WALL_SEARCH_COMPLETE_SUCCESS  keeping in mind that the next request should be made 10 seconds after the previous response is received. For this behaviour, we need to use debounceTime() which emits a value only after certain specified time period has passed. Here, debounce is set to 10000ms which is equal to 10 seconds. The effect also needs to dispatch the next action depending on the lastResponseLength state property of the reducer. It should dispatch WallNextPageAction if the entities length of the response is more than 0, otherwise, it should dispatch StopWallPaginationAction.

@Effect()
nextWallSearchAction$
= this.actions$
.ofType(apiAction.ActionTypes.WALL_SEARCH_COMPLETE_SUCCESS)
.debounceTime(10000)
.withLatestFrom(this.store$)
.map(([action, state]) => {
if (state.mediaWallResponse.lastResponseLength > 0) {
return new wallPaginationAction.WallNextPageAction();
}
else {
return new wallPaginationAction.StopWallPaginationAction();
}
});


  • Effect wallPagination$: Now, we need to have an effect that should detect WALL_NEXT_PAGE_ACTION and call the SearchService similar to wallSearchAction$ Effect. However, we need to keep a check on the last record of the entities from the previous response received. This can be done using lastRecord state property which maintains the last record of the entities.

@Effect()
wallPagination$: Observable<Action>
= this.actions$
.ofType(wallPaginationAction.ActionTypes.WALL_NEXT_PAGE)
.map((action: wallPaginationAction.WallNextPageAction) => action.payload)
.withLatestFrom(this.store$)
.map(([action, state]) => {
return {
query: state.mediaWallQuery.query,
lastRecord: state.mediaWallResponse.entities.length
};
})
.switchMap(queryObject => {
const nextSearch$ = this.actions$.ofType(wallAction.ActionTypes.WALL_SEARCH);this.searchServiceConfig.startRecord = queryObject.lastRecord + 1;
if (queryObject.query.filter.image) {
this.searchServiceConfig.addFilters([‘image’]);
} else {
this.searchServiceConfig.removeFilters([‘image’]);
}
if (queryObject.query.filter.video) {
this.searchServiceConfig.addFilters([‘video’]);
} else {
this.searchServiceConfig.removeFilters([‘video’]);
}return this.apiSearchService.fetchQuery(queryObject.query.queryString, this.searchServiceConfig)
.takeUntil(nextSearch$)
.map(response => {
return new wallPaginationAction.WallPaginationCompleteSuccessAction(response);
})
.catch(() => of(new wallPaginationAction.WallPaginationCompleteFailAction()));
});


  • Effect nextWallPageAction$: Similar to the nextWallSearchAction$ effect, we need to implement an effect that detects WALL_PAGINATION_SUCCESS_ACTION and depending on the lastResponseLength should either dispatch WallNextPageAction or StopWallPaginationAction after a certain specified debounceTime.

@Effect()
nextWallPageAction$
= this.actions$
.ofType(wallPaginationAction.ActionTypes.WALL_PAGINATION_COMPLETE_SUCCESS)
.debounceTime(10000)
.withLatestFrom(this.store$)
.map(([action, state]) => {
if (state.mediaWallResponse.lastResponseLength > 0) {
return new wallPaginationAction.WallNextPageAction();
}
else {
return new wallPaginationAction.StopWallPaginationAction();
}
});


Now the cycle is created and requests will be automatically made after every 10 seconds depending on the previous response. This cycle also closes the connection and stops making a pagination request for the particular query as soon as no feeds are received from the server.

Reference

Continue ReadingAuto-Refreshing Mode in loklak Media Wall