Using Flask SocketIO Library in the Apk Generator of the Open Event Android App

Recently Flask SocketIO library was used in the apk generator of the Open Event Android App as it gave access to the low latency bi-directional communications between the client and the server side. The client side of the apk generator was written in Javascript which helped us to use a SocketIO official client library to establish a permanent connection to the server.

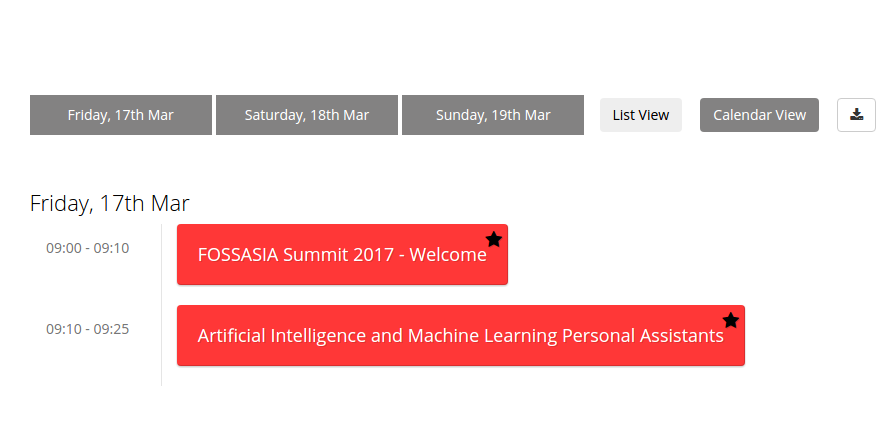
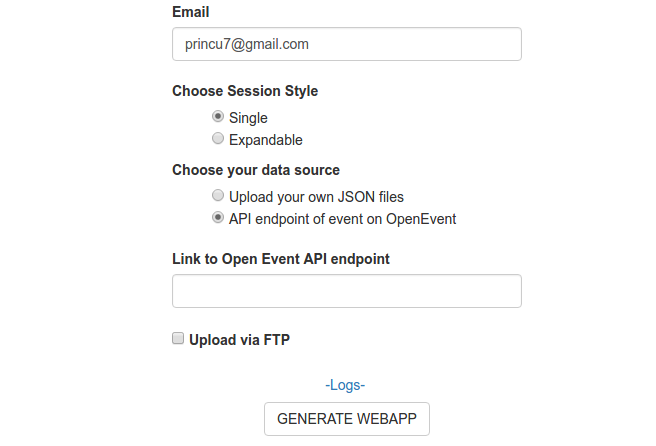
The main purpose of using the library was to display logs to the user when the app generation process goes on. This gives the user an additional help to check what is the mistake in the file uploaded by them in case an error occurs. Here the library established a connection between the server and the client so that during the app generation process the server would send real time logs to the client so that they can be viewed by the user displayed in the frontend.

To use this library we first need to download it using pip command:

pip install flask-socketio

This library depends on the asynchronous services which can be selected amongst the following listed below:

  1. Eventlet
  2. Gevent
  3. Flask development server based on Werkzeug

Amongst the three listed, eventlet is the best performant option as it has support for long polling and WebSocket transports.

The next thing was importing this library in the flask application i.e the apk generator of the app as follows:

from flask_socketio import SocketIO

current_app = create_app()
socketio = SocketIO(current_app)

if __name__ == '__main__':
    socketio.run(current_app)

The main use of the above statement (socket.run(current_app)) is that with this the startup of the web server is encapsulated. When the application is run in debug mode it is preferred to use the Werkzeug development server. However in production mode the use of eventlet web server or gevent web server is recommended.

We wanted to show the status messages currently shown to the user in the form of logs. For this firstly the generator.py file was looked upon which had the status messages and these were sent to the client side of the generator by establishing a connection between them using this library. The code written on the server side to send messages to the client side was as follows:

def handle_message(message):
    if message not None:
        namespace = “/” + self.identifier;
        send(message, namespace = namespace)

As we can see from the above code the message had to be sent to that particular namespace. The main idea of using namespace was that if there were more than one users using the generator at the same time, it would mean the send() method would send the messages to all the clients connected which would lead to the mixing up of status messages and hence it was important to use namespace so that a message was sent to that particular client.

Once the server sent the messages to the client we needed to add functionality to the our client side to receive the messages from them and also update the logs area with suitable content received. For that first the socket connection was established once the generate button was clicked which generated the identifier for us which had to be used as the namespace for that process.

socket = io.connect(location.protocol + "//" + location.host + "/" + identifier, {reconnection: false});

This piece of code established the connection of the socket and helps the client side to receive and send messages from and to the server end.

Next thing was receiving messages from the server. For this the following code snippet was added:

socket.on('message', function(message) {
    $buildLog.append(message);
});

This piece of code receives the messages from the server for unnamed events. Once the connection is established and the messages are received, the logs are updated with each message being appended so as to show the user the real time information about their build status of their app.

This was how the idea of logs being shown in the apk generator was incorporated by making the required changes in the server and client side code using the Flask SocketIO library.

Related Links:

Continue ReadingUsing Flask SocketIO Library in the Apk Generator of the Open Event Android App

Handlebars.js used in Open Event Web App

I recently started working in the Open Event Webapp project. One of the initial issues that I took up was a trivial UI bug. It was about adding sponsor names beneath sponsor images for better representation. The issue can be found here. On reading up the code base and exploring the project a bit, I came across a new template – Handlebars.js. Handlebars is a template which has it’s base with the Mustache templating language. One of the early discoveries that I made with Handlebars.js was the use of {{ }} and {{{ }}} and the basic difference between them. In general, all Handlebar.js expressions, just like in Mustache templating, are written between {{ }} or {{{ }}} type of brackets. That is how I learned to identify and distinguish Handlebars from core HTML, even though they are inter-linked. The official Handlebars documentation describes Handlebars expressions in the following way:

A handlebars expression is a {{, some contents, followed by a }} ”

Getting started with Handlebars.js

Installation:

For a basic Linux installation, type the following in your command line:

npm install --save handlebars

Including Handlebars in HTML:

<script src="handlebars-v4.0.10.js"></script>

Handlebars templates are often stored in .hbs files for better readability and accessibility. The Open Event Webapp project consists of a handlebars .hbs file for each of the tracks, events, rooms, schedule, sessions and speakers templates. These can be found here, that is under src/backend/templates folder.

Difference between {{ }} and {{{ }}}: 

Handlebars enables developers to print raw HTML tags or code with the help of {{{ }}}. On the contrary, if you don’t want to print HTML (which is usually the case), use {{ }}. For better understanding, let’s take an example.

If our JS has an object that looks something like:

$(function () {
   var templateScript = $("#title-template").html();

   var temp = Handlebars.compile(templateScript);

var Title= {
“title”: <a> Handlebars</a>
}

Then, HTML of the following kind will help to distinguish the {{ }} and {{{ }}} brackets.

<script id=”title-template” type=”text/x-handlebars-template”>
{{title}}
{{{title}}}
</script>

//the first line will contain an anchor tag with the name “Handlebars”
//the second line will contain “<a>Handlebars</a>”

Block helpers in Handlebars:

Block helpers are identified by a ‘ #’ and they help to define and access custom iterators.

Handlebars allow calling JavaScript functions with the help of ‘helpers’. It doesn’t allow direct JavaScript code in the HTML with templates. We can create our own helpers using Handlebars.registerHelper () in our JavaScript. We generally pass a function to the helper. A good example was provided in the Handlebars.js documentation:

Handlebars.registerHelper('noop', function(options) {
  return options.fn(this);
});

By default, Handlebars helpers take the current context as the context to pass(“this”). Other fields are overshadowed. Incase, we want to access one of the fields that is masked by the default “this” context, we have to use a path reference.

Iterations using helpers:

Helpers can be a great way  to iterate over lists or objects. I will demonstrate it with an example from the Open Event Webapp project. To display all the sponsors of an event in the home page of the event Webapp, we use the following handlebars code, where we iterate over the object list “sponsorpics” that we have. It looks something like this:

{'1': ['Oreilly', 'Amazon'], '2': ['Huawei', 'Google'],'3': ['RedHat', 'GitHub']}
     
{{#if eventurls.sponsorsection}}
<div class="sponsor-container">
       <section class="sponsorscont">
         <div class="row sponsor-row">
           <div class="col-sm-12 col-md-12 col-xs-12 text-center">
             <h1 class="section-header">Proudly supported by</h1><br>
           </div>
         </div>
         <div class="row">
           <div class="col-sm-10 col-sm-offset-1">


             <div class="row">
               {{#each sponsorpics}}
                 {{#each this}}
                   <div class="{{{divclass}}}">
                     <div class=" {{{sponsorimg}}} text-center">
                       <a href="{{{url}}}" data-toggle="tooltip" title="{{{type}}}">
                         <img class="lazy centre {{{imgsize}}}" alt="{{{name}}}" data-original="{{{logo}}}">
                       </a>
                       {{{name}}}
                     </div>
                   </div>
                 {{/each}}
               {{/each}}
             </div> <!-- sponsor-row -->
           </div>
         </div>
       </section>
     </div>
   {{/if}}

For your reference, you can view a sample Webapp for the OSCON 2017 event here.
For further information, please refer to Handlebars.js .
An interesting tutorial about Handlebars in 10 mins or less can be found here.

Continue ReadingHandlebars.js used in Open Event Web App

Implementing Registration API in Open Event Front-end

In this post I will discuss how I implemented the registration feature in Open Event Front-end using the Open-Event-Orga API. The project uses Ember Data for consumption of the API in the ember application. The front end sends POST request to Open Event Orga Server which verifies and creates the user.

We use a custom serialize method for trimming the request payload of the user model by creating a custom user serializer. Lets see how we did it.

Implementing register API

The register API takes username & password in the payload for a POST request which are validated in the register-form component using the semantic-ui form validation. After validating the inputs from the user we bubble the save action to the controller form the component.

submit() {
  this.onValid(() => {
    this.set('errorMessage', null);
    this.set('isLoading', true);
    this.sendAction('submit');
  });
}

In controller we have `createUser()` action where we send a POST request to the server using the save() method, which returns a promise.

createUser() {
  var user = this.get('model');
  user.save()
    .then(() => {
      this.set('session.newUser', user.get('email'));
      this.set('isLoading', false);
      this.transitionToRoute('login');
    })
    .catch(reason => {
      this.set('isLoading', false);
      if (reason.hasOwnProperty('errors') && reason.errors[0].status === 409) {
        this.set('errorMessage', this.l10n.t('User already exists.'));
      } else {
        this.set('errorMessage', this.l10n.t('An unexpected error occurred.'));
      }
    });
}

The `user.save()` returns a promise, therefore we handle it using a then-catch clause. If the request is successful, it executes the `then` clause where we redirect to the login route. If the request fails we check if the status is 409 which translates to a duplicate entry i.e the user already exists in the server.

Serializing the user model using custom serializer

Ember lets us customise the payload using serializers for models. The serializers have serialize function where we can trim the payload of the model. In the user serializer we check if the request is for record creation using `options.includeId`. If the request is for record creation we trim the payload using the lodash `pick` method and pick only email & password for payload for POST request.

serialize(snapshot, options) {
  const json = this._super(...arguments);
  if (options && options.includeId) {
    json.data.attributes = pick(json.data.attributes, ['email', 'password']);
  }
  return json;
}

Thank you for reading the blog, you can check the source code for the example here.

Resources

Continue ReadingImplementing Registration API in Open Event Front-end

Acceptance Testing of a Feature in Open Event Frontend

In Open Event Frontend, we have integration tests for ember components which are used throughout the project. But even after those tests, user interaction could pose some errors. We perform acceptance tests to alleviate such scenarios.

Acceptance tests interact with application as the user does and ensures proper functionality of a feature or to determine whether or not the software system has met the requirement specifications. They are quite helpful for ensuring that our core features work properly.

Let us write an acceptance test for register feature in Open Event Frontend.

import { test } from 'qunit';
import moduleForAcceptance from 'open-event-frontend/tests/helpers/module-for-acceptance';

moduleForAcceptance('Acceptance | register');

In the first line we import test from ‘ember-qunit’ (default unit testing helper suite for Ember) which contains all the required test functions. For example, here we are using test function to check the rendering of our component. We can use test function multiple times to check multiple components.

Next, we import moduleForAcceptance from ‘open-event-frontend/tests/helpers/module-for-acceptance’ which deals with application setup and teardown.

test('visiting /register', function(assert) {
  visit('/register');

  andThen(function() {
    assert.equal(currentURL(), '/register');
  });
});

Inside our test function, we simulate visiting  /register route and then check for the current route to be /register.

test('visiting /register and registering with existing user', function(assert) {
  visit('/register');
  andThen(function() {
    assert.equal(currentURL(), '/register');
    fillIn('input[name=email]', 'opev_test_user@nada.email');
    fillIn('input[name=password]', 'opev_test_user');
    fillIn('input[name=password_repeat]', 'opev_test_user');
    click('button[type=submit]');
    andThen(function() {
      assert.equal(currentURL(), '/register');
      // const errorMessageDiv = findWithAssert('.ui.negative.message');
      // assert.equal(errorMessageDiv[0].textContent.trim(), 'An unexpected error occurred.');
    });
  });
});

Then we simulate visiting /register route and register a dummy user. For this, we first go to /register route and then check for the current route to be register route. We fill the register form with appropriate data and hit submit.

test('visiting /register after login', function(assert) {
  login(assert);
  andThen(function() {
    visit('/register');
    andThen(function() {
      assert.equal(currentURL(), '/');
    });
  });
});

The third test is to simulate visiting /register route with user logged in and this is very simple. We just visit /register route and then check if we are are at / route or not because a user redirects to / route when he tries to visit /register after login.

And since we checked for all the possible combinations, to run the test we simply use the following command-

ember test --server

But there is a little demerit to acceptance tests. They boot up the whole EmberJS application and start us at the application.index route. We then have to navigate to the page that contains the feature being tested. Writing acceptance tests for each and every feature would be a big waste of time and CPU cycles. For this reason, only core features are tested for acceptance.

Resources

Continue ReadingAcceptance Testing of a Feature in Open Event Frontend

Writing Selenium Tests for Checking Bookmark Feature and Search functionality in Open Event Webapp

We integrated Selenium Testing in the Open Event Webapp and are in full swing in writing tests to check the major features of the webapp. Tests help us to fix the issues/bugs which have been solved earlier but keep on resurging when some new changes are incorporated in the repo. I describe the major features that we are testing in this.

Bookmark Feature
The first major feature that we want to test is the bookmark feature. It allows the users to mark a session they are interested in and view them all at once with a single click on the starred button. We want to ensure that the feature is working on all the pages.

Let us discuss the design of the test. First, we start with tracks page. We select few sessions (2 here) for test and note down their session_ids. Finding an element by its id is simple in Selenium can be done easily. After we find the session element, we then find the mark button inside it (with the help of its class name) and click on it to mark the session. After that, we click on the starred button to display only the marked sessions and proceed to count the number of visible elements on the page. If the number of visible session elements comes out to be 2 (the ones that we marked), it means that the feature is working. If the number deviates, it indicates that something is wrong and the test fails.

82080522-21e8-403d-9906-3b4f420720b9.png

Here is a part of the code implementing the above logic. The whole code can be seen here

// Returns the number of visible session elements on the tracks page
TrackPage.getNoOfVisibleSessionElems = function() {
 return this.findAll(By.className('room-filter')).then(this.getElemsDisplayStatus).then(function(displayArr) {
   return displayArr.reduce(function(counter, value) { return value == 1 ? counter + 1 : counter; }, 0);
 });
};
// Bookmark the sessions, scrolls down the page and then count the number of visible session elements
TrackPage.checkIsolatedBookmark = function() {
 // Sample sessions having ids of 3014 and 3015 being checked for the bookmark feature
 var sessionIdsArr = ['3014', '3015'];
 var self = this;
 return  self.toggleSessionBookmark(sessionIdsArr).then(self.toggleStarredButton.bind(self)).then(function() {
   return self.driver.executeScript('window.scrollTo(0, 400)').then(self.getNoOfVisibleSessionElems.bind(self));
 });
};

Here is the excerpt of code which matches the actual number of visible session elements to the expected number. You can view the whole test script here

//Test for checking the bookmark feature on the tracks page
it('Checking the bookmark toggle', function(done) {
 trackPage.checkIsolatedBookmark().then(function(num) {
   assert.equal(num, 2);
   done();
 }).catch(function(err) {
   done(err);
 });
});

Now, we want to test this feature on the other pages: schedule and rooms page. We can simply follow the same approach as done on the tracks page but it is time expensive. Checking the visibility of all the sessions elements present on the page takes quite some time due to a large number of sessions. We need to think of a different approach.We had already marked two elements on the tracks page. We then go to the schedule page and click on the starred mode. We calculate the current height of the page. We then unmark a session and then recalculate the height of the page again. If the bookmark feature is working, then the height should decrease. This determines the correctness of the test. We follow the same approach on the rooms pages too. While this is not absolutely correct, it is a good way to check the feature. We have already employed the perfect method on the tracks page so there was no need of applying it on the schedule and the rooms page since it would have increased the time of the testing by a quite large margin.

Here is an excerpt of the code. The whole work can be viewed here

RoomPage.checkIsolatedBookmark = function() {
 // We go into starred mode and unmark sessions having id 3015 which was marked previously on tracks pages. If the bookmark feature works, then length of the web page would decrease. Return true if that happens. False otherwise
 var getPageHeight = 'return document.body.scrollHeight';
 var sessionIdsArr = ['3015'];
 var self = this;
 var oldHeight, newHeight;
 return self.toggleStarredButton().then(function() {
   return self.driver.executeScript(getPageHeight).then(function(height) {
     oldHeight = height;
     return self.toggleSessionBookmark(sessionIdsArr).then(function() {
       return self.driver.executeScript(getPageHeight).then(function(height) {
         newHeight = height;
         return oldHeight > newHeight;
       });
     });
   });
 });
};

Search Feature
Now, let us go to the testing of the search feature in the webapp. The main object of focus is the Search bar. It is present on all the pages: tracks, rooms, schedule, and speakers page and allows the user to search for a particular session or a speaker and instantly fetches the result as he/she types.

We want to ensure that this feature works across all the pages. Tracks, Rooms and Schedule pages are similar in a way that they display all the session of the event albeit in a different manner. Any query made on any one of these pages should fetch the same number of session elements on the other pages too. The speaker page contains mostly information about the speakers only. So, we make a single common test for the former three pages and a little different test for the latter page.

Designing a test for this feature is interesting. We want it to be fast and accurate. A simple way to approach this is to think of the components involved. One is the query text which would be entered in the search input bar. Other is the list of the sessions which would match the text entered and will be visible on the page after the text has been entered. We decide upon a text string and a list containing session ids. This list contains the id of the sessions should be visible on the above query and also contain few id of the sessions which do not match the text entered. During the actual test, we enter the decided text string and check the visibility of the sessions which are present in the decided list. If the result matches the expected order, then it means that the feature is working well and the test passes. Otherwise, it means that there is some problem with the default implementation and the test fails.

For eg: We decide upon the search text ‘Mario’ and then note the ids of the sessions which should be visible in that search.

c0e4910f-cf69-4b2a-8cc1-233badb35eee.png

Suppose the list of the ids come out to be

['3017''3029''3013''3031']

We then add few more session ids which should not be visible on that search text. Like we add two extra false ids 3014, 3015. Modified list would be something like this

['3017''3029''3013''3031''3014''3015']

Now we run the test and determine the visibility of the sessions present in the above list, compare it to the expected output and accordingly determine the fate of the test.

Expected: [truetruetruetruefalsefalse]
Actual Output: [truetruetruetruetruetrue]

Then the test would fail since the last two sessions were not expected to be visible.

Here is some code related to it. The whole work can be seen here

function commonSearchTest(text, idList) {
 var self = this;
 var searchText = text || 'Mario';
 // First 4 session ids should show up on default search text and the last two not. If no idList provided for testing, use the idList for the default search text
 var arrId = idList || ['3017', '3029', '3013', '3031', '3014', '3015'];
 var promise = new Promise(function(resolve) {
   self.search(searchText).then(function() {
     var promiseArr = arrId.map(function(curElem) {
       return self.find(By.id(curElem)).isDisplayed();
     });

     self.resetSearchBar().then(function() {
       resolve(Promise.all(promiseArr));
     });
   });
 });
 return promise;
}

Here is the code for comparing the expected and the actual output. You can view the whole file here

it('Checking search functionality', function(done) {
 schedulePage.commonSearchTest().then(function(boolArr) {
   assert.deepEqual(boolArr, [true, true, true, true, false, false]);
   done();
 }).catch(function(err) {
   done(err);
 });
});

The search functionality test for the speaker’s page is done in the same style. Just instead of having the session ids, we work with speaker ids there. Rest everything is done in a similar manner.

Resources:

Continue ReadingWriting Selenium Tests for Checking Bookmark Feature and Search functionality in Open Event Webapp

How the Compare Twitter Profiles loklak App works

People usually have a tendency to compare their profiles with others, So this is what exactly this app is used for: To compare Twitter profiles. loklak provides so many API’s which serves different functionalities. One among those API’s which I am using to implement this app is loklak’s User Details API. This API actually help in getting all the details of the user we search giving the user name as the query. In this app am going to implement a comparison between two twitter profiles which is shown in the form of tables on the output screen.

Usage of loklak’s User Profile API in the app:

In this app when the user given in the user names in the search fields as seen below:

The queries entered into the search field are taken and used as query in the User Profile API. The query in the code is taken in the following form:

var userQueryCommand = 'http://api.loklak.org/api/user.json?' +
                       'callback=JSON_CALLBACK&screen_name=' +
                       $scope.query;

var userQueryCommand1 = 'http://api.loklak.org/api/user.json?' +
                        'callback=JSON_CALLBACK&screen_name=' +
                        $scope.query1;

The query return a json output from which we fetch details which we need. A simple query and its json output:

http://api.loklak.org/api/user.json?screen_name=fossasia

Sample json output:

{
  "search_metadata": {"client": "162.158.50.42"},
  "user": {
    "$P": "I",
    "utc_offset": -25200,
    "friends_count": 282,
    "profile_image_url_https": "https://pbs.twimg.com/profile_images/1141238022/fossasia-cubelogo_normal.jpg",
    "listed_count": 185,
    "profile_background_image_url": "http://pbs.twimg.com/profile_background_images/882420659/14d1d447527f8524c6aa0c568fb421d8.jpeg",
    "default_profile_image": false,
    "favourites_count": 1877,
    "description": "#FOSSASIA #OpenTechSummit 2017, March 17-19 in Singapore https://t.co/aKhIo2s1Ck #OpenTech community of developers & creators #Code #Hardware #OpenDesign",
    "created_at": "Sun Jun 20 16:13:15 +0000 2010",
    "is_translator": false,
    "profile_background_image_url_https": "https://pbs.twimg.com/profile_background_images/882420659/14d1d447527f8524c6aa0c568fb421d8.jpeg",
    "protected": false,
    "screen_name": "fossasia",
    "id_str": "157702526",
    "profile_link_color": "DD2E44",
    "is_translation_enabled": false,
    "translator_type": "none",
    "id": 157702526,
    "geo_enabled": true,
    "profile_background_color": "F50000",
    "lang": "en",
    "has_extended_profile": false,
    "profile_sidebar_border_color": "000000",
    "profile_location": null,
    "profile_text_color": "333333",
    "verified": false,
    "profile_image_url": "http://pbs.twimg.com/profile_images/1141238022/fossasia-cubelogo_normal.jpg",
    "time_zone": "Pacific Time (US & Canada)",
    "url": "http://t.co/eLxWZtqTHh",
    "contributors_enabled": false,
    "profile_background_tile": true,
}


I am getting data from the json outputs as shown above, I use different fields from the json output like screen_name, favourites_count etc.

Injecting data from loklak API response using Angular:

As the loklak’s user profile API returns a json format file, I am using Angular JS to align the data according to the needs in the app.

I am using JSONP to retrieve the data from the API. JSONP or “JSON with padding” is a JSON extension wherein a prefix is specified as an input argument of the call itself. This how it is written in code:

$http.jsonp(String(userQueryCommand)).success(function (response) {
    $scope.userData = response.user;
 });

Here the response is stored into a $scope is an application object here. Using the $scope.userData variable , we access the data and display it on the screen using Javascript, HTML and CSS.

<div id="contactCard" style="pull-right">
    <div class="panel panel-default">
        <div class="panel-heading clearfix">
            <h3 class="panel-title pull-left">User 1 Profile</h3>
        </div>
        <div class="list-group">
            <div class="list-group-item">
                <img src="{{userData.profile_image_url}}" alt="" style="pull-left">
                <h4 class="list-group-item-heading" >{{userData.name}}</h4>
            </div>

In this app am also adding keyboard action and validations of fields which will not allow users to search for an empty query using this simple line in the input field.

ng-keyup="$event.keyCode == 13 && query1 != '' && query != '' ? Search() : null"


Resources:

Continue ReadingHow the Compare Twitter Profiles loklak App works

Building a showcase site to display sample events and auto deploying them on each PR merge in Open Event Webapp

Open Event Webapp generates static websites of the event fed to it in the form of JSON data. Earlier, we used to automatically deploy the FOSSASIA Summit event website on the Github pages of the repository on every merge of a pull request.  The presence of it helped in showcasing and testing purposes. But a single event was not enough. Events are diverse, taking place in a large number of rooms, h a variety of sessions and extending over several days. So, having multiple events on the showcase site and continuously showcasing and testing them was a really great idea.

Here is the feature request for it. I will be explaining the major portions of it. The whole code can be found here

First of all, we need to build the main index page which we will showcase our sample events. It will contain the small images of the event and on clicking them, the selected event will be opened. For displaying features and capability of the generator,  we have two separate sections of events: one having the single session page and the other having the expandable sessions page. There will be links to the other components of the Open Event Ecosystem like Android App generator,  Web App generatorOrganizer App, and Eventyay.

The contents of that page are kept in the overviewSite folder. It contains the event background images of the events and the main index file. The basic structure of the file is shown below. The whole file can be viewed here

<div class="container-fluid bg-3 text-center">
 <div class="row margin">
   <div class="col-md-6 col-sm-12 col-xs-12">
     <div class="row">
       <h2 class="margin"> Apps with expandable sessions page </h2>
       <div class="col-md-6 col-sm-6 col-xs-12 margin">
         <p><strong>Open Tech Summit 2017</strong></p>
         <a href='./OpenTechSummit/index.html' target='_blank'>
           <img src="./otssmall.jpg" class=""  alt="Image">
         </a>
       </div>
      </div>
    </div>
   <div class="col-md-6 col-sm-12 col-xs-12">
     <div class="row">
       <h2 class="margin"> Apps with single sessions page </h2>
       <div class="col-md-6 col-sm-6 col-xs-12 margin">
         <p><strong>Mozilla All Hands 2017</strong></p>
         <a href='./MozillaAllHands2017/index.html' target='_blank'>
           <img src="./mozilla_banner.jpg" class=""  alt="Image">
         </a>
       </div>
     </div>
   </div>
 </div>
</div>

But, this is just the front end of the page. We haven’t generated the sample events yet and neither have we made any changes to make them auto deploy on each PR merge. The test script of the app which contains unit, acceptance and selenium tests runs on each PR made against the repo when Travis CI build is triggered. So, it makes sense to write code for generating the event there itself. When the test script has finished executing, all of the events would have been generated and present inside a single folder named a@a.com (We needed something short and easy to remember and the name doesn’t really matter). We then copy the contents of the overviewSite folder into the above folder. It already contains the folder of different sample events.

Here is the related code. The full test script file can be found here

describe('generate', function() {
 describe('.create different event sites and copy assets of overview site', function() {
   // Sample events are generated inside the a@a.com folder
   it('should generate the Mozilla All Hands 2017', function(done) {
     var data = {};
     // API endpoint configuration of the All Hands 2017 event and the session style set to single pages
     data.body = {
       "email": "a@a.com",
       "name": "Open Event",
       "apiendpoint":    "https://raw.githubusercontent.com/fossasia/open-event/master/sample/MozillaAllHands17",
       "sessionMode": "single",
       "datasource": "eventapi",
       "assetmode" : "download"
     };
     generator.createDistDir(data, 'Socket', function(appFolder) {
       assert.equal(appFolder, "a@a.com/MozillaAllHands2017");
       done();
     });
   });
   // For copying the static files required for the showcase site
   it('should copy all the static files', function(done) {
     var staticPath = __dirname + '/../src/backend/overviewSite/';
     function copyStatic(fileName) {
       // Copy the static files in the overviewSite folder to the a@a.com folder
     }
   });
 });
});

Everything is almost done now. We then just make some changes in the deploy script to publish the whole folder containing the different event samples instead of a particular sample and everything works fine.

We navigate to the a@a.com folder inside the dist directory and initialize a git repository there. We then set the username and email and fetch the contents of the gh-pages branch of the official repo (using the Github token. It is defined in the Travis Settings as a private environment variable) and reset it. We then add all the files present in the current directory to the staging area, commit them and push it to the upstream repository. Here is the relevant code. The whole github deploy script file can be viewed here

eval cd dist/a@a.com/
git init
git config --global user.name "Travis CI"
git config --global user.email "noreply+travis@fossasia.org"
git remote add upstream "https://$GH_TOKEN@github.com/"${TRAVIS_REPO_SLUG}".git"
git fetch upstream
git reset upstream/gh-pages
touch .
git add -A .
git commit -m "rebuild pages at ${rev}"
git push -q upstream HEAD:gh-pages

Here is the screenshot showing the successful deployment of the sample events. You can view the whole log here. A screenshot of it is below. You can view the higher quality image by clicking on it.

29e53dc0-8841-4329-8a37-8d2e9f08756c.png

After all the work, this is how the showcase page looks like. Samples are re-generated and the site is auto-deployed on every Pull Request merged in the repository.

66804d19-6862-494f-80b6-e1749493e780.png

On clicking on any of the listed events, we jump to the index page of that particular event. Like, If we click on the Facebook Developer Conference, a new tab is opened and we are taken to the front page of that event!

6a47f623-82c6-49e2-af1c-4d152aaaf9b7.png

References

Continue ReadingBuilding a showcase site to display sample events and auto deploying them on each PR merge in Open Event Webapp

Implementing Single Session Pages in Open Event Webapp

Recently, we implemented a feature request in the Open Event Webapp which allows the organizers of an event to choose the style of the sessions displayed on the event web site. Before this feature of individual session pages was implemented, we had a single default style of displaying collapsible session elements on the page. A small preview of the session containing its title, type, name, position, and picture of the speaker(s) presenting it would be shown on the different pages. When the user will click on this session element, it would collapse showing detailed information about it.

Before Clicking

2c12db41-d999-423a-bdee-6b639cbdbb0b.png

After Clicking on the first session element

fe1a3362-ebad-42a0-ba9d-0909c2de21a9.png

While this default behavior of collapse of session element on click (shown above) works well in most of the cases, it might not be apt in situations where the session contains a large amount of detail and a higher number of speakers presenting it. Single session pages would work better in that case.

So, we provided an option to select it on the generator form itself. We provided an input field asking which session style does the organizer want? Is it the single session style or the expandable session? The organizer can then select one of them and the site will be generated according to that!!

2989ee1f-509c-400d-94cd-023a06a3601d.png

The whole work was huge and you can view all of it here. I will only be describing the major parts of it here.

The first challenge was to make a template (handlebars) file for the individual sessions. This template would take a single session object as an input. The object would contain all the details about the session and after compilation during generation, a unique individual page for that session would be created.

Here is the basic structure of the template. You can view the whole file here

<div class="container session-container">
 <!-- Contains all the information about the session -->
 <div class="row single-session" id="{{session_id}}">
   <!-- Displaying the date, start and end time of the session -->
   <h3> {{startDay}} </h3>
   <div class = "eventtime"><span class="time-track">{{start}} - {{end}}</span></div>
   <div class="session-content">
     <div class="sizeevent event" id="event-title">
       <!-- Display the title, type and the track of the session -->
     </div>
     <div>
       <!-- Short abstract of the session -->
       {{{description}}}
       <div class="session-speakers-list">
         <!-- Contains detailed information about the speakers of the session. Display their picture, show their position, short biography and social links links like Github, Twitter and LinkedIn -->
       </div>
     </div>
   </div>
 </div>
</div>

But the work is not completed yet. We have to check the style of the session selected by the organizer and if he/she has selected the single session option, then we have to pass all the sessions to this template file during the generation process and create the pages. If the mode selected is expandable, then we carry out the normal generation procedure. Else, we extract every session from the JSON data and feed into to the above template. Since the number of sessions can be quite large, we don’t generate them alongside the other pages like tracks, schedule, rooms, speakers and so on. Instead, we create a new folder named sessions and put in all of the new individual pages there in one place. It helps to keep the directory clean and modularized. Also, since we are placing it inside of a session folder, we will have to update the links to the main pages in the navbar section. Like, instead of track.html, it will be ../tracks.html now. The file is given a common format name of session_sessionId where sessionId is the id of that particular session.

Here is the related code. It is taken from generator.js file in the project

function templateGenerate() {
 if(mode == 'single') {
   function checkLinks() {
     // Made necessary modifications in the links to the main pages
   }
   //jsonData contains all the information about the event
   var trackArr = jsonData.tracks;
   for(var i = 0; i < trackArr.length; i++) {
     var sessionArr = trackArr[i].sessions;
     for(var j = 0; j < sessionArr.length; j++) {
       var sessionObj = JSON.parse(JSON.stringify(sessionArr[j]));
       // Do some modifications in the sessionObj to include the track background and font color and additional links
     } 
   }
   var data = {session: sessionObj};
   checkLinks();
   // Pass the session object to the template, compile and minify the HTML file and place into the sessions folder
   fs.writeFileSync(distHelper.distPath + '/' + appFolder + '/sessions/session_' + sessionId + '.html', minifyHtml(sessiontpl(data)));
 }
}

Ok, most of the things are done now. Just one simple step is missing. When the user clicks on the small session element on the tracks, rooms or the schedule page, then we collapse the session element or open up a brand new session page for showing detailed information about the session depending upon what option the organizer has selected. So, we will have to make little appropriate change for handling this as well. Below code is taken from the tracks page template file

<div class = "room-filter">
 {{#if ../../../mode}}
   <div class="sizeevent event">
 {{else}}
   <div class="sizeevent event" data-toggle="collapse" data-target="#desc-{{session_id}}, #desc2-{{session_id}}">
 {{/if}}
</div>

$('.room-filter').click(function () {
 var sessionMode = "{{mode}}";
 var id =  $(this).attr('id');
 if(sessionMode == 'single') {
   var curUrl = window.location.href;
   var newUrl = curUrl.substring(0, curUrl.lastIndexOf('/') + 1) + 'sessions/session_' + id + ".html";
   window.location.href = newUrl;
 }
});

We are simply checking the mode and if it is set, it means that the session style is a single page. So, we don’t include the bootstrap collapse classes in that case. We handle that click event in the javascript part and appropriate redirect the user to the unique page for that session.

So, after all this hard work, this is how it looks like.

Before clicking

0fdb3641-2579-4537-8f36-910c636cf172.png

After clicking on the first session element, a new page is opened

e5d2ed0d-c54a-44fd-b30c-af440936c8ed.png

Resources

Continue ReadingImplementing Single Session Pages in Open Event Webapp

Image Cropper On Ember JS Open Event Frontend

In Open Event Front-end, we have a profile page for every user who is signed in where they can edit their personal details and profile picture. To provide better control over profile editing to the user, we need an image cropper which allows the user to crop the image before uploading it as their profile picture. For this purpose, we are using a plugin called Croppie. Let us see how we configure Croppie in the Ember JS front-end to serve our purpose.

All the configuration related to Croppie lies in a model called cropp-model.js.

 onVisible() {
    this.$('.content').css('height', '300px');
    this.$('img').croppie({
      customClass : 'croppie',
      viewport    : {
        width  : 400,
        height : 200,
        type   : 'square'
      },
      boundary: {
        width  : 600,
        height : 300
      }
    });
  },

  onHide() {
    this.$('img').croppie('destroy');
    const $img = this.$('img');
    if ($img.parent().is('div.croppie')) {
      $img.unwrap();
    }
  },

  actions: {
    resetImage() {
      this.onHide();
      this.onVisible();
    },
    cropImage() {
      this.$('img').croppie('result', 'base64', 'original', 'jpeg').then(result => {
        if (this.get('onImageCrop')) {
          this.onImageCrop(result);
        }
      });
    }

There are two functions: onVisible() and onHide(), which are called every time when we hit reset button in our image cropper model.

  • When a user pushes reset button, the onHide() function fires first which basically destroys a croppie instance and removes it from the DOM.
  • onVisible(), which fires next, sets the height of the content div. This content div contains our viewport and zoom control. We also add a customClass of croppie to the container in case we are required to add some custom styling. Next, we set the dimensions and the type of viewport which should be equal to the dimensions of the cropped image. We define type of cropper as ‘square’ (available choices are ‘square’ and ‘circle’). We set the dimensions of our boundary. The interesting thing to notice here is that we are setting only the height of the boundary because if we pass only the height of the boundary, the width will be will be calculated using the viewport aspect ratio. So it will fit in all the screen sizes without overflowing.

The above two functions are invoked when we hit the reset button. When the user is satisfied with the image and hits ‘looks good’ button, cropImage() function is called where we are get the resulting image by passing some custom options provided by croppie like base64 bit encoding and size of cropped image which we are set to ‘original’ here and the extension of image which is we set here as ‘.jpeg’. This function returns the image of desired format which we use to set profile image.

Resources

Continue ReadingImage Cropper On Ember JS Open Event Frontend

Using Semantic UI Modals in Open Event Frontend

Modals in semantic UI are used to display the content on the current view while temporarily blocking the interaction with the main view. In Open Event Frontend application, we’ve a ‘delete’ button which deletes the published event as soon as the button is pressed making all the data clean. Once the event is deleted by the user, it is not possible to restore it again. We encountered that this can create a whole lot of problem if the button is pressed unintentionally. So we thought of solving this by popping up a dialog box on button click with a warning and asking for user’s confirmation to delete the event. To implement the dialog box, we used semantic UI modals which helped in ensuring that the user correctly enters the name of the event in the given space to ensure that s/he wants to delete the event.

Since we want our modal to be customizable yet reusable so that it can be used anywhere in the project so we made it as the component called ‘event-delete-modal’. To do that we first need to start with the template.

The markup for the event-delete-modal looks like this:

<div class="content">
  <form class="ui form" autocomplete="off" {{action (optional formSubmit) on='submit' preventDefault=true}}>
    <div class="field">
      <div class="label">
        {{t 'Please enter the full name of the event to continue'}}
      </div>
      {{input type='text' name='confirm_name' value=confirmName required=true}}
    </div>
  </form>
</div>
<div class="actions">
  <button type="button" class="ui black button" {{action 'close'}}>
    {{t 'Cancel'}}
  </button>
  <button type="submit" class="ui red button" disabled={{isNameDifferent}} {{action deleteEvent}}>
    {{t 'Delete Event'}}
  </button>
</div>

The complete code for the template can be seen here.

The above code for the modal window is very similar to the codes which we write for creating the main window. We can see that the semantic UI collection “form” has also been used here for creating the form where the user can input the name of the event along with delete and cancel buttons. The delete button remains disabled until the time correct name of the event been written by the user to ensure that user really wants to delete the event. To cancel the modal we have used close callback method of semantic UI modal which itself closes it. Since the ‘isNameDifferent’ action is uniquely associated to this particular modal hence it’s been declared in the ‘event-delete-modal.js’ file.

The code for the  ‘isNameDifferent’ in ‘event-delete-modal.js’ file looks like this.

export default ModalBase.extend({
  isSmall         : true,
  confirmName     : '',
  isNameDifferent : computed('confirmName', function() {
    return this.get('confirmName').toLowerCase() !== this.get('eventName').toLowerCase();
  })
});

The complete code for the.js file can be seen here.

In the above piece of code, we have isSmall variable to ensure that our modal size is small so it can fit for all screen sizes and we have the implementation isNameDifferent() function. We can also notice that our modal is extending the ‘ModelBase’ class which has all the semantic UI modal settings and the callback methods to perform show, hide, close and open actions along with settings which will help modal to look the way we want it to be.  

The modal-base.js class looks like this.

  openObserver: observer('isOpen', function() {
   close() {
     this.set('isOpen', false);
   },
   actions: {
    close() {
      this.close();
    }
  },
  willInitSemantic(settings) {
    const defaultOptions = {
      detachable     : false,
      duration       : testing ? 0 : 200,
      dimmerSettings : {
        dimmerName : `${this.get('elementId')}-modal-dimmer`,
        variation  : 'inverted'
      },
      onHide: () => {
        this.set('isOpen', false);
        if (this.get('onHide')) {
          this.onHide();
        }
      },
      onVisible: () => {
        this.set('isOpen', true);
        this.$('[data-content]').popup({
          inline: true
        });
     }

The complete code for the .js file can be seen here.

In the above code, we can see that at the top we’ve an ‘openObserver’ function where we’re observing the behaviour of the modal and setting the variables according to the behavioural changes. Now, later we’re checking the status of those variables and performing the actions based on their value. For example, to close the modal we have a boolean variable ‘isOpen’ which is set to false now close() action will be called which closes the modal.  Similarly, in ‘willInitSemantic(settings)’ function we’re setting the modal’s setting like the effects, length, the details modal will display on popping out etc.
We’re here overriding the semantic UI moda settings like detachable, dimmerSettings, duration etc along with the callback methods like onHide(), onVisible() etc. to get the required results.

Finally, our event-delete-modal will look something like this.

Fig: Modal to delete the event

So to conclude this post, we can easily say that the modals are of great use. They can solve the purpose of displaying some alert or to input some values without interrupting the flow of the main page depending upon the requirements.

Additional Resources:

Blog post about Awesome Ember.js Form Components of Alex Speller: http://alexspeller.com/simple-forms-with-ember/

Continue ReadingUsing Semantic UI Modals in Open Event Frontend