Real Time Upload Progress in Phimpme Android

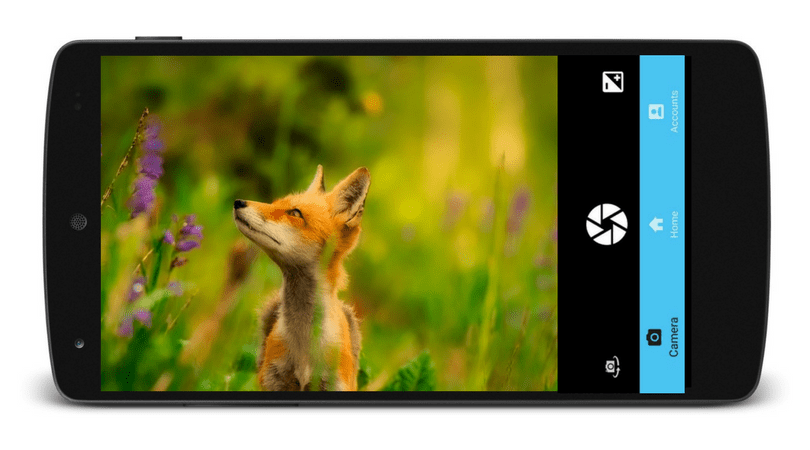
The Phimpme Android application along with a wonderful gallery, edit image and camera section comes in with an option to share the images to different connected accounts. For sharing the images to different accounts, we have made use of different SDK’s provided to help users to share the images to multiple accounts at once without having to install other applications on their devices. When the user connects the account and shares the image to any account, we display a snackbar at the bottom that the upload has started and then we display the progress of the uploads in the notification panel as depicted in the screenshot below.

In this tutorial, I will be explaining how we achieved this feature of displaying the upload progress in the Phimpme Android application using a Notification handler class.

Step 1

The first thing we need to do is to create an AsyncTask that will be handling the upload progress and the notification handling in the background without affecting the main UI of the application. This can be done using the upload progress class which is a subclass of the AsyncTask class as depicted below.

private class UploadProgress extends AsyncTask<Void, Integer, Void> {
}

The AsyncTask overrides three methods which are onPreExecute, doInBackground and onPostExecute methods. In the onPreExecute method we will make the uploading notification visible to the user via the Notification handler class.

Step 2

After this, we need to create a notification handler class which will be handling the uploads progress. We will be needing four methods inside of the Notification handler class to :

  1. Make the app notification in the notification panel.
  2. To update the progress of the upload.
  3. To display the upload failed progress.
  4. To display the upload passed progress.

The notification display can be made using the following lines of code below:

mNotifyManager = (NotificationManager) ActivitySwitchHelper.getContext().getSystemService(Context.NOTIFICATION_SERVICE);
mBuilder = new NotificationCompat.Builder(ActivitySwitchHelper.getContext());
mBuilder.setContentTitle(ActivitySwitchHelper.getContext().getString(R.string.upload_progress))
      .setContentText(ActivitySwitchHelper.getContext().getString(R.string.progress))
      .setSmallIcon(R.drawable.ic_cloud_upload_black_24dp)
      .setOngoing(true);
mBuilder.setProgress(0, 0, true);
// Issues the notification
mNotifyManager.notify(id, mBuilder.build());

The above code makes use of the Android’s NotificationManager class to get the notification service and sets the title and the upload image which is to be displayed to the user at the time of image uploads.

Now we need to update the notification after every each second to display the real time upload progress to the user. This can be done by using the upload progress method which takes in total file size and the amount of data uploaded as a parameter.

public static void updateProgress(int uploaded, int total, int percent){
  mBuilder.setProgress(total, uploaded, false);
  mBuilder.setContentTitle(ActivitySwitchHelper.getContext().getString(R.string.upload_progress)+" ("+Integer.toString(percent)+"%)");
  // Issues the notification
  mNotifyManager.notify(id, mBuilder.build());

The above updating process can be done in the doInBackground task of the AsyncTask described in step 1.

Step 3

After the upload has completed, the onPostExecute method will be executed and in that we need to make display the status whether the upload passed or failed and we need to set the onProgress value of the notification to be false so that user can remove the notification. This can be done using the following line of code below:

mBuilder.setContentText(ActivitySwitchHelper.getContext().getString(R.string.upload_done))
      // Removes the progress bar
      .setProgress(0,0,false)
      .setContentTitle(ActivitySwitchHelper.getContext().getString(R.string.upload_complete))
      .setOngoing(false);
mNotifyManager.notify(0, mBuilder.build());
mNotifyManager.cancel(id);

This is how we have created and made use of the Notification handler class in the Phimpme Application to display the upload progress in the application. To get the full source code for implementing the uploads to multiple accounts and to display the notification, please refer to the Phimpme Android GitHub repository.

Resources

  1. Google Developer’s Guide – Notification Handling – https://developer.android.com/guide/topics/ui/notifiers/notifications.html
  2. Google Developer’s Guide – AsyncTask in Android – https://developer.android.com/reference/android/os/AsyncTask.html
  3. StackOverflow – Notification Handling – https://stackoverflow.com/questions/31063920/how-to-program-android-notification
  4. GitHub – Phimpme Android Repository – https://github.com/fossasia/phimpme-android/
Continue ReadingReal Time Upload Progress in Phimpme Android

Zooming Feature in the Phimpme Android’s Camera

The Phimpme Android application comes with a complete package of camera, Edit images, sharing and gallery functionalities. It has a well featured and fully functional camera with all the capabilities that a user expects from a camera application. One such feature in the Phimpme Android application is the zooming functionality. It provides the user the option to zoom in using the pinch gesture of the fingers or the user can select the settings to zoom in from the volume buttons. In this tutorial, I will be explaining how I achieved the zooming functionality in the Phimpme Android app.

Step 1

The first thing we need to do is to check whether the device will support the zoom in functionality or not to avoid random crashes while runtime of the application and while performing the zoom action in case the camera of the device doesn’t support this feature. This can be done by the following lines of code:

Camera.Parameters params = mCamera.getParameters();
Boolean supports = params.isZoomSupported();

Step 2

Now after getting the camera parameters and checking whether the camera supports the zoom in functionality, we need to add the touch listener to the surface view of the camera so that we can get the touch locations and the finger spacing of the user to get the pinch to zoom in functionality. This can be done using the following line of code.

surfaceView.setOnTouchListener(this);

Whenever the user touches the screen this touch listener gives a callback to the overridden onTouchEvent method and passes the MotionEvent to the function. The motion event object in Android handles the movement reports. Now in the onTouchEvent method, we calculate the finger spacing between the two fingers and calculate the approximate amount by which the user wants to zoom in. The finger spacing can be calculated using the following lines of code.

float x = event.getX(0) - event.getX(1);
   float y = event.getY(0) - event.getY(1);
   return FloatMath.sqrt(x * x + y * y);

After getting the finger spacing we need to cancel the auto focus of the camera before performing the zoom action so that the application does not crash. This can be achieved by a single line of code below.

mCamera.cancelAutoFocus();

Step 3

The final step is to set the zoom level in the camera application by calculating the zoom level by using the finger spacing. For this, first we need to get the max zoom level supported by the device so that we do not apply the zoom level that is not supported by the device. The calculation of max zoom level and setting of the desired zoom level by the user can be performed by using the following lines of code.

int maxZoom = params.getMaxZoom();
   int zoom = params.getZoom();
   float newDist = getFingerSpacing(event);
   if (newDist > mDist) {
       //zoom in
       if (zoom < maxZoom)
           zoom++;
   } else if (newDist < mDist) {
       //zoom out
       if (zoom > 0)
           zoom--;
   }
   mDist = newDist;
   params.setZoom(zoom);

This is how we have achieved the functionality of zooming in and clicking pictures in the Phimpme Android application. To get the full source code and to know how to use the volume control buttons to zoom in/out, please refer to the Phimpme Android repository.

Resources

  1. GitHub – Open camera source code : https://github.com/almalence/OpenCamera
  2. Android developer’s guide – MotionEvents in Android : https://developer.android.com/reference/android/view/MotionEvent.html
  3. StackOverflow – Pinch to zoom functionality : https://stackoverflow.com/questions/8120753/android-camera-preview-zoom-using-double-finger-touch
  4. GitHub – Phimpme Android repository : https://github.com/fossasia/phimpme-android
Continue ReadingZooming Feature in the Phimpme Android’s Camera

How to Make Phimpme Android App Crash Free

Now Phimpme Android app is almost ready with lots of social sharing options. A user can upload images on multiple platforms like Tumblr, Flickr, Imgur, OwnCloud (open source), Nextcloud, dropbox, pinterest, etc. Apart from Sharing, Phimpme app also allow user to click image from own custom camera with different filters and various editing options. As everything is now almost ready so It also important to make app stable and crash free. To make app stable to compatible with all types of device, we can write instrumentation test cases. So in this post I will be explaining how I made Phimpme android app crash free. To do so I have integrated crash reporting service in Phimpme using Firebase Crash report service and Crashlytics.

Using Firebase Crash Reporting service:

Firebase is free of cost and provide various features along with crash reporting. To integrate firebase crash service there is step by step guide.

Step 1:

First, step is to register your app on firebase developer console. To register your Android app on firebase click here.  Add your app name and select your country.


Step 2:

Next, click on the Add Firebase to your Android app button and fill in the your Android application’s package name and the SHA-1 key. You can generate this key very easily with the help of Android studio. Type this command in your terminal to generate SHA-1

keytool -list -v -keystore ~/.android/debug.keystore -alias androiddebugkey -storepass android -keypass android

On successful completion of the command, the SHA-1 key will be displayed on the terminal.

Step 3:

Now add the SHA-1 and package name in firebase console. After that download googleservice.json file and place in app folder of your project.

Step 4:

Add following dependency in your android project and plugin in build.gradle

dependencies {
    classpath 'com.google.gms:google-services:3.1.0'
  }
 apply plugin: 'com.google.gms.google-services'


Step 5:

Once you have done the above four steps your app will be visible in firebase console and now you can add crash service. Now you can see crash in your firebase console

After this add the following dependency in build.gradle. This is very important.

compile 'com.google.firebase:firebase-crash:9.4.0'

Resources:

Continue ReadingHow to Make Phimpme Android App Crash Free

Adding Tumblr Upload Feature in Phimpme

The Phimpme Android application along with various other cloud storage and social media upload features provides an option to upload the images on Tumblr without having to download any other applications. In this post, I will be explaining how I integrated Tumblr in phimpme as there is no proper guide on the web how to integrate to Tumblr in Android. Tumblr provides an Android-SDK but there is no proper documentation to it and is not enough to authenticate and upload the images to it. After so much research I came to a solution. So read this article to know how to integrate Tumblr in Android.

Step 1:

First, add two dependencies to your project one is for Android SDK of Tumblr and one is for loglr which help you to get login on Tumblr.

dependencies {

compile 'com.daksh:loglr:1.2.1'

compile 'com.tumblr:jumblr:0.0.11'

}

Step 2:

  1. Register your app on Tumblr to obtain developer keys.
  2. Enter callback URL it is important to get keys.
  3. Generate CONSUMER_KEY & CONSUMER_SECRET from the official developer console of Tumblr.

Register your application

Step 3:

Now we use Loglr library to log in to Tumblr. Tumblr doesn’t provide any library to login so I am using Loglr library for login Tumblr. After successfully log in Loglr will return API_KEY and API_SECRET. We will use these keys later to upload the image. Save these keys as constant variables.

public final static String TUMBLR_CONSUMER_KEY = "ENTER-CONSUMER-KEY";

public final static String TUMBLR_CONSUMER_SECRET = "ENTER-CONSUMER-SECRET";

Step 4:

To authenticate the Tumblr use loglr login instance and it can be done as follows.

Loglr.getInstance()

     .setConsumerKey(Constants.TUMBLR_CONSUMER_KEY)

     .setConsumerSecretKey(Constants.TUMBLR_CONSUMER_SECRET)

     .setLoginListener(loginListener)

     .setExceptionHandler(exceptionHandler)

     .enable2FA(true)

     .setUrlCallBack(Constants.CALL_BACK_TUMBLR)

     .initiateInActivity(AccountActivity.this);

After that you will be prompt to enter your tumblr credentials to authenticate the phimpme Android app. Once you have done it will return api_token and api_secret. Now save this in database.

account.setToken(loginResult.getOAuthToken());

account.setSecret(loginResult.getOAuthTokenSecret());

Step 5:

Once the authentication is done now we can upload an image directly to Tumblr from the Share activity in the Phimpme Android application. To upload an image create an async task so that uploading process will run in a background thread and not block the main UI thread. Keep in mind Tumblr require 4 variable to create Tumblr client CONSUMER_KEY, CONSUMER_SECRET, API_KEY and API_SECRET. Now we can create a Tumblr client using these 4 values. Once the client is created we are ready to get data from Tumblr and upload an image on Tumblr. Before uploading an image on Tumblr we need blog name because the user can have multiple blogs on Tumblr so we need to ask the user to choose a blog name from the list or we can provide dialog to enter blog name manually. Now enter the following code in the doInBackground() method of asynctask.

PhotoPost post = null;

try {

 post = client.newPost(user.getBlogs().get(0).getName(), PhotoPost.class);

 if (caption!=null && !caption.isEmpty())

 post.setCaption(caption);

 post.setData(new File(imagePath));

 post.save();

} catch (IllegalAccessException | InstantiationException e) {

 success = false;

}

If success variable is true that means our image is uploaded successfully. This is how I implemented the upload feature to Tumblr using two different libraries. To get the full source code, please refer to the Phimpme Android repository.

Resources:

Continue ReadingAdding Tumblr Upload Feature in Phimpme

Uploading Images to Box Storage from the Phimpme Application

The Phimpme Android application along with many other cloud storage applications integrated like Dropbox, Imgur, Pinterest has the option to upload the image to the Box storage without having to install any other applications on the device. From the Phimpme app, the user can click the photo, edit it, view any image from the gallery and then can upload multiple images to many storage services or social media without any hassle. In this tutorial, I will be discussing how we achieved the functionality to upload the images on the Box storage.

Step 1:

To integrate Box storage to the application, the first thing we need to do is create an application from the Box developers console and get the CLIENT_ID and the CLIENT_SECRET. To do this:

  1. Go to the Box developer page and log in.
  2. Create a new application from the app console.
  3. It will now give options to select what kind of application are you using. Select the option partner integration to get the image upload functionality to all the users.
  4. Give a name to your application and finally click the create application button.
  5. After this, you will be taken to the screen similar to the below screenshot from where you can copy the CLIENT_ID and CLIENT_SECRET to be used later on.

Step 2:

Now coming to the Android part, to get the image upload functionality to the box storage, we need to make use of the Android SDK provided by Box to achieve the uploading functionality easily. To add the SDK to the Android project from Gradle, copy the following line of Gradle script which will download and install the SDK from the maven repository.

maven{ url "https://mvnrepository.com/artifact/com.box/box-android-sdk" }
compile group: 'com.box', name: 'box-android-sdk', version: '4.0.8'

Now after adding the SDK, rebuild the project.

Step 3:

After this, to upload the file on the box storage, we need to login to the Box account to get the access token and the user name to store it in Realm database. For this, first we have to configure the Box client. This can be done using the following line of code.

BoxConfig.CLIENT_ID = BOX_CLIENT_ID;
BoxConfig.CLIENT_SECRET = BOX_CLIENT_SECRET;

Replace the BOX_CLIENT_ID and BOX_CLIENT_SECRET in the above code with the key received by following the step 1.

After configuring the Box API client, we can authenticate the user using the sessionBox object by following lines of code.

sessionBox = new BoxSession(AccountActivity.this);
sessionBox.authenticate();

After the authentication, we have to get the user name and the access token of the user using the authenticated session box.

account.setUsername(sessionBox.getUser().getName());
account.setToken(String.valueOf(accessToken));

After authenticating the user, we can upload the photos directly to the Box storage from the Share Activity in the Phimpme Android application. For this, we have to create a new Asynchronous task in android which will do the network operations in the background to avoid the Network on main thread exception. After this, we can make use of the Box file API to upload the photos to the Box storage and call the function getUploadRequest which takes the three parameters file input stream, the upload name of the file and the destination of the folder respectively. This can be done by the following lines of code.

mFileApi = new BoxApiFile(sessionBox);
BoxRequestsFile.UploadFile request = mFileApi.getUploadRequest(inputStream, uploadName, destinationFolderId);

This upload request throws a BoxException so we have to catch that exception using the try/catch block to avoid the application crash in case the upload request fails.

This is how we have implemented the upload to Box storage functionality in the Phimpme Android application. To get the full source code, please refer to the Phimpme Android repository.

Resources

  1. Box Developers app console : https://app.box.com/developers/console/
  2. Box Android SDK GitHub page : https://github.com/box/box-android-sdk
  3. Android’s Developer page on NetworkOnMainThreadExceoption : https://developer.android.com/reference/android/os/NetworkOnMainThreadException.html
Continue ReadingUploading Images to Box Storage from the Phimpme Application

Adding Manual ISO Controls in Phimpme Android

The Phimpme Android application comes with a well-featured camera to take high resolution photographs. It features an auto mode in the camera as well as a manual mode for users who likes to customise the camera experience according to their own liking. It provides the users to select from the range of ISO values supported by their devices with a manual mode to enhance the images in case the auto mode fails on certain circumstances such as low lighting conditions.

In this tutorial, I will be discussing how we achieved this in Phimpme Android with some code snippets and screenshots.

To provide the users with an option to select from the range of ISO values, the first thing we need to do is scan the phone for all the supported values of ISO and store it in an arraylist to be used to display later on. This can be done by the snippet provided below:

String iso_values = parameters.get("iso-values");
if( iso_values == null ) {
 iso_values = parameters.get("iso-mode-values"); // Galaxy Nexus
 if( iso_values == null ) {
    iso_values = parameters.get("iso-speed-values"); // Micromax A101
    if( iso_values == null )
       iso_values = parameters.get("nv-picture-iso-values"); // LG dual P990

Every device supports a different set of keyword to provide the list of ISO values. Hence, we have tried to add every possible keywords to extract the values. Some of the keywords used above covers almost 90% of the android devices and gets the set of ISO values successfully.

For the devices which supports the ISO values but doesn’t provide the keyword to extract the ISO values, we can provide the standard list of ISO values manually using the code snippet provided below:

values.add("200");
values.add("400");
values.add("800");
values.add("1600");

After extracting the set of ISO values, we need to create a list to display to the user and upon selection of the particular ISO value as depicted in the Phimpme camera screenshot below

Now to set the selected ISO value, we first need to get the ISO key to set the ISO values as depicted in the code snippet provided below:

if( parameters.get(iso_key) == null ) {
 iso_key = "iso-speed"; // Micromax A101
 if( parameters.get(iso_key) == null ) {
    iso_key = "nv-picture-iso"; // LG dual P990
    if( parameters.get(iso_key) == null ) {
       if ( Build.MODEL.contains("Z00") )
          iso_key = "iso"; // Asus Zenfone 2 Z00A and Z008

Getting the key to set the ISO values is similar to getting the key to extract the ISO values from the device. The above listed ISO keys to set the values covers most of the devices.

Now after we have got the ISO key, we need to change the camera parameter to reflect the selected change.

parameters.set(iso_key, supported_values.selected_value);
setCameraParameters(parameters);

To get the full source code on how to set the ISO values manually, please refer to the Phimpme Android repository.

Resources

  1. Stackoverflow – Keywords to extract ISO values from the device: http://stackoverflow.com/questions/2978095/android-camera-api-iso-setting
  2. Open camera Android source code: https://sourceforge.net/p/opencamera/code/ci/master/tree/
  3. Blog – Learn more about ISO values in photography: https://photographylife.com/what-is-iso-in-photography
Continue ReadingAdding Manual ISO Controls in Phimpme Android

Sorting Photos in Phimpme Android

The Phimpme Android application features a fully fledged gallery interface with an option to switch to all photos mode, albums mode and to sort photos according to various sort actions. Sorting photos via various options helps the user to get to the desired photo immediately without having to scroll down till the end in case it is the last photo in the list generated automatically by scanning the phone for images using the Android’s mediaStore class. In this tutorial, I will be discussing how we achieved the sorting option in the Phimpme application with the help of some code snippets.

To sort the all photos list, first of all we need a list of all the photos by scanning the phone using the media scanner class via the code snippet provided below:

uri = android.provider.MediaStore.Images.Media.EXTERNAL_CONTENT_URI;
      String[] projection = {MediaStore.MediaColumns.DATA};
      cursor = activity.getContentResolver().query(uri, projection, null, null, null);

In the above code we are using a cursor to point to each photos and then we are extracting the path of the images and storing it in a list using a while loop. After we generate the list of path of all the images, we have to convert the into a list of media using the file path using the code below:

for (String path : listOfAllImages) {
          list.add(new Media(new File(path)));
      }
      return list;
  }

After generating the list of all images we can sort the photos using the Android’s collection class. In Phimpme Android we provide the option to sort photos in different categories namely:

  1. Name Sort action
  2. Date Sort action
  3. Size Sort action
  4. Numeric Sort action

As sorting is somewhat heavy task so doing this in the main thread will result in freezing UI of the application so we have to put this into an AsyncTask with a progress dialog to sort the photos. After putting the above four options in the menu options. We can define an Asynctask to load the images and in the onPreExecute method of the AsyncTask, we are displaying the progress dialog to the user to depict that the sorting process is going on as depicted in the code snippet below

AlertDialog.Builder progressDialog = new AlertDialog.Builder(LFMainActivity.this, getDialogStyle());
dialog = AlertDialogsHelper.getProgressDialog(LFMainActivity.this, progressDialog,
      getString(R.string.loading_numeric), all_photos ? getString(R.string.loading_numeric_all) : getAlbum().getName());
dialog.show();

In the doInBackgroundMethod of the AsyncTask, we are sorting the list of all photos using the Android’s collection class and using the static sort method defined in that class which takes the list of all the media files as a parameter and the MediaComparator which takes the sorting mode as the first parameter and the sorting order as the second. The sorting order decides whether to arrange the list in ascending or in descending order.

getAlbum().setDefaultSortingMode(getApplicationContext(), NUMERIC);
Collections.sort(listAll, MediaComparators.getComparator(getAlbum().settings.getSortingMode(), getAlbum().settings.getSortingOrder()));

After sorting, we have to update the data set to reflect the changes of the list in the UI. This we are doing in the onPostExecute method of the AsyncTask after dismissing the progress Dialog to avoid the window leaks in the application. You can read more about the window leaks in Android due to progressdialog here.

dialog.dismiss();
mediaAdapter.swapDataSet(listAll);

To get the full source code, you can refer the Phimpme Android repository listed in the resources below.

Resources

  1. Android developer guide to mediastore class: https://developer.android.com/reference/android/provider/MediaStore.html
  2. GitHub LeafPic repository: https://github.com/HoraApps/LeafPic
  3. Stackoverflow – Preventing window leaks in Android: https://stackoverflow.com/questions/6614692/progressdialog-how-to-prevent-leaked-window
  4. Blog – Sorting lists in Android: http://www.worldbestlearningcenter.com/tips/Android-sort-ListView.htm
Continue ReadingSorting Photos in Phimpme Android

Maintaining Aspect Ratio of Images while Uploading in Open Event Frontend

In Open Event Frontend, we are using the image-upload at many places such as the cover photo of the event on the create event page, also at the system images (in the admin routes) where the user gets to change the image uploaded by him earlier, and also at the ‘profile’ route where the user can change his photo. But at different places, different dimensions of photos are needed since we are keeping standard in Open Event Frontend.

Therefore the image needs to be in a size with the correct ratio at the time of uploading. We are using the cropper component  for achieving this. The cropper is a modal which pops up after the image upload modal so that a user can crop the image according to the aspect ratio kept specific for that purpose. It looks as follows:

While dealing with an issue in Open Event Frontend, we had to have change in aspect ratio for ‘avatar’ images, unlike the other images. So, we had to modify our cropper modal so as to have different aspect ratios for different images when needed.

We solved the above problem as follows:

In our image-modal, we pass the aspect ratio as a parameter. So in our case, we wanted to set the aspect ratio 1:1 for the ‘avatar’ images only. Following is the code snippet of what we wanted:

{{widgets/forms/image-upload
needsCropper=true
label=(t 'Update Image')
id='user_image'
aspectRatio=(if (eq subTopic.name 'avatar') (array 1 1))
icon='photo'
hint=(t 'Select Image')
maxSizeInKb=10000
helpText=(t 'For Cover Photos : 300x150px (2:1 ratio) image.
For Avatar Photos : 150x150px (1:1 ratio) image.')}}

Thus, we passed the ‘aspectRatio’ as a parameter to the ‘image-upload’ modal. The image-upload further calls the cropper modal and passes ‘aspectRatio’.

{{#if needsCropper}}
{{modals/cropper-modal isOpen=cropperModalIsShown imgData=imgData onImageCrop=(action 'imageCropped') aspectRatio=aspectRatio}}
{{/if}}

Thus, we can use the passed param i.e ‘aspectRatio’ in our cropper to modify the logic for the aspect ratio. Following is what we did so as to obtain the aspect Ratio of 1:1 for ‘avatar’ images only. The default aspect ratio for all other images is 2:1.

onVisible() {
let viewPort = {};
let factor = 150;
const aspectRatio = this.getWithDefault('aspectRatio', [2, 1]);
viewPort.width = aspectRatio[0] * factor;
viewPort.height = aspectRatio[1] * factor;
viewPort.type = 'square';
this.$('.content').css('height', '300px');
this.$('img').croppie({
customClass : 'croppie',
viewport : viewPort,
boundary : {
height: 250
}
});
},

As shown above, we have kept a multiplying factor which is fixed. According to the aspect ratio specified, we calculate and set the width and height in the viewport object.

Thus, following is the thing (Aspect Ratio 1:1 ) we achieved for the ‘avatar’ images:


Resources
Official Ember JS guide: https://guides.emberjs.com/v1.10.0/templates/actions/

Blog on making our own modals: http://ember.guru/2014/master-your-modals-in-ember-js

Source code: https://github.com/sumedh123/open-event-frontend/tree/system-images

Continue ReadingMaintaining Aspect Ratio of Images while Uploading in Open Event Frontend

Uploading images to Dropbox from the Phimpme App

The Phimpme Android application along with the camera, gallery and image editing features offers the option to upload images to many social media and cloud storages without having to install several other applications. As we can see from the screenshot below, Phimpme application contains a user-friendly accounts screen to connect to the accounts using a username and password so that we can upload photos from the share screen to that particular account later on.

One such famous cloud storage is the Dropbox and in this tutorial, I am explaining how I implemented the account authentication and image uploading feature to Dropbox in the Phimpme Android application.

Step 1

The first thing we need to do is to create an application in the Dropbox application console and to get the app key and the API secret key which we will require later on for the authentication purposes. To create an application on the Dropbox application console page,

  1. Go to this link. It will open a page as depicted in the screenshot below:
  2. Now click on the Dropbox API option.
  3. Click on App folder – access to a single folder created specifically for your app.
  4. Write the name of your application and press the create app button.

After this, we will be redirected to the page which will contain all the keys required to authenticate and upload photos.

Step 2

After getting the keys, the next thing we need to do is install the Dropbox SDK. To do this:

  1. Download the Android SDK from this link and extract it.
  2. Copy the dropbox-android-sdk-1.6.3.jar and json_simple-1.1.jar file to the libs folder.
  3. Click on the add as library button by right clicking on the jar files added.
  4. Copy the below-mentioned code in the AndroidManifest.xml file which defines the dropbox login activity within a new activity tag.
android:name="com.dropbox.client2.android.AuthActivity"
android:launchMode="singleTask"
android:theme="@android:style/Theme.Translucent.NoTitleBar"
android:configChanges="orientation|keyboard">
<intent-filter>
     <!-- Change this to be db- followed by your app key -->
         <data android:scheme="db-app_key" />
         <action android:name="android.intent.action.VIEW" />
         <category android:name="android.intent.category.BROWSABLE"/>
         <category android:name="android.intent.category.DEFAULT" />
</intent-filter>

In the 7th line of the code snippet, replace the app_key with the key you received from following the step 1.

Step 3

After setting up everything, we need to extract the access token for the user to upload the photos in that particular account. To do this, we can make use of the below code snippet, which uses the dropbox SDK we installed in step 2 to create an object named mDBApi and initialises it to authenticate the user.

private DropboxAPI<AndroidAuthSession> mDBApi;AppKeyPair appKeys = new AppKeyPair(APP_KEY, APP_SECRET);
AndroidAuthSession session = new AndroidAuthSession(appKeys);
mDBApi = new DropboxAPI<AndroidAuthSession>(session);

After initialisation in the onCreate method of the activity, we can authenticate the user using the following line of code.

mDBApi.getSession().startOAuth2Authentication(MyActivity.this);

This will open up a window where the user will be prompted to login to their dropbox account. After the login is finished, we will be taken back to the activity which made the authentication call, so in the onResume method, we need to get the access token of the user which will be used later on to upload the images using the following code snippet provided below:

mDBApi.getSession().finishAuthentication();
String accessToken = mDBApi.getSession().getOAuth2AccessToken();

After we have stored the access token, we can upload the selected image to the Dropbox using the following line of code.

File file = new File("working-draft.jpg");
FileInputStream inputStream = new FileInputStream(file);
Entry response = mDBApi.putFile("/magnum-opus.jpg", inputStream,
                              file.length(), null, null);

For more information on uploading and retrieving data from the Dropbox account, you can go to the dropbox developer guide and for working example refer to the Phimpme Android repository in the resources below.

Resources

  1. Phimpme Repo : Phimpme Android github repository.
  2. Dropbox official documentation : https://www.dropbox.com/developers-v1/core/start/android
  3. Dropbox application console : https://www.dropbox.com/developers/apps
  4. Stackoverflow example to upload image on Dropbox : https://stackoverflow.com/questions/10827371/upload-photo-to-dropbox-by-android
Continue ReadingUploading images to Dropbox from the Phimpme App

Using Vector Images in SUSI Android

SUSI is an artificial intelligence for interactive chat bots. For making it more user friendly and interactive we add a lot of images in the form of drawable resources in the SUSI Android App (https://github.com/fossasia/susi_android). Most of these drawables are in the form of PNGs. There are certain problems associated with the use of PNG images.

  1. PNGs cannot be scaled without losing quality. Due to which for the same PNG image we have to include separate images of varied quality. Otherwise the image will become blur.
  2. PNGs tends to take large disk space which can be easily reduced with the use of vector images.
  3. PNGs have fixed color and dimensions which cannot be changed.

Due to the above shortcomings of PNG images we decided to use vector drawable images instead of them.

Advantages associated with Vector images

  1. They can be scaled to any size without the loss in quality. Thus we need to include only a single image in the app and not of varied qualities.
  2. They are very small in size as compared to PNGs.
  3. They can be easily modified programmatically in XML file unlike PNGs.

Using Vector Images in Android Studio

Android Studio provide tools by which we can directly import vector drawables in the project. To import Vector images go to File>New>Vector Assets in studio.

From here we can choose the icon we want to include in our project and click OK. The icon will appear in the drawables directory and can be used anywhere in the projects.

Implementation in SUSI Android

In Susi Android we have used various vector images such as arrows, pointer and even the logo of the app. Here below is the logo of SUSI.

This is actually a vector image below we will see the code required to get this logo as the output.

<vector android:height="50dp" android:viewportHeight="279.37604"

  android:viewportWidth="1365.2" android:width="220dp" xmlns:android="http://schemas.android.com/apk/res/android">

<path android:fillColor="#ffffff"

      android:pathData="M127.5,7.7c-26.8,3.3 -54.2,16.8 -75.9,37.4 -11.8,11.1 -20.4,22.9 -28.1,38.4 -8.9,17.8 -12.8,32.1 -13.7,51l-0.3,6 39,0 39,0 0.3,-4c0.7,-12.1 6.8,-24.1 17.2,-34.5 8.5,-8.4 16.2,-13.4 25.9,-16.7l6.6,-2.2 81.3,-0.1 81.2,0 0,-38 0,-38 -84.7,0.1c-46.7,0.1 -86.1,0.4 -87.8,0.6z" android:strokeColor="#00000000"/>

  <path android:fillColor="#ffffff"

      android:pathData="M319.2,11.3l-4.3,4.3 0.3,103c0.4,113.2 0,105.9 6.4,118.6 10.8,21.3 35.1,41.9 56.2,47.3 8.5,2.3 99.1,2.2 107.7,0 18.7,-4.9 39.2,-20.7 51.5,-39.7 3.4,-5.1 7.1,-12.2 8.3,-15.8l2.2,-6.5 0.5,-103.3 0.5,-103.3 -4.5,-4.4 -4.6,-4.5 -31.5,0 -31.5,0 -4.7,4.8 -4.7,4.8 0,93 0,93 -3.3,3.2 -3.3,3.2 -29,0 -29,0 -2.6,-2.7 -2.7,-2.8 -0.7,-94.2 -0.7,-94.2 -4.3,-4 -4.2,-4.1 -31.9,0 -31.9,0 -4.2,4.3z" android:strokeColor="#00000000"/>

  <path android:fillColor="#ffffff"

      android:pathData="M680,7.6c-31.6,4.8 -56.1,17.3 -79,40.3 -23.2,23.3 -36.3,50.5 -38.9,80.9 -0.5,5.9 -0.7,11 -0.4,11.4 0.2,0.5 17.7,0.8 38.8,0.8l38.4,0 0.6,-4.8c3.2,-23.2 21.3,-44.1 44.7,-51.3 5.6,-1.8 10.6,-1.9 86.6,-1.9l80.7,0 -0.3,-38 -0.2,-38 -84.3,0.1c-46.3,0.1 -85.3,0.3 -86.7,0.5z" android:strokeColor="#00000000"/>

  <path android:fillColor="#ffffff"

      android:pathData="M869.1,13.4l-4.1,6.4 0,126.4 0,126.3 4.8,6.7 4.7,6.8 31.6,0 31.6,0 4.7,-7 4.6,-7 0,-125.7 0,-125.8 -4.7,-6.7 -4.8,-6.8 -32.1,0 -32.1,0 -4.2,6.4z" android:strokeColor="#00000000"/>

  <path android:fillColor="#ffffff"

      android:pathData="M222.5,152.2c-0.2,0.7 -0.9,4.2 -1.5,7.7 -3.4,19.5 -19.4,38 -40,46.4l-5.5,2.2 -83,0.5 -83,0.5 -0.3,37.8 -0.2,37.8 89.2,-0.3 89.3,-0.3 9.6,-2.7c57.7,-16.3 100.1,-67.4 102.1,-123.3l0.3,-7 -38.3,-0.3c-30.1,-0.2 -38.3,0 -38.7,1z" android:strokeColor="#00000000"/>

  <path android:fillColor="#ffffff"

      android:pathData="M774.5,152.2c-0.2,0.7 -0.9,4.1 -1.5,7.5 -3.3,19.2 -18.8,37.3 -39.4,46.2l-6.1,2.6 -83,0.5 -83,0.5 -0.3,37.7 -0.2,37.8 85.9,0c93.7,0 91.4,0.1 110.1,-5.9 26.4,-8.5 53.3,-28.4 69.8,-51.7 15.2,-21.3 25.1,-50.1 24,-69.9l-0.3,-6 -37.8,-0.3c-29.7,-0.2 -37.8,0 -38.2,1z" android:strokeColor="#00000000"/>

  <path android:fillColor="#ffffff" android:pathData="m1146.99,0 l-1.38,1.19c-0.76,0.66 -1.85,1.61 -2.43,2.13 -0.58,0.51 -1.75,1.54 -2.61,2.28 -1.52,1.31 -1.58,1.41 -2.4,3.53 -0.46,1.2 -0.92,2.37 -1.01,2.59 -30.55,82.93 -61.62,165.72 -96.03,259.63 0,0.08 1.61,1.88 3.57,3.98l3.57,3.84 33.47,-0.04 33.47,-0.04c12.28,-35.6 25.13,-72.47 37.4,-107.27 0.06,-0.25 0.28,-0.64 0.5,-0.88 0.37,-0.41 0.61,-0.43 4.2,-0.43 3.63,0 3.83,0.02"/>

  <path android:fillColor="#ffffff" android:pathData="m967.09,279.18c-2.48,-3.74 -4.97,-7.04 -8.09,-11.76l0.09,-43.92c3.34,-5.26 5.31,-6.73 8.42,-11.51 17.91,0.02 34.3,0.26 50.88,0.26 3.21,4.88 4.09,6.72 7.81,12.66 -0.05,13.98 0.1,27.96 -0.12,41.94 -2.9,4.2 -4.27,7.42 -7.78,12.18 -18.81,-0.04 -35.43,0.2 -51.21,0.15z"/>

  <path android:fillColor="#ffffff"

      android:pathData="m1287.3,6.59 l-4.1,6.4 0,126.4 0,126.3 4.8,6.7 4.7,6.8 31.6,0 31.6,0 4.7,-7 4.6,-7 0,-125.7 0,-125.8 -4.7,-6.7 -4.8,-6.8 -32.1,0 -32.1,0 -4.2,6.4z" android:strokeColor="#00000000"/>


</vector>

In this code we can easily change the color and minor details for the logo which could have been not possible if the logo was in PNG format. Also we don’t need multiple logo images of varied qualities as it can be scaled without decreasing quality.

Resources

Continue ReadingUsing Vector Images in SUSI Android