Updating the UI of the generator form in Open Event Webapp

  • Add a pop-up menu bar similar to the one shown in Google/Susper6be8d972-72bc-4e12-b27a-219e46608cfc.png
  • Add a version deployment link at the bottom of the page like the one shown in staging.loklak.org.

29072668-b1db-4ef5-8865-c71ef2438433.png


  • Implementing the top-bar and the pop-up menu bar

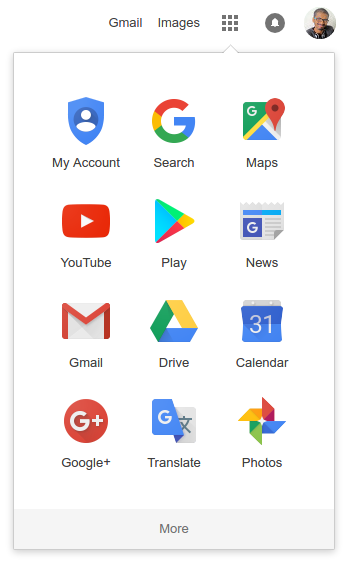
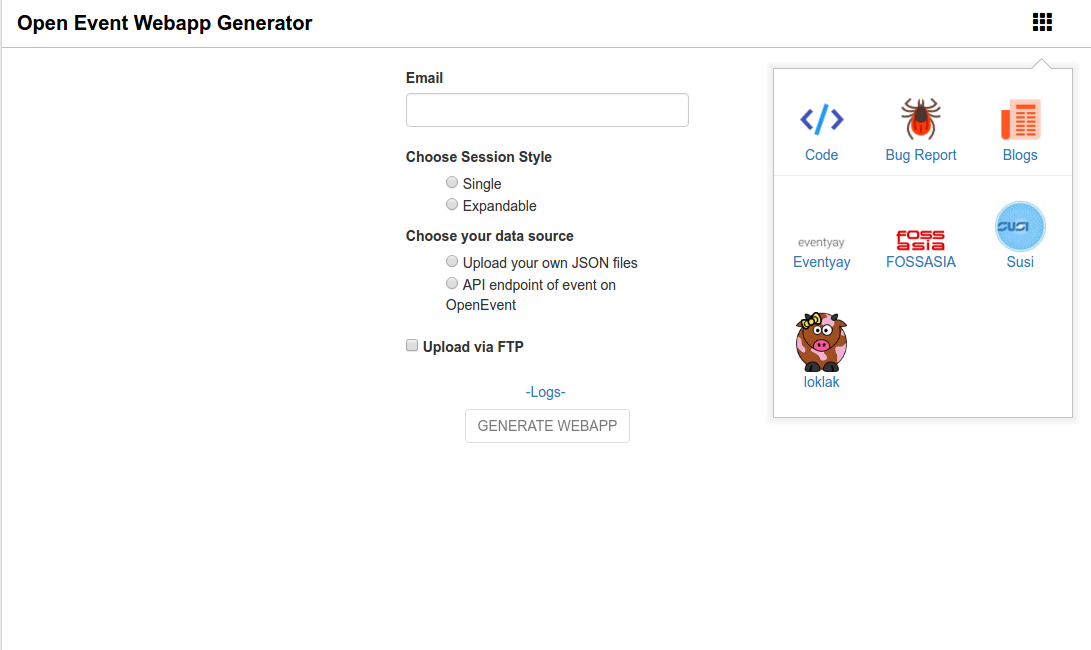
The first task was to introduce a top-bar and a pop-up menu bar in Generator. The top-bar would contain the text Open Event Webapp Generator and an icon button on the right side of it which would show a pop-up menu. The pop-up menu would contain a number of icons which would link to different pages like FOSSASIA blogs and it’s official website, different projects like loklak, SUSI and Eventyay and also to the Webapp Project Readme and issues page.

Creating a top navbar is easy but the pop-up menu is a comparatively tougher. The first step was to gather the gather the small images of the different services. Since this feature had already been implemented in Susper project, we just copied all the icon images from there and copy it into a folder named icons in the open event webapp. Then we create a custom menu div which would hold all the different icons and present it an aesthetic manner. Write the HTML code for the menu and then CSS to decorate and position it! Also, we have to create a click event handler on the pop-up menu button for toggling the menu on and off.

Here is an excerpt of the code. The whole file can be seen here

<div class="custom-navbar">
 <a href='.' class="custom-navtitle">
   <strong>Open Event Webapp Generator</strong> <!-- Navbar Title -->
 </a>
 <div class="custom-menubutton">
   <i class="glyphicon glyphicon-th"></i> <!-- Pop-up Menu button -->
 </div>
 <div class="custom-menu"> <!-- Custom pop-up menu containing different links -->
   <div class="custom-menu-item">
     <a class="custom-icon" href="http://github.com/fossasia/open-event-webapp" target="_blank"><img src="./icons/code.png">
       <p class="custom-title">Code</p></a>
   </div>
   <!-- Code for other links to different projects-->
 </div>
</div>

Here is a screenshot of how the top-bar and the pop-up menu looks!

bb82ba88-4317-46b0-91ec-514499c5cfde.png

  • Adding version deployment info to the bottom

The next task was to add a footer to the page which would contain the version deployment info. The user can click on that link and we can then be taken to the latest version of the code which is currently deployed.

To show the version info, we make use of the Github API. We need to get the hash of the latest commit made on the development branch. We send an API request to the Github requesting for the latest hash and then dynamically add the info and the link received to the footer. The user can then click on that link and will be taken to the latest deployment page of the webapp!

var apiUrl = "https://api.github.com/repos/fossasia/open-event-webapp/git/refs/heads/development";
$.ajax({url: apiUrl, success: function(result){
 var version = result['object']['sha'];
 var versionLink = 'https://github.com/fossasia/open-event-webapp/tree/' + version;
 var deployLink = $('#deploy-link');
 deployLink.attr('href', versionLink);
 deployLink.html(version);
}});

This is how the footer looks after the API Response

44385ad8-e094-490b-8575-a47932aa75c5.png

References:

Continue ReadingUpdating the UI of the generator form in Open Event Webapp

Display a List of Registered Repositories in User’s Dashboard

Yaydoc, our automatic documentation generation and deployment project was recently introduced with the dashboard for its registered users. Introducing a dashboard to Yaydoc enabled us to include a lot of new functionalities and processes associated with users and their registered repositories.

One of the main reasons of creating a dashboard for registered users was to enable them to access and edit configurations of the repositories they registered to Yaydoc. Hence, there was a need to display all of the registered repositories to users. These repositories include the public repositories owned by the users and organizations’ repositories the user has admin access to.

The organizations and users are retrieved separately in parallel using async.js. Async is a utility module which provides straight-forward, powerful functions for working with asynchronous JavaScript. The required functionality is achieved using async.parallel() method which runs the tasks of a collection of functions in parallel, without waiting until the previous function has completed.

async.parallel({
  organizations: function (callback) {
    github.retrieveOrganizations(user.token, function (error, organizations)) {
      callback(null, organizations);
    }
  },
  ownedRepositories: function (callback) {
    Repository.getRepositoriesByOwner(user.username, function (err, repositories)) {
      callback(null, repositories);
    }
  }, function (err, results) {
    res.render(‘dashboard’, {
      title: ‘Dashboard’,
      organizations: results.organizations,
      ownedRepositories: results.ownedRepositories
    });
  }
});

In order to show the organizations’ registered repositories  the github.retrieveOrganizations() function is updated, retrieving registered repositories from Yaydoc’s database. To perform the operation, we use async’s waterfall method. This method runs the tasks in series, passing the result of each function to the next function in that array. This function is needed since we are retrieving the organizations first and then for each organization, we retrieve all the repositories for each organization. To access each organization asynchronously, we use the async.forEachOf() method.

/**
 * Retrieve a list of organization the user has access to
 * Along with the organizations, also retrieve the registered repositories
 * @param accessToken: Access token of the user
 * @param callback
 */
exports.retrieveOrganizations = function (accessToken, callback) {
  async.waterfall([
    function (callback) {
      // Retrieve organizations
      ....
      organizations.push({
        id: organization.id,
        name: organization.login,
        avatar: organization.avatar_url
      });
      return callback(null, organizations);
    },
    function (organizations, callback) {
      async.forEachOf(organizations, function (value, key, callback)) {
        Repository.getRepositoriesByOwner(value.name, function (error, repositories) {
          value.repositories = repositories;
          update.push(value);
          callback()
        });
      }, function (err) {
        callback(null, update);
      }
    }
  ], function (error, result) {
    callback(error, result);
  });
};

Showing the list of repositories, we now plan to make these repositories configurable. Some of these configurations may include deleting the repository and enabling or disabling it from the build process.

Resources

  1. Async utilities for node and browser – https://caolan.github.io/async/
  2. Github’s organization API https://developer.github.com/v3/orgs/
Continue ReadingDisplay a List of Registered Repositories in User’s Dashboard

Registering Organizations’ Repositories for Continuous Integration with Yaydoc

Among various features implemented in Yaydoc was the introduction of a modal in the Web Interface used for Continuous Deployment. The modal was used to register user’s repositories to Yaydoc. All the registered repositories then had their documentation updated continuously at each commit made to the repository. This functionality is achieved using Github Webhooks.

The implementation was able to perform the continuous deployment successfully. However, there was a limitation that only the public repositories owned by a user could be registered. Repositories owned by some organisations, which the user either owned or had admin access to couldn’t be registered to Yaydoc.

In order to perform this enhancement, a select tag was added which contains all the organizations the user have authorized Yaydoc to access. These organizations were received from Github’s Organization API using the user’s access token.

/**
 * Retrieve a list of organization the user has access to
 * @param accessToken: Access Token of the user
 * @param callback: Returning the list of organizations
 */
exports.retrieveOrgs = function (accessToken, callback) {
  request({
    url: ‘https://api.github.com/user/orgs’,
    headers: {
      ‘User-Agent’: ‘request’,
      ‘Authorization’: ‘token ’ + accessToken
    }
  }, function (error, response, body) {
    var organizations = [];
    var bodyJSON = JSON.parse(body);
    bodyJSON.forEach(function (organization) {
      organizations.push(organization.login);
    });
    return callback(organizations);
  });
};

On selecting a particular organization from the select tag, the list of repositories is updated. The user then inputs a query in a search input which on submitting shows a list of repositories that matches the tag. An AJAX get request is sent to Github’s Search API in order to retrieve all the repositories matching the keyword.

$(function () {
  ....
$.get(`https://api.github.com/search/repositories?q=user:${username}+fork:true+${searchBarInput.val()}`, function (result) {
    ....
    result.items.forEach(function (repository) {
      options +=<option>+ repo.full_name +</option>’;
    });
    ....
  });
  ....
});

The selected repository is then submitted to the backend where the repository is registered in Yaydoc’s database and a hook is setup to Yaydoc’s CI, as it was happening with user’s repositories. After a successful registration, every commit on the user’s or organization’s repository sends a webhook on receiving which, Yaydoc performs the documentation generation and deployment process.

Resources:

  1. Github’s Organization API: https://developer.github.com/v3/orgs/
  2. Github’s Search API: https://developer.github.com/v3/search/
  3. Simplified HTTP Request Client: https://github.com/request/request
Continue ReadingRegistering Organizations’ Repositories for Continuous Integration with Yaydoc

Advanced configurations in Yaydoc’s Web UI

Yaydoc’s User Interface consists of a form with three required fields; the user’s email address, git repository’s URL, and a theme for the generated website. Specific values of these fields are the minimum requirement to generate documentation for a project. There are certain other configuration variables for whom we assumed default values. Among these, we assumed `docs/` directory or the directory specified in the `yaydoc.yml` configuration file as the default path for the documentation. Also, `Default Branch` is assumed as the branch to generate documentation website. However, this cannot guarantee the generation of docs for every other project. These configurations can have different values based on a project.

Thus, there was a need to include certain input values for advanced configuration. The addition of these configurations in the UI doesn’t compel the user to specify them. In our attempt to improve user’s experience, we show the default values to the user when they are specifying custom values for these configurations.

If the user doesn’t specify a value for the repository’s branch, a default value is retrieved from Github’s Repository Components API, taking repository’s URL from the required input as the input URL.

/**
 * Setting the branch name with `default_branch` attriburte from
 * Github’s Repository Components API
 * @param gitUrl: URL of the github repository
 */
setDefaultBranchName: function (gitUrl) {
  var owner = gitUrl.split(“/”)[3] || ‘’;
  var repository = gitUrl.split(“/”)[4] || ‘’).split(‘.’)[0] || ‘’;
  $.get(‘https://api.github.com/repos/’ + owner + ‘/’ + repository, {
    headers: {“User-Agent”: “Yaydoc”}
  }).complete(function (data) {
    $(“#target_branch”).val(data.responseJSON.default_branch);
  });
}

There are certain cases in which the design of the Web User Interface could have been confusing. Since we are displaying all the advanced configurations at once, it could’ve appeared to the users that they are specifying empty values for the other. Thus to handle this, inputs were enabled on toggle when a checkbox beside them was checked. This was achieved making following changes in the front end of the code.

/**
 * Toggle editing of Branch Name input
 */
$(“#btnEditBranch”).click(function () {
  styles.toggleEditing(“target_branch”);
  ....
  ....
});

/**
 * Toggle Enabling/Disabling an input tag
 * @param id: `id` attribute of input tag
 */
toggleEditing: function (id) {
  const input = $(‘#’ + id);
  if (input.attr(‘disabled’)) {
    input.removeAttr(‘disabled’);
    $(‘#checkbox_’ + id).removeClass(‘glyphicon-unchecked’).addClass(‘glyphicon-check’);
  } else {
    input.attr(‘disabled’, ‘disabled’);
    $(‘checkbox_’ + id).removeClass(‘glyphicon-check’).addClass(‘glyphicon-unchecked’);
  }
}

Introducing advanced configurations to the User Interface has opened the possibility for even more projects to generate and deploy docs with much lesser constraints. One of our main aim for this project is to have a fairly simple UI and UX and we hope to bring further updated to achieve that.

Resources:

  1. Github’s Repository API: https://developer.github.com/v3/repos/
  2. jQuery’s AJAX Requests: https://api.jquery.com/jquery.get
Continue ReadingAdvanced configurations in Yaydoc’s Web UI