Add Navigation Architecture Component in Eventyay Attendee

The eventyay attendee is an android app which allows users to discover events happening around the world using the Open Event Platform. It consumes the APIs of the open event server to get a list of available events and can get detailed information about them.

The project earlier used Fragment transition to handle fragment with multiple activities. Multiple activities are used because it is very complex to handle all fragment with a single activity using fragment transition. If we try to make a single activity application with fragment transition, it contains a lot of bugs with the back stack.

But we can use Navigation Architecture Component to efficiently make Eventyay attendee a single activity. It is the perfect technology to handle all fragments and authentication in a single activity with no bigs or back stack.

  • Issues with fragment transition and multiple activities
  • Why navigation architecture component?
  • Process for using Navigation Architecture Component in the application
  • Animation of fragments with Navigation Architecture Component
  • Conclusion
  • Resources 

Let’s analyze every step in detail.

Issues with fragment transition and multiple activities

  1. Need to handle back stack on each Fragment Transition
  2. Hard to debug
  3. This can leave your app in an unknown state when receiving multiple click events or during configuration changes.
  4. Fragment instances can be created
  5. Multiple activities make the app slower due to using multiple intents

Why navigation architecture component?

  1. Handling Fragment transactions
  1. Handling Up and Back actions correctly by default
  2. Providing standardized resources for animations and transitions
  3. Treating deep linking as a first-class operation
  4. Including Navigation UI patterns, such as navigation drawers and bottom navigation, with minimal additional work
  5. Providing type safety when passing information while navigating
  6. Visualizing and editing navigation graphs with Android Studio’s Navigation Editor

Steps involved in using Navigation Architecture Component in the application

Adding dependencies to build.gradle:

//Navigation
    implementation 'android.arch.navigation:navigation-fragment:1.0.0-alpha09'
    implementation 'android.arch.navigation:navigation-ui:1.0.0-alpha09'

Create new resources file for navigation graph under res -> navigation:

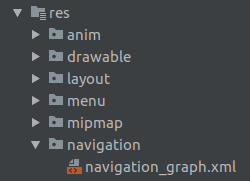
Add fragments in navigation_graph.xml with navigation editor. Let’s take one example:

<?xml version="1.0" encoding="utf-8"?>
<navigation xmlns:android="http://schemas.android.com/apk/res/android"
    xmlns:app="http://schemas.android.com/apk/res-auto"   android:id="@+id/mobile_navigation"
    app:startDestination="@id/eventsFragment">

    <fragment
        android:id="@+id/eventsFragment"
        android:name="org.fossasia.openevent.general.event.EventsFragment"
        android:label="EventsFragment" />
</navigation>

Here app:startDestination attribute is for the very first fragment after which app exit on back pressed.

Replace Frame layout with a fragment in the main activity layout file. And add the above navigation graph to it: 

<fragment
            android:id="@+id/frameContainer"
            android:name="androidx.navigation.fragment.NavHostFragment"
            android:layout_width="match_parent"
            android:layout_height="0dp"
            android:background="@android:color/white"
            android:layout_weight="1"
            app:defaultNavHost="true"
            app:navGraph="@navigation/navigation_graph"
            app:layout_behavior="@string/appbar_scrolling_view_behavior" />

Now, this fragment layout is directly connected with all fragments added in the navigation graph. We only need to navigate the fragment.

Set bottom navigation drawer with the navigation architecture component – 

First, we need to make the ids of menu component same as the ids of fragments in the navigation graph. Bottom navigation menu:

<?xml version="1.0" encoding="utf-8"?>
<menu xmlns:android="http://schemas.android.com/apk/res/android">
    <item
        android:id="@+id/eventsFragment"
        android:icon="@drawable/ic_baseline_event_24px"
        android:title="@string/events" />
    <item
        android:id="@+id/searchFragment"
        android:icon="@drawable/ic_search_grey_24dp"
        android:title="@string/search" />
    <item
        android:id="@+id/favoriteFragment"
        android:icon="@drawable/ic_baseline_favorite_border_24px"
        android:title="@string/likes" />
    <item
        android:id="@+id/orderUnderUserFragment"
        android:icon="@drawable/ic_baseline_ticket_24dp"
        android:title="@string/tickets" />
    <item
        android:id="@+id/profileFragment"
        android:icon="@drawable/ic_baseline_account_circle_24px"
        android:title="@string/profile" />
</menu>

Setup the bottom navigation menu with navigation controller:

// import require libraries
import androidx.navigation.fragment.NavHostFragment
import androidx.navigation.ui.NavigationUI.setupWithNavController

// Set nav controller with host fragment using Kotlin smart cast
val hostFragment = supportFragmentManager.findFragmentById(R.id.frameContainer)
 if (hostFragment is NavHostFragment)
     navController = hostFragment.navController
setupWithNavController(navigationMenu, navController)

Navigate fragment for bottom naviagtion whenever required:

navController.navigate(R.id.munuItemId)

Navigate any fragment which is added in navigation graph with arguments:

import androidx.navigation.Navigation
findNavController(rootView).navigate(R.id.fragmentId,  arguments)

Add Animations for fragments using navigation architecture component

Add require animations in utils as navigation options:

fun getAnimFade(): NavOptions {
        val builder = NavOptions.Builder()
        builder.setEnterAnim(R.anim.fade_in)
        builder.setExitAnim(R.anim.fade_out)
        builder.setPopEnterAnim(R.anim.slide_in_left)
        builder.setPopExitAnim(R.anim.slide_out_right)
        return builder.build()
    }

    fun getAnimSlide(): NavOptions {
        val builder = NavOptions.Builder()
        builder.setEnterAnim(R.anim.slide_in_right)
        builder.setExitAnim(R.anim.slide_out_left)
        builder.setPopEnterAnim(R.anim.slide_in_left)
        builder.setPopExitAnim(R.anim.slide_out_right)
        return builder.build()
    }

Resource files for animations (fade_in, fade_out, slide_in_right, slide_out_left, slide_in_left, slide_out_right) are added in res -> anim.

Now add nav options whenever navigate to fragments:

import androidx.navigation.Navigation
import org.fossasia.openevent.general.utils.Utils
findNavController(rootView).navigate(R.id.fragmentId,  arguments, getAnimFade())

GIF

In a Nutshell

Single activity application is the future of Android and many apps are shifting towards single activity Architecture from multiple activity ones. This brings in ease to use and smooth user experience. In shifting to a single activity, we have used Navigation Architecture Component which is much more efficient than Fragment transition which has many bugs associated with it while converting the app to a single activity.

Resources

  1. Documentation for navigation architecture component: https://developer.android.com/topic/libraries/architecture/navigation/
  2. Google navigation codelab: https://codelabs.developers.google.com/codelabs/android-navigation/

Tags

Eventyay, open-event, Navigation, Fragment, FOSSASIA, GSoC, Android, Kotlin

Continue ReadingAdd Navigation Architecture Component in Eventyay Attendee

Saving Current State when Redirected to Login Fragment in Open Event Android

Some features in Open Event Android requires the user to be logged in, for example, buying tickets or viewing bought tickets. If the user selects to buy tickets for an event and he/she is not logged in, the user will be redirected to login fragment and on successful login, the user will return to the last state. This blog post will help you understand how its done in Open Event Android we will be taking the example of buying tickets without logged in.

To give you an overview once a user selects to buy tickets he is taken to a Tickets Fragment which contains different tickets and allows the user to pick their respective quantity. After selecting the right quantities the user can select on the register and he/she will be taken to Attendee Fragment which requires the user to be logged in, if not he will be redirected to login fragment and on successful login he can continue from attendee fragment without losing the selected tickets and their quantity information

To do this when redirecting from Attendee Fragment to the AuthActivity we modify the redirect method and send additional information with the intent such as even id and list of ticket id and quantity selected by the user. Following is how it can be done.

val intent = Intent(activity, AuthActivity::class.java)
       val bundle = Bundle()
       bundle.putLong(EVENT_ID, id.toLong())
       if (ticketIdAndQty != null)
           bundle.putSerializable(TICKET_ID_AND_QTY, ticketIdAndQty as ArrayList)
intent.putExtras(bundle)
 startActivity(intent)

Now that we have sent additional information with intent we will also have to modify the login fragment to use this information.

The above-discussed method will redirect the user to AuthActivity which handles all the authentication part. The user can either select to log in with an existing account or he may sign up with a new account. For existing accounts login fragment is shown and similarly for new sign up sign up fragment is shown.

The AuthActivity simply takes the bundle it received using intent.getExtras and passes the same to the fragment it is rendering. The load fragment function in Auth Activity looks like below. Whatever fragment is opened (signup/login) it passes the bundle that AuthActivity received as arguments to the fragments. This is done by setting fragment.arguments = bundle

private fun loadFragment(fragment: Fragment) {
       if (bundle != null)
           fragment.arguments = bundle
       supportFragmentManager.beginTransaction()
               .replace(R.id.frameContainerAuth, fragment)
               .commit()

Now we have all the bundle information in our login fragment next what we want is whenever login completes successfully send the user back to Attendee Fragment along with the event and ticket id and selected quantity information.

The following snippet of code takes the user to MainActivity whenever user information is received which means the user has successfully logged in

 loginActivityViewModel.user.observe(this, Observer {
           redirectToMain(bundle)
       })

redirectToMain accepts bundle as a parameter this bundle contains the ticket id and quantity list and the event id this is what we received from AuthActivity.

 private fun redirectToMain(bundle: Bundle?) {
       val intent = Intent(activity, MainActivity::class.java)
       if (((bundle != null) && !id.equals(-1)) && (ticketIdAndQty != null)) {
           intent.putExtra(LAUNCH_ATTENDEE, true)
           intent.putExtras(bundle)
       }
       startActivity(intent)
       activity?.overridePendingTransition(R.anim.slide_in_left, R.anim.slide_out_right)
       activity?.finish()
   }

The above code snippet shows the redirectToMain function in Login Fragment, this method opens the Main Activity and passes the bundle as a parameter to it along with a trigger LAUNCH_ATTENDEE set. This trigger is responsible for telling MainAcitivty that the login fragment was actually a redirect from attendee fragment and MainActivity uses the bundle information to recreate the Attendee Fragment screen.

The following code handles this part in Main Activity.

if (bundle != null && bundle.getBoolean(LAUNCH_ATTENDEE)) {
           val fragment = AttendeeFragment()
           fragment.arguments = bundle
           loadFragment(fragment)
           openEventsFragment = false
       }

If the bundle information is available and the Launch attendee trigger is set AttendeeFragment is created with arguments as the bundle (fragment.arguments = bundle).

Resources

Continue ReadingSaving Current State when Redirected to Login Fragment in Open Event Android

Displaying a Comments dialogfragment on a Button Click from the Feed Adapter in the Open Event Android App

Developing the live feed of the event page from Facebook for the Open Event Android App, there were questions how best to display the comments in the feed.  A dialog fragment over the feeds on the click of a button was the most suitable solution. Now the problem was, a dialogfragment can only be called from an app component (eg- fragment or an activity). Therefore, the only challenge which remained was to call the dialogfragment from the adapter over the feed fragment with the corresponding comments of the particular post on a button click.

What is a dialogfragment?

A dialogfragment displays a dialog window, floating on top of its activity’s window. This fragment contains a Dialog object, which it displays as appropriate based on the fragment’s state. Control of the dialog (deciding when to show, hide, dismiss it) should be done through the API here, not with direct calls on the dialog (Developer.Android.com).

Solution

The solution which worked on was to define a adapter callback interface with a onMethodCallback method in the feed adapter class itself with the list of comment items fetched at runtime on the button click of a particular post. The interface had to be implemented by the main activity which housed the feed fragment that would be creating the comments dialogfragment with the passed list of comments.

Implementation

Define an interface adapterCallback with the method onMethodCallback parameterized by the list of comment items in your adapter class.

public interface AdapterCallback {
   void onMethodCallback(List<CommentItem> commentItems);
}


Create a constructor of the adapter with the adapterCallback as a parameter. Do not forget to surround it with a try/catch.

public FeedAdapter(Context context, AdapterCallback adapterCallback, List<FeedItem> feedItems) {
     this.mAdapterCallback = adapterCallback;
}


On the click of the comments button, call onMethodCallback method with the corresponding comment items of a particular feed.

getComments.setOnClickListener(v -> {
   if(commentItems.size()!=0)
       mAdapterCallback.onMethodCallback(commentItems);
});


Finally implement the interface in the activity to display the comments dialog fragment populated with the corresponding comments of a feed post. Pass the comments with the help of arraylist through the bundle.

@Override
public void onMethodCallback(List<CommentItem> commentItems) {
   CommentsDialogFragment newFragment = new CommentsDialogFragment();
   Bundle bundle = new Bundle();
   bundle.putParcelableArrayList(ConstantStrings.FACEBOOK_COMMENTS, new ArrayList<>(commentItems));
   newFragment.setArguments(bundle);
   newFragment.show(fragmentManager, "Comments");
}


Conclusion

The comments generated with each feed post in the open event android app does complement the feed well. The pagination is something which is an option in the comments and the feed both however that is something for some other time. Until then, keep coding!

Resources

Continue ReadingDisplaying a Comments dialogfragment on a Button Click from the Feed Adapter in the Open Event Android App