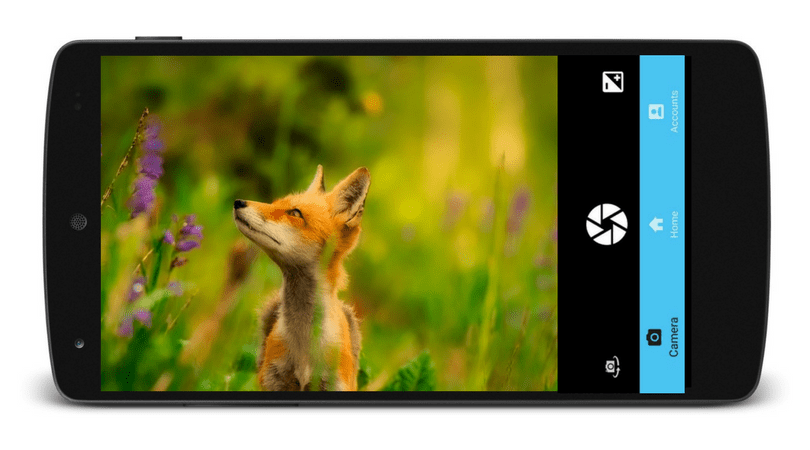
Camera Controls Using Volume Buttons In The Phimpme Application

The Phimpme Android application has a camera, Gallery section, edit image section and also the inbuilt sharing option. In spite of having all of the above features, the Phimpme application doesn’t compromise on the quality and functions of each of the sections. For instance, we can control the camera fully with the help of just the volume buttons. For this, we have provided an option in the settings of the application to change and select the behaviour of the volume buttons according to the users choice. In this post, I will be discussing how we have achieved this functionality.

Step 1

First, we have to display an ArrayList of options using the ListPreference in the settings. The user can perform the following functions using the volume keys.

  1. Take Photo
  2. Focus
  3. Zoom in/out
  4. Change Exposure Level
  5. Switch Auto Level on/off

There are also two other option to change device volume and to do nothing in case the user wants the default behaviour.

The above options in the settings can be provided using the following lines of code.

<ListPreference
   android:defaultValue="volume_take_photo"
   android:entries="@array/preference_volume_keys_entries"
   android:entryValues="@array/preference_volume_keys_values"
   android:key="preference_volume_keys"
   android:summary="@string/preference_volume_keys_summary"
   android:title="@string/preference_volume_keys" />

Step 2

Now as the user selects a particular option from the ListPreference, the value in the SharedPreference associated with a particular key value gets updated. After this, we have to perform the particular activity as soon as the volume button is pressed. For this, we have to Override the onKeyDown() function of the KeyEvent.Callback class in Android. This function takes in the Integer keycode and the KeyEvent as the parameters.

@Override
public boolean onKeyDown(int keyCode, KeyEvent event) {
   if (MyDebug.LOG)
       Log.d(TAG, "onKeyDown: " + keyCode);
   boolean handled = mainUI.onKeyDown(keyCode, event);
   if (handled)
       return true;
   return super.onKeyDown(keyCode, event);
}

Step 3

We have defined another onKeyDown() method in the MainUI class to keep the code modularized. In this, we have made use of the Switch cases to perform the different actions. This can be done by using the following line of code snippet.

Switch (volume_keys) {
  case "volume_take_photo":
     main_activity.takePicture();
     return true;

  case "volume_zoom":
     if (keyCode == KeyEvent.KEYCODE_VOLUME_UP) {
        main_activity.getPreview().zoomTo(main_activity.getPreview().getCameraController().getZoom() + 1);
     }
     else {
        main_activity.getPreview().zoomTo(main_activity.getPreview().getCameraController().getZoom() - 1);
     }
     return true;

In the above code snippet, we have defined the function to perform the zoom operation and to click picture using the volume keys. Similarly, we can add the functions to perform all the above mentioned activities. To get the full source code, please refer to the Phimpme Android GitHub repository mentioned in the resources section below.

Resources

  1. Android Developer Guide – KeyEvent.Callback class – https://developer.android.com/reference/android/view/KeyEvent.Callback.html
  2. GitHub – Phimpme Android Repository – https://github.com/fossasia/phimpme-android/
  3. StackOverflow – Handling key events in Android – https://stackoverflow.com/questions/5631977/keyevent-handling-in-android
  4. Blog post – Handleling Key Events – https://android-developers.googleblog.com/2009/12/back-and-other-hard-keys-three-stories.html


Continue ReadingCamera Controls Using Volume Buttons In The Phimpme Application

Timer Option in Phimpme Android’s Camera

The Phimpme Android application comes in with all the options like clicking a picture, editing them and sharing it with the world using many many connected social media accounts. Not only this, it features a fully functional camera with lots of different functionality which a user wants in their day to day life. One such feature is the Timer option in Phimpme. In Phimpme, the user can go to the camera settings to enable or disable the Timer options and click their photos after setting the timer for a particular duration. After setting the timer and pressing the capture photo button, it also displays a ticker at the UI of the camera to notify the user the amount of time after which the photo will be clicked.

In this tutorial, I will be explaining how we have achieved this feature in the Phimpme application.

Step 1

The first thing we need to do is to display the options to the user in camera settings to enable/disable the timer and to select the specific amount of time for the delay in the capture. To do this we have made use of the pop-up view in which we have programmatically added all the timer values to be displayed to the user using the code snippet below:

final String[] timer_values = getResources().getStringArray(R.array.preference_timer_values);
  String[] timer_entries = getResources().getStringArray(R.array.preference_timer_entries);
String timer_value = sharedPreferences.getString(PreferenceKeys.getTimerPreferenceKey(), "0");
addArrayOptionsToPopup(Arrays.asList(timer_entries), getResources().getString(R.string.preference_timer), true, timer_index, false)

What the function addArrayOptionsToPopup does is that it adds the following arrays to the linear layout of the pop-up view programmatically.

Step 2

After displaying the timer values to the user, we need to think about the functionality of the camera if the timer is enabled. When the user presses the click picture button we check the condition whether the timer is enabled or not. If it is enabled, we make the application to wait for a specific amount of time before clicking the photo. This can be done using the CountDownTimer class which is provided by Android.

new CountDownTimer(timerDelay, 1000) {
   public void onTick(long millisUntilFinished) {
          //Called after each second
       }
       public void onFinish() {
         //Called after timer delay
       }
   }.start();

What the above piece of code does is to wait for the specific amount of time as specified by the timer delay. Suppose the user selects the option to wait for 5 seconds then we set the timerDelay to be 5000, then the above code calls the onTick method after each second where we update the user that how much time is remaining and on the onFinish method we call the takePicture method to capture the image using the following line of code below.

mCamera.takePicture(null, null, mPicture);

This is how we have implemented the option of Timer in the Phimpme Android application. To get the full source code of the Camera, please check out the Phimpme Android GitHub repository listed in the resources section below.

Resources

  1. Android Developer Guide : CountDown Timer – https://developer.android.com/reference/android/os/CountDownTimer.html
  2. StackOverflow – Implementing Timer in Camera – https://stackoverflow.com/questions/35355320/camera-application-timer-implementaion-issue
  3. GitHub – Phimpme Android Repository – https://github.com/fossasia/phimpme-android/
  4. GitHub – Open Camera Source Code – https://github.com/almalence/OpenCamera


Continue ReadingTimer Option in Phimpme Android’s Camera

Burst Camera Mode in Phimpme Android

Camera is an integral part of core feature in Phimpme Android. Various features were added in the camera part such as resolution, timer, shutter sound, white balance etc. Click burst shot from camera is also an important feature to be added. Burst shot is clicking multiple pictures in one go.

Adding a Burst mode in Phimpme Camera

  • Adding burst mode enable entry in options

The popup view in Camera is added programmatically in app. Setting up the values from sharedpreferences. It takes the value and set burst mode off, 1x, 2x etc. according to value.

final String[] burst_mode_values = getResources().getStringArray(R.array.preference_burst_mode_values);
  String[] burst_mode_entries = getResources().getStringArray(R.array.preference_burst_mode_entries);
String burst_mode_value = sharedPreferences.getString(PreferenceKeys.getBurstModePreferenceKey(), "1");

Two methods created for setting up the previous and next values. To set up the previous value we need to check the current value to be not equal to -1 and greater that zero. Upgrade or downgrade the value of burst mode, according to the click.

public int onClickPrev() {
         if( burst_mode_index != -1 && burst_mode_index > 0 ) {
            burst_mode_index--;
            update(); ...
}

public int onClickNext() {
            if( burst_mode_index != -1 && burst_mode_index < burst_mode_values.length-1 ) {
              burst_mode_index++;
            update();...
}
  • Saving the value in sharedpreferences

So on clicking the previous and next, the value of burst mode value will be updated. As shown in the above code snippet, after every increment and decrement the values set on view and called update method to update the value in the sharedpreference as shown below.

private void update() {
        String new_burst_mode_value = burst_mode_values[burst_mode_index];
        SharedPreferences sharedPreferences = PreferenceManager.getDefaultSharedPreferences(main_activity);
SharedPreferences.Editor editor = sharedPreferences.edit();
editor.putString(PreferenceKeys.getBurstModePreferenceKey(), new_burst_mode_value);
editor.apply();}

  • Taking multiple Images

Now in the implementation part, we need to continuously click the image according to the burst value set by the user. So to enable this, first check the value not to be negative and should be greater than zero. Whole iteration work on separate variable named remaining burst photos. The value of the variable decrease after every image click i.e. takePhoto method calls.

if( remaining_burst_photos == -1 || remaining_burst_photos > 0 ) {
  if( remaining_burst_photos > 0 )
     remaining_burst_photos--;
  long timer_delay = applicationInterface.getRepeatIntervalPref();
  if( timer_delay == 0 ) {
     phase = PHASE_TAKING_PHOTO;
     takePhoto(true);
  }
  else {
     takePictureOnTimer(timer_delay, true);
  }
}

Resources:


Continue ReadingBurst Camera Mode in Phimpme Android

Shortcuts in the Phimpme Android Application

The Phimpme Android application comes with a great functionality of capturing moments, editing them, and sharing it with the world using various social media or cloud platforms integrated into the application. Sometimes, the user may want to directly go to a particular section of the application without having to go to the home activity all the time. We have solved this issue using the App shortcuts option which is provided on Android versions greater than 7.0 Nougat. When the user long clicks on the icon of the application, it provides us with multiple options to choose which activity or section we would like to go to as depicted in the screenshot below.

In this post, I will be explaining how we have achieved this functionality in the Phimpme Android application.

Step 1

In the Phimpme app, we have three main sections named Camera, Gallery and Accounts and we have added these three options in the app shortcut menu. To do this, first of all, we need to add a meta data to the main activity in the AndroidManifest.xml file. To do this, search for the activity which contains “android.intent.action.MAIN” and add the following line of code in the activity tag.

<meta-data android:name="android.app.shortcuts"
  android:resource="@xml/shortcuts" />

Step 2

Now after we have configured the manifest file, we need to create shortcuts.xml file in the resources folder which will contain the information about our app shortcuts along with the intent action to go to a particular activity.

After creating the xml file, add the following line of code.

<shortcuts xmlns:tools="http://schemas.android.com/tools"
  xmlns:android="http://schemas.android.com/apk/res/android">

Now after this we have to create a shortcut tag and define the id of our shortcut and should add the icon to it which will be displayed to the user along with the shortcut text as depicted in the screenshot above. This can be done using the following line of code.

android:shortcutId="camera"
android:enabled="true"
android:icon="@drawable/ic_camera_alt_black_24dp"
android:shortcutShortLabel="@string/camera_short"
android:shortcutLongLabel="@string/camera_long"
android:shortcutDisabledMessage="@string/camera_short"

Now after this, we have to define the action which we want to perform when the user clicks on a particular app shortcut. To do this, create an intent tag and add the following lines of code in it.

<intent
  android:action="android.media.action.IMAGE_CAPTURE_SECURE"
  android:targetPackage="org.fossasia.phimpme"
  android:targetClass="org.fossasia.phimpme.opencamera.Camera.CameraActivity" />
<categories android:name="android.intent.category.DEFAULT" />

The above code sets the action type as Image capture and defines the package name of the application. The above code is used to open the Camera activity of the Phimpme Application from the shortcut menu. In the similar fashion as described above, we have implemented the option to open up the Gallery and Accounts section of our application by just modifying the action name of the shortcut.

This is how we have implemented the App shortcut functionality in the Phimpme app. To get the full source code of the Shortcuts.xml file, please refer to the Phimpme Android repository.

Resources

  1. Android Developer’s Guide – App shortcuts – https://developer.android.com/guide/topics/ui/shortcuts.html
  2. GitHub – Google Sample Project to depict the usage of app shortcuts – https://github.com/googlesamples/android-AppShortcuts
  3. Blog – Using app shortcuts in Android 7.0 – http://www.brevitysoftware.com/blog/how-to-use-app-shortcuts-in-android-7-1-nougat/
  4. GitHub – Phimpme Android repository – https://github.com/fossasia/phimpme-android/
Continue ReadingShortcuts in the Phimpme Android Application

Getting Image location in the Phimpme Android’s Camera

The Phimpme Android app along with a decent gallery and accounts section comes with a nice camera section stuffed with all the features which a user requires for the day to day usage. It comes with an Auto mode for the best experience and also with a manual mode for the users who like to have some tweaks in the camera according to their own liking. Along with all these, it also has an option to get the accurate coordinates where the image was clicked. When we enable the location from the settings, it extracts the latitude and longitude of the image when it is being clicked and displays the visible region of the map at the top of the image info section as depicted in the screenshot below.

In this tutorial, I will be discussing how we have implemented the location functionality to fetch the location of the image in the Phimpme app.

Step 1

For getting the location from the device, the first step we need is to add the permission in the androidmanifest.xml file to access the GPS and the location services. This can be done using the following lines of code below.

<uses-permission android:name="android.permission.ACCESS_COARSE_LOCATION"/>

After this, we need to download install the google play services SDK to access the Google location API. Follow the official google developer’s guide on how to install the Google play services into the project from the resources section below.

Step 2

To get the last known location of the device at the time of clicking the picture we need to make use of the FusedLocationProviderClient class and need to create an object of this class and to initialise it in the onCreate method of the camera activity. This can be done using the following lines of code below:

private FusedLocationProviderClient mFusedLocationClient;
mFusedLocationClient = LocationServices.getFusedLocationProviderClient(this);

After we have created and initialised the object mFusedLocationClient, we need to call the getLastLocation method on it as soon as the user clicks on the take picture button in the camera. In this, we can also set onSuccessListener method which will return the Location object when it successfully extracts the present or the last known location of the device. This can be done using the following lines of code below:

mFusedLocationClient.getLastLocation()
       .addOnSuccessListener(this, new OnSuccessListener<Location>() {
           @Override
           public void onSuccess(Location location) {
               if (location != null) {
            //Get the latitude and longitude here
                  }

After this, we can successfully extract the latitude and the longitude of the device in the onSuccess method of the code snippet provided below and can store it in the shared preference to get the map view of the coordinates from a different activity of the application later on when the user tries to get the info of the images.

Step 3

After getting the latitude and longitude, we need to get the image view of the visible region of the map. We can make use of the Glide library to fetch the visible map area from the url which contains our location values and to set it to the image view.

The url of the visible map can be generated using the following lines of code.

String.format(Locale.US, getUrl(value), location.getLatitude(), location.getLongitude());

This is how we have added the functionality to fetch the coordinates of the device at the time of clicking the image and to display the map in the Phimpme Android application. To get the full source code, please refer to the Phimpme Android GitHub repository.

Resources

  1. Google Developer’s : Location services guide – https://developer.android.com/training/location/retrieve-current.html
  2. Google Developer’s : Google play services SDK guide – https://developer.android.com/studio/intro/update.html#channels
  3. GitHub : Open camera Source Code –  https://github.com/almalence/OpenCamera
  4. GitHub : Phimpme Android – https://github.com/fossasia/phimpme-android/
  5. GitHub : Glide library – https://github.com/bumptech/glide


Continue ReadingGetting Image location in the Phimpme Android’s Camera

Zooming Feature in the Phimpme Android’s Camera

The Phimpme Android application comes with a complete package of camera, Edit images, sharing and gallery functionalities. It has a well featured and fully functional camera with all the capabilities that a user expects from a camera application. One such feature in the Phimpme Android application is the zooming functionality. It provides the user the option to zoom in using the pinch gesture of the fingers or the user can select the settings to zoom in from the volume buttons. In this tutorial, I will be explaining how I achieved the zooming functionality in the Phimpme Android app.

Step 1

The first thing we need to do is to check whether the device will support the zoom in functionality or not to avoid random crashes while runtime of the application and while performing the zoom action in case the camera of the device doesn’t support this feature. This can be done by the following lines of code:

Camera.Parameters params = mCamera.getParameters();
Boolean supports = params.isZoomSupported();

Step 2

Now after getting the camera parameters and checking whether the camera supports the zoom in functionality, we need to add the touch listener to the surface view of the camera so that we can get the touch locations and the finger spacing of the user to get the pinch to zoom in functionality. This can be done using the following line of code.

surfaceView.setOnTouchListener(this);

Whenever the user touches the screen this touch listener gives a callback to the overridden onTouchEvent method and passes the MotionEvent to the function. The motion event object in Android handles the movement reports. Now in the onTouchEvent method, we calculate the finger spacing between the two fingers and calculate the approximate amount by which the user wants to zoom in. The finger spacing can be calculated using the following lines of code.

float x = event.getX(0) - event.getX(1);
   float y = event.getY(0) - event.getY(1);
   return FloatMath.sqrt(x * x + y * y);

After getting the finger spacing we need to cancel the auto focus of the camera before performing the zoom action so that the application does not crash. This can be achieved by a single line of code below.

mCamera.cancelAutoFocus();

Step 3

The final step is to set the zoom level in the camera application by calculating the zoom level by using the finger spacing. For this, first we need to get the max zoom level supported by the device so that we do not apply the zoom level that is not supported by the device. The calculation of max zoom level and setting of the desired zoom level by the user can be performed by using the following lines of code.

int maxZoom = params.getMaxZoom();
   int zoom = params.getZoom();
   float newDist = getFingerSpacing(event);
   if (newDist > mDist) {
       //zoom in
       if (zoom < maxZoom)
           zoom++;
   } else if (newDist < mDist) {
       //zoom out
       if (zoom > 0)
           zoom--;
   }
   mDist = newDist;
   params.setZoom(zoom);

This is how we have achieved the functionality of zooming in and clicking pictures in the Phimpme Android application. To get the full source code and to know how to use the volume control buttons to zoom in/out, please refer to the Phimpme Android repository.

Resources

  1. GitHub – Open camera source code : https://github.com/almalence/OpenCamera
  2. Android developer’s guide – MotionEvents in Android : https://developer.android.com/reference/android/view/MotionEvent.html
  3. StackOverflow – Pinch to zoom functionality : https://stackoverflow.com/questions/8120753/android-camera-preview-zoom-using-double-finger-touch
  4. GitHub – Phimpme Android repository : https://github.com/fossasia/phimpme-android
Continue ReadingZooming Feature in the Phimpme Android’s Camera

Adding Manual ISO Controls in Phimpme Android

The Phimpme Android application comes with a well-featured camera to take high resolution photographs. It features an auto mode in the camera as well as a manual mode for users who likes to customise the camera experience according to their own liking. It provides the users to select from the range of ISO values supported by their devices with a manual mode to enhance the images in case the auto mode fails on certain circumstances such as low lighting conditions.

In this tutorial, I will be discussing how we achieved this in Phimpme Android with some code snippets and screenshots.

To provide the users with an option to select from the range of ISO values, the first thing we need to do is scan the phone for all the supported values of ISO and store it in an arraylist to be used to display later on. This can be done by the snippet provided below:

String iso_values = parameters.get("iso-values");
if( iso_values == null ) {
 iso_values = parameters.get("iso-mode-values"); // Galaxy Nexus
 if( iso_values == null ) {
    iso_values = parameters.get("iso-speed-values"); // Micromax A101
    if( iso_values == null )
       iso_values = parameters.get("nv-picture-iso-values"); // LG dual P990

Every device supports a different set of keyword to provide the list of ISO values. Hence, we have tried to add every possible keywords to extract the values. Some of the keywords used above covers almost 90% of the android devices and gets the set of ISO values successfully.

For the devices which supports the ISO values but doesn’t provide the keyword to extract the ISO values, we can provide the standard list of ISO values manually using the code snippet provided below:

values.add("200");
values.add("400");
values.add("800");
values.add("1600");

After extracting the set of ISO values, we need to create a list to display to the user and upon selection of the particular ISO value as depicted in the Phimpme camera screenshot below

Now to set the selected ISO value, we first need to get the ISO key to set the ISO values as depicted in the code snippet provided below:

if( parameters.get(iso_key) == null ) {
 iso_key = "iso-speed"; // Micromax A101
 if( parameters.get(iso_key) == null ) {
    iso_key = "nv-picture-iso"; // LG dual P990
    if( parameters.get(iso_key) == null ) {
       if ( Build.MODEL.contains("Z00") )
          iso_key = "iso"; // Asus Zenfone 2 Z00A and Z008

Getting the key to set the ISO values is similar to getting the key to extract the ISO values from the device. The above listed ISO keys to set the values covers most of the devices.

Now after we have got the ISO key, we need to change the camera parameter to reflect the selected change.

parameters.set(iso_key, supported_values.selected_value);
setCameraParameters(parameters);

To get the full source code on how to set the ISO values manually, please refer to the Phimpme Android repository.

Resources

  1. Stackoverflow – Keywords to extract ISO values from the device: http://stackoverflow.com/questions/2978095/android-camera-api-iso-setting
  2. Open camera Android source code: https://sourceforge.net/p/opencamera/code/ci/master/tree/
  3. Blog – Learn more about ISO values in photography: https://photographylife.com/what-is-iso-in-photography
Continue ReadingAdding Manual ISO Controls in Phimpme Android

Controlling Camera Actions Using Voice Interaction in Phimpme Android

In this blog, I will explain how I implemented Google voice actions to control camera features on the Phimpme Android project. I will cover the following features I have implemented on the Phimpme project:

  • Opening the application using Google Voice command.
  • Switching between the cameras.
  • Clicking a Picture and saving it through voice command.

Opening application when the user gives a command to Google Now.                       When the user gives command “Take a selfie” or “Click a picture” to Google Now it directly opens Phimpme camera activity.

 First                                                                                                                                        We need to add an intent filter to the manifest file so that Google Now can  detect Phimpme camera activity

<activity
   android:name=".opencamera.Camera.CameraActivity"
   android:screenOrientation="portrait"
   android:theme="@style/Theme.AppCompat.NoActionBar">
   <intent-filter>
       <action android:name="android.media.action.IMAGE_CAPTURE"/>

       <category android:name="android.intent.category.DEFAULT"/>
       <category android:name="android.intent.category.VOICE"/>
   </intent-filter>
</activity>

category android:name=”android.intent.category.VOICE” is added to the IMAGE_CAPTURE intent filter for the Google Now to detect the camera activity. For the Google Now assistance to accept the command in the camera activity we need to add the following in the STILL_IMAGE_CAMERA intent filter in the camera activity.

<intent-filter>
   <action android:name="android.media.action.STILL_IMAGE_CAMERA"/>

   <category android:name="android.intent.category.DEFAULT"/>
   <category android:name="android.intent.category.VOICE"/>
</intent-filter>

So, now when the user says “OK Google” and “Take a Picture” the camera activity on Phimpme opens.

Integrating Google Voice assistance in Camera Activity

Second,                                                                                                                               After opening the camera application the Google Assistance should ask a question.

The cameraActivity in Phimpme can be opened in two ways, such as:

  • When opened from a different application.
  • When given the command to Goole Now assistance.

We need to check whether the camera activity is prompted from Google assistance or not to activate voice command. We will check it in onResume function.

@Override
public void onResume() {
if (CameraActivity.this.isVoiceInteraction()) {
     startVoiceTrigger();
  }
} 

If is.VoiceInteraction gives “true” then voice Assistance prompts.             Assistance to ask which camera to use

Third,                                                                                                                                 After the camera activity opens the Google assistance should ask which camera to use either front or back.

To take any voice input from the user, we to store the expected commands in VoiceInteractor.PickoptionRequest. This function listens to the command by the user. We need to add synonyms for the same command.

To choose the rear camera

VoiceInteractor.PickOptionRequest.Option rear = new VoiceInteractor.PickOptionRequest.Option(getResources().getString(R.string.camera_rear), 0);
rear.addSynonym(getResources().getString(R.string.rear));
rear.addSynonym(getResources().getString(R.string.back));
rear.addSynonym(getResources().getString(R.string.normal)); 

I added synonyms like the rear, normal and back.

To choose front camera

VoiceInteractor.PickOptionRequest.Option front = new VoiceInteractor.PickOptionRequest.Option(getResources().getString(R.string.camera_front), 1);
front.addSynonym(getResources().getString(R.string.front));
front.addSynonym(getResources().getString(R.string.selfie_camera));
front.addSynonym(getResources().getString(R.string.forward));

I added synonyms like the front, selfie camera and forward. 

For assistance to ask any question such as “Which camera to use we” I have used getVoiceinteractor and inflating VoiceInteractor.PickOptionRequest.option[] array with options front and rear.

CameraActivity.this.getVoiceInteractor()
     .submitRequest(new VoiceInteractor.PickOptionRequest(
           new VoiceInteractor.Prompt(getResources().getString(“Which camera would you like to use?”),
           new VoiceInteractor.PickOptionRequest.Option[]{front, rear},
           null) {

The google assistance waits for a response from the user for only a few seconds and it goes inactive. If the user gives any unexpected command the assistance will ask the question one more time.

Check if the user gives an expected command or not.

We will override OnOptionResult(boolean finished, Options[] selection, Bundle result) function.if  (finished && selections.length == 1) if the speech length matches with any of the options provided it checks which option was used.

Check the command given by the user to switch between the cameras.

Two array objects are passed 0 and 1.  If the command given was “rear” then selection[0].getindex() = 0 and camera activity switches to the rear camera and if the the command given by the user is rear then selection[0].getIndex = 1 and camera activity switches to front camera.

@Override
public void onPickOptionResult(boolean finished, Option[] selections, Bundle result) {
  if (finished && selections.length == 1) {
     Message message = Message.obtain();
     message.obj = result;
     if (selections[0].getIndex() == 0)
     {  rearCamera();
        asktakePicture();
     }
     if (selections[0].getIndex() == 1)
     {
        asktakePicture();
     }
  }else{

       getActivity().finish();
  }

Click Picture when the user says “Cheese

After switching the camera the assistant prompts the message”Say cheese”. We need to add voiceInteractor.prompt(“Say cheese”).

We need to store the synonyms in VoiceInteractor.PickOption.Options options. I have added synonyms like ready, go, take it, OK, and Cheese to click a picture. If the user gives an unexpected output the assistance checks selection.length ==1 or not and prompts the message “Say cheese” again.

private void asktakePicture() {
  VoiceInteractor.PickOptionRequest.Option option = new VoiceInteractor.PickOptionRequest.Option(getResources().getString(R.string.cheese), 2);
  option.addSynonym(getResources().getString(R.string.ready));
  option.addSynonym(getResources().getString(R.string.go));
  option.addSynonym(getResources().getString(R.string.take));
  option.addSynonym(getResources().getString(R.string.ok));
getVoiceInteractor()
        .submitRequest(new VoiceInteractor.PickOptionRequest(
              new VoiceInteractor.Prompt(getResources().getString(R.string.say_cheese)),
              new VoiceInteractor.PickOptionRequest.Option[]{option},
              null) {
           @Override
           public void onPickOptionResult(boolean finished, Option[] selections, Bundle result) {
              if (finished && selections.length == 1) {
                 Message message = Message.obtain();
                 message.obj = result;
                 takePicture();
              } else {
                 getActivity().finish();
              }
           }
           @Override
           public void onCancel() {
              getActivity().finish();
           }
        });                                                                                                                                     

Conclusion

Now, Users can start camera activity on Phimpme through voice command “Take a Selfie”. They can switch between the cameras through voice command “Selfie camera” or “back camera”, “back” or “front” and finally click a picture by giving voice command “Cheese”, “Click it” and related synonyms.

Github

Resources

Continue ReadingControlling Camera Actions Using Voice Interaction in Phimpme Android

Face detection in Phimpme Android’s Camera

The Phimpme Android application comes with a well-featured camera application which offers almost all the functionality an advanced camera user searches for. It comes with a wide range of options to apply different scene modes in the camera and also to detect the faces using the front or the back camera of the device. In this tutorial, I will be discussing how we achieved the face detection functionality in Phimpme.

In the Phimpme application, we have the option in the settings to enable the face detection just as depicted in the screenshot below. After enabling it the Camera starts detecting the faces and draws rectangular boxes on the number of faces detected by the camera.

I will be explaining step by step to achieve this using some code snippets.

Step 1

First, we have to check whether our device supports the face detection functionality to avoid unnecessary application crashes using the Android’s Camera.Parameters class.

After the check we have to create a new class named My FaceDetectionListener which will be implementing the Android’s Camera.FaceDetectionListener. The face detection class overrides the function onFaceDetection and passes the array of Faces detected and the camera as the parameter to this function.

class MyFaceDetectionListener implements CameraController.FaceDetectionListener {
  @Override  
  public void onFaceDetection(CameraController.Face[] faces) { 
    faces_detected = new CameraController.Face[faces.length];     System.arraycopy(faces, 0, faces_detected, 0, faces.length);
  }
 }

Step 2

After creating this class, we need to start the camera of the application to set the face detection listener to it. This can be done by the code snippet provided below

camera = Camera.open(cameraId);

We can open the front camera and the back camera by simply changing the cameraId. If we want to open the front camera, then we need to set the camera Id value as 1 and if we want the back camera to open up we can set the camera Id to be 0.
After this, we can set the face detection listener in the camera. This can be done using the below code snippet.

mCamera.setFaceDetectionListener(fDetectionListener);
   mCamera.startFaceDetection();

The set face detection listener function takes in the object of the class we created in step 1 as the parameter and calls the Android’s pre defined function to start the face detection. The object of the class we created in step 1 can be created and initialised with the help of code snippet below.

MyFaceDetectionListener fDListener = new MyFaceDetectionListener();

After we have set the detection listener in the camera, as soon as it detects the face, it will call the overridden function onFaceDetection but how do the user know if the face has been detected or not. For this we have to create a rectangular box of size approximately that of the face detected. This can be done with the following code snippet.

int l = faces[i].rect.left;
               int r = faces[i].rect.right;
               int t = faces[i].rect.top;
               int b = faces[i].rect.bottom;
               Rect uRect = new Rect(l0, t0, r0, b0);

To get the full source code, please check out the Phimpme Android github repository.

Resources

  1. Phimpme Android Github repository
  2. Complete tutorial on face detection in Android
  3. Leafpic github repository
  4. Android Camera API Google developer page
Continue ReadingFace detection in Phimpme Android’s Camera

Multiple Color Effects in Phimpme Camera

The Phimpme Android’s camera comes with an option to switch between various color effects along with various other functionalities. To select different color modes, we have added a toggle button at the top right corner of the camera interface and which switches from the range of color effect available and on long clicking the toggle button, it resets the effect to normal. To show the functionality of the toggle button we have made use of the Showcase view in the application which displays all the functionality of the toggle button on the first run of the application.

In this tutorial, I will be discussing how we implemented the color effects feature in the Phimpme Android application with the help of some code snippets.

Step 1

Firstly we have to create a toggle button in the camera interface and have to set the onclicklistener on it to change the various color effects on the button click. This can be done with the following code snippet.

toggle.setOnClickListener(new View.OnClickListener() {
  @Override
  public void onClick(View v) {
       //Actions here
}

Similarly, we have to set the long click listener on the toggle button which will handle the reset color effects function in the application.

Step 2

The next thing we need is to extract all the color modes supported by the device and to create an Arraylist of it so that we can call the respective values by just increasing the index on toggle button click. This can be done with the help of the following code snippet.

Now we have all the supported color modes along with the normal mode stored in the values list. For instance,

  1. Mono
  2. Negative
  3. Solarize
  4. Sepia
  5. Neon

Hence on button click, we have to get the color values using the list index and we have to set the value to the camera parameter from where we extracted the supported color effects.

For this, we can make use of a static variable named colorNum and initialise it with 0 and on button click we can just increment this variable by 1 and can set the color effect using the code snippet provided below

final String color = colorEffect.get(colorNum);
CameraController.SupportedValues supported_values = camera_controller.setColorEffect(color);
if (supported_values != null) {
    color_effects = supported_values.values;
   applicationInterface.setColorEffectPref(supported_values.selected_value);
}

And on the long click listener method of the camera, we can set the value of the variable to be 0 and can set the color values accordingly.

To get the full source code on changing the color effects in the camera and to know about adding the showcase view which we have used in this to show the functionality. Please refer to the Phimpme Android repository.

Resources

  1. Open camera Github repository
  2. Color effects in Android camera
  3. Camera API developer page
  4. Amlcurran Showcaseview


Continue ReadingMultiple Color Effects in Phimpme Camera