Updating the UI of the generator form in Open Event Webapp

  • Add a pop-up menu bar similar to the one shown in Google/Susper6be8d972-72bc-4e12-b27a-219e46608cfc.png
  • Add a version deployment link at the bottom of the page like the one shown in staging.loklak.org.

29072668-b1db-4ef5-8865-c71ef2438433.png


  • Implementing the top-bar and the pop-up menu bar

The first task was to introduce a top-bar and a pop-up menu bar in Generator. The top-bar would contain the text Open Event Webapp Generator and an icon button on the right side of it which would show a pop-up menu. The pop-up menu would contain a number of icons which would link to different pages like FOSSASIA blogs and it’s official website, different projects like loklak, SUSI and Eventyay and also to the Webapp Project Readme and issues page.

Creating a top navbar is easy but the pop-up menu is a comparatively tougher. The first step was to gather the gather the small images of the different services. Since this feature had already been implemented in Susper project, we just copied all the icon images from there and copy it into a folder named icons in the open event webapp. Then we create a custom menu div which would hold all the different icons and present it an aesthetic manner. Write the HTML code for the menu and then CSS to decorate and position it! Also, we have to create a click event handler on the pop-up menu button for toggling the menu on and off.

Here is an excerpt of the code. The whole file can be seen here

<div class="custom-navbar">
 <a href='.' class="custom-navtitle">
   <strong>Open Event Webapp Generator</strong> <!-- Navbar Title -->
 </a>
 <div class="custom-menubutton">
   <i class="glyphicon glyphicon-th"></i> <!-- Pop-up Menu button -->
 </div>
 <div class="custom-menu"> <!-- Custom pop-up menu containing different links -->
   <div class="custom-menu-item">
     <a class="custom-icon" href="http://github.com/fossasia/open-event-webapp" target="_blank"><img src="./icons/code.png">
       <p class="custom-title">Code</p></a>
   </div>
   <!-- Code for other links to different projects-->
 </div>
</div>

Here is a screenshot of how the top-bar and the pop-up menu looks!

bb82ba88-4317-46b0-91ec-514499c5cfde.png

  • Adding version deployment info to the bottom

The next task was to add a footer to the page which would contain the version deployment info. The user can click on that link and we can then be taken to the latest version of the code which is currently deployed.

To show the version info, we make use of the Github API. We need to get the hash of the latest commit made on the development branch. We send an API request to the Github requesting for the latest hash and then dynamically add the info and the link received to the footer. The user can then click on that link and will be taken to the latest deployment page of the webapp!

var apiUrl = "https://api.github.com/repos/fossasia/open-event-webapp/git/refs/heads/development";
$.ajax({url: apiUrl, success: function(result){
 var version = result['object']['sha'];
 var versionLink = 'https://github.com/fossasia/open-event-webapp/tree/' + version;
 var deployLink = $('#deploy-link');
 deployLink.attr('href', versionLink);
 deployLink.html(version);
}});

This is how the footer looks after the API Response

44385ad8-e094-490b-8575-a47932aa75c5.png

References:

Continue ReadingUpdating the UI of the generator form in Open Event Webapp

Implementing Search Functionality In Calendar Mode On Schedule Page In Open Event Webapp

f79b5a2b-b679-4095-8311-cf403193e0cc.png

Calendar Mode

fef75c16-da0a-4145-a2e5-620d63637194.png

The list mode of the page already supported the search feature. We needed to implement it in the calendar mode. The corresponding issue for this feature is here. The whole work can be seen here.

First, we see the basic structure of the page in the calendar mode.

<div class="{{slug}} calendar">
 <!-- slug represents the currently selected date -->
 <!-- This div contains all the sessions scheduled on the selected date -->
 <div class="rooms">
   <!-- This div contains all the rooms of an event -->
   <!-- Each particular room has a set of sessions associated with it on that particular date -->
   <div class="room">
     <!-- This div contains the list of session happening in a particular room -->
     <div class="session"> <!-- This div contains all the information about a session -->
       <div class="session-name"> {{title}} </div> <!-- Title of the session -->
       <h4 class="text"> {{{description}}} </h4> <!-- Description of the session -->
       <!-- This div contains the info of the speakers presenting the session -->
       <div class="session-speakers-list">
         <div class="speaker-name"><strong>{{{title}}}</div> <!-- Name of the speaker -->
           <div class="session-speakers-more"> {{position}} {{organisation}} </div> <!-- Position and organization of speaker-->
         </div>
       </div>
     </div>
   </div>
 </div>
</div>

The user will type the query in the search bar near the top of the page. The search bar has the class fossasia-filter.

c30a84c8-c456-4116-86fa-c5ffc382bdb3.png

We set up a keyup event listener on that element so that whenever the user will press and release a key, we will invoke the event handler function which will display only those elements which match the current query entered in the search bar. This way, we are able to change the results of the search dynamically on user input. Whenever a single key is pressed and lifted off, the event is fired which invokes the handler and the session elements are filtered accordingly.

Now the important part is how we actually display and hide the session elements. We actually compare few session attributes to the text entered in the search box. The text attributes that we look for are the title of the session, the name, position , and organization of the speaker(s) presenting the session. We check whether the text entered by the user in the search bar appears contiguously in any of the above-mentioned attributes or not. If it appears, then the session element is shown. Otherwise, its display is set to hidden. The checking is case insensitive. We also count the number of the visible sessions on the page and if it is equal to zero, display a message saying that no results were found.

For example:- Suppose the user enters the string ‘wel’ in the search bar, then we will iterate over all the different sessions and only those who have ‘wel’ in their title or in the name/ position/organization of the speakers will be visible. Rest all the sessions would be hidden.

Here is the excerpt from the code. The whole file can be seen here

$('.fossasia-filter').change(function() {
 var filterVal = $(this).val(); // Search query entered by user
 $('.session').each(function() { // Iterating through all the sessions. Check for the title of the session and the name of the
   // speaker and its position and organization
if ($(this).find('.session-name').text().toUpperCase().indexOf(filterVal.toUpperCase()) >= 0 ||
 $(this).find('.session-speakers-list a p span').text().toUpperCase().indexOf(filterVal.toUpperCase()) >= 0 || $(this).find('.speaker-name').text().toUpperCase().indexOf(filterVal.toUpperCase()) >= 0) {
     $(this).show(); // Matched so display the session
   } else {
     $(this).hide(); // Hide the Element
   }
 });
 var calFilterLength = $('.calendar:visible').length;
 if((isCalendarView && calFilterLength == 0)) { // No session elements found
   $('.search-filter:first').after('<p id="no-results">No matching results found.</p>');
 }
}).keyup(function() {
 $(this).change();
});

Below is the default view of the calendar mode on the schedule page

471d6b30-d8db-4dea-8593-df0ad68072a6.png

On entering ‘wel’ in the search bar, sessions get filtered

d6eec31e-fde1-4640-881b-a0216b68533d.png

 References:

Continue ReadingImplementing Search Functionality In Calendar Mode On Schedule Page In Open Event Webapp

Adding Service Workers In Generated Event Websites In Open Event Webapp

var urlsToCache = [
 './css/bootstrap.min.css',
 './offline.html',
 './images/avatar.png'
];
self.addEventListener('install', function(event) {
 event.waitUntil(
   caches.open(CACHE_NAME).then(function(cache) {
     return cache.addAll(urlsToCache);
   })
 );
});

All the other assets are cached lazily. Only when they are requested, we fetch them from the network and store it in the local store. This way, we avoid caching a large number of assets at the install step. Caching of several files in the install step is not recommended since if any of the listed files fails to download and cache, then the service worker won’t be installed!

self.addEventListener('fetch', function(event) {
event.respondWith(caches.match(event.request).then(function(response) {
     // Cache hit - return response
     if (response) { return response; }
     // Fetch resource from internet and put into cache
     var fetchRequest = event.request.clone();
     return fetch(fetchRequest).then(function(response) {
         var responseToCache = response.clone();
         caches.open(CACHE_NAME).then(function(cache) {
           cache.put(event.request, responseToCache);
         });
         return response;
       }).catch(function(err) {
         // Return fallback page when user is offline and resource is not cached
         if (event.request.headers.get('Accept').indexOf('text/html') !== -1) {
           return caches.match('./offline.html');
         }
       });
   })
 );
});

One thing which we need to keep in mind is that the website content should not become stale. Because it might happen that the website is updated but the actual content shown is older since response to every request is being fetched from the outdated cache. We need to delete the old cache and install a new service worker when the content of the site is updated. To deal with this issue, we calculate the hash of event website folder after the site has been generated. This value of the hash is used as the cache name inside which we keep the cached resources. When the content of the event website changes, the value of the hash changes. Due to this, a new service worker (containing the new value of the hash) is installed. After the currently open pages of the website are closed, the old service worker is killed and the activate event of the new service worker is fired. During this activate event, we clear the old cache containing the outdated content!  

// Hash of the event website Folder
var CACHE_NAME = 'Mtj5WiGtMtzesubewqMtdGS9wYI=';
self.addEventListener('activate', function(event) {
 event.waitUntil(caches.keys().then(function(cacheNames) {
   return Promise.all(cacheNames.map(function(cacheName) {
     if (cacheName !== CACHE_NAME) {
       console.log('Deleting cache ' + cacheName);
       return caches.delete(cacheName);
     }
   })
   );
 }));
});

Here are many screenshots showing service workers in action

  • When the site is updated, the outdated cache contents are cleared

29312352-87f9e8da-81d2-11e7-9f05-02a557a820da.png

  • On visiting a page which has not yet been cached, its contents are placed into cache for utilization on future visits

29312487-2155e70e-81d3-11e7-85c1-004c4a475e82.png

  • On visiting the cached page again, the assets will be served from the cache directly.

29312349-87f6c222-81d2-11e7-8fb4-c54feb175ed9.png

  • The page will comfortably load even on offline connections

29312351-87f8eec6-81d2-11e7-985a-7f1ba2dba482.png

  • On requesting for a page which has not yet been cached, we show a custom fallback page which shows a message

29312350-87f821c6-81d2-11e7-90e7-30f6467b2988.pngReferences:

Continue ReadingAdding Service Workers In Generated Event Websites In Open Event Webapp

Implementing ICS/ICAL to sync calendars with the event schedule in Open Event Webapp

As an end result, we want to provide a button to the user which will export the whole data of the event schedule to an ICS file and present it to the user for download after clicking the button. The whole work regarding the feature can be seen here.

Instead of implementing the whole specification ourselves which would be much tougher and time-consuming, we looked for some good open source libraries to do a bit of heavy lifting for us. After searching exhaustively for the solution, we came across this library which seemed appropriate for the job. The heart of the library is a function which takes in an object which contains information about the session. It expects information about the start and end time, subject, description and location of the session. Here is an excerpt from the function. The whole file can be seen here

var addEvent = function (session) {
 var calendarEvent = [
   'BEGIN:VEVENT',
   'UID:' + session.uid,
   'CLASS:PUBLIC',
   'DESCRIPTION:' + session.description,
   'DTSTART;VALUE=DATETIME:' + session.begin,
   'DTEND;VALUE=DATE:' + session.stop,
   'LOCATION:' + session.location,
   'SUMMARY;LANGUAGE=en-us:' + session.subject,
   'TRANSP:TRANSPARENT',
   'END:VEVENT'
 ];
 calendarEvents.push(calendarEvent);
};

We need to call the above function for every session in the event schedule. In the schedule template file, we have the jsonData object available which contain all the information about the event. It contains a field called timeList which contains the chronological order of the different sessions taking place throughout the events. The structure of that sub-object is something like this.

[{'slug': '2017-03-20', 'times': {'caption' : '09:00-09:30', 'sessions': [{'title': 'Welcome', 'description': 'Opening of the event', 'start': '09:00', 'end': '09:30'}]}]

So, we define a function for iterating through every session in the above object and adding it to the calendar. We can use most of the attributes directly but have to modify the date and time fields of the session to an appropriate format before adding it. The specification expects time in the ISO 8601 Format. You can read more about the specification here. For eg – If the date is 2017-03-20 and the time is 09:30 then it should be written as 20170320T093000. Here is some part of the function here

function exportICS() {
 var scheduleArr = {{{json timeList}}};
 // Helper functions for converting time to ISO 8601 Format
 function removeDashFromDate(date) {
   return date.replace(/-/g, '');
 }
 function removeColonFromTime(time) {
   return time.replace(/:/g, '');
 }
 // Iteration through the object and adding every session to the calendar
 scheduleArr.forEach(function(scheduleDay) {
   var date = removeDashFromDate(scheduleDay.slug);
   scheduleDay.times.forEach(function(time) {
     time.sessions.forEach(function(session) {
       var sessObj = {};
       sessObj.begin = date + 'T' + removeColonFromTime(session.start) + '00';
       sessObj.stop = date + 'T' + removeColonFromTime(session.end) + '00';
       sessObj.subject = session.title;
       sessObj.description = session.description;
       sessObj.location = session.location;
       cal.addEvent(sessObj);
     });
   });
 });
 cal.download('calendar', 'ics', false); // Download the ics file of the calendar
}

After defining the function, we add a button for starting the download of the whole schedule of the event. On clicking, we call the function which initiates the download after all the sessions of the event have been added.

<span class="schedule-download">
 <button type="button" class="btn btn-default export-schedule"><i class="fa fa-calendar" aria-hidden="true"></i></button>
</span>

$('.export-schedule').click(function() {
 exportICS();
});

Here is the export schedule button

65203af9-3962-4ab5-9655-3250bf2253a0.png

This is the download pop-up of the ICS file of the event.

Screenshot from 2017-08-10 21-56-16.png

After importing it in the Google calendar

Screenshot from 2017-08-10 23-01-22.png

References

Continue ReadingImplementing ICS/ICAL to sync calendars with the event schedule in Open Event Webapp

Implementing Logging Functionality in Open Event Webapp

  • INFO: Info statements give information about the task currently being performed by the webapp
  • SUCCESS: Success statements give the information of a task being successfully completed
  • ERROR: Error statements give information about a task failing to complete. These statements also contain a detailed error log

Along with the type of the statement, the object also contains information about the task. For all types of statements, there is a field called smallMessage containing short information about the task. For the ERROR statements where more information is required to see what went wrong, the message object has an additional field called largeMessage which holds detailed information about the event.

We also create a new file called buildlogger.js and define a function for creating log statements about the tasks being performed by generator and export it. The function creates a message object from the arguments received and then return it to the client under the buildLog event via the socket IO.

exports.addLog = function(type, smallMessage, socket, largeMessage) {
 var obj = {'type' : type, 'smallMessage' : smallMessage, 'largeMessage': largeMessage};
 var emit = false;
 if (socket.constructor.name === 'Socket') {
   emit = true;
 }
 if (emit) {
   socket.emit('buildLog', obj);
 }
};

Most of the steps of the generation process are defined in the generator.js file. So, we include the logging file there and call the addLog function for sending logs messages to the client. All the different steps like cleaning temporary folders, copying assets, fetching JSONs, creating the website directory, resizing images etc have multiple log statements for their inception and successful/erroneous completion. Below is an excerpt from the cleaning step.

var logger = require('./buildlogger.js');
 async.series([
   (done) => {
     console.log('CLEANING TEMPORARY FOLDERS\n');
     logger.addLog('Info', 'Cleaning up the previously existing temporary folders', socket);
     fs.remove(distHelper.distPath + '/' + appFolder, (err) => {
       if(err !== null) {
         // Sending Error Message when the remove process failed
         logger.addLog('Error', 'Failed to clean up the previously existing temporary folders', socket, err);
       }
       // Success message denoting the completion of the step
       logger.addLog('Success', 'Successfully cleaned up the temporary folders', socket);
       done(null, 'clean');
     });
   }
 )]

But we have only done the server side work now. We also have to handle the message on the client side. We send the message object to the client under the event buildLog and set up a listener for that event to catch the sent message. After the message object is received on the client side, we extract the information out of that object and then display it on the website. We have a div having an id of buildLog for displaying the log information. The content of the message is dynamically added to it as soon as it is received from the server. All the client side logic is handled in the form.js file.

socket.on('buildLog', function(data) {
   var spanElem = $('<span></span>'); // will contain the info about type of statement
   var spanMess = $('<span></span>'); // will contain the actual message
   var aElem = $('<button></button>'); // Button to view the detailed error log
   var paragraph = $('<p></p>'); // Contain the whole statement
   var divElem; // Contain the detailed error log
   spanMess.text(data.smallMessage);
   spanElem.text(data.type.toUpperCase() + ':');
   paragraph.append(spanElem);
   paragraph.append(spanMess);
   divElem.text(data.largeMessage);
   paragraph.append(aElem);
   paragraph.append(divElem);
   $('#buildLog').append(paragraph); // Div containing all the log messages
};

This is how the logs look on the client side. They are loaded on the go in real time as and when the events occur.

image (1).jpg

Resources:

Continue ReadingImplementing Logging Functionality in Open Event Webapp

Implementing Tracks Filter in Open Event Webapp using the side track name list

4f451d29-c6c2-44be-9ef7-d91a45fc1eb0.png

On Clicking the Design, Art, Community Track

ff85d907-512b-4a41-be49-888bbd17bf83.png

But, it was not an elegant solution. We already had a track names list present on the side of the page which remained unused. A better idea was to use this side track names list to filter the sessions. Other event management sites like http://sched.org follow the same idea. The relevant issue for it is here and the major work can be seen in this Pull Request. Below is the screenshot of the unused side track names list.

5b15a297-fd5e-4c23-bc1b-dbed193db0f4.png

The end behavior should be something like this, the user clicks on a track and only sessions belonging to the track should be visible and the rest be hidden. There should also be a button for clearing the applied filter and reverting the page back to its default view. Let’s jump to the implementation part.

First, we make the side track name list and make the individual tracks clickable.

<div class="track-names col-md-3 col-sm-3"> 
  {{#tracknames}}
    <div class="track-info">
      <span style="background-color: {{color}};" 
      class="titlecolor"></span>
      <span class="track-name" style="cursor: pointer">{{title}}
      </span>
    </div>
  {{/tracknames}}
</div>

f45f1591-937d-4e2f-9245-237cfaf3af0d.png

Now we need to write a function for handling the user click event on the track name. Before writing the function, we need to see the basic structure of the tracks page. The divs with the class date-filter contain all the sessions scheduled on a given day. Inside that div, we have another div with class tracks-filter which contains the name of the track and all the sessions of that track are inside the div with class room-filter.

Below is a relevant block of code from the tracks.hbs file

<div class="date-filter">
  // Contains all the sessions present in a single day
  <div class="track-filter row">
    // Contains all the sessions of a single track
    <div class="row">
      // Contains the name of the track
      <h5 class="text">{{caption}}</h4>
    </div>
    <div class="room-filter" id="{{session_id}}">
      // Contain the information about the session
    </div>
  </div>
</div>

We iterate over all the date-filter divs and check all the track-filter divs inside it. We extract the name of the track and compare it to the name of the track which the user selected. If both of them are same, then we show that track div and all the sessions inside it. If the names don’t match, then we hide that track div and all the content inside it. We also keep a variable named flag and set it to 0 initially. If the user selected track is present on a given day, we set the flag to 1. Based on it, we decide whether to display that particular day or not. If the flag is set, we display the date-filter div of that day and the matched track inside it. Otherwise, we hide the div and all tracks inside it.

$('.track-name').click(function() {
  // Get the name of the track which the user clicked
  trackName = $(this).text();
  // Show the button for clearing the filter applied and reverting to the default view
  $('#filterInfo').show();
  $('#curFilter').text(trackName);
  // Iterate through the divs and show sessions of user selected track
  $('.date-filter').each(function() {
    var flag = 0;
    $(this).find('.track-filter').each(function() {
      var name = $(this).find('.text').text();
      if(name != trackName) {
        $(this).hide();
        return;
      }
      flag = 1;
      $(this).show();
    });
    if (flag) {
     $(this).show();
    } else {
      $(this).hide();
    }
  });
});

On Selecting the Android Track of FOSSASIA Summit, we see something like this

935f208b-c17c-4d41-abb6-7197c003d962.png

Now the user may want to remove the filter. He/she can just click on the Clear Filter button shown in the above screenshot to remove the filter and revert back to the default view of the page.

$('#clearFilter').click(function() {                                                                                                   
  trackFilterMode = 0;                                                                                                                 
  display();                                                                                                                           
  $('#filterInfo').hide();                                                                                                             
});

Back to the default view of the page

2ff61ccf-17cf-4595-9c2f-e6825de549f7.png

References:

Continue ReadingImplementing Tracks Filter in Open Event Webapp using the side track name list

Scaling the logo of the generated events properly in Open Event Webapp

In the Facebook Developer Conference, the logo was too small

27190158-334a5446-5211-11e7-95e8-9690dfe8312e.png

In the Open Tech Summit Event, the logo was too long and increased the height of the navigation bar

77dc9fb0-3966-11e7-92c3-d6321dc98ac7.png

We decide some constraints regarding the width and the height of the logo. We don’t want the width of the logo to exceed greater than 110 pixels in order to not let it become too wide. It would look odd on small and medium screen if barely passable on bigger screens. We also don’t want the logo to become too long so we set a max-height of 45 pixels on the logo. So, we apply a class on the logo element with these properties

.logo-image {
 max-width: 110px;
 max-height: 45px;
}

But simply using these properties doesn’t work properly in some cases as shown in the above screenshots. An alternative approach is to resize the logo appropriately during the generation process itself. There are many different ways in which we can resize the logo. One of them was to scale the logo to a fixed dimension during the generation process. The disadvantage of that approach was that the event logo comes in different size and shapes. So resizing them to a fixed size will change its aspect ratio and it will appear stretched and pixelated. So, that approach is not feasible. We need to think of something different.  After a lot of thinking, we came up with an algorithm for the problem. We know the height of the logo would not be greater than 45px. We calculate the appropriate width and height of the logo, resize the image, and calculate dynamic padding which we add to the anchor element (inside which the image is located) if the height of the image comes out to be less than 45px. This is all done during the generation of the app. Note that the default padding is 5px and we add the extra pixels on top of it. This way, the logo doesn’t appear out of place or pixelated or extra wide and long. The detailed steps are mentioned below

  • Declare variable padding = 5px
  • Get the width, height and aspect ratio of the image.
  • Set the height to 45px and calculate the width according to the aspect ratio. If the width <= 110px, then directly resize the image and no change in padding is necessary
  • If the width > 110px, then make width constant to 110px and calculate height according to the aspect ratio. It will surely come less than 45px. Subtract the difference = (45 – height), divide it by 2 and add it to the padding variable.
  • Apply padding variable on the anchor tag. Now every logo should be displayed nicely and we have fixed the height of the navigation bar = 55px for all cases.

Here is an excerpt of the code. The whole work and discussion can be viewed here

var optimizeLogo = function(image, socket, done) {
 sharp(image).metadata(function(err, metaData) {
   if(err) {
     return done(err);
   }
   var width = metaData.width;
   var height = metaData.height;
   var ratio = width/height;
   var padding = 5;
   var diffHeight = 0;

   height = 45;
   width = Math.floor(45 * ratio);
   if (width > 110) {
     width = 110;
     height = Math.floor(width/ratio);
     diffHeight = 45 - height;
     padding = padding + (diffHeight)/2;
   }
   sharp(image).resize(width, height).toFile(image + '.new', function(err, info) {
     return done(null, padding);
   });
 });
};

It solved the problem. Now the logos of all the events were displaying properly. They were neither too wide, long or short. Here are some screenshots to show the improvements.

Facebook Developer Conference

27262455-d3558540-5474-11e7-852e-ef98888ef647.png

Open Tech Summit 2017

27262033-6f9d2df8-546c-11e7-811b-e35f849072eb.png

Resources:

Continue ReadingScaling the logo of the generated events properly in Open Event Webapp

Writing Selenium Tests for Checking Bookmark Feature and Search functionality in Open Event Webapp

We integrated Selenium Testing in the Open Event Webapp and are in full swing in writing tests to check the major features of the webapp. Tests help us to fix the issues/bugs which have been solved earlier but keep on resurging when some new changes are incorporated in the repo. I describe the major features that we are testing in this.

Bookmark Feature
The first major feature that we want to test is the bookmark feature. It allows the users to mark a session they are interested in and view them all at once with a single click on the starred button. We want to ensure that the feature is working on all the pages.

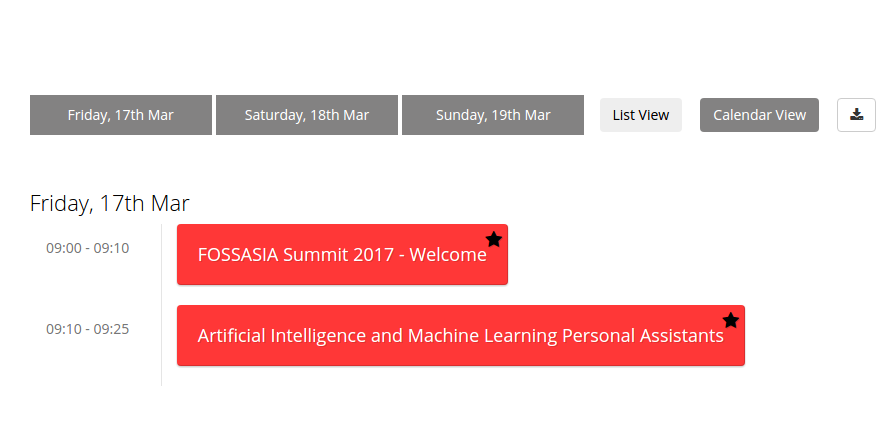
Let us discuss the design of the test. First, we start with tracks page. We select few sessions (2 here) for test and note down their session_ids. Finding an element by its id is simple in Selenium can be done easily. After we find the session element, we then find the mark button inside it (with the help of its class name) and click on it to mark the session. After that, we click on the starred button to display only the marked sessions and proceed to count the number of visible elements on the page. If the number of visible session elements comes out to be 2 (the ones that we marked), it means that the feature is working. If the number deviates, it indicates that something is wrong and the test fails.
82080522-21e8-403d-9906-3b4f420720b9.png

Here is a part of the code implementing the above logic. The whole code can be seen here

// Returns the number of visible session elements on the tracks page
TrackPage.getNoOfVisibleSessionElems = function() {
 return this.findAll(By.className('room-filter')).then(this.getElemsDisplayStatus).then(function(displayArr) {
   return displayArr.reduce(function(counter, value) { return value == 1 ? counter + 1 : counter; }, 0);
 });
};
// Bookmark the sessions, scrolls down the page and then count the number of visible session elements
TrackPage.checkIsolatedBookmark = function() {
 // Sample sessions having ids of 3014 and 3015 being checked for the bookmark feature
 var sessionIdsArr = ['3014', '3015'];
 var self = this;
 return  self.toggleSessionBookmark(sessionIdsArr).then(self.toggleStarredButton.bind(self)).then(function() {
   return self.driver.executeScript('window.scrollTo(0, 400)').then(self.getNoOfVisibleSessionElems.bind(self));
 });
};

Here is the excerpt of code which matches the actual number of visible session elements to the expected number. You can view the whole test script here

//Test for checking the bookmark feature on the tracks page
it('Checking the bookmark toggle', function(done) {
 trackPage.checkIsolatedBookmark().then(function(num) {
   assert.equal(num, 2);
   done();
 }).catch(function(err) {
   done(err);
 });
});

Now, we want to test this feature on the other pages: schedule and rooms page. We can simply follow the same approach as done on the tracks page but it is time expensive. Checking the visibility of all the sessions elements present on the page takes quite some time due to a large number of sessions. We need to think of a different approach.We had already marked two elements on the tracks page. We then go to the schedule page and click on the starred mode. We calculate the current height of the page. We then unmark a session and then recalculate the height of the page again. If the bookmark feature is working, then the height should decrease. This determines the correctness of the test. We follow the same approach on the rooms pages too. While this is not absolutely correct, it is a good way to check the feature. We have already employed the perfect method on the tracks page so there was no need of applying it on the schedule and the rooms page since it would have increased the time of the testing by a quite large margin.

Here is an excerpt of the code. The whole work can be viewed here

RoomPage.checkIsolatedBookmark = function() {
 // We go into starred mode and unmark sessions having id 3015 which was marked previously on tracks pages. If the bookmark feature works, then length of the web page would decrease. Return true if that happens. False otherwise
 var getPageHeight = 'return document.body.scrollHeight';
 var sessionIdsArr = ['3015'];
 var self = this;
 var oldHeight, newHeight;
 return self.toggleStarredButton().then(function() {
   return self.driver.executeScript(getPageHeight).then(function(height) {
     oldHeight = height;
     return self.toggleSessionBookmark(sessionIdsArr).then(function() {
       return self.driver.executeScript(getPageHeight).then(function(height) {
         newHeight = height;
         return oldHeight > newHeight;
       });
     });
   });
 });
};

Search Feature
Now, let us go to the testing of the search feature in the webapp. The main object of focus is the Search bar. It is present on all the pages: tracks, rooms, schedule, and speakers page and allows the user to search for a particular session or a speaker and instantly fetches the result as he/she types.

We want to ensure that this feature works across all the pages. Tracks, Rooms and Schedule pages are similar in a way that they display all the session of the event albeit in a different manner. Any query made on any one of these pages should fetch the same number of session elements on the other pages too. The speaker page contains mostly information about the speakers only. So, we make a single common test for the former three pages and a little different test for the latter page.

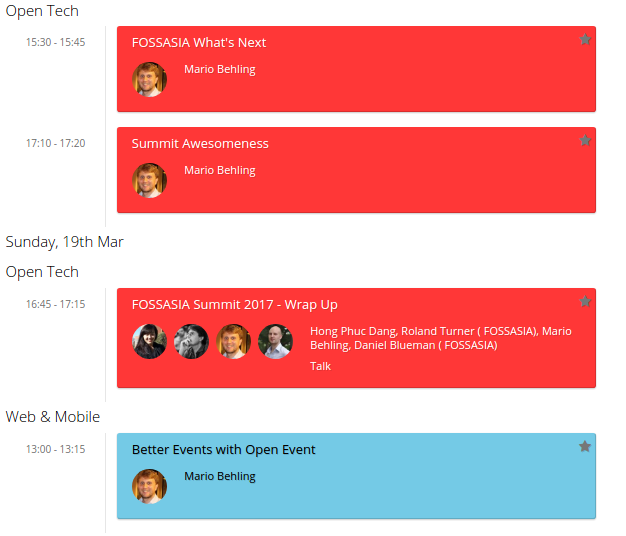
Designing a test for this feature is interesting. We want it to be fast and accurate. A simple way to approach this is to think of the components involved. One is the query text which would be entered in the search input bar. Other is the list of the sessions which would match the text entered and will be visible on the page after the text has been entered. We decide upon a text string and a list containing session ids. This list contains the id of the sessions should be visible on the above query and also contain few id of the sessions which do not match the text entered. During the actual test, we enter the decided text string and check the visibility of the sessions which are present in the decided list. If the result matches the expected order, then it means that the feature is working well and the test passes. Otherwise, it means that there is some problem with the default implementation and the test fails.

For eg: We decide upon the search text ‘Mario’ and then note the ids of the sessions which should be visible in that search.
c0e4910f-cf69-4b2a-8cc1-233badb35eee.png

Suppose the list of the ids come out to be

['3017''3029''3013''3031']

We then add few more session ids which should not be visible on that search text. Like we add two extra false ids 3014, 3015. Modified list would be something like this

['3017''3029''3013''3031''3014''3015']

Now we run the test and determine the visibility of the sessions present in the above list, compare it to the expected output and accordingly determine the fate of the test.

Expected: [truetruetruetruefalsefalse]
Actual Output: [truetruetruetruetruetrue]

Then the test would fail since the last two sessions were not expected to be visible.

Here is some code related to it. The whole work can be seen here

function commonSearchTest(text, idList) {
 var self = this;
 var searchText = text || 'Mario';
 // First 4 session ids should show up on default search text and the last two not. If no idList provided for testing, use the idList for the default search text
 var arrId = idList || ['3017', '3029', '3013', '3031', '3014', '3015'];
 var promise = new Promise(function(resolve) {
   self.search(searchText).then(function() {
     var promiseArr = arrId.map(function(curElem) {
       return self.find(By.id(curElem)).isDisplayed();
     });

     self.resetSearchBar().then(function() {
       resolve(Promise.all(promiseArr));
     });
   });
 });
 return promise;
}

Here is the code for comparing the expected and the actual output. You can view the whole file here

it('Checking search functionality', function(done) {
 schedulePage.commonSearchTest().then(function(boolArr) {
   assert.deepEqual(boolArr, [true, true, true, true, false, false]);
   done();
 }).catch(function(err) {
   done(err);
 });
});

The search functionality test for the speaker’s page is done in the same style. Just instead of having the session ids, we work with speaker ids there. Rest everything is done in a similar manner.

Resources:

Continue ReadingWriting Selenium Tests for Checking Bookmark Feature and Search functionality in Open Event Webapp

Building a showcase site to display sample events and auto deploying them on each PR merge in Open Event Webapp

Open Event Webapp generates static websites of the event fed to it in the form of JSON data. Earlier, we used to automatically deploy the FOSSASIA Summit event website on the Github pages of the repository on every merge of a pull request.  The presence of it helped in showcasing and testing purposes. But a single event was not enough. Events are diverse, taking place in a large number of rooms, h a variety of sessions and extending over several days. So, having multiple events on the showcase site and continuously showcasing and testing them was a really great idea.

Here is the feature request for it. I will be explaining the major portions of it. The whole code can be found here

First of all, we need to build the main index page which we will showcase our sample events. It will contain the small images of the event and on clicking them, the selected event will be opened. For displaying features and capability of the generator,  we have two separate sections of events: one having the single session page and the other having the expandable sessions page. There will be links to the other components of the Open Event Ecosystem like Android App generator,  Web App generatorOrganizer App, and Eventyay.

The contents of that page are kept in the overviewSite folder. It contains the event background images of the events and the main index file. The basic structure of the file is shown below. The whole file can be viewed here

<div class="container-fluid bg-3 text-center">
 <div class="row margin">
   <div class="col-md-6 col-sm-12 col-xs-12">
     <div class="row">
       <h2 class="margin"> Apps with expandable sessions page </h2>
       <div class="col-md-6 col-sm-6 col-xs-12 margin">
         <p><strong>Open Tech Summit 2017</strong></p>
         <a href='./OpenTechSummit/index.html' target='_blank'>
           <img src="./otssmall.jpg" class=""  alt="Image">
         </a>
       </div>
      </div>
    </div>
   <div class="col-md-6 col-sm-12 col-xs-12">
     <div class="row">
       <h2 class="margin"> Apps with single sessions page </h2>
       <div class="col-md-6 col-sm-6 col-xs-12 margin">
         <p><strong>Mozilla All Hands 2017</strong></p>
         <a href='./MozillaAllHands2017/index.html' target='_blank'>
           <img src="./mozilla_banner.jpg" class=""  alt="Image">
         </a>
       </div>
     </div>
   </div>
 </div>
</div>

But, this is just the front end of the page. We haven’t generated the sample events yet and neither have we made any changes to make them auto deploy on each PR merge. The test script of the app which contains unit, acceptance and selenium tests runs on each PR made against the repo when Travis CI build is triggered. So, it makes sense to write code for generating the event there itself. When the test script has finished executing, all of the events would have been generated and present inside a single folder named a@a.com (We needed something short and easy to remember and the name doesn’t really matter). We then copy the contents of the overviewSite folder into the above folder. It already contains the folder of different sample events.

Here is the related code. The full test script file can be found here

describe('generate', function() {
 describe('.create different event sites and copy assets of overview site', function() {
   // Sample events are generated inside the a@a.com folder
   it('should generate the Mozilla All Hands 2017', function(done) {
     var data = {};
     // API endpoint configuration of the All Hands 2017 event and the session style set to single pages
     data.body = {
       "email": "a@a.com",
       "name": "Open Event",
       "apiendpoint":    "https://raw.githubusercontent.com/fossasia/open-event/master/sample/MozillaAllHands17",
       "sessionMode": "single",
       "datasource": "eventapi",
       "assetmode" : "download"
     };
     generator.createDistDir(data, 'Socket', function(appFolder) {
       assert.equal(appFolder, "a@a.com/MozillaAllHands2017");
       done();
     });
   });
   // For copying the static files required for the showcase site
   it('should copy all the static files', function(done) {
     var staticPath = __dirname + '/../src/backend/overviewSite/';
     function copyStatic(fileName) {
       // Copy the static files in the overviewSite folder to the a@a.com folder
     }
   });
 });
});

Everything is almost done now. We then just make some changes in the deploy script to publish the whole folder containing the different event samples instead of a particular sample and everything works fine.

We navigate to the a@a.com folder inside the dist directory and initialize a git repository there. We then set the username and email and fetch the contents of the gh-pages branch of the official repo (using the Github token. It is defined in the Travis Settings as a private environment variable) and reset it. We then add all the files present in the current directory to the staging area, commit them and push it to the upstream repository. Here is the relevant code. The whole github deploy script file can be viewed here

eval cd dist/a@a.com/
git init
git config --global user.name "Travis CI"
git config --global user.email "noreply+travis@fossasia.org"
git remote add upstream "https://$GH_TOKEN@github.com/"${TRAVIS_REPO_SLUG}".git"
git fetch upstream
git reset upstream/gh-pages
touch .
git add -A .
git commit -m "rebuild pages at ${rev}"
git push -q upstream HEAD:gh-pages

Here is the screenshot showing the successful deployment of the sample events. You can view the whole log here. A screenshot of it is below. You can view the higher quality image by clicking on it.

29e53dc0-8841-4329-8a37-8d2e9f08756c.png

After all the work, this is how the showcase page looks like. Samples are re-generated and the site is auto-deployed on every Pull Request merged in the repository.

66804d19-6862-494f-80b6-e1749493e780.png

On clicking on any of the listed events, we jump to the index page of that particular event. Like, If we click on the Facebook Developer Conference, a new tab is opened and we are taken to the front page of that event!

6a47f623-82c6-49e2-af1c-4d152aaaf9b7.png

References

Continue ReadingBuilding a showcase site to display sample events and auto deploying them on each PR merge in Open Event Webapp

Implementing Single Session Pages in Open Event Webapp

Recently, we implemented a feature request in the Open Event Webapp which allows the organizers of an event to choose the style of the sessions displayed on the event web site. Before this feature of individual session pages was implemented, we had a single default style of displaying collapsible session elements on the page. A small preview of the session containing its title, type, name, position, and picture of the speaker(s) presenting it would be shown on the different pages. When the user will click on this session element, it would collapse showing detailed information about it.

Before Clicking

2c12db41-d999-423a-bdee-6b639cbdbb0b.png

After Clicking on the first session element

fe1a3362-ebad-42a0-ba9d-0909c2de21a9.png

While this default behavior of collapse of session element on click (shown above) works well in most of the cases, it might not be apt in situations where the session contains a large amount of detail and a higher number of speakers presenting it. Single session pages would work better in that case.

So, we provided an option to select it on the generator form itself. We provided an input field asking which session style does the organizer want? Is it the single session style or the expandable session? The organizer can then select one of them and the site will be generated according to that!!

2989ee1f-509c-400d-94cd-023a06a3601d.png

The whole work was huge and you can view all of it here. I will only be describing the major parts of it here.

The first challenge was to make a template (handlebars) file for the individual sessions. This template would take a single session object as an input. The object would contain all the details about the session and after compilation during generation, a unique individual page for that session would be created.

Here is the basic structure of the template. You can view the whole file here

<div class="container session-container">
 <!-- Contains all the information about the session -->
 <div class="row single-session" id="{{session_id}}">
   <!-- Displaying the date, start and end time of the session -->
   <h3> {{startDay}} </h3>
   <div class = "eventtime"><span class="time-track">{{start}} - {{end}}</span></div>
   <div class="session-content">
     <div class="sizeevent event" id="event-title">
       <!-- Display the title, type and the track of the session -->
     </div>
     <div>
       <!-- Short abstract of the session -->
       {{{description}}}
       <div class="session-speakers-list">
         <!-- Contains detailed information about the speakers of the session. Display their picture, show their position, short biography and social links links like Github, Twitter and LinkedIn -->
       </div>
     </div>
   </div>
 </div>
</div>

But the work is not completed yet. We have to check the style of the session selected by the organizer and if he/she has selected the single session option, then we have to pass all the sessions to this template file during the generation process and create the pages. If the mode selected is expandable, then we carry out the normal generation procedure. Else, we extract every session from the JSON data and feed into to the above template. Since the number of sessions can be quite large, we don’t generate them alongside the other pages like tracks, schedule, rooms, speakers and so on. Instead, we create a new folder named sessions and put in all of the new individual pages there in one place. It helps to keep the directory clean and modularized. Also, since we are placing it inside of a session folder, we will have to update the links to the main pages in the navbar section. Like, instead of track.html, it will be ../tracks.html now. The file is given a common format name of session_sessionId where sessionId is the id of that particular session.

Here is the related code. It is taken from generator.js file in the project

function templateGenerate() {
 if(mode == 'single') {
   function checkLinks() {
     // Made necessary modifications in the links to the main pages
   }
   //jsonData contains all the information about the event
   var trackArr = jsonData.tracks;
   for(var i = 0; i < trackArr.length; i++) {
     var sessionArr = trackArr[i].sessions;
     for(var j = 0; j < sessionArr.length; j++) {
       var sessionObj = JSON.parse(JSON.stringify(sessionArr[j]));
       // Do some modifications in the sessionObj to include the track background and font color and additional links
     } 
   }
   var data = {session: sessionObj};
   checkLinks();
   // Pass the session object to the template, compile and minify the HTML file and place into the sessions folder
   fs.writeFileSync(distHelper.distPath + '/' + appFolder + '/sessions/session_' + sessionId + '.html', minifyHtml(sessiontpl(data)));
 }
}

Ok, most of the things are done now. Just one simple step is missing. When the user clicks on the small session element on the tracks, rooms or the schedule page, then we collapse the session element or open up a brand new session page for showing detailed information about the session depending upon what option the organizer has selected. So, we will have to make little appropriate change for handling this as well. Below code is taken from the tracks page template file

<div class = "room-filter">
 {{#if ../../../mode}}
   <div class="sizeevent event">
 {{else}}
   <div class="sizeevent event" data-toggle="collapse" data-target="#desc-{{session_id}}, #desc2-{{session_id}}">
 {{/if}}
</div>

$('.room-filter').click(function () {
 var sessionMode = "{{mode}}";
 var id =  $(this).attr('id');
 if(sessionMode == 'single') {
   var curUrl = window.location.href;
   var newUrl = curUrl.substring(0, curUrl.lastIndexOf('/') + 1) + 'sessions/session_' + id + ".html";
   window.location.href = newUrl;
 }
});

We are simply checking the mode and if it is set, it means that the session style is a single page. So, we don’t include the bootstrap collapse classes in that case. We handle that click event in the javascript part and appropriate redirect the user to the unique page for that session.

So, after all this hard work, this is how it looks like.

Before clicking

0fdb3641-2579-4537-8f36-910c636cf172.png

After clicking on the first session element, a new page is opened

e5d2ed0d-c54a-44fd-b30c-af440936c8ed.png

Resources

Continue ReadingImplementing Single Session Pages in Open Event Webapp